ENGLISH
Getting Started
1
ENGLISH
Contents
Getting Started
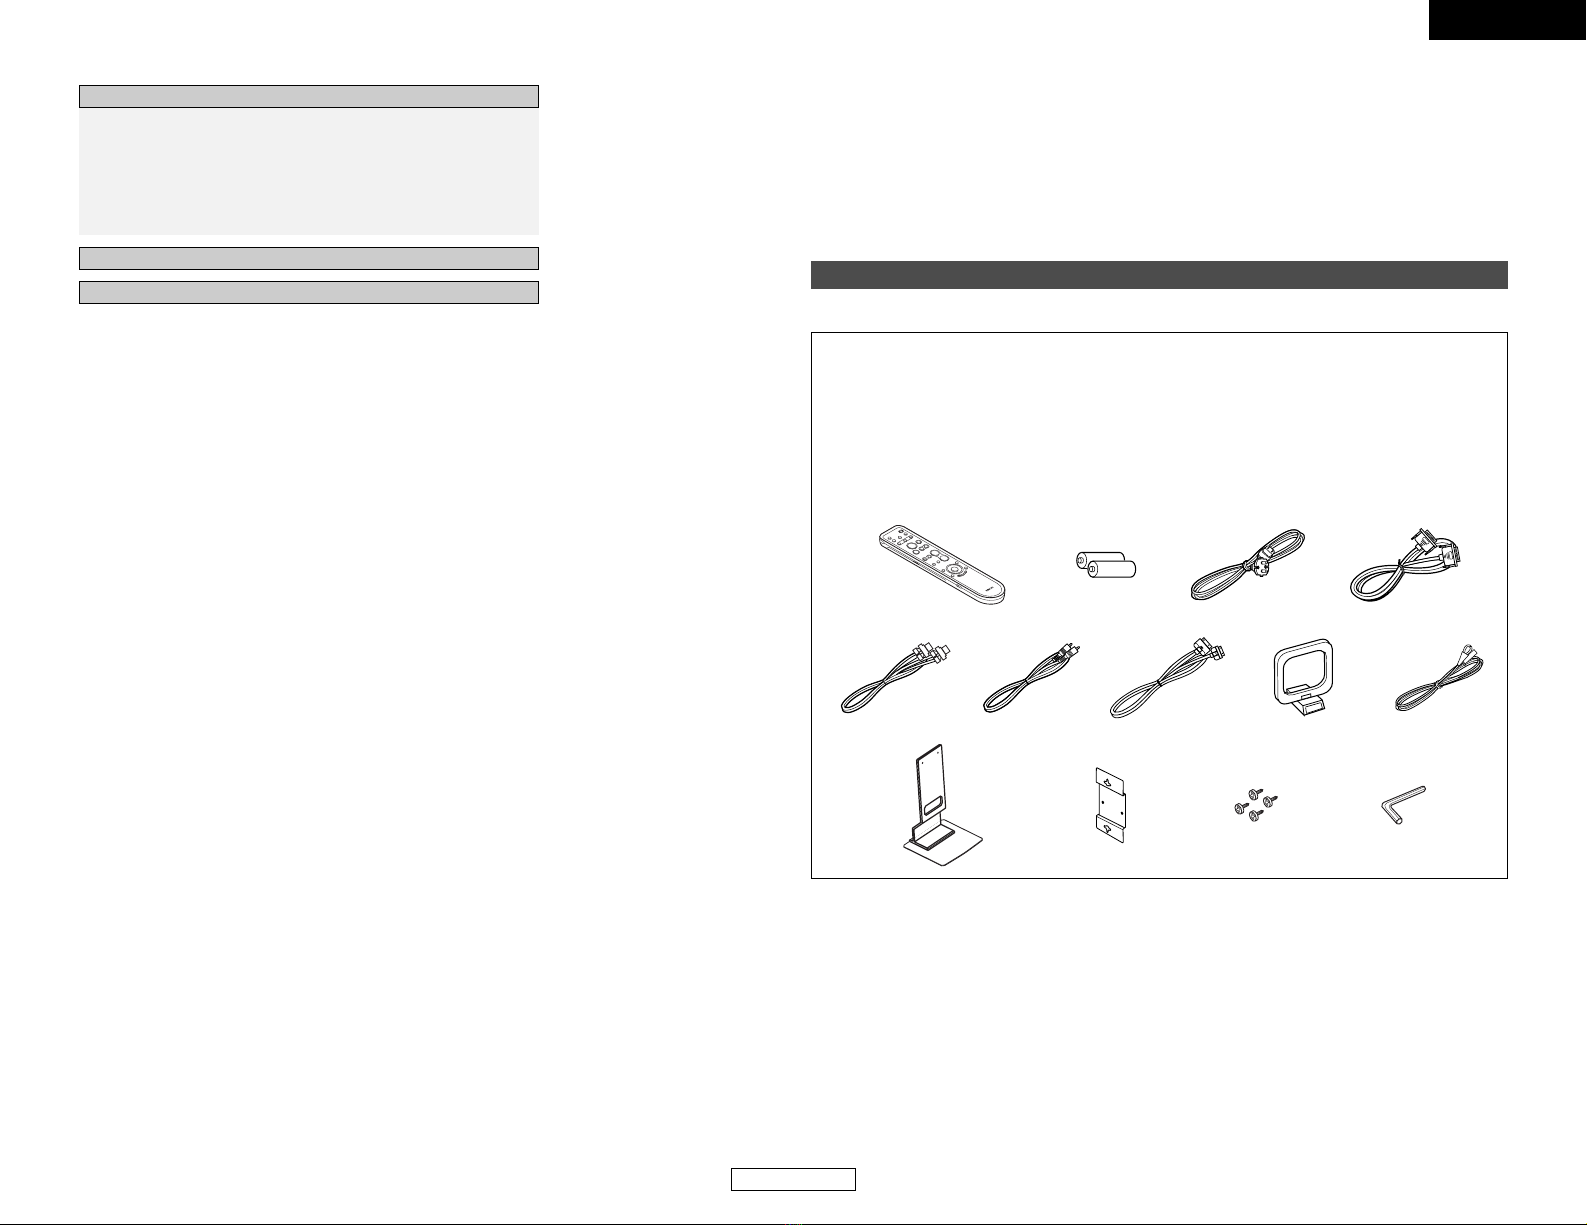
Accessories ··············································································2
Before using·············································································3
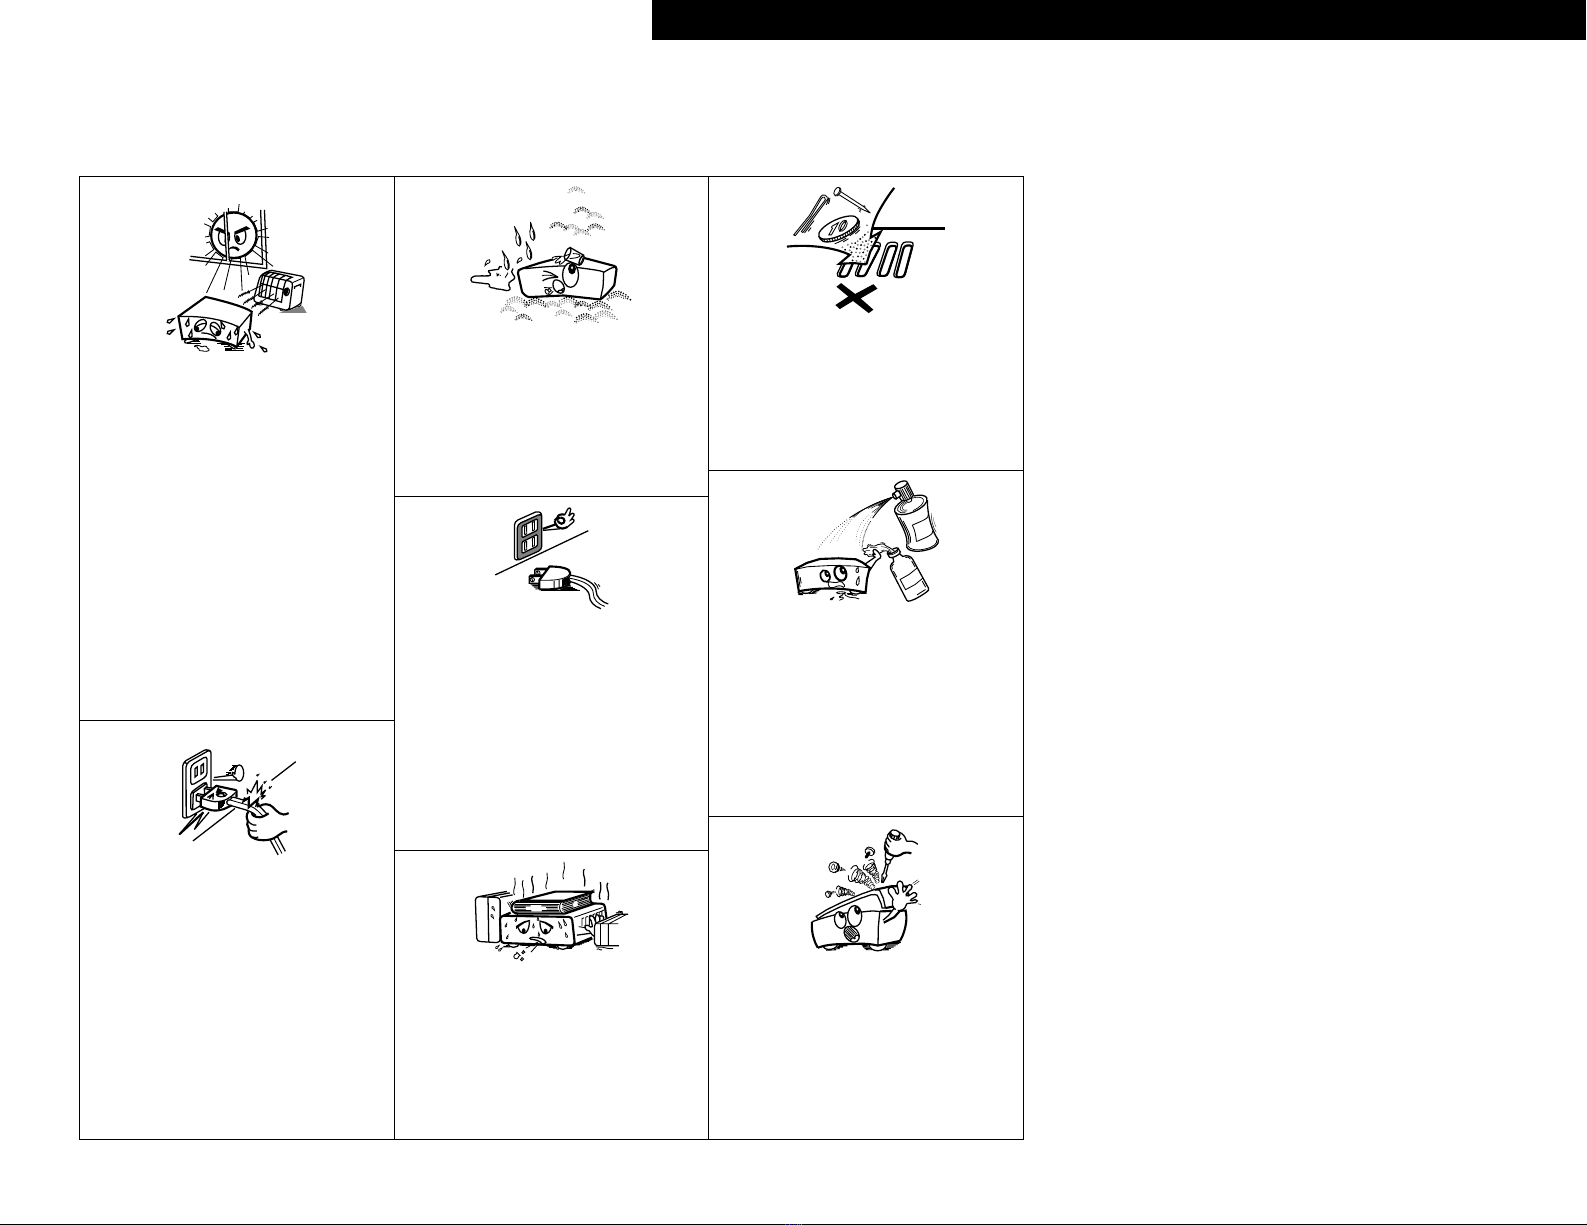
Cautions on installation
DVD Surround receiver···························································3
Speaker system and subwoofer·········································3, 4
Cautions on handling
DVD Surround receiver···························································4
Speaker system ·····································································4
Subwoofer ·············································································4
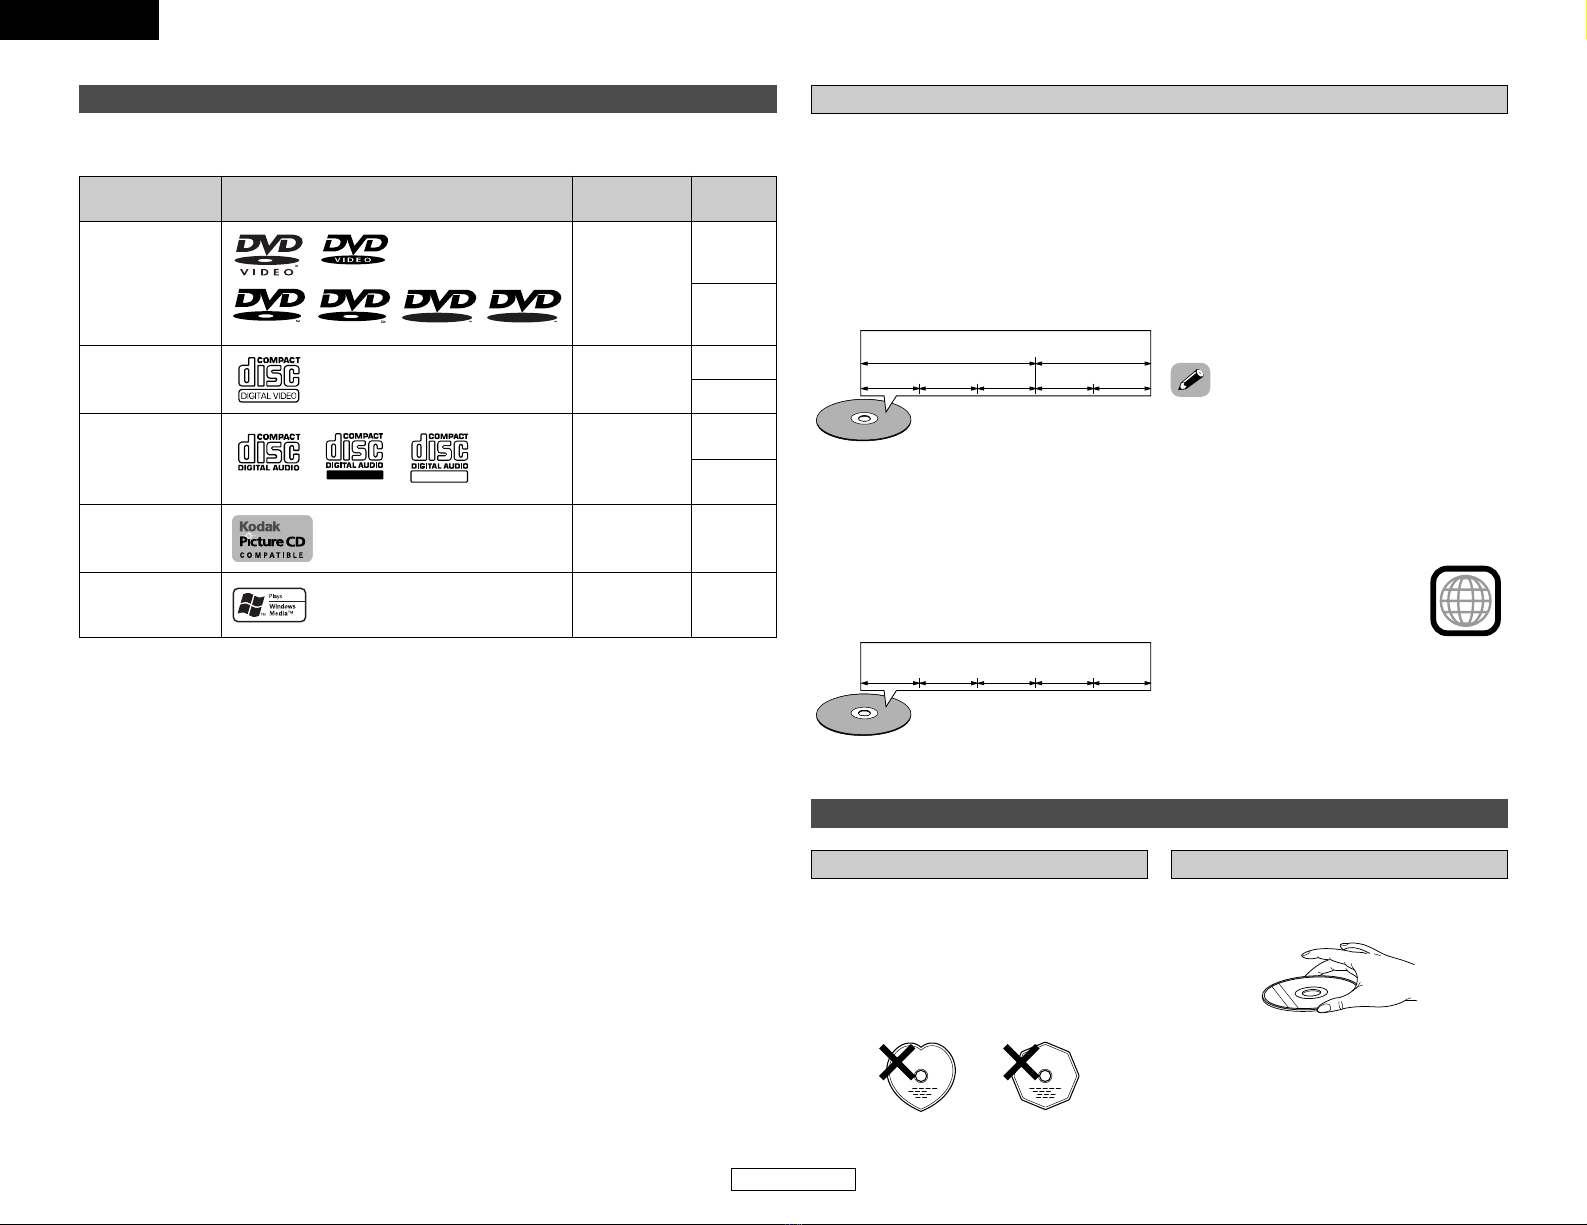
Discs ·························································································5
Disc terminology·····································································5
Cautions on handling disc
Discs·······················································································5
Holding discs ··········································································5
Cleaning discs·········································································6
Cautions on handling discs·····················································6
Storing discs···········································································6
Loading discs··········································································6
Operating range of the remote control unit ························6
Part names and functions
DVD surround receiver front panel·········································7
Subwoofer rear panel ·····························································7
Display ····················································································7
Remote control unit····························································8, 9
Advanced setup options
Cable indications···································································14
Connecting a DBS/Cable tuner/VCR·····································15
Connecting a tape deck, MD recorder or CD recorder ········15
Connecting a S-Video connections
(Better picture quality) ··························································15
Connecting a component connections
(Better than S-Video picture quality)·····································15
Connecting a TV with 21-pin
SCART terminal connections ···············································16
To change the speaker cable················································16
Connecting the antenna terminals ·······································16
Using other playback function (playing the disc)
Playing repeatedly ································································35
Playing tracks in the desired order (Program) ······················36
Playing tracks in the random order·······································36
Playing in the zoom mode····················································36
Using the RDS (Radio Data System)
RDS (Radio Data System)·····················································37
RDS search···········································································37
PTY search············································································37
TP search··············································································38
RT (Radio Text) ·····································································38
On-screen display
Operating using the disc information OSD ····················38, 39
Operating using the multiple audio,
subtitle and angle OSD···················································39, 40
Adjusting the picture quality·················································40
Other functions
Adjusting the sound quality (TONE/SDB) ·····························41
Auto power on function························································41
System functions··································································41
Initialization of the microprocessor·······································41
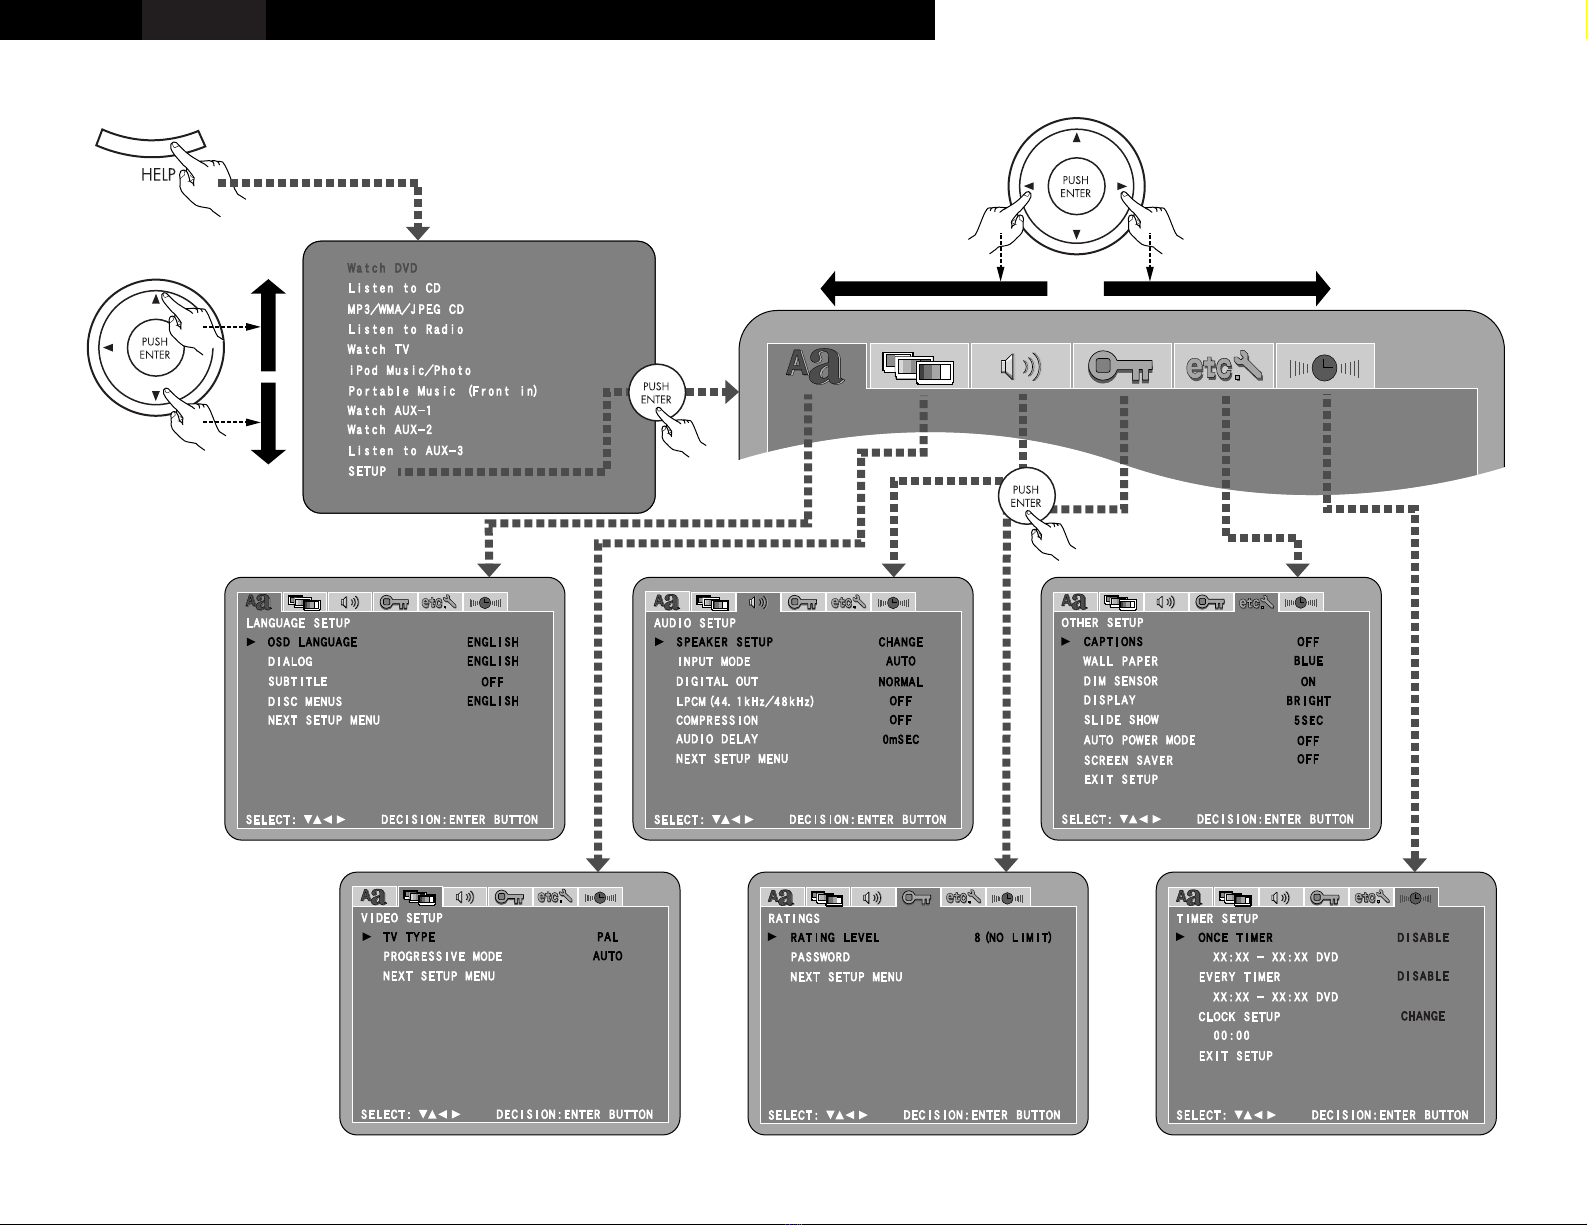
Changing the default settings
System setup items ·····························································42
Setting “LANGUAGE SETUP” ·······································43, 44
Setting “VIDEO SETUP” ······················································45
Setting “AUDIO SETUP”·············································45 ~ 47
Setting “CHANNEL LEVEL”···········································47, 48
Setting “DISTANCE”······················································48, 49
Setting “SPEAKER LOCATION” ····································49, 50
Setting “RATINGS” ························································50, 51
Setting “OTHER SETUP” ············································51 ~ 53
Setting “TIMER SETUP”················································53, 54
After changing the system settings ·····································54
System setup items and default values
(set upon shipment from the factory) ····························55, 56
About digital audio signal output
When a disc is played on the S-101 (DIGITAL OUT)············57
Setting up the remote control unit
to control other audio / video devices
TV, cable tuner and satellite receiver
preset memories ··································································58
Operating the TV, cable tuner and satellite receiver
after storing its remote control signals
in the preset memory···························································58
Special punch through setting··············································58
Connecting Other Sources
Getting Started
System Setup
Playing a disc
Playback··········································································17, 18
Stopping playback·································································18
Playing still pictures (Pausing) ··············································18
Forward / Reverse searching················································19
Skipping to the beginning of chapters or tracks···················19
Playing frame by frame (for DVDs and video CDs only) ······19
Slow playback (for DVDs and video CDs only)·····················19
Listening to recorded MP3 or WMA CD-R/CD-RW············20, 21
Playing still picture files (JPEG format) ··························22, 23
Listening to the radio
Manual tuning·······································································24
Auto tuner presets (for main unit only) ································24
Listening to preset stations··················································24
Presetting stations that have been tuned in
and giving names to stations
(for remote control unit only)················································25
Playing the iPod
Connecting the iPod ·····························································26
Playback················································································27
Viewing the slideshow
(Only for iPods equipped with the Photo function) ··············28
Disconnecting the iPod·························································28
Playing and recording other sources
Connecting the portable player ············································28
Playing a portable audio (stereo mini plug)···························28
About analog recording onto
an external audio component (AUX3)···································28
Function setting ······························································29, 30
Operating the surround functions
Playing Dolby Digital and DTS surround sound
(with digital inputs only)························································30
2-channel mode settings ······················································31
Paying in the DENON original surround modes·············31, 32
Playback using the Dolby Headphone mode ·····················32
Using the “HELP” menu·······················································33
Using the sleep timer
Setting the clock (24-hour display) ·································33, 34
Setting the sleep timer·························································34
Basic Operation
Advanced Operation
Connecting the system ························································10
Connecting the supplied antennas·······································11
Connecting a TV ··································································11
Inserting the batteries ··························································12
Connecting the power supply cord ······································12
Playing a DVD disc··························································13, 14
Easy Setup and Operation