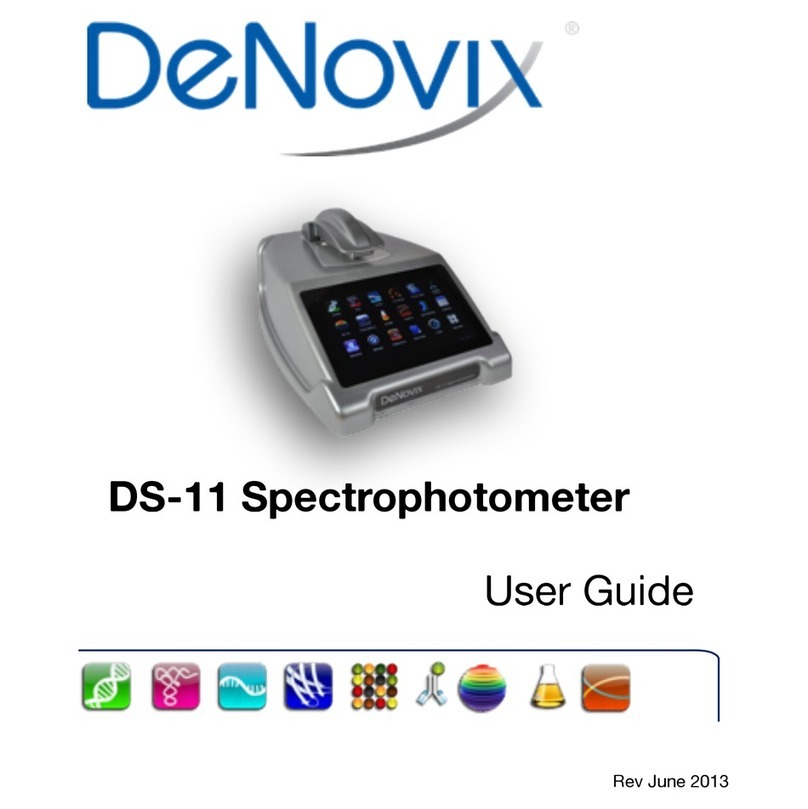
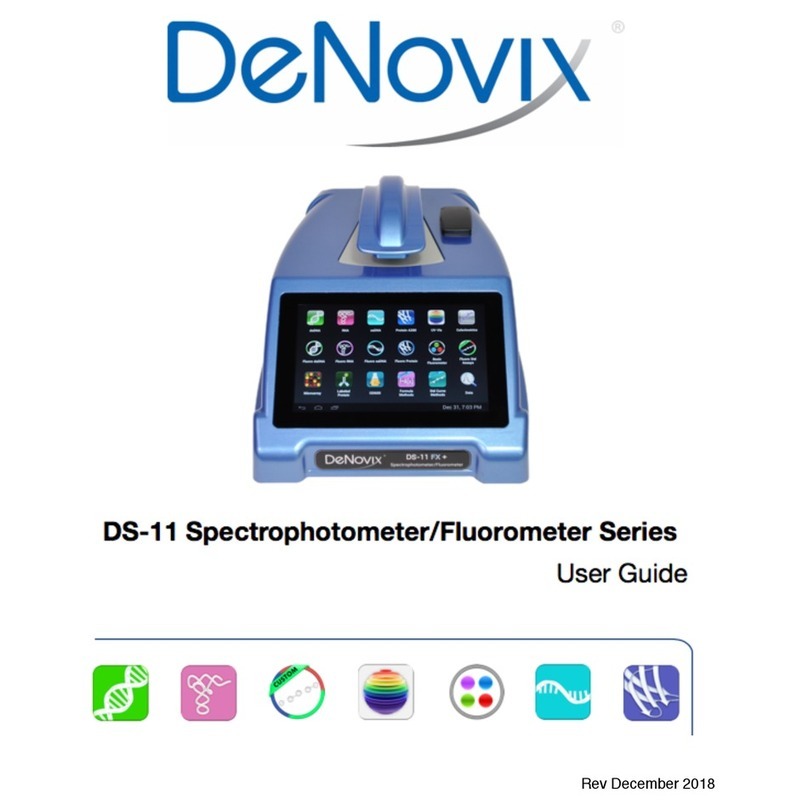
DeNovix DS-11 FX+ Owner's manual

1
Quick User Manual
Rev October 2016
DS-11 FX+ Spectrophotometer / Fluorometer
Series

2
Table of Contents
1.!Product Technology..........................................................................................................3!
Installation and Safety .................................................................................................3!
2.!Basic Operation.................................................................................................................4!
Microvolume Measurements .......................................................................................4!
Auto Measurements .....................................................................................................4!
Cuvette Measurements ................................................................................................4!
Fluorescence Measurements.......................................................................................4!
3.!Software Quick Guides .....................................................................................................5!
Software Navigation.....................................................................................................7!
4.!General Screen Features ..................................................................................................8!
Run Screen....................................................................................................................8!
Report / Graph Screens................................................................................................8!
5.!Absorbance Measurement Apps......................................................................................9!
Nucleic Acid Apps.........................................................................................................9!
Protein Apps .................................................................................................................9!
Custom Method Apps...................................................................................................9!
Additional Apps.............................................................................................................9!
6.!Fluorescence Measurement Apps ................................................................................ 10!
Standard Curve Based Apps ..................................................................................... 10!
Basic Fluorometer App.............................................................................................. 10!
7.!Utility and Lab Tool Apps .............................................................................................. 11!
Accounts .................................................................................................................... 11!
Data App..................................................................................................................... 11!
Diagnostics App......................................................................................................... 11!
Updater App ............................................................................................................... 11!
Settings App............................................................................................................... 11!
Calculator App ........................................................................................................... 12!
Timer App................................................................................................................... 12!
8.!Data Export and Print Options ...................................................................................... 13!
Export Options ........................................................................................................... 13!
Print Options .............................................................................................................. 14!
9.!Quick Help ...................................................................................................................... 15!
Cleaning ..................................................................................................................... 15!
Troubleshooting ........................................................................................................ 15!
10.!Customer Support........................................................................................................ 17!

3
1. Product Technology
DeNovix Spectrophotometers / Fluorometers are compact instruments with an
integrated processor and a high-resolution touchscreen. The software utilizes
application specific icons along with the Android™ operating system to provide
an intuitive, easy-to-use instrument for both absorbance and fluorescence
measurements.
The SmartPath®technology automatically adjusts the microvolume mode
pathlengths to enable measurements of samples with absorbances that range
between 0.015 to 750 AU (1 cm pathlength equivalent).
FX models include a fluorescence mode while the DS-11+ and DS-11 FX+
instruments also enable cuvette-based measurements for low concentration
samples and basic absorbance kinetic studies.
Installation and Safety
1. Remove all packing materials including the protective cover on the screen.
2. Plug the unit into a 100-240 VAC, 50-60/Hz receptacle using the grounded
power supply (CUI MPN: ETSA120330U-P5P-SZ, Transformer Dest Top 12V
40W, Lead free / RoHS Compliant) included with each unit.
3. Turn on the power switch located in the back of the instrument. The Android-
based operating system will boot up in less than a minute.
4. Use the Shut Down icon (accessed from within each app or on the Home
screen) to do a soft power down. Toggle the power switch to restart the
instrument.
Cautions
DO NOT REMOVE COVER
No operator serviceable components inside. Refer servicing to qualified personnel.
The DS-11 is designed for indoor use under the following conditions:
Temperature: 15˚ to 35˚ C
Humidity: 35 to 65 %
Use only the power supply provided with the instrument. Use of the instrument in
any manner not specified by the manufacturer may impair the protection provided
by the supplied power cord and power supply.

4
2. Basic Operation
Microvolume Measurements
1. Ensure both top and bottom sample surfaces are clean.
2. Pipette 1 μl of the blank solution onto the lower sample surface. Lower the top
arm and tap the Blank button.
3. Remove the solution from both sample surfaces using a clean, dry lab wipe.
4. Pipette 1 μl of the sample solution onto the lower sample surface.
5. Lower the arm and tap the Measure button.
The Microvolume mode uses 1.0 μL samples pipetted onto the sample
surface. The microvolume Short Path mode requires just 0.5 μL samples. The
0.5 mm pathlength is not used when the Short Path mode is selected.
Auto Measurements
1. Perform a Blank measurement as described above and then select the Auto
checkbox on the app Run screen. Pipette 1 μl of the sample solution onto the
lower sample surface.
2. Lower the arm for automatic measurements. Deselect the feature to perform
new Blank measurements.
Cuvette Measurements
1. Insert a cuvette pre-filled with the Blank solution. Tap the Blank button.
2. Insert a cuvette pre-filled with the sample solution. Tap the Measure button.
Width 12.5mm, length 12.5 mm, Height 45 mm, Z heights of 8.5 mm. Use the
light path arrow as a guide when inserting a cuvette.
Fluorescence Measurements
1. Insert the standard (200 uL in a thin walled PCR tube) into the sample holder
and lower the cover.
2. Measure at least one replicate for a minimum of 2 standard concentrations for
standard assays.
3. Tap the Samples radio button and quantitate a sample using the Measure
button.
Screen Saver Mode
The backlight for the screen will automatically turn off after 10 minutes of
inactivity. Tap anywhere on the screen to resume the last function.
Mechanism Busy Indicator
A progress bar will be displayed on the screen when the mechanism is busy. It is
normal for the bar to stop and start during mechanism operations. Please do not
lift the arm or push software buttons when a spinner is displayed.

5
3. Software Quick Guides
Software Icons
Add
Select All
Export
Delete
Deselect
All
Sort
Edit
Copy
Info
Undo
Paste
Shut
Down
The Overflow (top action bar) is used to access secondary features
such as Select Units, Screen Capture, User Guide and Exit.
Progress bars or busy indicators are used to indicate the
instrument is in the process of making a measurement. Please wait
until the icon has disappeared before tapping the screen to perform
any additional actions.
The Quick Print icon is only displayed on Report or Graph screens
when a DYMO label printer is connected to the instrument.
The USB Flash Drive Eject icon appears in the bottom notification
bar when a drive is detected. The software will automatically safely
unmount the flash drive after a screen capture or a report is
exported to the drive. Tap the icon to remove a flash drive when
nothing was exported or saved.
Auto Export status icons are displayed at the top right of a Run
screen. Ensure WiFi is connected prior to making a measurement.
Lock icons are used in the absorbance Colorimetrics and Std Curve
Methods apps to indicate whether a saved curve is in an editable
state. Tap the icon change the status.

6
Software Buttons
The absorbance apps Blank button is used to establish a
reference absorbance within each measurement app. The graph
will not display a spectrum for a Blank measurement.
The absorbance apps Measure button is used for sample
measurements. It is inactive until at least one Blank
measurement is complete.
The fluorescence apps Standards Measure button is used to
measure standards when building a standard curve.
The Samples Measure button is used to quantitate samples.
The fluorescence apps Replicates On/Off button is used to
define if the standards curve enables one or up to three
replicates.
The fluorescence apps Basic Measure button is used to make
single measurements not being read from a standard curve.
Fields with Drop-Down Menus are indicated by black or white
triangles located on the bottom.
Fields with black underlines are editable by the user. Tapping on
the field will enable a keyboard, a numeric keypad or a dialog
box.
Application specific editor options can be accessed using the
List Add/Edit button found to the right of some drop-down
menus. Examples include the Dye, Sample Type and the
Colorimetrics Standard Curve lists. Tap the icon to access the
list or save new user defined entries.
Options buttons are used for such purposes as change units or
trend line analysis parameters in the fluorescence apps.
The Quick Print button is visible on the Run screen when a
DYMO printer is connected.

7
Software Navigation
Home Screen Apps
Applications are launched using Home Screen icons.
Swipe the Home page to the left for additional icons.
Up and Back Button
The bottom bar Back button is generally used to
navigate to the main level of the current app. If
accessed from the main level of an app, the button will
bring up an Exit app dialog box.
Home Button
The bottom bar Home button is used to navigate to
the Home screen without closing the app.
Recents Button
The bottom bar Recents button is used to as a means
of displaying recently used apps. Swiping an app to
the left from the Recents lists will close the app.
Collapse Button
The bottom bar Collapse button is used in place of the
Up and Back button whenever a keyboard is enabled.
Use this button to dismiss the keyboard.
Top Level Screens
The Application Run, Report and Graph screens are
accessed either by the tabs on the top bar or by
dragging the screens left or right.

8
4. General Screen Features
Run Screen
•Blank or Measure: Use these buttons to perform Blank and Sample
measurements.
•Sample Name and Sample Number: Tap the input box to enable a keyboard or
use a DeNovix approved barcode scanner to enter sample names.
•Sample Type and Factor Fields: Displays current sample type and associated
factors used for concentration calculations.
•Assay or Method Selections: Use the associated drop-down menus to select
an assay or method on the Run screen of an app.
•Absorbance App Graph: The spectral plot displays data for the current sample
normalized to a 10 mm pathlength for microvolume measurements.
•Florescence App Graph: The sample RFU is plotted on the standard curve trend
line for standard curve based fluorescence apps.
Report / Graph Screens
•Tap rows to highlight and select data for export. The Select All icon can be
used to quickly highlight all data rows.
•Erase highlighted sample records from both the Report and Graph screens
using the Delete icon. The cleared data will be available using the Data app.
•Tap a sample name and then tap the Edit icon to add or modify a sample
name. The change will be applied to the Report and Graph screen rows.
•Tap rows on the Graph screen to highlight and select data to display the
spectra. Up to 24 sample spectra may be overlaid on the graph.
•Color blocks are used as a legend convention.
•Highlighted sample data may be exported or printed using the Overflow Screen
Capture or Export functions. Screen captures may be emailed, saved to a USB
device, sent to a network folder and printed to either a network printer or
supported DYMO USB printers.
•Exported data are saved as .csv files. Absorbance app files include all
absorbance vs wavelength data for the full measurement wavelength range as
well as the calculated data displayed on the app Report screen. Fluorescence
app files include standard curve information as well as the calculated data
displayed on the app Report screen.

9
5. Absorbance Measurement Apps
Nucleic Acid Apps
The nucleic acid apps are optimized to use the sample type specific concentration
calculation factors. The ssDNA and Microarray apps enable user-defined factors
for calculating oligo concentrations.
Protein Apps
Use the Protein A280 app for purified proteins. The Peptide app is used for low
concentration samples that do not have aromatic residues such as Trp, Tyr or Cys-
Cys disulphide bonds. The Protein A280 app is recommended when the sample
does contain aromatic rings.
Note: For accurate calculated concentrations, use the Run screen drop-down
list to select the optimal sample type for the specific protein measured.
Colorimetric assays are generally recommended for whole cell extracts.
Custom Method Apps
These applications are used to create, save and access user-defined methods.
Additional Apps
The UV-Vis app is used to monitor up to 6 specific analysis wavelengths. The
Kinetics application is a cuvette mode only application and is available for the DS-
11+ model. The OD 600 application is generally used to determine the optical
density of microbial cell cultures at 600 nm.

10
6. Fluorescence Measurement Apps
Standard Curve Based Apps
The five apps listed below are designed using the same basic architecture. Each
app (except the Custom Std Curves app) includes preconfigured assays designed
to accommodate commonly used commercially available reagent kits.
Fluoro
dsDNA
DeNovix dsDNA Broad Range
DeNovix dsDNA High Sensitivity
DeNovix dsDNA Ultra High Sensitivity
Quant-iT™PicoGreen
Quant-iT™dsDNA HS
Quant-iT™dsDNA BR
Qubit™dsDNA HS
Qubit™dsDNA BR
Quantifluor dsDNA
Quantifluor One dsDNA
Fluoro
RNA
Quant-iT™RiboGreen
Quant-iT™RNA HS
Quant-iT™RNA BR
Qubit™RNA HS
Qubit™RNA BR
Quantifluor RNA
Quant-iT™microRNA
Qubit™microRNA
Fluoro
ssDNA
Quant-iT™OliGreen
Qubit™ssDNA
Quantifluor ssDNA
Fluoro
Protein
Quant-iT™Protein
Qubit™Protein
Custom Fluoro
Standard Curves
All entries to be defined by the user
Basic Fluorometer App
This app enables the DS-11 FX series of instruments to be used as a versatile
fluorometer for applications such as dye QC checks and assay development. The
app is especially useful for fluorophores with significant Stoke shifts as it allows
the user to excite a sample with one LED and get RFU results from multiple
emission channels.

11
7. Utility and Lab Tool Apps
Accounts
Accounts are used to manage default settings within specific apps or delete saved
sample and dye types, wavelength lists and user methods created within the
account. The Overflow Address Book function in this app is used to add frequently
used recipient email addresses.
Account Types
•Primary Administrator: This account is used to manage instrument settings. It
is not used within the measurement applications.
•User Added Administrator Accounts: Any administrator may create a password
protected administrator level account.
•General Account: This account is used as the default selection for all apps
each time an app is opened.
•Standard Accounts: Any user may add a password protected standard level
account.
Data App
This app allows the user to search for past data using either a Quick Search or an
Advanced Search mode. Data is automatically filtered based upon the Account
selected using the tab on the top action bar.
Diagnostics App
Although the DS-11’s propriety SmartPath™ technology enables accurate
microvolume pathlength control and eliminates the need for routine recalibration,
labs may choose to run the Diagnostics app to verify that the instrument is working
within specifications.
Updater App
This app is used to update all apps to the most current available versions. The
latest updates are available at www.denovix.com.
Settings App
Administrator accounts may access and change the following:

12
•Back-up and Restore: Exports a copy of all user-defined app settings,
methods, dyes, sample types, email addresses, shared folder paths, user
accounts and sample results to either a USB thumb drive or a network folder.
•Language: The language selected determines The DS-11 number format.
•Date/Time
•Network Information and Permissions
•WiFi and Ethernet
Calculator App
Three convenient calculators are included within the app. Use the tabs in the top
action bar to navigate between the scientific, oligo and dilution options.
Timer App
This app is a lab tool that allows a user to set two independent timers.

13
8. Data Export and Print Options
Export Options
The data associated with highlighted samples on a Report or Graph screen may
be exported via email, sent to a network folder or saved to USB flash drives as
.csv files. To open an exported .csv file on a computer, the DeNovix instrument
and the computer must both be set to use either period or comma number
formats. The language selected using the Settings app determines the number
format.
Export Formats
•The default .csv file format for each absorbance measurement app includes
all absorbance vs wavelength data for the app specific measurement
wavelength range as well as the calculated data displayed on the app Report
screen.
•User specific formats may be defined using the Export Formats option
accessed from the Report screen Overflow menu.
•Selected sample results exported from an absorbance app Graph screen
follow the same format as when exported for the Report screen. Graphs are
not exported as part of the .csv file.
•Use the Screen Capture option to export the current graph via email or to save
the .jpg image to a network folder or a FAT32 formatted USB flash drive.
Export Via Email
•Screen captures as well as data .csv files may be exported via email.
•Use the Account app Overflow Address Book function to save frequently used
recipient email addresses.
•It is recommended that a new, dedicated Gmail account be used for all
outgoing email from the DS-11 (except for instruments used in China).
Export Via USB
•Compatible with FAT32 formatted flash drives only.
•The USB Flash Drive Eject icon appears in the bottom notification bar when a
drive is detected. The software will automatically safely unmount the flash
drive after anything is written to the drive. If not removed, the software will
automatically remount the flash drive when another write operation is
performed.
•Please wait for the “OK to remove” toast message to appear before removing
the drive. Tap the icon to safely remove a flash drive when nothing was
exported or saved.

14
Print Options
The DS-11 FX software supports printing to networked printers or to supported
DYMO USB printers. All Dymo labels are in printed in black and white.
WiFi and Networked Printers
Screen shots as well as selected sample data and graphs may be printed to both
WiFi enabled and networked printers.
DYMO Printers
The software enables the use of three DYMO paper or label sizes including an 1 x
0.5 inch option suitable for 2.0 ml microfuge tubes.

15
9. Quick Help
Cleaning
Routine
1. Pipette 3-4 μL of dH20 onto the bottom sample surface.
Lower the upper arm. Wait 1-2 minutes.
2. Wipe away the water from both the upper and lower sample
surfaces with a dry, lint-free lab wipe.
Between
Measurements
Use a dry, lint-free lab wipe to remove samples from both the
lower and upper sample surfaces.
Troubleshooting
Most issues concerning accuracy, reproducibility, negative spectra and low nucleic
acid purity ratios are sample or technique related and are resolved by following the
suggestions below:
•Establish a new Blank using the appropriate buffer.
•Ensure that the sample isolation procedure is optimized and that samples are
purified when required prior to making absorbance measurements.
•Ensure all solutions are homogenous and well mixed prior to sampling.
•Ensure sample concentrations fall within the absorbance limits of the instrument.
In the case of fluorescence assays, ensure sample concentrations fall within the
reagent limits as described by the assay manufacturer.
Microvolume Mode
•Ensure both top and bottom microvolume measurement surfaces are clean prior
to making the Blank measurement. Remove sample solutions from both the top
and bottom measurement surfaces using dry, lint-free wipe immediately after
each measurement is complete.
•Use calibrated pipettors and properly fitting tips to ensure a full 1 μlaliquot is
delivered to the sample measurement surface. Protein samples sometimes wick
up on the outside of the tip and may not be properly dispensed.
•Use a clean pipette tip and a new aliquot of sample for each measurement.
Cuvette Mode
•Use cuvettes with Z heights of 8.5 mm.

16
•Use quartz or UV transparent cuvettes for UV range measurements.
•Ensure cuvettes are clean prior to use.
•Fill cuvettes to manufacturer's specifications.
•Confirm the mode selection has been changed on the Run screen to the proper
cuvette pathlength prior to a measurement.
•Ensure cuvettes are properly inserted following the etched arrow light path.
•Refer to a reagent kit manufacturer for troubleshooting colorimetric assays.
Fluorescence Mode
•Use 200 μL volumes in a clear thin walled PCR tube
•Avoid introducing air bubbles into the sample solution when mixing samples.
•Ensure all sample concentrations in the thin walled assay tubes fall within the
limits of the assay or reagent kit for accurate results.
•Follow assay reagent manufacturers' recommendations regarding temperature,
incubation time, and protection from ambient light.
•Follow assay reagent manufacturers' recommendations regarding suggested
standard curve concentrations and data analysis.
•Confirm that the correct LED excitation source was used for all user-defined
assays and methods.
•Confirm that standard concentrations and dilutions were performed correctly.
•Confirm that the correct concentration units for the standard curve and the
unknown samples were used to calculate the stock concentrations.
Software Errors
Pop-up messages will provide explanations for software-based errors or invalid
user actions.

17
10. Customer Support
DeNovix Inc.
3411 Silverside Road, Hanby Building
Wilmington, DE USA 19810
302-442-6911
info@denovix.com
www.denovix.com
Please include the serial number of your instrument when contacting Customer
Support by email. If sending Customer Support a Screen Capture or a report .csv
file using the DS-11 email feature include your name, institute/company, phone
number and return email address. Responses will not be sent directly to the
email account used by the instrument.
Outside of the US, please contact your local distributor for assistance.
Warranty
All product(s) and accessories sold by DeNovix Inc. are under warranty against
manufacturing defects in parts for a 36-month period from the date of delivery.
Disclaimer
All information in this document is for reference purposes only. DeNovix Inc.
makes no claims that this document is complete or error-free and assumes no
responsibility and will not be liable for any errors, omissions, damage or loss that
might result from any use of this document.
“Android is a trademark of Google Inc.. Qubit, Quant-iT, PicoGreen and OliGreen are trademarks of Thermo Fisher
Scientific and its subsidiaries. QuantiFluor is a trademark of Promega Corporation."
This manual suits for next models
2
Table of contents
Other DeNovix Measuring Instrument manuals
Popular Measuring Instrument manuals by other brands

Siemens
Siemens Sitrans FUG1010 Operating instruction

EternalArts
EternalArts Universal Tape Stage operating instructions
Helios
Helios CO2 AP-A Installation and operating instructions
LSI LASTEM
LSI LASTEM Heat Shield Quick user guide
Acterna
Acterna FST-2000 TestPad Service Pack/Upgrade/Optioning Instructions
Field Scout
Field Scout TDR 150 User's product manual
