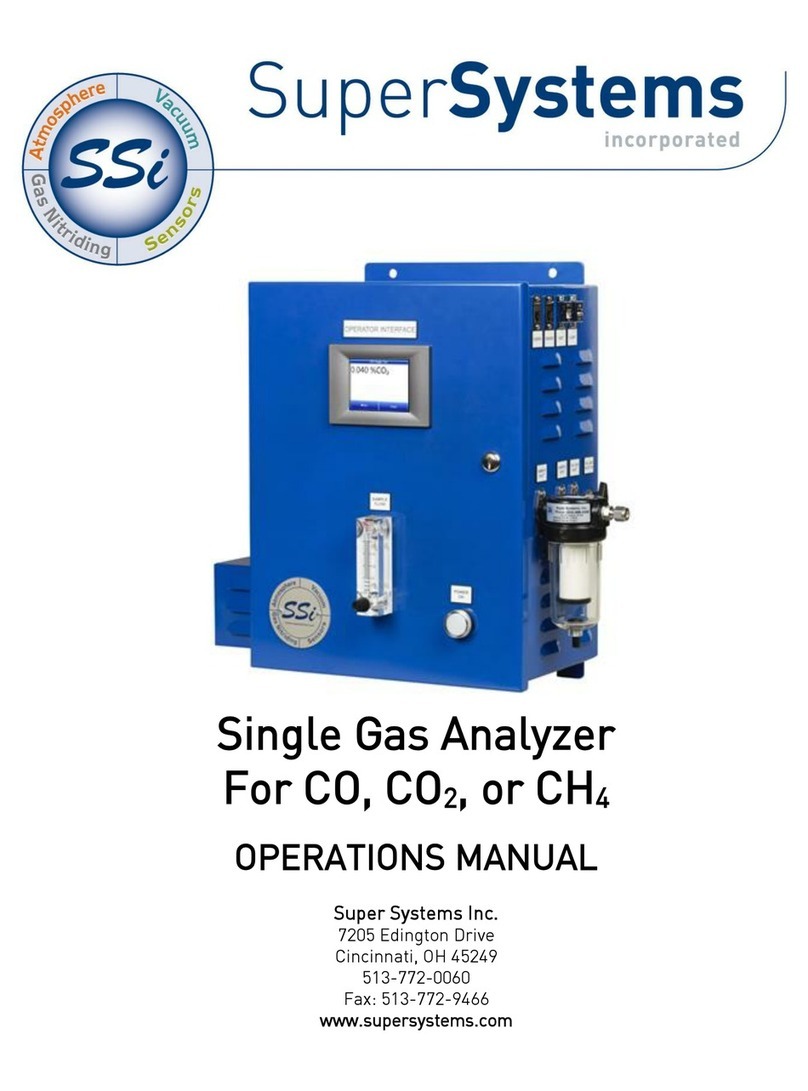
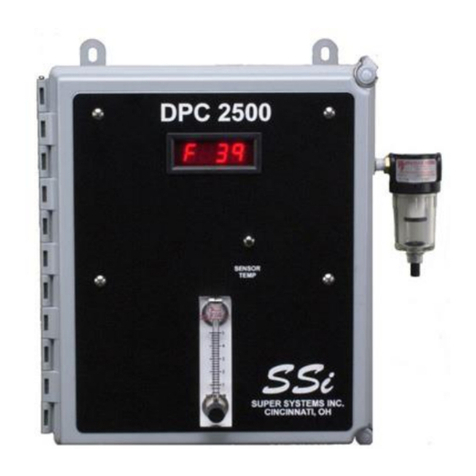
Super Systems MGA 6010 User manual

MGA 6010
Multi-Gas IR Analyzer
(CO, CO2, and CH4Gas Analyzer
with Optional H2Measurement and
% Carbon, % Dissociated Ammonia, % NH3, KN, and
KCCalculation Capabilities)
Operations Manual
Please read, understand, and follow these instructions before operating this equipment.
Super Systems, Inc. is not responsible for damages incurred due to a failure to comply with these
instructions. If at any time there are questions regarding the proper use of this analyzer, please contact
us at 513-772-0060 for assistance.

MGA 6010 Operations Manual
Super Systems Inc. Page 2 of 67
Super Systems Inc.
USA Office
Corporate Headquarters:
7205 Edington Drive
Shipping Address:
7245 Edington Drive
Cincinnati, OH 45249
Phone: (513) 772-0060
http://www.supersystems.com
Super Systems Europe
Unit E, Tyburn Trading Estate,
Ashold Farm Road, Birmingham
B24 9QG
UNITED KINGDOM
Phone: +44 (0) 121 306 5180
http://www.supersystemseurope.com
Super Systems México
Sistemas Superiores Integrales S de RL de CV
Acceso IV No. 31 Int. H Parque Industrial
Benito Juarez
C.P. 76120 Queretaro, Qro.
Phone: +52 442 210 2459
http://www.supersystems.com.mx
Super Systems China
No. 369 XianXia Road
Room 703
Shanghai, CHINA
200336
Phone: +86 21 5206 5701/2
http://www.supersystems.cn
Super Systems India Pvt. Ltd.
A-26 Mezzanine Floor, FIEE Complex,
Okhla Indl. Area, Phase –2
New Delhi, India 110 020
Phone: +91 11 41050097
http://www.supersystemsindia.com

MGA 6010 Operations Manual
Super Systems Inc. Page 3 of 67
Table of Contents
Introduction................................................................................................................................................... 5
Specifications ................................................................................................................................................ 6
Unpacking the Device.................................................................................................................................... 7
Mechanical Installation ................................................................................................................................. 7
Enclosure Mounting ........................................................................................................................................7
Wiring Connections ....................................................................................................................................... 8
Plumbing Connections....................................................................................................................................9
Basic Operating Description ....................................................................................................................... 11
Default Screen ............................................................................................................................................ 11
Pump Operation .......................................................................................................................................... 12
Carbon Calculation...................................................................................................................................... 12
Chart ........................................................................................................................................................... 13
Chart Sub Menu.............................................................................................................................................14
Menu Lists................................................................................................................................................... 15
Carbon Calculation........................................................................................................................................16
Nitrider Calculation (Available on Units Configured for Nitriding & FNC Applications)...........................17
Sessions.........................................................................................................................................................18
Pump Control ................................................................................................................................................20
Sensor Calibration ........................................................................................................................................20
Performing a Zero Calibration.................................................................................................................23
Performing a Span Calibration ................................................................................................................24
Automatic Sampling Parameters.................................................................................................................24
COF/PF Adjustment Increment................................................................................................................24
COF/PF Adjustment Interval (minutes) ...................................................................................................25
Minimum COF / PF Value .........................................................................................................................25
Maximum COF / PF Value ........................................................................................................................25
COF / PF Adjustment Mode......................................................................................................................25
Minimum Temperature for sampling (0 = disabled)...............................................................................25
Communications and Source Setup............................................................................................................. 26
IP Address .................................................................................................................................................26
Atmosphere/Temp Sources .....................................................................................................................27
Port Setup ................................................................................................................................................. 28
Instrument Setup ..........................................................................................................................................29
Calculation Factors ..................................................................................................................................29
General Setup ...........................................................................................................................................35
Security Settings.......................................................................................................................................35
Analog Output Setup.................................................................................................................................36
Factory Default Settings...........................................................................................................................36
Other Settings ...........................................................................................................................................36
Language Setup ........................................................................................................................................36
Auto Calibration Setup.................................................................................................................................. 37
Gas Alarm Setup ...........................................................................................................................................38
Instrument Information ................................................................................................................................38
General Information .................................................................................................................................38
Calibration Dates ......................................................................................................................................39
Power Status.............................................................................................................................................39
Tools...............................................................................................................................................................39
Database Maintenance............................................................................................................................. 39
Pressure Sensor Calibration ................................................................................................................... 40
Thermister Calibration ............................................................................................................................. 40
SuperCalc..................................................................................................................................................40
Set User Cal / Load User Cal ...................................................................................................................40
Valve Setup................................................................................................................................................41
Shut Down Interface......................................................................................................................................41
Parts List and Internal Components ........................................................................................................... 42

MGA 6010 Operations Manual
Super Systems Inc. Page 4 of 67
Revision History .......................................................................................................................................... 45
Appendix A: Piping Diagram........................................................................................................................ 46
Appendix B: Digital Inputs on the MGA 6010 ............................................................................................... 47
Appendix C: Modbus Registers ................................................................................................................... 48
Appendix D: Configuration Parameters ...................................................................................................... 66

MGA 6010 Operations Manual
Super Systems Inc. Page 5 of 67
Introduction
The Model MGA 6010 (see part numbers in the Parts List on page 42) is a Multi-Gas IR analyzer. It
measures Carbon Monoxide (CO), Carbon Dioxide (CO2) and Natural Gas (CH4) typically found in an
endothermic atmosphere. The measurement of these gases, combined with furnace temperature
information, allows the MGA 6010 to calculate the percent Carbon (%C) of the measured gas. A Hydrogen
(H2) sensor can also be incorporated as an option to provide a more complete picture of the measured
gas.
For nitriding and ferritic nitrocarburizing (FNC) applications, the MGA 6010 can calculate carburizing
potential (KC) and nitriding potential (KN).
Finally, the MGA 6010 can be configured for compatibility with environments containing ammonia (NH3)
gas. NH3compatibility must be specifically requested when the MGA 6010 is ordered.
NOTE: Calculation of KCmay have inaccuracies in the presence of ammonia.
IMPORTANT!
Do not use a MGA 6010 for gas analysis with NH3-containing gas if the MGA 6010 has not been
configured with NH3compatibility. Any use of a non-NH3compatible MGA 6010 with NH3-
containing gas will void the product warranty.

MGA 6010 Operations Manual
Super Systems Inc. Page 6 of 67
Specifications
The unit is designed and manufactured for the atmosphere heat treating industry; however, its uses go
beyond the scope of these applications.
CO:
Range: 0 –30% of gas concentration.
Accuracy: +/-1% of full scale (+/-0.3% of gas concentration, based on 30%).
Resolution: 0.01%
CO2 Low:
Range: 0 –2% of gas concentration.
Accuracy: +/-1% of full scale (+/-0.02% of gas concentration, based on 2%).
Resolution: 0.001%
CO2 High:
Range: 0 –20% of gas concentration.
Accuracy: +/-1% of full scale (+/-0.2% of gas concentration, based on 20%).
Resolution: 0.01%

MGA 6010 Operations Manual
Super Systems Inc. Page 7 of 67
CH4:
Range: 0 –20% of gas concentration.
Accuracy: +/-1% of full scale (+/-0.2% of gas concentration, based on 20%).
Resolution: 0.01%
H2:
Range: 0 –100% of gas concentration.
Accuracy: +/-1% of full scale (+/-1% of gas concentration, based on 100%).
Resolution: 0.1%
* Note: These sensors have been optimized for use at the levels normally seen in an Endothermic
atmosphere. The ranges can be adjusted to fit other applications. For information regarding
modifications to the ranges shown above, please contact Super Systems.
Sampling method: Extraction by internal pump (when necessary)
Measurement Method (CO, CO2, CH4): Non-Dispersive Infrared (NDIR)
Measurement Method (H2): Thermal Conductivity
Repeatability: 1% of full scale
Recommended Calibration Interval: Annual
AC Power Requirements: 110VAC (can be modified to 220V upon request)
Communications: Ethernet, USB(A), USB(B), RS485 Modbus
Data Storage: Continuous automatic data logging
Data Retrieval: XGA Viewer Software (included) or on-screen
Operating Temperature: 32to 122F (0to 50C)
External Dimensions: Approx. 16”H X 20”L X 8”D
Weight: Approx. 28 lbs.
Unpacking the Device
The following items should be included with the MGA:
(1) MGA 6010 Gas Analyzer
(1) Bowl Filter Assembly (attach to “Sample Inlet” port)
(1) ¼” Male NPT to 3/16” barb fitting (attach to “Aux. Cal. Gas Inlet” if desired)
(1) Operations Manual
(1) XGA Viewer CD
(2 ) ¼” Male NPT to calibration gas inlet hose fitting (attach to “Zero and Span Cal. Gas Inlet” if desired)
If any of these items is missing or damaged please contact Super Systems Inc. at 513-772-0060.
Mechanical Installation
Enclosure Mounting
It is recommended that the MGA 6010 be mounted as close to the sampling point as possible, since that
will reduce the length of the plumbing lines that will need to be maintained. It is intended for use in a
heat treating environment, but care should be taken not to mount it too close to a furnace or other heat
source. The operating temperature of the enclosure should be maintained below 122°F (50°C). If
necessary, a heat shield can be mounted behind the enclosure to reduce the amount of radiant heat that
the MGA is exposed to. In most cases, this will not be necessary.
The enclosure is heavily vented to prevent the buildup of potentially harmful gases in the unlikely event of
an internal leak. This venting will also reduce the internal temperature by allowing the free flow of
ambient air around the internal components.

MGA 6010 Operations Manual
Super Systems Inc. Page 8 of 67
Wiring Connections
Terminal blocks inside the instrument are available for the following purposes:
Each terminal block is numbered according to the included electrical drawing. Knockout holes in the
enclosure have been provided to simplify wiring connections. Knockouts are located on the bottom of the
enclosure. Additional or alternate locations can be added as needed. Please note that due to the
potential for electrical interference, it is recommended that communication wires not be run in parallel to
AC power wires.
The right side of the enclosure also contains two Ethernet ports, one USB A port and one USB B port.
These can be used to communicate to the MGA 6010. For detailed information on the use of these ports,
please see the section of this manual, Communications and Source Setup.
Electrical drawings are available from SSi at:
http://www.supersystems.com/documentation/typical-schematicsdrawings/

MGA 6010 Operations Manual
Super Systems Inc. Page 9 of 67
Plumbing Connections
There are five plumbing connections on the MGA 6010:
Sample Inlet –The incoming gas to be sampled should be routed through this port after passing through
the included bowl filter.
Sample Vent –After sampling, the gas will exit the enclosure through this port. Due to the potentially
harmful nature of the gas being measured, the gas should be vented to a place in accordance with local
regulations and safety standards.
Zero and Span Calibration Gas Inlets –These are ¼” NPT female ports for connecting to calibration
gases. For more information on acceptable calibration gases see the Sensor Calibration section of this
manual. The incoming pressure of the gas will need to be adjusted to allow the flow to be the same for
the calibration gas and the sample gas flow rate. The incoming pressurized gas goes through a small
fixed orifice inside the analyzer, which should require between 20 and 50 psi to maintain proper flow.
These ports are used with the automatic calibration system to provide calibrations at predetermined
intervals or events. The use of these ports is not required for the operation of the MGA 6010.
Auxiliary Calibration Gas Inlet –This ¼” NPT female port provides another entry point for both zero and
span calibration gases. If calibrations are being performed manually, this port should be used for both
gases.
The flow of gas through the MGA 6010 is controlled by solenoid valves. Each valve is normally closed, and
for safety purposes all valves will shut to prevent unwanted furnace gases from entering the instrument
when power to the enclosure is lost or the specified sampling parameters are not met.
Appendix A: Piping Diagram shows the plumbing connections.

MGA 6010 Operations Manual
Super Systems Inc. Page 10 of 67

MGA 6010 Operations Manual
Super Systems Inc. Page 11 of 67
Basic Operating Description
The Model MGA 6010 has been designed for the simultaneous analysis of CO, CO2and CH4in heat-treat
furnace atmosphere gases. It uses a color touch screen display / operator interface for data entry and for
viewing. Selections can be made on the screen using a finger or a stylus. Avoid the use of sharp objects
(pens, paperclips, screwdrivers, etc.) as they can cause permanent damage to the screen and void the
warranty of the instrument.
After the power switch is turned on, it will take approximately 30 seconds for the MGA 6010 software to
automatically load. Once the software is properly loaded, the instrument is ready to use. Power to the
MGA can be turned off by tripping the circuit breaker inside the enclosure. Before the breaker is tripped,
select the “Shut down interface” option from the main menu and allow the screen to close the MGA
software in a controlled manner. Doing so will help minimize any damage to data that could be done by an
unexpected shutdown.
Hydrogen Cell Note:
For highest H2accuracy, it is recommended that the instrument be powered on for 60 minutes before
measurements are taken.
Default Screen
Once the MGA 6010 has successfully loaded its software, the default screen will be displayed.
A
B
C
DEFGHI
J
K
A –Measured values of CO, CO2, CH4, and IR %C (and H2, if the H2sensor is present)
B –Pump status indicator / Button to change pump status
C –Button to access menu list
D –Session status indicator
E –Temperature / Instrument Temperature indicator
F –Button for Carbon Calculation screen
G –Automatic Carbon Calculation Adjustment indicator
H –External Instrument Communications status indicator
I –Button for Trend Chart screen

MGA 6010 Operations Manual
Super Systems Inc. Page 12 of 67
J –Numeric Flow indicator
K –Visual Flow indicator
Pressing the Return button at the bottom right of the operator interface on any screen will take the
display to the default. It may be necessary to press the Return button multiple times.
Pump Operation
Initially, the pump will be off. The pump should remain off while sampling an endothermic generator or
any other atmosphere under positive pressure. The pump should also remain off during calibration. For
proper operation, the flow of gas through the sensors should be between 1.0 and 2.0 SCFH. If the flow
meter on the right of the screen does not indicate sufficient flow, turn the pump on. When accessed from
the main screen, the pump has two possible modes: Automatic and Off.
Carbon Calculation
The MGA 6010 determines the percent carbon in the sample gas using measured amounts of CO, CO2, and
CH4along with the Furnace Temperature. The Furnace Temperature is either entered by the user or
obtained automatically from the Furnace Temperature Controller via RS-485 communications.
Additionally, the carbon percentage measured by the MGA 6010 can be used as a comparison to the
carbon percentage measured by a furnace’s oxygen probe. This is accomplished either by manually
entering the Probe Temperature, Probe Millivolts, and the Probe CO Factor into the MGA 6010 or by
obtaining the information automatically via RS-485 communications to the Furnace Carbon Controller.
Providing the probe information allows the MGA 6010 to suggest an adjustment for the probe CO Factor
(or Process Factor) in order to keep the oxygen probe measuring properly.

MGA 6010 Operations Manual
Super Systems Inc. Page 13 of 67
Using infra-red analysis is considered a more accurate method for determining the percent carbon of a
gas compared to using an oxygen probe alone. The single point oxygen probe assumes a theoretical
mixture of endothermic gas to infer the percent carbon whereas the gas analyzer will measure the exact
composition of the process gas. The percent carbon determined by the gas analyzer can then be used to
adjust the carbon percentage determined by the oxygen probe.
Chart
The Chart Display shows between 1 hour and 24 hours of process variable data on the screen and can be
scrolled back to view all of the data stored on the flash card. The vertical timelines change as the time
changes on the screen. The function buttons run along the bottom of the screen.
The Trend Lines button - - will allow the user to select or de-select the trend lines on the trend
chart to display. If the checkbox next to each trend line is checked, then that trend line will be displayed.
The Datagrid View button - - will display a screen with the trend data in a grid format instead of
with trend lines. The trend data is shown in 1-minute intervals. Clicking on the OK button on this screen
will close the screen down and return to the Chart Display screen.
The Refresh button - - will refresh the screen’s trend data if the screen is not in real-time mode.
The left-pointing green arrow button - - will move the chart’s view backward in time by the
specified chart interval.
The chart interval button - - will determine the number of hours displayed on the trend chart. The
options are: 1 Hour, 2 Hours, 4 Hours, 8 Hours, 12 Hours, or 24 Hours.
The right-pointing green arrow button - - will move the chart’s view forward in time by the
specified chart interval.

MGA 6010 Operations Manual
Super Systems Inc. Page 14 of 67
The right-pointing arrow with the vertical line next to it button - - will toggle between viewing the
chart in or out of real-time. When in real-time mode, the chart will automatically be updated once a
minute.
Chart Sub Menu
There is a sub-menu available by putting a finger or a stylus anywhere on the chart and holding it there
for a couple of seconds. The sub-menu will have the following options available: Zoom, Restore, Add
Note, Data, and Exit.
The Zoom option will allow the user to zoom in on a particular part of the screen. Once this has been
selected, the user can take a stylus or a finger and create a box around the data. Once the user releases
the stylus or finger, a zoom is no longer possible, and the user will need to re-select the option from the
sub-menu to zoom in again.
The Restore option will back out of any zoom options that have been performed and display the initial
chart screen.
The Add Note option allows the operator to enter a note on the chart, similar to writing on a paper chart.
The note is available when the chart is printed out using the utility software included with the Series 9010
instrumentation. Pressing the Add Note option displays a screen where the operator can enter the
operator ID or initials and a note. The user has the option to enter a note using either the operator
interface keyboard and typing or using the Signature mode and writing the note with the stylus.
The Data option will show the trend data as a data grid instead of the trend lines on a chart. This
functionality is exactly the same as if the user pressed the Datagrid View button - - from the chart
screen.
Exit will close out the sub-menu without selecting an item.

MGA 6010 Operations Manual
Super Systems Inc. Page 15 of 67
Pressing the red ‘X’ in the top right-hand corner of the screen will take the user back to the status
screen.
Menu Lists
Accessing the menu screen will show three or four available options, depending on whether the Nitrider
Calculation feature is installed.
Carbon Calculation, Nitrider Calculation (if installed), Sessions, Instrument Information, and Shut Down
Interface can be accessed by any users. Additional menu items are available when an authorized user
logs in using an appropriate Pass Code. When the Supervisor Pass Code is entered (default = 1), the user
will also be able to access the Pump Control and Instrument Information screen.

MGA 6010 Operations Manual
Super Systems Inc. Page 16 of 67
To see the full range of options available, the user must use the Configuration Pass Code (Default = 2).
This provides the user with all available options including calibration and setup functions.
To access any items on the menu list, touch the item to highlight it and then press Detail. A specific
description of each item on the list follows.
Carbon Calculation
Please see the Carbon Calculation section starting on page 12.

MGA 6010 Operations Manual
Super Systems Inc. Page 17 of 67
Nitrider Calculation (Available on Units Configured for Nitriding & FNC Applications)
When configured for nitriding and ferritic nitrocarburizing (FNC) applications, the MGA 6010 has the
ability to provide a calculation of values essential those processes—specifically, nitriding potential (KN)
and carburizing potential (KC). To access these values, open the Nitrider Calculation page. NOTE: If the
MGA 6010 unit you are using does not have the Nitrider Calculation option, and you would like this feature
added, please contact SSi at 513-772-0060.
a
The Nitrider Calculation page displays data on current atmosphere parameters such as temperature and
measured values for % CO, % CO2, % CH4, and % H2(if the H2sensor is installed). The calculated value for
%C is also shown.
User-provided flow values for N2, NH3, DA, and CO2are used by the MGA 6010 in performing calculations.
The flow values are visible on the right side of the Nitrider Calculation page. To change a flow value,
simply tap on the blue field for that value. A numeric entry page will appear, allowing you to change the
value. For the purpose of KN and KC calculations, any valid gas flow unit (for example, cubic feet per
minute, or cfm) may be used. The flow unit must be the same for all gases. NOTE: If one or more of the
flow gases do not show up in the list, it is likely that the gas flow valve is not enabled in the Tools →
Valve Setup menu. Refer to the Valve Setup section on page 41 for more information.
KN provides a measurement of the amount of nitrogen that can be diffused into a metal (e.g., iron); it is a
derived measurement based on the partial pressures of NH3and H2. The MGA 6010 performs the
calculation of KNusing user-provided flow values and displays the calculated KN value on the Nitrider
Calculation page.

MGA 6010 Operations Manual
Super Systems Inc. Page 18 of 67
KCprovides a measurement of the amount of carbon that can be diffused into a metal; it is derived from a
calculation involving the partial pressures of CO2, H2, CO, and H20. The MGA 6010 performs the required
calculation using user-provided flow values and displays the calculated KCvalue on the Nitrider
Calculation page.
NOTE: Calculation of KCmay have inaccuracies in the presence of ammonia.
Sessions
The instrument is logging data any time that it is powered on. Data of interest can be viewed by entering
its date and time. Users can apply custom tags to sections of data, allowing for easy identification of
viewing and recalling data. These tags can include the name of the operator and the name of the
equipment that is being measured.
The instrument has default values for each of these variables. However, it is highly recommended that
the selections be modified so that data may be tagged in a way that is easily recognized. For more
information on how to set up these selections with custom entries, see the “Tools – Database
Maintenance” section of this manual.
Using the pull-down menus, select the Operator Name and Equipment Name from the list of available
selections. If a Session ID is desired, tap on Input Session ID and use the text entry keyboard to enter a
Session ID. If using an Equipment Specific IRF Matrix, make sure that the applicable checkbox is selected.
(More information on the IRF Matrix can be found in the Calculation Factors section beginning on page
29.)
Begin the session by pressing Start. After confirming the beginning of a session, a sessions summary
screen will be displayed. To end the session, press the red End button.

MGA 6010 Operations Manual
Super Systems Inc. Page 19 of 67
This screen will identify sessions within the date range specified at the top of the screen. As a default,
sessions from the past 24 hours are shown. By expanding the data range, additional sessions can be
seen. These sessions are sorted with the newest entry at the top, but they can be sorted by End Time,
Equipment Name, or Operator Name by touching the header of each column.
To see the details of any session, highlight it by touching it, and then press Detail. This will display a
graphical representation of the data from the selected session.
For more information on navigating the Chart Screen see the “Chart” section of this manual. To leave the
Chart view, press the red X in the upper right hand corner of the screen.

MGA 6010 Operations Manual
Super Systems Inc. Page 20 of 67
Pump Control
The Pump Control screen will identify and allow the modification of the pump status (On or Off), as well as
the amount of time (in seconds) to delay turning the pump on (Pump On Delay) and off (Pump Off Delay).
Sensor Calibration
On the MGA 6010, you can perform a sensor calibration with one of four calibration sources. These
sources are displayed when Sensor Calibration is first selected: Automatic Calibration Port, Auxiliary
Calibration Port,Sample Line (with pump on), and Sample Line (with pump off).
You will be required to select one of the four sources.
With the Automatic Calibration Port, calibration is performed using the Zero Calibration Gas Inlet and
Span Calibration Gas Inlet ports on the side of the unit.
This manual suits for next models
4
Table of contents
Other Super Systems Measuring Instrument manuals
Popular Measuring Instrument manuals by other brands

City Theatrical
City Theatrical RadioScan 5988 user manual

scigiene
scigiene TxIsoRail0-10 Vdc Installation and operation manual

Romus
Romus MINI manual

R&S
R&S FSW Series user manual

Schenck process
Schenck process Intecont Satus operating manual

HACH LANGE
HACH LANGE QuikChem 8500 2 Series Maintenance and troubleshooting