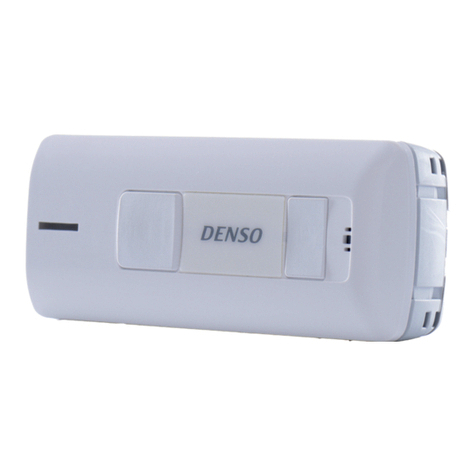
Denso SP1-QUBi User manual

RF Tag Handy Scanner
SP1-QUBi
User’s Manual

Contents
Contents ................................................................................. ii
Preface ................................................................................... i
About This Manual......................................................................... ii
Customer Registration and Inquiries......................................................... iii
SAFETY PRECAUTIONS................................................................... iv
Components Required ..................................................................... ix
Bluetooth®Wireless Communication Link ...................................................... x
Proper Care of the Scanner ................................................................. xi
Chapter 1 Names and Functions.............................................................. 1
1.1 Description on each operating part ................................................... 2
1.2 Description on each indicator ........................................................ 3
1.3 Description on each buzzer.......................................................... 4
Chapter 2 Basic Operations .................................................................. 5
2.1 Loading the Batteries ............................................................... 5
2.2 Battery Charging ................................................................... 7
2.3 Powering ON/OFF ................................................................ 11
2.4 Connecting the Host Terminal ...................................................... 11
2.5 Scanning Codes .................................................................. 13
2.6 Reading/Writing RF Tags .......................................................... 15
2.7 Battery Power level Indicator ....................................................... 18
2.8 Attaching the Host Terminal ........................................................ 19
Chapter 3 Parameters and Defaults .......................................................... 23
Appendix 1. Specifications .................................................................. 25
Appendix 1. Specifications(2)................................................................ 27
Appendix 2. Bluetooth® Glossary ............................................................ 30
Appendix 3. CU-SP1A Specifications ......................................................... 31

i
Preface
Thank you for using the DENSO WAVE RF Tag Handy Scanner.
Please read this manual thoroughly prior to operation to ensure full use of the product’s functionality, and store safely in a
convenient location for quick reference even after reading.
Made for iPhone X, iPhone 8, iPhone 8 Plus, iPhone 7, iPhone 7 Plus, iPad Pro 12.9-inch (2nd generation),
iPad Pro 10.5-inch, iPad (5th generation), iPod touch (6th generation)
Made for iPhone, Made for iPad, and Made for iPod means that an accessory has been designed to connect
specifically to the iPhone, iPad, or iPod, and has been certified by the developer to meet Apple performance
standards. Apple is not responsible for the operation of this device or its compliance with safety and regulatory
standards.
Apple, iPad, iPad Pro, iPod, iPod touch, iPhone are trademarks of Apple Inc., registered in the U.S. and
other countries. The trademark “iPhone” is used in Japan with a license from Aiphone K.K.
Copyright © DENSO WAVE INCORPORATED, 2019
Copyright © Extended Systems, Inc., 2000-2005
Portions copyright © iAnywhere Solutions, Inc., 2005-2014.
All rights reserved.
No part of this publication may be reproduced in any form or by any means without permission in writing from the
publisher.
All products and company names mentioned in this document are trademarks or registered trademarks of their
respective holders.
QR Code and QBdirect are trademarks of DENSO WAVE INCORPORATED.
This Product uses the Source Code of T-Kernel 2.0 under T-License 2.1 granted by TRON Forum
(www.tron.org).
IOS is a trademark or registered trademark of Cisco in the U.S. and other countries and is used under license.
Android is a trademark of Google LLC.
The Bluetooth® word mark and logos are registered trademarks owned by the Bluetooth SIG, Inc. and any use of
such marks by DENSO WAVE INCORPORATED is under license.
Other products and company names mentioned in this document are trademarks or registered trademarks of
their respective holders.
Specifications are subject to change without prior notice.
The Customer shall not modify, reverse compile, reverse engineer, reverse assemble, and or otherwise tamper
with our scanner's firmware.
ii
About This Manual
•Due to changes and improvements, the content of this manual may be subject to change without prior notice.
•The reproduction or duplication of the whole or part of this manual is strictly prohibited without prior consent.
•Every attempt has been made to ensure that the content of this manual is thorough and up to date, however, we kindly ask
you to report any questionable descriptions, mistakes or omissions, if any, to DENSO WAVE INCORPORATED.
Liability Limitations
•DENSO WAVE INCORPORATED (“DENSO WAVE”) does not assume any product liability (including damages for lost
profits, interruption of operations, or the loss of business-related information) arising out of, or in connection with, the use
of, or inability to use the scanner system software or related manuals.
•DENSO WAVE takes reasonable precautions to ensure its products do not infringe upon any patents or other intellectual
property rights of other(s), however, DENSO WAVE cannot be responsible for any patent or other intellectual property
right infringement(s) or violation(s) arising from any of the following.
(1) The use of DENSO WAVE’s products in connection or in combination with other components, products, devices, data
processing systems or software not supplied by DENSO WAVE.
(2) The use of DENSO WAVE’s products in a manner for which they were not intended nor designed.
(3) The modification of DENSO WAVE’s products by parties other than DENSO WAVE.
•If it is judged by DENSO WAVE that malfunction of the product is due to the product having been dropped or subjected to
impact, repairs will be made at a reasonable charge even within the warranty period.
•DENSO WAVE will not bear any responsibility for data which customers have recorded and are received by DENSO
WAVE for repair and analysis.
Related Manuals
•DENSO SP1 SDK for Android Manual
•DENSO SP1 SDK for iOS Manual
•DENSO SP1 SDK for Xamarin Manual

iii
Customer Registration and Inquiries
Customer Registration
To allow us to provide our customers with comprehensive service and support, we request that all customers complete a
Member Registration Form. Registered members will be offered the following privileges.
•The latest upgrade information
•Free exhibition and event information for new products
•Free web-information service “QBdirect”
QBdirect Service Contents
Information searching
service (FAQ)
Offers detailed information on each product.
Download service The latest OS systems for the SP1 Series, repair software, and sample programs can be
downloaded.
E-mail inquiries Product related queries can be sent in by e-mail.
Please note that these privileges may be subject to change without prior notice..
How to Register
Access the URL below and follow the instructions provided.
https://www.denso-wave.com/
Inquiries
For inquires relating to products, please access our website https://www.denso-wave.com .
Technical inquiries can be made at our exclusive website for registered users (QBdirect).

iv
SAFETY PRECAUTIONS
Be sure to observe all these safety precautions.
Please READ through these instructions carefully. They will enable you to use the scanner correctly.
Always keep this manual nearby for speedy reference.
Safety precautions description in this document.
Strict observance of these warnings and cautions is a MUST for preventing accidents that could result in bodily injury and
substantial property damage. Make sure you fully understand all definitions of these terms and symbols given below before
you proceed to the text itself. and meaning of symbols are as follows;
Warning levels
DANGER
Alerts you to those conditions that could imminently lead to serious bodily injury or
death if the instructions are not followed correctly.
WARNING
Alerts you to those conditions which could cause serious bodily injury or death if the
instruct
ions are not followed correctly.
CAUTION
Alerts you to those conditions which could cause minor bodily injury or substantial
property damage if the instructions are not followed correctly.
Meaning of Symbols
A triangle ( ) with a picture inside alerts you to a warning of danger. Here you see the warning for electrical
shock.
A diagonal line through a circle ( ) warns you of something you should not do; it may or may not have a picture
inside. Here you see a screwdriver inside the circle, meaning t
hat you should not disassemble.
A black circle ( ) with a picture inside alerts you to something you MUST do. This example shows that you
MUST unplug the power cord.

v
DANGER
Handling the battery
Incorrect handling the batteries may result in electrical shock, overheating, smoke generation, combustion,
blowout, or leakage of battery fluid. Please read the following items prior to use.
•Never disassemble or modify the battery.
•Do not stick a needle into the battery, hammer at it, or tread on it.
•Avoid dropping or throwing the battery or letting it undergo any shock or impact.
•Do not use significantly damaged or deformed batteries. Do not use batteries when they are
subject to the impact, for example, a drop impact.
•Never connect the battery (+) and (-) terminals with a metal object such as a piece of wire.
•Do not carry or store the battery together with ballpoint pens, necklaces, coins, hairpins, or
anything else metallic.
•Never place the battery into or soak it in water or seawater.
•Never burn or heat up the battery.
•
Never use, leave, or charge the battery in the vicinity of high-temperature locations (60 °C or
higher) such as a fire, stove, or under a scorching sun.
•
Do not use or store the battery in places exceeding the service or storage temperature.
•Never charge the battery near a fire or in strong sunlight. Raised battery temperature may result
in leakage of battery fluid, blowout, or combustion.
•Never charge or use the battery where any inflammable gases may be emitted.
•Never apply solder directly to the battery.
•Do not use batteries other than the specified ones.
•If the battery fluid leaked from the battery gets into the eyes, wash thoroughly with clean water
such as tap water without rubbing and obtain medical treatment immediately. Failure to do so will
result in eye injuries.
•During use, charging, or storage of the battery, if odors come from the battery, the battery is
overheated, discolored, deformed, or anything unusual is found, unload the battery from the
scanner or charger. Do not use the battery.
•If the battery does not finish recharging within the specified time, stop recharging.

vi
WARNING
To System Designers:
•When introducing the scanner in those systems that could affect human lives (e.g., medicines
management system), develop applications carefully through redundancy and safety design
which avoids the feasibility of affecting human lives even if a data error occurs.
Handling the scanner
Incorrect handling of the scanner could cause electric shock, impaired vision, skin problems, injury, burns and generation of heat
and smoke from the scanner. Be sure to observe the following to use the device correctly.
•Never disassemble or modify the scanner.
•Do not let the battery undergo any shock or impact or throw it at something hard.
•When the scanner is subject to the strong impact, for example, a drop impact, check the case for
any damage and the battery for damage and leakage.
•Never use a damaged case.
•Never use a damaged or leaked battery.
•Do not insert any foreign materials into the battery.
•Do not get the scanner wet or put it in water or seawater.
•Never put the scanner in a microwave oven or high-pressure container.
•Never put the scanner in places where there are excessively high temperatures, such as inside
closed-up automobiles, or in places exposed to direct sunlight.
•Avoid using the scanner in extremely humid or dusty areas, or where there are drastic
temperature changes.
•Never stare into the reading window.
•If battery fluid leaks from the battery and it gets into your eyes, wash thoroughly with clean water
such as tap water without rubbing and obtain medical treatment immediately. Failure to do so will
result in eye injuries.
•If smoke, abnormal odor or noise comes from the scanner, immediately turn off the power and
remove the battery from the scanner case.

vii
WARNING
Handling the battery
Incorrect handling the batteries may result in electrical shock, overheating, smoke generation, combustion,
blowout, or leakage of battery fluid. Please read the following items prior to use.
•The battery is exclusively for the scanner. Do not use the battery for purposes other than charging
the scanner.
•Never put the battery in a microwave oven or high-pressure container.
•Use the specified charger or charging cable.
•If abnormal odor, heat, discoloration, deformation or any other abnormal conditions are noticed
when the battery is in use, being charged, or is in storage, remove it from the scanner or charger
and avoid further use.
CAUTION
Handling the scanner
Incorrect handling of the scanner could cause generation of heat and smoke from the scanner, and malfunction.
Be sure to observe the following to use the device correctly.
•When using the hand strap or neck strap, exercise due care to avoid getting them caught in other
objects or entangled in rotating machinery. Failure to do so could result in accident or injury.
•Do not move your ear close to the speaker while the Buzzer is beeping. Doing so could lead to
hearing difficulty.
•Do not operate the scanner in environments where static electricity can build into significant
charges. Doing so could result in malfunction or mechanical failure.
•Avoid dropping the battery cartridge or letting it undergo any strong shock or impact. Doing so
could result in malfunction or mechanical failure.
•Do not use the scanner near a wireless transmitter such as a ham radio. Doing so could result in
malfunction or mechanical failure.
•Do not touch the scanner with oily hands or gloves containing oil such as machine oil and grease.
Doing so may cause the deformation and discoloration of a device.
•Do not attach a wet scanner or rechargeable battery cartridge to CU
•Do not use excessive force when inserting or removing the battery cartridge. Doing so could result
in malfunction or mechanical failure.
•Keep magnetic cards such as a cash card or a credit card away from the beeper of this product.
Failure to do so

viii
USAGE PRECAUTIONS
Usage environment restrictions
● Do not use the scanner where it may be exposed to fire, high temperatures, or direct sunlight.
Failure to observe this may result in damage, overheating, explosion, or fire.
When the scanner is stored in a high-temperature, high-humidity environment of 50° to 60°C, leave to sit in
a location at room temperature and normal humidity for at least 1 day prior to use.
Failure to observe this may cause a reading failure or damage the scanner.
● Do not use the scanner in places with extreme temperature variations.
Failure to observe this may lead to the scanner malfunction due to condensation.
Leave the scanner for a short while prior to use when moved from a cold to a warm environment.
● Do not use the scanner in places where it may be exposed to strong impact or significant static electricity.
●Do not use the scanner in places where a strong magnetic field is generated.
Failure to observe this may lead to the scanner malfunction due to magnetic force.
Keep the scanner away from radio waves and metallic objects.
Wireless communication may not be possible in the following locations.
● In the vicinity of other RFID devices
Failure to observe this may lead to scanner malfunction.
● In the vicinity of the following devices operating on a 2.4 GHz waveband
・Industrial, scientific, or medical equipment such as microwave ovens
・Wireless LAN devices
・Logistics systems in places such as plants or warehouses
・Wireless devices such as personal radio stations
Communication may not be possible due to radio wave interference.
● In the vicinity of household appliances emitting radio waves such as computers or televisions
Communication may not be possible due to electromagnetic noise.
●
In the vicinity of metallic objects, in places with high levels of metallic dust, or in places surrounded by
metallic walls
Communication may not be possible due to the presence of metallic objects.

ix
Components Required
This product communicates with iOS terminal such as iPhone, and AndroidTM terminal using Bluetooth® interface.
Since batteries are not included, please prepare either of the following specified batteries.
Thin-type battery (with thin battery cover)
Large capacity battery (with large capacity battery cover)
Optional items
Host terminal BHT-1800 series, etc.
Thin-type battery (with thin battery cover) BT-SP1LA-C Prepare either
of the these
batteries
Large capacity battery (with large capacity
battery cover)
BT-SP1L-C
Communication unit CU-SP1A
Charger CH-SP1L4 4 slots charger
AC adapter AD3-02 series For CU and CH
USB Direct Cable CBSP-US2000/4
Thin-type battery BT-180LA 2900mAh
Large capacity battery BT-SP1L 5800mAh
Attachment EA-SP1-AS For Smart Device
Attachment EA-SP1-A1800 For BHT-1800
Charging Cable CBBHT-US500/C18-4A For BHT-1800
RF Tag Handy Scanner
SP1-QUBi
Host terminal
Bluetooth®
Communication

x
Bluetooth®Wireless Communication Link
The scanner SP1-QUBi uses Bluetooth®wireless networking technology.
Item Specifications
Standard Bluetooth
®
Specification Ver. 2.1+EDR
Radio output Class 2 (maximum 2.5 mW)
Profile(s) supported SPP (Serial Port Profile), iAP2
Communications range (reference value*
1
) Max. 10 m, with no obstructions
*1This value is for wireless networking between the scanner and the host terminal. The communications range varies with
the equipment used and the operating environment.
Wireless networking requires a stable radio environment. Not all operating environments provide this. In particular, note that
•Using the scanner in close proximity to other wireless LAN equipment operating in the same frequency band (2.4 GHz)
risks radio interference that can reduce throughput or even entirely block wireless networking.
•Microwave ovens, industrial heating equipment, high-frequency medical equipment, and other equipment using the 2.4
GHz band can sometimes block wireless networking.
•Electromagnetic noise from computers, refrigerators, and other home appliances can sometimes block wireless networking.
•The following environments can sometimes block wireless networking.
- Metal objects or particles in the vicinity
- Metal walls around the area
- Excessive vibration
•The communications range of 10 m given above is merely a reference value assuming a clear line of sight. Reliable wireless
networking is by no means guaranteed at 10 m for all combinations of equipment used and operating environments. Some
combinations might even work for greater distances, but be sure to confirm that the scanner link operates properly before
introducing the link operation.
NOTE:
To System Designers:
•
Before developing applications, make sure that the intended environment is free
of the interference factors above
and thus actually capable of supporting link operation.
•
When introducing the scanner into an environment where equipment using radio waves in the 2.4
GHz band
operates or when introducing such equipment after the introduction of the scanner, be sure to confirm that
the
scanner radio link operates properly with all equipment being in operation beforehand.
•
If the environment of the radio communications system is changed after the
introduction (e.g., newly installed
household appliances and movement/addition of
shelves or objects), then confirm that the radio link operates
properly again before the actual use.

xi
Proper Care of the Scanner
Make sure to turn OFF the scanner before cleaning.
■Scanner and battery terminal dirt
Periodically wipe any dirt from the terminals of the scanner and battery with a cotton swab or similar soft object.
Be sure not to scratch or deform the terminals while cleaning.
Never use organic solvents such as thinner or alcohol, as this may cause terminal plating to be peeled off.
■Housing dirt
Wipe any dirt from the housing with a dry, soft cloth.
If excessively dirty, wipe with a soft cloth that has been soaked in soapy water (always use a neutral detergent) and
wrung out thoroughly.
Never use organic solvents such as thinner or alcohol, as this may cause the housing to be marred or paint to be peeled
off.
■Code reading window dirt
Any dirt or dust adhering to the clear plate of the code reading window will adversely affect reading performance.
When using in dusty areas, check regularly whether any dust has accumulated on the clear plate of the code reading
window,
and if so, first blow the dust away with an airbrush, and then gently wipe the plate with a cotton swab or similar soft
object.
If sand or hard particles have accumulated, rubbing the plate will result in scratches. Blow the particles away with an
airbrush
or wipe with a soft brush.

1
Chapter 1 Names and Functions
Strap hole
Use this hole when
attaching a hand strap.
Battery cover
Battery cover lock
Code reading window
A window to read
two
-dimensional code such
as QR Code, and barcode
RF tag antenna
Communicates w
ith RF tag.
Do not apply the metallic object such as
metallic name tape or cover it with your
hand.
Beep sound emitting hole
Trigger switch
Push this switch when reading
RF tag or code.
Power button
Mode button
Pairing button
Push this button when
connecting/disconnecting
Bluetooth
®.
Status indicator
Illuminates in blue when
reading is completed.
Charging terminals
Charge the scanner with CU or a
dedicated charger.
Pairing indicator
Shows the
Bluetooth®
connecting status.
Power indicator
Shows the battery level and
the charging status.
Bluetooth® antenna
Do not apply the metallic object such as
metallic name tape or cover it with your
hand because an antenna is
incorporated.

2
1.1 Description on each operating part
Button Operation Description
Power button
Powers ON/OFF
To power ON, press the button for one second or more
when the power is OFF.
To power OFF, press the button for three seconds or
more when the power is ON.
Checks battery power level.
Press this button swiftly (for less than one second), and
the power indicator turns on in the color according to
the battery level.
Pairing button
PAIR
Enables Bluetooth®Press this button for one second or more to enable the
pairing. Then, the pairing indicator blinks in blue.
Disconnects Bluetooth®Press this button for one second or more while being
connected, and then the connection is broken up.
Disables Bluetooth®Press this button for three seconds or more when the
pairing is enabled, and then the paring will be disabled
Mode button
MODE
Switches the pairing mode
Press this button for three seconds or more to switch
the pairing mode (master mode/slave mode) of the
Bluetooth®function.
Checks the paring mode
Press this button swiftly (for less than one second), and
the status indicator turns on in the color according to
the current pairing mode.
Blue: Slave mode
Red: Master mode
Trigger switch Reads RF tag/code Press this switch when reading RF tag or codes.
* Resets to the factory
default.
Press the mode button and the paring button at the
same time and press the power button for three seconds
or more simultaneously when the power is OFF. Then,
the status will be reset to the factory default and the
power will be OFF automatically.
*: Mode button, paring button, and power button

3
1.2 Description on each indicator
Indicator
Status
Description
Status indicator
Red, illuminating
While communicating with RF tag
Blue, illuminating
RF tag/code reading is completed.
Red, blinking (High speed, 3 times)
RF tag communication error (*1)
Red, blinking (Middle speed, 3 times)
Data transfer error (*2)
Red, blinking (Middle speed, continuously)
Device error (*2)
Red blinking (Low speed, continuously)
Full buffer (*3)
Blue, illuminating (for 1 second)
Current pairing mode: Slave mode
Red, illuminating (for 1 second)
Current pairing mode: Master mode
Violet, illuminating While using in a low temperature environment
(below 0°C),
Pairing
indicator
Blue, blinking (Low speed)
Pairing available status
Blue, blinking (High speed)
Pairing is completed. (iOS terminal only)
Blue, illuminating (Continuously)
Connection is completed.
Power
indicator
Green, illuminating (for 1 second)
Battery power level: 40% or more
Orange, illuminating (for 1 second)
Battery power level: 39% to 10%
Red, illuminating (for 1 second)
Battery power level: Less than 10%
Orange, blinking (Continuously)
Battery level warning: 39% to 10%
Red, blinking (Continuously)
Battery level warning: Less than 10%
Green, illuminating (Only while charging)
Charging is completed.
Red, illuminating (Only while charging)
While charging
Red, blinking (Only while charging)
Charging error
Status indicator
and Power
indicator
Blue, blinking (at the same time) Software updating (*4)
*1: Confirm RF tag, peripheral environment, and applications at the host side.
*2: If these errors still occur after powering on the scanner again, there may be something wrong with the device.
Contact a system administrator.
*3: Only when in the batch mode. Transfer data by the application at the host side.
*4: Do not remove the battery until complete.

4
1.3 Description on each buzzer
Function
Status
Description
Power
4times (ON 70ms、OFF 70ms) Power On
5times (ON 100ms、OFF 100ms)、
Detection of the battery deterioration
3min interval,
5times (ON 100ms
、
OFF 100ms)
、
Battery power level: Less than 10%
High freq, 1time (ON 480ms) Power Off
Barcode and
RFID
Short time, 1time (ON 80ms) Code reading is completed.
Short time, 1time (ON 80ms) RF tag reading is completed.
Low freq, short time,
5times (ON 70ms
、
OFF 70ms)
RF tag communication error
High freq, short time,
5times (ON 70ms
、
OFF 70ms)
Data transfer error
High freq, short time,
5times (ON 70ms
、
OFF 70ms)
Device error
Log freq, short time,
2times (ON 70ms
、
OFF 70ms)
Switch the master mode to the slave mode
Low freq, short time,
3times (ON 70ms
、
OFF 70ms)
Switch the slave mode to the master mode
Bluetooth
High freq, short time,
3times (60ms
、
60ms)
Bluetooth ON/Completed connection
High freq, long time,
1time (480ms)
Bluetooth failed to connec/disconnect

5
Chapter 2 Basic Operations
2.1 Loading the Batteries
When you purchase the scanner, a battery is not installed. Install it in the following procedure.
1
Press down and slide the battery cover
lock ①in the direction indicated by the
arrow. Remove the battery cover. ②
2
Confirm the direction of a battery and an
electrode. Insert the battery in the arrow
①direction and completely install it ②.
3
Retract a strap for removing a battery to
the position shown in the figure.
4
Close the battery cover
①
so as not to
involve the strap. Press down and slide
the battery cover lock ②in the direction
indicated by the arrow to lock the cover.

6
Notice on installing the battery.
・Remove the battery from the scanner and store it if not using the scanner for an extended period
of time.
・When using the scanner, be sure to attach the battery cover.
5
When replacing batteries, open the
battery cover and pull out the battery
using the strap.
Before replacing batteries, be sure to
power off the scanner.

7
2.2 Battery Charging
When you purchase the scanner, a battery has not been fully charged. You need to charge the battery using the
dedicated Charging Cradle. Be sure to power off the scanner before charging.
Charging the scanner
●Charging time
・It takes approximately for 3.5 hours for BT-180LA thin-type battery and 7 hours for BT-SP1L large capacity battery
to charge a battery to full. This charging time is a standard time when the temperature is at 25°C and it may vary
according to the condition of operation.
1
Connect the output plug of the AC
adapter into the DC input connector of
the CU.
Connect the AC adapter to a wall socket
2
Set the scanner on the CU.
Take care not to involve a hand strap
between the scanner and the CU.
Push the scanner to the CU securely.
3
The power indicator of the scanner turns
re
d and charging starts. When the
charging finishes, the power indicator
turns green.
When removing, pick up the scanner
with the CU held with one hand.
Power
indicator
AC adapter
AD3
-02 (FSP050-DBAE1)
DC input connector
Table of contents
Other Denso Scanner manuals

Denso
Denso QK30-U User manual

Denso
Denso QS20H User manual

Denso
Denso HC36 II TU-K User manual

Denso
Denso QK20-R User manual

Denso
Denso GT10Q-SU User manual

Denso
Denso GT10Q-SB User manual

Denso
Denso QB30-SR User manual

Denso
Denso UR40-H-ERU Owner's manual

Denso
Denso SE1-QB User manual

Denso
Denso QS20H User manual