Dentsply Sirona Hub User manual

New as of:
Operator's manual
09.2017
Hub
English
=
Title page


66 37 727 D3667
D3667.208.01.02.02 09.2017 3
Dentsply Sirona Table of contents
Operator's manual Hub
båÖäáëÜ
Table of contents
1General information................................................................................................. 5
1.1 Contact information ...................................................................................... 5
1.2 Open source software .................................................................................. 5
1.3 Conformity with the Directives...................................................................... 5
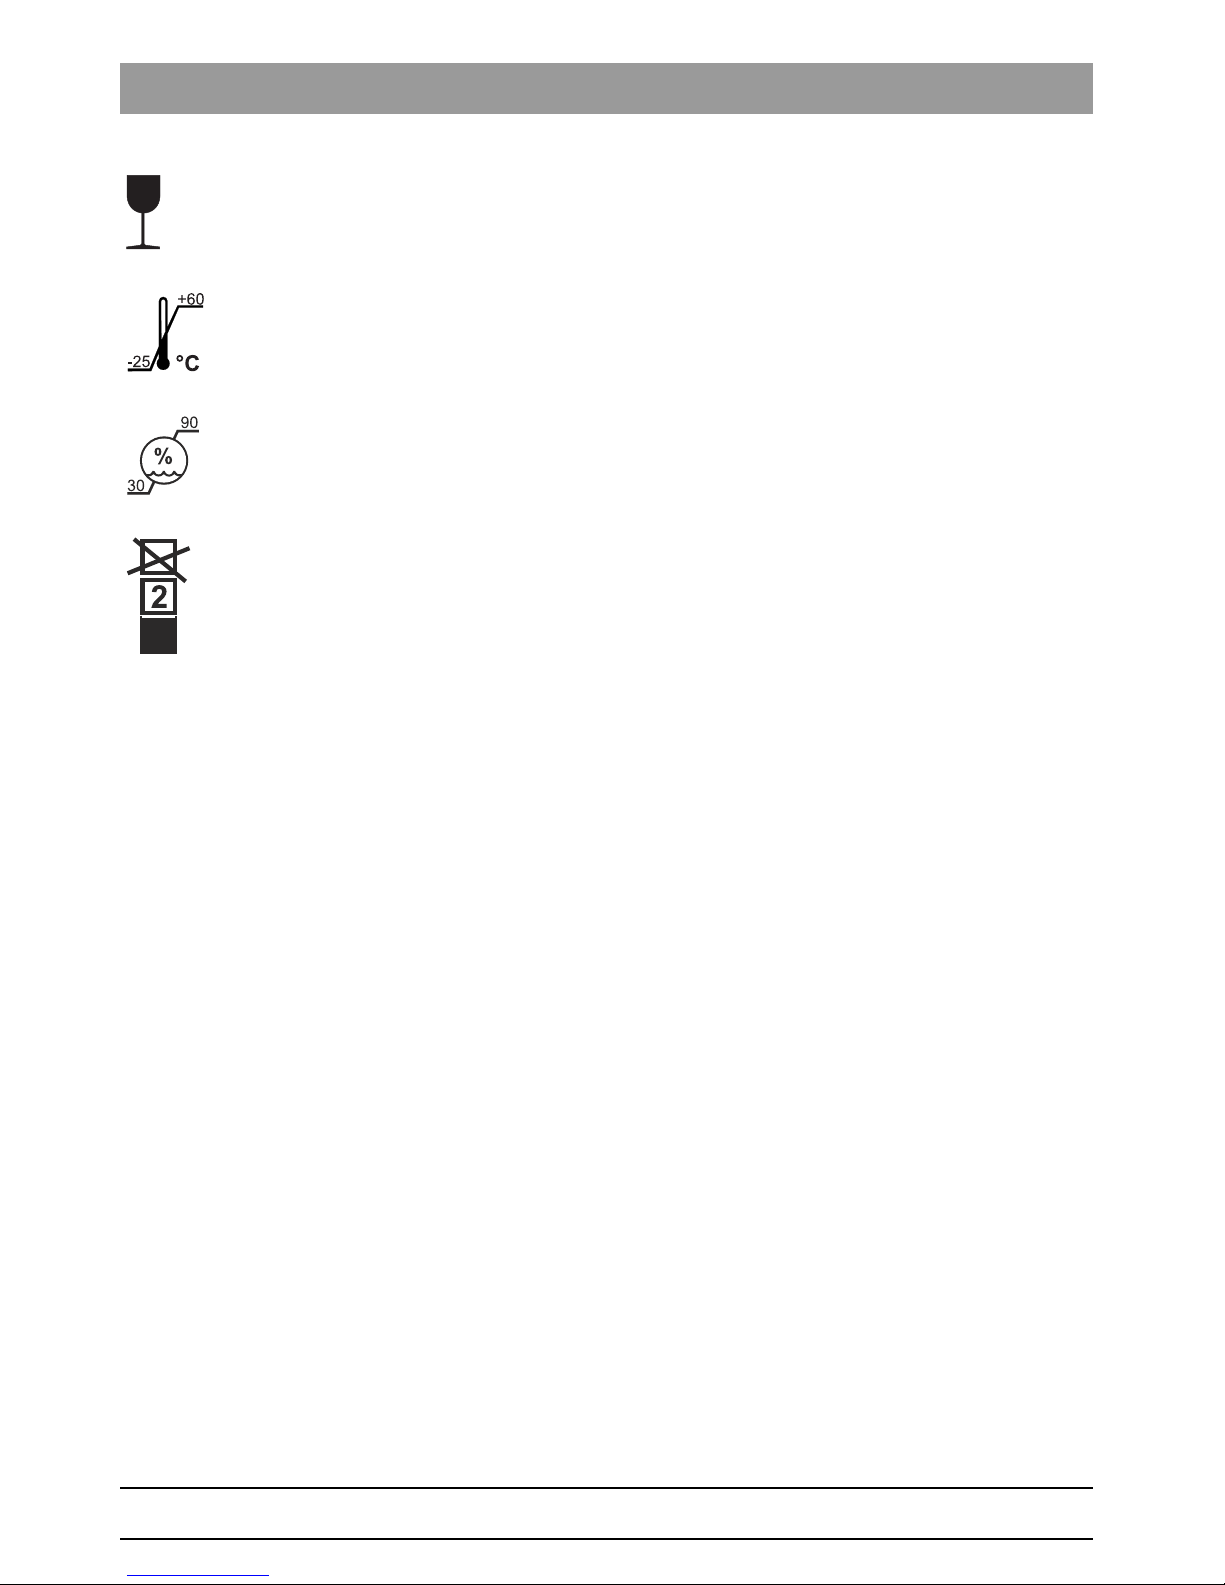
1.4 Symbols........................................................................................................ 5
2Safety ...................................................................................................................... 7
2.1 General safety information ........................................................................... 7
2.2 Electrical voltage .......................................................................................... 7
3System description .................................................................................................. 8
3.1 Scope of supply............................................................................................ 8
3.2 Scope of functions........................................................................................ 8
3.3 Data security ................................................................................................ 8
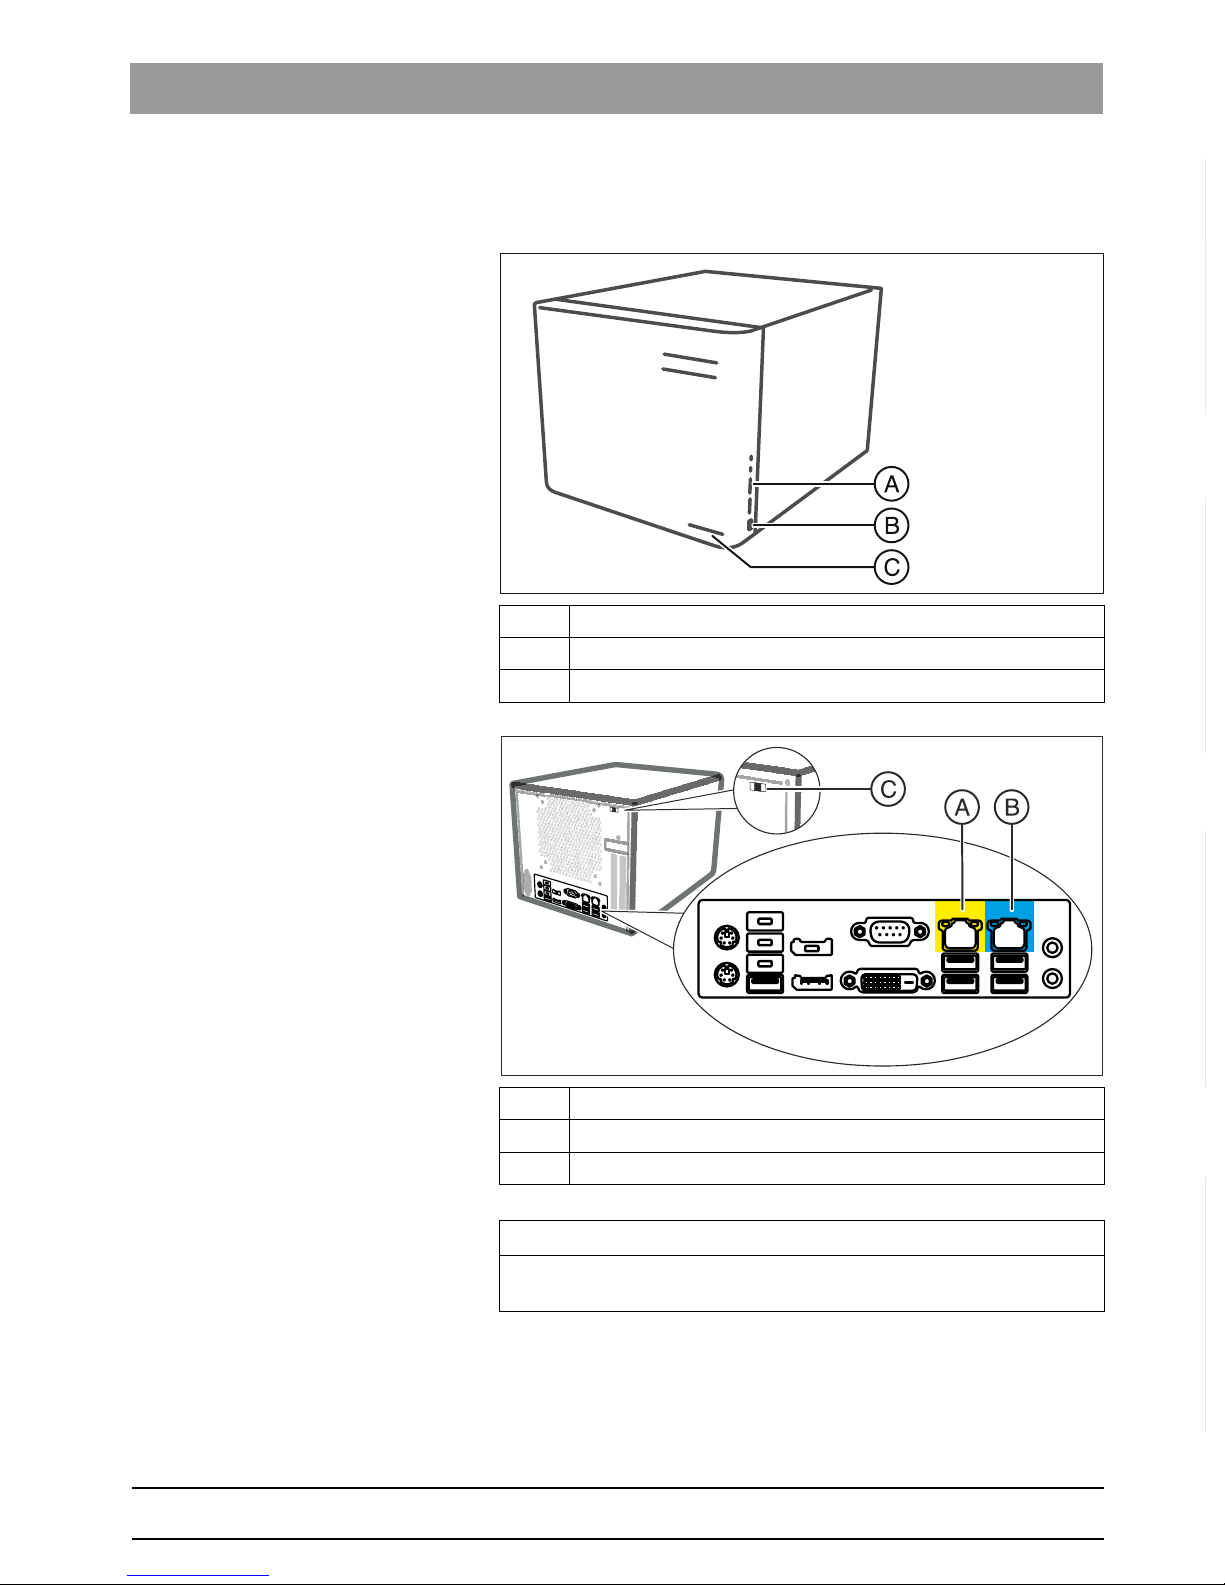
3.4 Hub (hardware) ............................................................................................ 9
3.5 Critical Ops USB Key ................................................................................... 10
3.6 Hub Control Center (Software)..................................................................... 10
3.7 Compatible CEREC software....................................................................... 10
3.8 System requirements ................................................................................... 10
3.9 Technical data.............................................................................................. 11
4Commissioning........................................................................................................ 12
4.1 Installing the Hub.......................................................................................... 12
4.2 Connecting the hub ...................................................................................... 12
4.3 Installing the Hub Control Center ................................................................. 13
4.4 Setting up the Hub (new unit)....................................................................... 14
4.5 Selecting the Hub as the storage location.................................................... 14
4.6 Setting up the spare unit .............................................................................. 14
5Configuration ........................................................................................................... 15
5.1 Overview of the Hub Control Center ............................................................ 15
5.2 Changing the language of the Hub Control Center ...................................... 15
5.3 Configuring the Hub ..................................................................................... 16
6Maintenance............................................................................................................ 17
7Disposal................................................................................................................... 18


66 37 727 D3667
D3667.208.01.02.02 09.2017 5
Dentsply Sirona 1General information
Operator's manual Hub 1.1Contact information
båÖäáëÜ
1General information
1.1 Contact information
Customer service center For technical questions, use the contact form on the internet at the
following address:
http://srvcontact.sirona.com
Manufacturer's address
Sirona Dental Systems GmbH
Fabrikstrasse 31
64625 Bensheim
Germany
Tel.: +49 (0) 6251/16-0
Fax: +49 (0) 6251/16-2591
e-Mail: [email protected]
www.dentsplysirona.com
1.2 Open source software
This product contains open source software. For more information,
please refer to the Licence.pdf in the installation directory.
1.3 Conformity with the Directives
This product bears the CE mark in accordance with the Directives 2014/
35/EU (Low Voltage Directive), 2014/30/EU (EMC Directive) and 2011/
65/EU (RoHS Directive).
1.4 Symbols
Symbols on the Hub
Symbols on the packaging
Product disposal symbol (see "Disposal [ → 18]").
Top
Protect from moisture

66 37 727 D3667
6D3667.208.01.02.02 09.2017
1General information Dentsply Sirona
1.4Symbols Operator's manual Hub
Fragile; handle with care
Temperature during storage and transport
Relative humidity during storage and transportation
Stack limit

66 37 727 D3667
D3667.208.01.02.02 09.2017 7
Dentsply Sirona 2Safety
Operator's manual Hub 2.1General safety information
båÖäáëÜ
2Safety
2.1 General safety information
Only use original software
Only use original software or software which has been released by
Dentsply Sirona.
Dentsply Sirona assumes no liability for the use of third-party software.
Software and software components must not be installed using incorrect
data.
Please check that each installed component has been granted approval
in its country. Contact your dealer for more information.
Changes to the unit
Modifications to this unit which may affect the safety of the operator,
patients or third parties are prohibited by law!
Do not cover ventilation openings
Ventilation openings must not be obstructed.
2.2 Electrical voltage
WARNING
Electrical voltage
➢Before commissioning, check the device and the power cable for
any damage.
➢Replace any defective power cable with an original spare part.
➢Have electrical work performed on the machine by appropriately
trained personnel only.

66 37 727 D3667
8D3667.208.01.02.02 09.2017
3System description Dentsply Sirona
3.1Scope of supply Operator's manual Hub
3System description
3.1 Scope of supply
●Hub
● Critical Ops USB Key
● LAN cable for network connection (with blue plug)
● LAN cable for service (with yellow plug)
● Power cable
3.2 Scope of functions
Hub offers the following scope of functions:
● Central storage of patient data and CEREC exposures
● Access to patient data and intraoral exposures via all devices
connected in the network (CEREC AC and PCs).
● Backup function
● Easy installation via Plug&Play
3.3 Data security
Data saved on the Hub are highly encrypted.
Each unit has an individual encryption. The data can only be read out
from the respective unit.
In order to read out data from a spare unit, the Critical Ops USB Key is
required.

66 37 727 D3667
D3667.208.01.02.02 09.2017 9
Dentsply Sirona 3System description
Operator's manual Hub 3.4Hub (hardware)
båÖäáëÜ
3.4 Hub (hardware)
A USB interfaces
B On/Off key (Standby)
C Control light
A LAN socket for service (yellow)
B LAN socket to be connected to the network (blue)
C Fan control
IMPORTANT
The fan control (C) must remain in the center position in order to
guarantee adequate cooling for the Hub.

66 37 727 D3667
10 D3667.208.01.02.02 09.2017
3System description Dentsply Sirona
3.5Critical Ops USB Key Operator's manual Hub
3.5 Critical Ops USB Key
The USB key for critical processes (Critical Ops USB Key) contains a
backup copy of the admin password and information, which can be used
to encrypt the data stored on the Hub.
All data on the hard disks of the Hub are highly encrypted, and the
corresponding encryption information are stored on the Critical Ops USB
Key. Without this information, the data stored in the Hub in the event of
hard disk failure or damage cannot be restored - including for Dentsply
Sirona. Each Critical Ops USB Key is unique and precisely fits one Hub.
3.6 Hub Control Center (Software)
The following actions are performed with the Hub Control Center:
● New Hub Setup
● Replacement Hub Configuration
● Configure Hub
● Display Notifications
3.7 Compatible CEREC software
The Hub is compatible with the following software:
● CEREC SW from Version 4.5.1
● CEREC Premium SW from Version 4.5
● CEREC Ortho SW from Version 1.2.2
3.8 System requirements
IMPORTANT
Data protection
Keep the Critical Ops USB Key in a safe or outside your practice.
Operating
system
Windows 7 or higher
Network ● LAN network
● Min. 1 GB recommended bandwidth
● All units which should be granted access to the
Hub, must be in the same subnetwork.
● For the Plug&Play installation, automatic
specification of the IP address is recommended
via DHCP.
Internet
connection
(recommended)
For automatic installation of updates and use of the
program for the purpose of quality improvements, an
Internet connection is required.

66 37 727 D3667
D3667.208.01.02.02 09.2017 11
Dentsply Sirona 3System description
Operator's manual Hub 3.9Technical data
båÖäáëÜ
3.9 Technical data
Technical data
Transportation and storage conditions
Operating conditions
Dimensions and weight
Type designation Hub
Rated line voltage 100 – 240 V ~ / 50 –
60 Hz
Nominal current 3.0 – 1.5 A
Type of protection against electric shock Class I device
Degree of protection against ingress of water IP20, ordinary device
(without protection
against ingress of water)
Degree of contamination 2
Installation category II
Operating mode Continuous operation
Storage capacity of hard disks 2 TB per hard disk
Temperature -25°C – 60°C
(-13°F – 140°F)
Relative humidity 30% – 90%
Air pressure 700 hPa – 1,060 hPa
Temperature 10°C – 35°C
(50°F – 95°F)
Relative humidity 30% – 85% (no
condensation)
Air pressure 700 hPa – 1,060 hPa
Operating altitude ≤ 2000m
Dimensions W x H x D 250 x 215 x 390 mm
(10"x8¾"x15½")
Weight 8.4kg (18.5lbs)

66 37 727 D3667
12 D3667.208.01.02.02 09.2017
4Commissioning Dentsply Sirona
4.1Installing the Hub Operator's manual Hub
4Commissioning
4.1 Installing the Hub
➢Set up the Hub on sufficiently stable ground.
4.2 Connecting the hub
Connecting the Hub to the power supply system
➢Connect the Hub to the power supply system using the power cable
provided.
➢To disconnect the Hub from the power supply system, pull the power
plug out or pull the connector plug from the Hub. The Hub has no
main switch.
IMPORTANT
Set up the Hub outside of the patient environment.
IMPORTANT
Ensure that the ventilation openings are not covered.
IMPORTANT
The power supply unit for the Hub is suitable for operation with IT power
supply systems (ungrounded supply voltage) of up to 230 V phase-
phase.
IMPORTANT
The power cable must be easily accessible so that it can be pulled out
quickly in an emergency.

66 37 727 D3667
D3667.208.01.02.02 09.2017 13
Dentsply Sirona 4Commissioning
Operator's manual Hub 4.3Installing the Hub Control Center
båÖäáëÜ
Connecting the Hub to the network
1. Connect the LAN cable provided with the blue plug to the blue
marked LAN socket (A) on the Hub.
2. Connect the LAN cable to a router or switch (B) in the network.
3. Switch on the Hub.
4.3 Installing the Hub Control Center
To set up, configure and operate the Hub, the Hub Control Center
software is required.
IMPORTANT! The Hub Control Centeris already included and installed in
the following CEREC software:
● CEREC SW from Version 4.6
● CEREC Premium SW from Version 4.6
● CEREC Ortho SW from Version 1.3
If you use one of these software versions, no installation is needed.
Continue with the section Setting up the Hub (new unit) [ → 14].
Installing the Hub Control Center
1. Log onto a CEREC AC or PC in the network with an administrator
account.
2. Download the setup file. It is available under
"http://
dentsplysirona.com/hub"
.
3. Run the setup file and proceed as prompted.

66 37 727 D3667
14 D3667.208.01.02.02 09.2017
4Commissioning Dentsply Sirona
4.4Setting up the Hub (new unit) Operator's manual Hub
4.4 Setting up the Hub (new unit)
✔The Hub Control Center is installed.
✔The Hub should be connected to the network and switched on.
1. Log onto a CEREC AC or PC in the network with an administrator
account.
Once the Hub Control Center locates a connected Hub, the icon
for the Hub Control Center is displayed in the taskbar.
2. Click the icon with the left mouse button.
3. Click on
"Hub Setup"
in the window that appears.
4. Click on
"New Hub Setup"
in the window that appears.
You will now be guided through the configuration of the Hub with
a wizard.
5. Follow the instructions in the wizard.
Once the wizard is complete, confirmation is displayed.
The wizard includes the following configuration steps:
● Connecting and searching the Critical Ops USB Key
● Assigning an admin password for the Hub and saving on the Critical
Ops USB Key
● Network Settings
NOTICE! In order for the Plug & Play functionality to be ensured, the
“DHCP” option must be selected here and the network must support
the DHCP protocol. If the network does not support DHCP protocols,
please contact your service engineer.
● Time and time zone
● Business Hours
NOTICE! Correctly enter the business hours of your practice. Outside
of business hours, automatic backups are created and updates
installed.
● Settings for automatic updates
● Settings for the quality improvement program.
4.5 Selecting the Hub as the storage location
➢In the CEREC software, select the Hub as the storage location for
scans. In your CEREC software select the dialog
"Configuration"
>
"Settings"
>
"Sirona Server"
.
4.6 Setting up the spare unit
Please contact your service engineer to set up the spare unit.
IMPORTANT
The Critical Ops USB Key is needed to set up the spare unit.
➢Keep the Critical Ops USB Key to hand.

66 37 727 D3667
D3667.208.01.02.02 09.2017 15
Dentsply Sirona 5Configuration
Operator's manual Hub 5.1Overview of the Hub Control Center
båÖäáëÜ
5Configuration
5.1 Overview of the Hub Control Center
Opening Hub Control Center
➢Click the icon in the taskbar with the left mouse button.
Functions
The Hub Control Center offers the following scope of functions:
● Notifications: Message display. By clicking on a message, further
information is opened.
● Switch language: Here the language of the Hub Control Center is
changed.
● Configure Hub
Connection status of the Hub
The icon in the taskbar displays the connection status of the Hub.
5.2 Changing the language of the Hub Control Center
1. Click on the
"Hub Control Center"
icon in the taskbar.
2. Click on
"Switch language"
in the window that appears.
3. Select the desired language.
4. Click on
"Back"
.
Hub is connected (green check mark).
No Hub is connected (crossed out grey circle)

66 37 727 D3667
16 D3667.208.01.02.02 09.2017
5Configuration Dentsply Sirona
5.3Configuring the Hub Operator's manual Hub
5.3 Configuring the Hub
1. Click on the
"Hub Control Center"
icon in the taskbar.
2. Click on
"Configure Hub"
in the window that appears.
3. Click one of the icons and complete the configuration.
The following configurations are possible:
● Information on the Hub
● Registered services
● Download log files for troubleshooting
● Settings
– Date, Time of day, Time zone
– DHCP or fixed IP address
– Settings for automatic updates
– Settings for the Quality Improvement Agreement
● Information on the Hub
● Download log files for troubleshooting
● Information on the Hub
● Download log files for troubleshooting
● Settings for practice management software
● Information on the Hub
● Download log files for troubleshooting
● Information on the Hub
● Download log files for troubleshooting
● Information on the Hub
● Download log files for troubleshooting
● Information on the Hub
● Download log files for troubleshooting

66 37 727 D3667
D3667.208.01.02.02 09.2017 17
Dentsply Sirona 6Maintenance
Operator's manual Hub
båÖäáëÜ
6Maintenance
1. Switch off the Hub.
2. Disconnect the Hub from the power supply.
3. Turn the Hub onto its side.
4. Use a vacuum cleaner to clean the ventilation grille on the bottom of
the Hub.
5. Place the Hub on the base again.
6. Connect the Hub to the power supply system.
7. Switch on the Hub.
Maintenance activities Interval
Clean the ventilation grille on the
bottom of the Hub.
1x annually

66 37 727 D3667
18 D3667.208.01.02.02 09.2017
7Disposal Dentsply Sirona
Operator's manual Hub
7Disposal
In accordance with Directive 2012/19/EU and national disposal
regulations regarding old electrical and electronic devices, please be
advised that such items must be disposed of in a special way within the
European Union (EU). These regulations require the environmentally
friendly recycling/disposal of old electrical and electronic devices. Such
items must not be disposed of as domestic refuse. This has been
expressed using the icon of the “crossed out trash can”.
Disposal procedure
We feel responsible for our products from the first idea to their disposal.
For this reason, we give you an option to return our old electronic and
electrical devices.
If you wish to dispose of your devices, please proceed as follows:
In Germany
To initiate return of the electrical device, please send a disposal request
to enretec GmbH. You have the following options here:
● Use the “Returning an electrical device” button under the “eom” menu
item on the enretec GmbH homepage (www.enretec.de).
● Alternatively, you can also contact enretec GmbH directly.
enretec GmbH
Kanalstraße 17
16727 Velten
Tel.: +49 3304 3919-500
E-mail: [email protected]
In accordance with the national disposal regulations regarding old
electrical and electronic devices (ElektroG), as the manufacturer, we
assume the costs for disposing of the electrical and electronic devices in
question. Disassembly, transport and packaging costs shall be borne by
the owner/operator.
Prior to disassembly/disposal of the product, it must be fully prepared
(cleaned/disinfected/sterilized).
If your unit is not permanently installed, it will be collected from the
practice. If it is permanently installed, it will be picked up curbside at your
address by appointment.
Other countries
For country-specific information on disposal, contact your local dental
dealers.


We reserve the right to make any alterations which may be required due to technical improvements.
© Sirona Dental Systems GmbH Sprache: englisch Printed in Germany
D3667.208.01.02.02 09.2017 Ä.-Nr.: 124 237
Sirona Dental Systems GmbH Contact in the USA:
Fabrikstraße 31
64625 Bensheim
Germany
Sirona Dental, Inc.
4835 Sirona Drive
Charlotte, NC 28273
USA
Order No 66 37 727 D3667
www.dentsplysirona.com
Table of contents
Popular Switch manuals by other brands

SICK
SICK L25 Mounting instructions

KTI Networks
KTI Networks KSD-541 installation guide

NETGEAR
NETGEAR ProSafe GSM7228PS Cli manual

Hall Research Technologies
Hall Research Technologies URA-232 user manual

Dell
Dell PowerConnect B-RX Configuration guide

Kindermann
Kindermann MultiSwitch 21 HDBT Mounting instructions