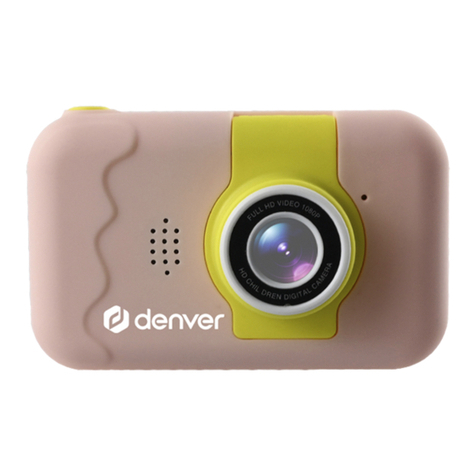
Denver KPC-1370 User manual

ENG 1

ENG 2
Safety information
Please read the safety instructions carefully before using the product for the first time and
keep the instructions for future reference.
1. Warning: This product includes lithium polymer batteries.
2. Warning: Choking Hazard –Children under 3 yrs. can choke or suffocate on camera because of its
small size. Adult supervision required. Keep camera away from toddlers and pets to avoid chewing
and swallowing. Discard broken buttons or parts at once.
3. Product operating and storage temperature is from 0 degree Celsius to 40 degree Celsius. Under
and over this temperature might affect the function.
4. Never open the product. Touching the inside electrics can cause electric shock. Repairs or service
should only be performed by qualified personnel.
5. Do not expose to heat, water, moisture, direct sunlight!
6. The unit is not waterproof. If water or foreign objects enter the unit, it may result in fire or electric
shock. If water or a foreign object enters the unit, stop use immediately.
7. Only charge with supplied USB cable.
8. Do not use non original accessories together with the product as this can make the product
functionality abnormal.

ENG 3
CAMERA USER GUIDE
Parts Description
1) Confirm/Shutter button 2) Power key/Back key 3) Up key 4) Right key
5) Left key 6) Down key 7) Zoom knob 8) Rear lens
9) Print Bin 10) SD card slot 11) Type-C 12) Toggle switch
1. Confirm/Shutter button
①Photo/Video mode: press this button to release the shutter and take photo/video.
②Playback/MP3 mode: press this button to play or pause playback.
③Game mode: press this button to confirm the selection.
④Setting mode: press this button to save the setting.
⑤Photo/video mode: press and hold this button to switch between front and rear camera.
2. Power key/Back key
Press and hold this button to turn the device on/off; press to exit the mode and return to the main
interface.
3. Up key
In the main interface, press to select a mode; in the photo mode, press to turn on/off the print
function.
4. Right key
In the main interface, press to select a mode; in the photo mode, press to select the photo frame,
special effects and time-lapse photo functions. In video mode, you can select special effects.
5. Left key
In the main interface, press to select a mode; in the photo mode, press to select the photo frame,
special effects and time-lapse photo functions. In video mode, you can select special effects.
6. Down key
In the main interface, press to select a mode; in photo/video mode, press this button to turn on/off
the flash function.
7. Zoom knob
Rotate the zoom knob left and right for image zoom in and zoom out settings.
8. Rear lens
Rear camera viewfinder window.

ENG 4
9. Print bin
Print paper cassette storage and print photo output.
10. SD card slot
Memory card slot
*Note: To reinstall or replace the card, insert the card (or any new SD Card) into the SD Card Slot with
the contacts facing the display side.
11. TYPE-C
For connecting PC (data transfer) and external power supply to charge the battery.
12. Toggle Switch
Used to turn the battery on and off to power the device.
Home Page Icons:
Basic operation instructions
1.Power On/Off:
Press and hold the power button to turn the camera on/off.
2.Video mode
Select the video recording function (Video recording only works when there is an SD card inserted).
-Use the arrow keys to select the video mode icon, then press the confirm/shutter key to confirm.
-Press the confirm/shutter key to start recording, and then press the confirm/shutter key again to stop
recording.
-In the video mode, press the left and right arrow keys to switch between different special effects scenes;
press the up button to switch between slow motion video, time-lapse video, and normal video; press the
down button to turn on or off the fill light.
3.Photo Mode
-Use the arrow keys to select the photo mode icon, then press the confirm/shutter key to confirm.
-Press the confirm / shutter key to take photos (the photo is successfully taken when you hear a beep).
-If the print switch is turned on, the photo will be printed immediately after it is taken.
-In the photo mode, press the left and right arrow keys to switch different frames and special effects;

ENG 5
press the up button to turn on or off the printing function; press the down button to turn on or off the fill
light mode.
4. Print Photo
-There are two ways to print photos:
1) Print immediately after taking a photo
-Enter photo mode, press the up button, and a print icon appears on the screen, as illustrated below:
-The photo will be printed immediately after it is taken.
-Press the up button again, the print icon will disappear, and the photo will not be immediately printed.
2) Print photos in the PLAYBACK
-Select the PLAYBACK icon, select a photo to be printed.
-Press the down key to turn on the print function (press the down key to turn the print function on/off).
-Press the confirm / shutter button, the photo will be printed.
*Note: The Camera supports printing without an SD card. Adjust the "Print" and "Printer Properties" in
the settings menu to adjust the printing effect, different printing paper will print the effect differently.
5.Print Paper
-Open the print cabin of the camera.
-Place the print paper in the cabin. Be sure to place the print paper in the correct direction!
-Close the lid of the camera.
*Note: Be sure to place the print paper in the correct direction! As illustrated below
6.Playback
-Use the arrow keys to select the playback icon, then press the confirm / shutter button to enter Playback
mode.
-Use the arrow keys to select the video or photo.
-Press the confirm / shutter button to play back the video.
-Press the Up key to delete the video or photo.
7.Games
-Use the arrow keys to select the games icon, then press the confirm / shutter button to enter Games
mode.
-The camera has four games.
-In the game mode interface:
Press the Up key to move upwards;
Press the Down key to move downwards;
Press the Left key to move to the left;
Press the Right key to move to the
ENG 6
right.
8.Settings
-Use the arrow keys to select the settings icon then press the confirm / shutter button to enter Settings
mode.
-Use the arrow keys to select the menu options, then press the confirm / shutter button to confirm the
menu setting.
-Press the Power button to exit the setting status.
9.Music
-Use the arrow keys to select the music icon, then press the confirm / shutter button to enter Music
mode.
-Press Left key to select the previous song; press Right key to select the next song.
-Press Down key to decrease the volume; press Up Key to increase the volume.
*Note: The music files in MP3 format should be copied to the SD card beforehand. Adult operation is
suggested.
10. USB
-Connect the USB cable to the computer, the camera will automatically connect to the USB. If no SD card
is connected to the camera, it will enter the PCCAM mode; if the camera is equipped with SD, it will enter
the U disk mode.
11. Battery Recharging
*Note: Adult operation is suggested.
-Insert the included TYPE-C cable (small end) into the Type-C port on the camera.
-Connect the large end of the TYPE-C cable to your computer or to a standard USB power adapter.
-Once the connection is successful, you will see a battery-charging symbol appear on the camera screen.
-Power indicator
Sufficient power Low power Insufficient power
*Note: Please charge your camera before you use it. It takes approximately 2 hours to fully charge the
battery.

ENG
- Note: The product specifications are based on updated information when compiling this
product manual. The specifications are subject to change without further notice. The
product is the actual camera. When the camera crashes from a drop, please restart it.
- Please notice - All products are subject to change without any notice. We take reservations
for errors and omissions in the manual.
Product Specifications
Video 1440P,1080P,720P Interpolated
7
Screen 2.8-inch IPS screen
Lens Support digital zoom up to 10x
Printing Thermal printing
Video Format AVI/JPG
Photo 48M,30M,24M,20M Interpolated
Filters 20 cartoon frames, 8 photo effects and 6 filters
Battery Built-in 800mAh Li-ion battery
Music Support MP3
Game Support 4 games (Snake, Push box, Tetris, Ball)
Memory MicroSD Card, up to 64GB (Included)
Port Type-C
Accessory 3 x thermal printing paper rolls included (approx. 150 Photos, around 50
photos in 1 roll)

ENG 8
ALL RIGHTS RESERVED, COPYRIGHT DENVER A/S
Electric and electronic equipment and included batteries contains materials, components and
substances that can be hazardous to your health and the environment, if the waste material
(discarded electric and electronic equipment and batteries) is not handled correctly.
Electric and electronic equipment and batteries is marked with the crossed out trash can
symbol, seen above. This symbol signifies that electric and electronic equipment and batteries
should not be disposed of with other household waste, but should be disposed of separately.
As the end user it is important that you submit your used batteries to the appropriate and
designated facility. In this manner you make sure that the batteries are recycled in accordance
with legislature and will not harm the environment.
All cities have established collection points, where electric and electronic equipment and
batteries can either be submitted free of charge at recycling stations and other collection sites,
or be collected from the households. Additional information is available at the technical
department of your city.
DENVER A/S
Omega 5A, Soeften
DK-8382 Hinnerup
Denmark
www.facebook.com/denver.eu
Warning: lithium battery inside

Version 1.1
Contact
Nordics
Headquarter
Denver A/S
Omega 5A, Soeften
DK-8382 Hinnerup
Denmark
Phone: +45 86 22 61 00
(Push “1” for support)
E-Mail
For technical questions, please write to:
support.hq@denver.eu
For all other questions please write to:
contact.hq@denver.eu
Benelux
DENVER BENELUX B.V.
Barwoutswaarder 13C+D
3449 HE Woerden
The Netherlands
Phone: 0900-3437623
E-Mail: support.nl@denver.eu
Spain/Portugal
DENVER SPAIN S.A
Ronda Augustes y Louis Lumiere, nº 23 – nave 16
Parque Tecnológico
46980 PATERNA
Valencia (Spain)
Spain
Phone: +34 960 046 883
Mail: support.es@denver.eu
Portugal:
Phone: +35 1255 240 294
E-Mail: denver.service@satfiel.com
Germany
Denver Germany GmbH Service
Max-Emanuel-Str. 4
94036 Passau
Phone: +49 851 379 369 40
E-Mail
support.de@denver.eu
Fairfixx GmbH
Repair and service
Rudolf-Diesel-Str. 3 TOR 2
53859 Niederkassel
(for TV, E-Mobility/Hoverboards/Balanceboards,
Smartphones & Tablets)
Tel.: +49 851 379 369 69
E-Mail: [email protected]
Austria
Lurf Premium Service GmbH
Deutschstrasse 1
1230 Wien
Phone: +43 1 904 3085
E-Mail: denver@lurfservice.at
If your country is not listed above,
please write an email to
support@denver.eu
DENVER A/S
Omega 5A, Soeften
DK-8382 Hinnerup
Denmark
denver.eu
facebook.com/denver.eu
Table of contents
Other Denver Digital Camera manuals

Denver
Denver WCT-5003MK3 User manual

Denver
Denver WCS-5020 User manual

Denver
Denver IOC-221 User manual

Denver
Denver WCT-8010 User manual

Denver
Denver DCA-5100 User manual

Denver
Denver WCM-3004 User manual

Denver
Denver MPC-4052PLL User manual

Denver
Denver KCA-1330 User manual

Denver
Denver WCT-5002 User manual

Denver
Denver KCA-1350 User manual

Denver
Denver WCM-5003MK3 User manual

Denver
Denver HSC-5003 User manual

Denver
Denver MPC-4055C User manual

Denver
Denver AC-5000W User manual

Denver
Denver WCT-9000WLAN User manual

Denver
Denver ACT-1301 User manual

Denver
Denver KCA-1340 Installation instructions

Denver
Denver KCA-1310 User manual

Denver
Denver ACT-1301 MK2 User manual

Denver
Denver KCA-1330 MK2 User manual