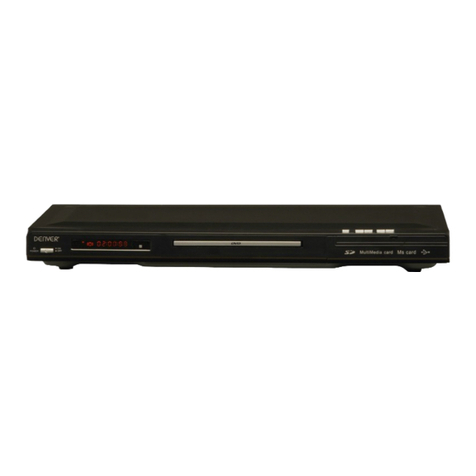
Denver DVD-7742 User manual

User Manual
DVD-7742
IMPORTANT
Please read this manual carefully before operating the DVD PLAYER.
Keep this manual handy for further reference.

17
19


Front and rear panel illustration
Front panel
Rear panel
REMOTE SENSOR
OPEN/CLOSE
PLAY/PAUSEY
TRAY DOOR
STOP
STAND BY
1
2
3
4
5
6
7
Scart Output
POWER INDICATOR
MODEL: DENVER DVD-7742
POWER IN:~110V-~230V 50Hz/60Hz 25W
Serial Number:
POWER IN
~110V-~230V
50Hz/60Hz
12 34
56
7
POWER ON/OFF

When use, direct the remote control to the infra-red sensor (within 45 degrees)
Do not put remote control near to the place with high temperature or moisture
Do not put water or any other object on remote control
Do not use new and old batteries or different type batteries together
Please replace batteries when find remote control is out of work or weak sensitivity.
Remote control
FAST BACKWARD
ENTER
123
456
789
0
10 +
VIDEO
N/P
DEFAULT
CLEAR
GOTO
PROG MARK
PBC
TITLE
SETUP
ZOOM
ANGLE
SUB-T
A-B
REPEAT
OSD
MUTE
RETURN
LANGUAGE
STEP
RANDOM
SLOW
VOL
+
-
L/R
MENU
NUMERIC KEYS
OPEN/CLOSE
PCB
STANDBY
VIDEO
RANDOM
RETURN
LANGUAGE
DEFAULT
CLEAR
PROG
FAST FORWARD
MARK
PREVLOUS
NEXT
STOP
PLAY/PAUSE
L/R
OSD
N/P
ANGLE
REPEAT
STEP
TITLE
MENU
SETUP
ENTER
ZOOM
SUB-T
A-B
VOL+
VOL-
MUTE
GOTO
BACKWARD SLOW
FORWARD SLOW

DVD+ TV
Notes :
There are five ways of connecting the player s AV output to the TV set:
Scart cable (set the video type to RGB)
SCART
MODEL: DENVER DVD-7742
POWER IN:~110V-~230V 50Hz/60Hz 25W
Serial Number:
POWER IN
~110V-~230V
50Hz/60Hz

1. Connect the DVD player to your TV and amplifier.
2. Turn on the TV.
3. Set the TV to the AV input connected to the DVD player.
4. Turn down the volume on your amplifier, and then power it on.
5. Set the amplifier to the AV input connected to the DVD player.
Step 2: Press OPEN/CLOSE either
on the front panel or remote control.
The player displays OPEN on
the display. When the tray is open,
please put the disc on the tray with the
label side up. Press OPEN/CLOSE
again to close the disc tray.
Basic operation
Step 3: Press the PLAY button on the
front panel or remote control. The
player will automatically read and
identify the disc, display the type and
total time and begin playback.
Step 1: Press the STAND BY,
and the player will start, LOAD
is illuminated on the display and
the logo is displayed on TV screen.

SETUP
A. Press to Change items
B. Press ENTER to display the submenu
C. Press SETUP to exit the setup menu
In stop mode, press SETUP, and the TV screen will display the setup menu as follows:
Setup Menu
LANGUAGE SETUP
A.Press ENTER to setup
B.Press to return to the setup
menu
Select <Language> in the setup menu, and press ENTER to display the <Language>
submenu:
Press to select
the menu item
Features setup
2. Select < Subtitle>, and press ENTER to display the <Subtitle> submenu:
A. Press to change your selection
B.Press ENTER to confirm
C.Press to return to the setup menu
D.Press SETUP to exit the setup menu
A. Press tochange your selection
B.Press ENTER to confirm
C.Press to returnto the setup menu
D.Press SETUP to exit the setup menu
1. Select < OSD language>, and press ENTER to display the <OSD language> submenu:
Multi

3. Select < Audio>, and press ENTER to display the <Audio>submenu:
A. Press to change your selection
B. Press ENTER to confirm
C.Press to return to the setup menu
D.Press SETUP to exit the setup menu
Note: Menu language vary by disc
A. Press to change your selection
B. Press ENTER to confirm
C.Press to return to the setup menu
D.Press SETUP to exit the setup menu
4.Select <DVD menu>,and press ENTER to display the <DVD menu> submenu:
Features setup

A.PressENTER to setup
B.Press to return to the setup menu
Video setup
Select <Video> in the setup menu, and press
ENTER to display the <Video> submenu:
Press to select
the menu item
A. Press to change your selection
B. Press ENTERto confirm
C.Press to return to the setup menu
D.Press SETUP to exit the setup menu
1. Select <Aspect Ratio>,and press ENTER to display the <Aspect Ratio> submenu:
A. Press to change your selection
B. Press ENTERto confirm
C.Press to returnto the setup menu
D.Press SETUP to exit the setup menu
2. Select <TV System>, and press ENTER to display the <TV System> submenu
Features setup
A. Press to change your selection
B. PressENTER to confirm
C.Press to return to the setup menu
D.Press SETUP to exit the setup menu
3. Select <Video out>, and press ENTER to display the <Video out> submenu
<RGB>---RGB video output

Features setup
Use the 0-9 keys to input four digits (set password), then press
ENTER to confirm.
The <Rating> submenu displays as follows:
Note: If you forget your password, please use
the universal password 8888 to unlock.
Locked
Rating setup
Select <Rating> in the setup menu, and press ENTER to display the <Rating>
submenu:
Note: Not all DVDs
support ratings.
A. Press to return
to the setup menu Unlocked
Select <Rating>, and press ENTER to change <Rating> mode.
Note: Unlock the password before setting <Rating>
A.Press ENTER repeatedly to select:
1. Kid safe,2. G, 3. PG, 4. PG-13, 5.
PG-R, 6. R,7. NC-17, 8. Adult
B.Press to return to the setup menu
Select <Load Factory>, and press ENTER to change <Load Factory> mode.
A. Press to change your selection
B. Press ENTERto confirm
C.Press to return to the setup menu
D.Press SETUPto exit the setup menu
Misc setup

TITLE
During DVD playback, press TITLE to display the DVD title menu or play
the first title.
Note: this function is subject to the disc.
MENU
During DVD playback, press MENU to display the disc menu of the
current title.
Note: This function is subject to the disc
OPEN/CLOSE
To open the disc tray, press OPEN/CLOSE
To close the disc tray, press OPEN/CLOSE again.
VIDEO
Under the open mode,Press the button to switch the video of
RGB
Remote control operation
10+
These keys are used to input the time, as well as title, chapter and
track numbers.
When a numeric item is displayed on the screen, press the 0-9 keys to
Select the desired entry, and press ENTER to confirm.
When a CD or VCD is playing (with PBC off), press the 0-9 keys to select
a track directly, then press ENTER to confirm.
0-10 keys
1/2 1/4 1/6 1/8
During DVD, VCD playback, press SLOW for slow
Once you press SLOW, the disc will play at 1/2, 1/4, 1/6 and 1/8 normal
Speed as follows:
Press PLAY to resume normal playback.
SLOW
During DVD, CD or VCD playback, press PREV to play the
previous chapter, title or track.
PREV
During VCD playback, Press PBC to select the mode of PBC On
or PBC Off
PBC is: playback control used to navigate VCD
PBC
motion playback.
During DVD, CD or VCD playback, press NEXT to play the next chapter,
title or track.
NEXT

REPEAT
Each press of the REPEAT button will change the repeat mode.
During DVD,playback,there are three modes: Repeat Charpter, Repeat
Title and Off.
During VCD,CD playback,there are three modes: repeat Single, repeat
Note:During VCD playback,the PCB mode must be set to Off
All and Off.
A-B
Note: During CD/VCD playback, points A and B must be within
the same track.
During DVD playback, points A and B can be selected from
different chapters.
During playback, press A-B to select point A
Press it again to select point B. The player will repeat the section
from A to B automatically .
Press A-B a third time to cancel A-B repeat and clear points A and B.
X2 X4 X8 X16
During DVD, CD or VCD playback, press REVto scan in reverse.
The player will review the disc at 2, 4, 8 and 16 times speed
as follows:
Press PLAY to resume normal playback.
REV
X2 X4 X16X8
During DVD, CD or VCD playback, press FWDto scan forward.
The player will cue the disc at 2, 4, 8 and 16 times speed
as follows:
Press PLAY to resume normal playback.
Remote control operation
During DVD,VCD, playback press the Button the menu will display as follow
Use to select the different bookwark
Press ENTER to input the current time.
If it has been input yet, the player will
play from this time.
Bookmark
Bookmark 1 : : :
-- -- --
Bookmark 2 : : :
-- -- --
Bookmark 3 : : :
-- -- --
FWD

Remote control operation
Press PLAY from stop mode to start playback.
PLAY
STOP
Press STOP once during playback to stop and hold playback.
Press PLAY to resume playback from the point you have pressed STOP.
Press STOP twice to stop playback completely .
Press PAUSE/STEP during playback to pause playback.
Press again to step forward one frame
PressPLAYto resume normal palyback.
PAUSE/STEP
NOTE:the step function is not available during CD playback
L/R
PressMUTEto turn off the audio.
PressMUTEagain to resume normal sound.
MUTE
During VCD/SVCD playback, press L/Rrepeatedly to select the
channel of audio-output: Stereo/Left/Right.
Press CLEAR to delete numbers you have entered.
Press once to delete one digit, press and hold to delete all digits.
CLEAR
Under PCB being turned on, press STOP then RETURN to return to the
program menu during playing VCD/SVCD disc.
Under menu displaying, press RETURN to clear the present display .
RETURN
ZOOM
During VCD/SVCD/DVD playback, press ZOOM to magnify the image as
follows:
Q 1 Q 2 Q 3
Q off

Remote control operation
During DVD playback,
PressANGLEto view scenes from different camera angles.
PressANGLEto repeatedly to change from one camera angle to another.
Note:This function is disc specific.
VOL
Press VOL to adjust the volume.
Press VOL + to enlarge the volume.
Press VOL - to reduce the volume.
ANGLE
During DVD playback,
Press SUBT repeatedly to select from up to 32 subtitle languages.
Note: This function is disc specific (language will vary).
SUBTITLE
Press LANGUAGE repeatedly to selectfrom up to 8 audio
languages/formats during DVD playback.
Press repeatedly to selectfrom up to 4 audio
languages/formats during SVCD playback.
Note: This function is disc specific
LANGUAGE
LANGUAGE
PROG
During VCD playback, press stop then PROG and the program menu will
display as follow:
Input the track numbers in the desired order.
When finished, select <play program> and then
press ENTER to play the tracks in the new
programmed order.
Select <clear all> and press ENTER to clear all
the numbers you have input.
During DVD playback, press stop then PROG and the <program> menu will display as follow:
Input the title numbers and the chapter numbers in
the desired order, then select <play program> and
Press ENTER to play the chapters in the order you
have set. Select <clear all> and press ENTER
to clear all the numbers you have input.
Program input
1 4 7 10
2 5 8 11
3 6 9 12
Play Program Clear All
Program input
Play Program Clear All
Title/ Chapter
_ _ __ _ __ _ __ _ __ _ __ _ __ _ __ _ _
_ _ _
_ _ _
_ _ _
_ _ _
_ _ _
_ _ __ _ __ _ __ _ __ _ __ _ __ _ __ _ _
_ _ _
_ _ _
_ _ __ _ __ _ __ _ __ _ __ _ __ _ __ _ _
_ _ _
_ _ _
_ _ __ _ __ _ __ _ __ _ __ _ __ _ __ _ _
_ _ _
_ _ _
_ _ _
_ _ _
_ _ _
_ _ __ _ __ _ __ _ __ _ __ _ __ _ __ _ _
_ _ _
_ _ _
_ _ __ _ __ _ __ _ __ _ __ _ __ _ __ _ _
_ _ _
_ _ _
14710
25811
36912
_ _ __ _ __ _ __ _ __ _ __ _ __ _ __ _ _
_ _ _
_ _ _
_ _ _
_ _ _
_ _ _
_ _ __ _ __ _ __ _ __ _ __ _ __ _ __ _ _
_ _ _
_ _ _
_ _ __ _ __ _ __ _ __ _ __ _ __ _ __ _ _
_ _ _
_ _ _

A Kodak picture CD has the size and shape of a regular CD.
The max. size of JPEG picture can be supported: 3840x3840ples.
JPEG stands for Joint Picture Experts Group. It is a compressing
standard. It is the first international standard on Still Picture
Compressing:ISO10918-1 constituted by the Committee on Still
Picture Compressing Standard of ISO. The pictures on Kodak
Picture CD are stored in this format (JPEG). This player can decode
the JPEG picture in Kodak Picture CD and playback the picture in different modes.
Operation instructions:
Press PAUSE key to stop playing.
Press PREV or NEXT key to select.
You can use number keys to select a special picture.
Press STOP key to stop playing, and the screen will display as follow:
CD-R 16/20
PICTURES
1
2
3
4
5
001--1
002--2
003--3
004--4
005--5
6
7
8
9
10
006--6
007--7
008--8
009--09
010--10
Picture
name
Total Pictures
Current Pictures
Directory window
Title
001--1
Picture
name
Current
Kodak Picture CD Playback

In this window, you can use arrows key to select a special picture, then use
PLAYor ENTERto confirm and display this picture.
Image rotation
There are three modes to rotate a picture: 90 cw, 180 cw, 90 ccw. Those
operations are allowed only when a picture is being displayed normally and
will be cancelled automatically when a new picture is displayed. Press ANGLE
repeatedly, you can select the different rotation modes: original, 90deg cw,
180deg cw, 90deg ccw.
Zoom function
The player provides both Zoom in/out and pan function. The picture will zoom
in/out as follow:
Note: During the ZOOM function, slideshow transitions and image rotation
are disabled.
Q off: close zoom, press PLAY key to resume slideshow transitions.
Note: the quality of the pictures displayed on your screen will depend on the
quality of your display equipment.
Kodak Picture CD Playback
Q 1 Q 2 Q 3
Q off

NO PICTURE, SOUND AND INDICATION
Ensure that the power switch is on.
Ensure that the wall inlet is ok.
Ensure that the power cord is not damaged.
Ensure that the power plug is connected to the inlet tightly.
Please read the user s manual carefully before using the DVD player. If you have any
Troubles in using this player, try to solve the problems by the suggestions mentioned below.
If you can not remove the trouble after using all the suggestions, please contact the
company or the technical service center authorized by us.
For the sake of your safety please
,
Do not open the cover and repair the player by yourself, if that, it may cause electric shock.
Troubleshooting
BLACK AND WHITE PICTURE OR SCREEN ROLLING
Ensure that you have set the right TV SYSTEM (e.g. PAL, NTSC) setting.
FLAWS OF PICTURE OR SOUND
Check whether the setting of AUDIO is right.
Check whether the disc is scratched or stained.
Check whether the AV connector and the output terminal is stained.
DISPLAY NO DISC
Ensure that you have put the disc on the tray.
Check whether the disc is put in the reverse side.
Check whether the disc is distorted.
Check whether the disc is stained or scratched badly .
Turn down the echo level.

Troubleshooting
REMOTE CONTROL IS INSENSITIVE OR DOES NOT WORK
Check the batteries of remote control and make sure that they are to be
powerful and good conductivity.
Direct the remote control to the IR sensor of the player.
Check whether there are some obstacles between the remote control and
ABNORMAL FUNCTION OPERATION
Turn off the power, and then turn on again.
DISC IS LOCKED IN THE TRAY
The disc can not be taken out of the tray when the player is reading, so you
have to turn off the power and turn on again, and press OPEN/CLOSE key
immediately to open the tray.
IR sensor.

Power requirements: -110 230V, 50/60Hz
Power consumption: 25W
Video standard: PAL/NTSC
Net weight: 4.3Lbs (1.9Kg)
Unit Dimensions: 225mm x 250mm x 38mm
Video out
Video out: 1.0Vp-p (75 load).
Technical specifications
Audio out
Scart connector
Output: analog out 2Vrms (1KHz); digital 1.15Vp-p
Frequency response: 48KHz sampling 4Hz 22KHz,
96KHz sampling 4Hz 44KHz S/N ratio: >90dB
Total harmonic distortion: <0.05%
Accessories
Remote control 1
User s manual 1
Appearance and function is subject to change without notice.
Specifications
To prevent children from watching programs which have a
rating above their age, please be sure to set the rating in the
setup menu appropriately. Before you set this rating, the
passward must be unlocked. If you forget your unique
passward, then please use the universal passward as set by
the mauufacturer. The universal passward is 8888 , please
detach this sheet and keep it in a safe place , away from children.
Warning
This manual suits for next models
1
Table of contents
Other Denver DVD Player manuals

Denver
Denver DVD-182 User manual

Denver
Denver DVH-1018 User manual

Denver
Denver DWM-110 User manual

Denver
Denver MTW-754 TWIN User manual

Denver
Denver DVH-7781 User manual

Denver
Denver DRS-1110 MK2 User manual

Denver
Denver DVD-948 User manual

Denver
Denver DVH-1243 User manual
Denver
Denver DVU-1111 User manual

Denver
Denver MT-769 User manual

Denver
Denver DVD-748 User manual

Denver
Denver DVD-7402 User manual

Denver
Denver DVU-1008 User manual

Denver
Denver DVD-766 User manual

Denver
Denver DVU-1112 User manual

Denver
Denver DVH-7779D User manual

Denver
Denver LDD-2458MC User manual

Denver
Denver DVD-808 User manual

Denver
Denver DVU-1009 User manual

Denver
Denver DVH-7786 User manual