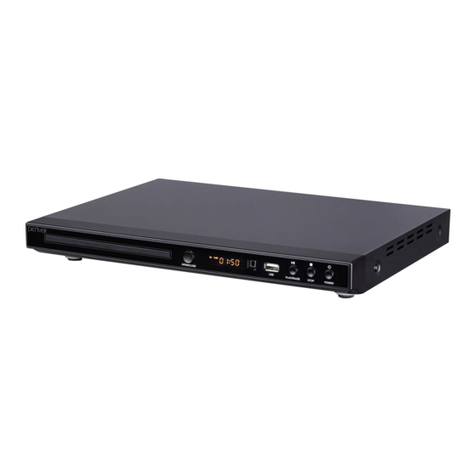
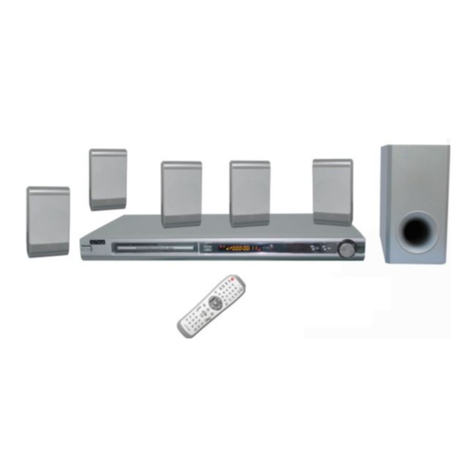
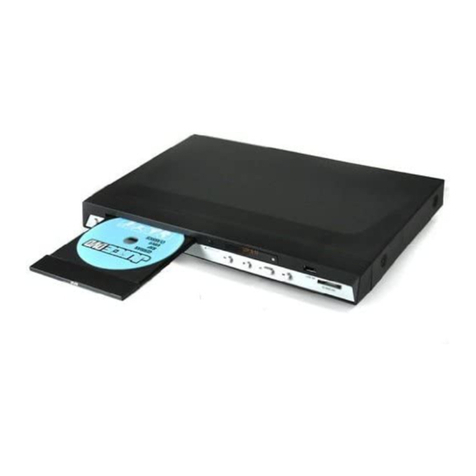
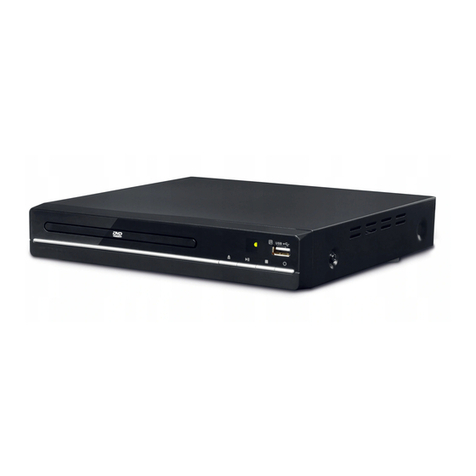
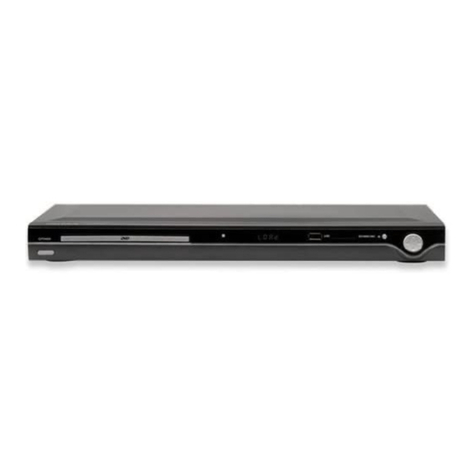
Denver DWM-110 User manual

Instruction Manual
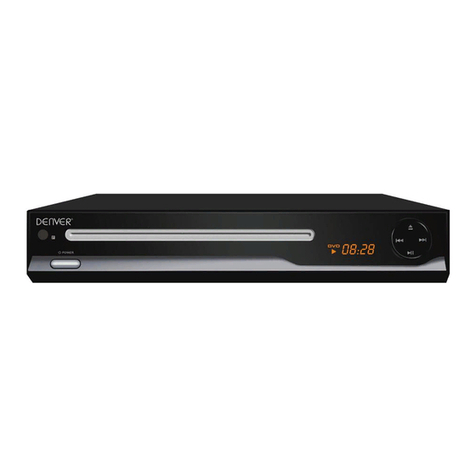
DWM-110 BLACK
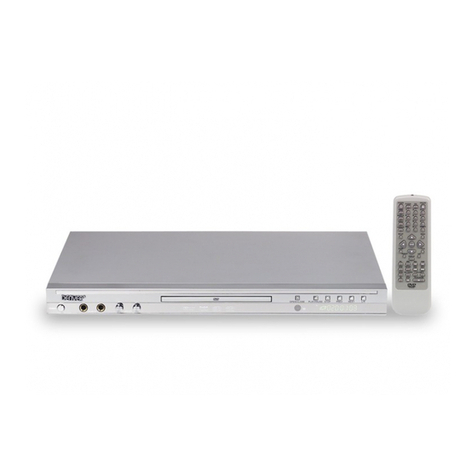
DWM-110 WHITE
DVDPLAYER

GB-1
WARNING:TOREDUCE THE RISK OFFIRE ORELECTRICSHOCK, DONOT
EXPOSE THIS APPLIANCE TORAINORMOISTURE.
CAUTION: TOREDUCE THE RISK OFELECTRICSHOCK, DONOTREMOVE COVER(ORBACK). NO
USERSERVICEABLE PARTS INSIDE. REFERSERVICINGTOQUALIFIEDSERVICE PERSONNEL.
Thelightening flashwitharrowhead symbol,withinan equilateraltriangle, isintended thealertthe
usertothepresenceof uninsulated dangerousvoltagewithintheproductsenclosurethatmaybeof
sufficient magnitudetoconstituteariskofelectricshocktopersons.
Theexclamation pointwithinan equilateraltriangleisintendedtoalertusertothepresenceof
importantoperatingand maintenance(servicing)instructionsintheliteratureaccompanyingthe
appliance.
Laserproduct symbol: located ontherearpaneloftheunit, indicatethisplayerisaclasslaserproduct, only
useweaklaserand nohazardousradiation outsideoftheunit.
1.Read through thisinstruction manualbeforeinstallation and use.
2.Donot touchthepowerplug withwet hand.
3.Switchoff themainpowerwhentheunitisnotinuse.(Disconnectthepowerplug fromthepoweroutletwhen
youdonotintendtousetheunitforaprolongedperiodoftime.)Beforemoving theunit, removethediscfromthe
unit/ trayfirst.
4.Donot open thecoverortouchanyof thecomponentsexposed out of theunit, onlyforqualified technicians.
5.Donotexposetheunit underdirect sunlightornearbyobjectsthat radiateheat toavoiddamagetheunit.
6.Donot placetheunit inmoistandhumidconditions, whicheffect thepick-upoftheunit leadtoout ofwork.
7.Placetheunitonaflat surfaceand ventilativecondition. Pleaseensuretheventilation holesarenot covered
toavoidoverheating and malfunction.
8.Clearthepaneland casewithsoftdryclothonly,donotapplyanykind ofthinner,alcoholorsprays.
9. Theapparatusshall notbeexposed todripping orsplashing andthatnoobjectsfilledwithliquids,suchas
vases, shall beplacedon theapparatus
10. unplug theapparatuswhennot usingforalongtimeoriented todisconnect fromtheMainspower
11. Nonaked flamesources, suchaslighted candles, shouldnot beplacedon theapparatus.
12.Makesurethereisfreecirculation ofair(donot placethedeviceon shelves, on athickcarpet, onabed, or
anywherethatobstructstheventilationslots,andleaveat least 10cmclearanceon all sides.
13.Theapparatusshall not beexposed todrippingorsplashing.
14.Themainsplug isused asthedisconnect device, thedisconnect deviceshall remainreadilyoperable.
15.Thebattery(batteryofbatteriesofbatterypack)shall not beexposed toexcessiveheat suchassunshine,
fireorthelike.
16.TheMainsplug isused asthedisconnect device. It shall remainreadilyoperable,and shouldnot be
obstructedduring intended use.
Iftheelectriccableisdamaged,itmustbereplaced bythemanufacturer,orbythequalificationpersons,inorder
toavoidadanger.
Theproduct'sfunctionmaybereset whenit issubjectedtoelectrostaticdischarge
disturbance. Just followtheinstructiondescribed inthismanualtoset thefunctionagain
fornormaloperation.
During electrostaticdischargeand thestrong electromagneticfield, theproduct maymalfunction, then press
STANDBY”buttonand theproduct will returntonormalperformance.

GB-2
Macrovision:
Thisproductincorporatescopyrightprotection technologythatisprotected bymethod claimsofcertainU.S
patentsand otherintellectualpropertyrightsowned byMacrovision Corporation, and isintended forhomeand
otherlimitedviewingusesonlyunlessotherwiseauthorized byMacrovision Corporation. Reverseengineering
ordisassemblyisprohibited.
Manufactured underlicensefromDolbyLaboratories.
"Dolby",and thedouble-D symbolaretrademarksofDolbyLaboratories.
Mainsplug isused asthedisconnect device. It shall remainreadilyoperable, and should
not beobstructedduring intended use.

GB-3
1. PANELILLUSTRATION
1. STANDBY
2. PLAY/PAUSE
3. OPEN/CLOSE
4. DisplayScreen
5. IRSensor
6. DiscTray
7. CardReader
8. USB Port
9. CoaxialOutput
10.AV Output
11.HDMI OUTPUT
12.DC INPUT
Note:TheUSB port isused asadirect connectiveport,Pleasedon't useanyextended connectiveCords.

GB-4
2. REMOTECONTROL
1. Power
2. Repeat
3. N/P
4. Subtitle
5.Angle
6. Language
7. Setup
8. Upbutton
9. Left button
10.Enterbutton
11.PBC
12.Volume-
13.Zoom
14.Return
15.USB/CARD
16.Program
17.Clear
18.PREV
19.Next
20.HD/Res.
21.Stop
22.Open/Close
23.A-B
24.NumericButton
25.Time
26.Title
27.Right Button
28.Menu
29.DownButton
30.Volume+
31.Slow
32.Step
33.Display
34.Mute
35.FWD
36.REV
37.Play/Pause

GB-5
3.CONNECTIONS
Turnoffthepowerbeforeconnection.
●Turnon thepowerafterfinishing connection.
Wiresmust befirmlyconnected;especiallytheplug shall befullyinserted.
DVD+TV
Notes:
Therearethefollowingwaysofconnecting theplayerAV output totheTVset:
lAV cable(Compositevideo cableand left/right audiocable)
lHDMI cable
DVD+AVAmplifier:
Notes:
Therearethefollowingwaysofconnecting theplayerwithamplifier:
lAV cable(left/rightaudiooutput)
lcoaxialaudiooutput
Warning:
Donot connectanyamplifierwithcoaxialconnectorthat doesnot containDolbydigitalAC3orDTSdecoder.
Anyattempttodosoandplayof DVDdiscwill resultindamagingyourspeakersand causing possiblehearing
injury.OtherthanDVDdisc,VCD and CDcan beoperated normallywithoutconforming totheabove
restriction.
Setting ofTV system
Ifyoufind theimagelikenon-fullyzoomed picture,brimpicturecovered orblack&whitepictureetc,please
selectPALorNTSCbysystemssettingorpress N/P buttontoswitchtheTVsystemon theremotecontrol.
ThisDVDdisciscapableofsupportingdifferentscalespicture,asaresult, non-full zoomed picturecould
appearorpicturebepartiallycoveredon user’sTV set.

GB-6
4. Playing WMA, MP3and JPEG discs
PlaceaMP3/ JPEGdiscintothetray,andtheplayerwill autosearchthedirectoriessavedMP3/ JPEGfiles.
Aftersearching,itwill autogotothefirstdirectorysaved MP3files(tothedisccontaining bothmp3 and jpeg
files; Tothedisccontaining singletypeoffiles, it will autogotothefirst directory)and playthefirst songinthe
directory( 01:”ishighlighted).Thescreen displays asthepicturebelow:
UsetheArrowbuttonstoentertheDirectoryRegionand highlightthedesired directory,then thefirsttrack
underitstartsplayback;Alsoyou canusetheArrowbuttonstoentertheFileRegion and selectthefileyou
want toplay.
I. Press the Left and Rightarrowbuttons,youcan activateDirectoryRegion,FileRegion and File
SwitchRegion separately.
II. The highlightinDirectoryRegion andFileRegion isshownasthe pictureabove;Whileitappearsa
transparent rectangleinFileSwitchRegion.
III. InFileSwitchRegion,youcan press the Leftand Rightarrowbuttonstoswitchthe highlight, then
press PLAY; the M”, P”, and V”buttonisillustrated inthe abovepicture. Forexample, if adiscwith
MP3and JPEGfilesbutwithoutanyNES filesisloaded,the colorofthe letter M”and P”will appear
towhiteand V”black. If aMP3fileplaying, M”turnsdarker.
IV. Tothe disc withWMA, MP3and JPEGfiles,when playing aJPEGpicture,press the Returnbuttonto
returntoJPEGlist.
V. Whenapictureplaying orpausing, press the Arrowbuttonstochange thedisplayangle:
Up: flipvertical
Down: fliphorizontal
Left: rotate90Ocounter-clockwise
Right: rotate90Oclockwise
VI. Whenapicturestop,press the Menu button,the screen displays small pictures.Upto6small
picturesaredisplayed perscreen.Toviewthe next6pictures,press the Nextbuttonorthe RIHGT
button togoforwardandthe Prevbuttonorthe LEFTbuttontogotothe previouspage.
VII. You can press the Numericbuttonstoselect the fileyouwant toplay. Forexample, if youdesirethe
15thtrack incurrent list, press the 10+”buttononce, thenpress 5”, the 15thstartsplayback.
Notes: Whenplaying adisc withMP3files,videocannot be output whileonlydigitalaudiocan.
VIII. Whenplaying JPEGpictures,press the Programbutton tochoosethepicturesswitched mode.
Thereare17 switchmodes;Press Programrepeatedlytoactivatethe functionandchoosethe required
switchmode:Spread fromUptoDown,SpreadfromDowntoLeft, Spread fromLefttoRight, Spread from
Right toLeft, Spread fromLeft UptoRightDown, SpreadfromRight UptoLeftDown, SpreadLeftDown
toRight Up, Spread fromRight DowntoLeft Up, SpreadfromCentertoUp/ Down, FoldfromUp/ Down
toCenter,FoldfromLeft/RighttoCenter,HorizontalShutter,VerticalShutter,Foldfromthe Cornersto
the Center, RandomPlay, Off.

GB-7
5. CD-RIPPING
Audio-CD encoding toMP3ontoUSB stickorSD/MMC/MS card
Pressthesubtitlebuttonon theremotecontrol, thefollowing interfacewill bedisplay.
Usethedirectionbutton(UP,DOWN,LEFT,RIGHT),youcanselectyourdesiredoptionsdisplayed inthe
interface PresstheENTERbutton repeatedly,youcan select
different speed, different bitrate, createorcancelpalylist.
UsetheDOWNdirection button,you canselectTRACKS
option, thefollowing interfacewill bedisplayed.
Onthetopofthepicture,press theENTERbutton
repeatedly,youcan selectall thetracks,and pressagain,
youcanunselectall thetracks.
UsetheDOWNandUPdirection button,andpress
ENTERbutton,you can selectorunselectyourdesired
tracks.
UsetheDOWNdirectionbutton,you canselectSTART
option, thefollowing interfacewill bedisplayed.
PresstheENTERbutton, theCD-RIPPINGwill begin. In
theCD-RIPPINGprogress, you canchangethespeed by
pressing ENTERbuttonand alsoyou can cancelthe
current operation.
UsetheDOWNdirectionbutton ,youcanselectQUIT
option, thefollowing interfacewill bedisplayed.
PressENTERbutton,youcan exittheCD-RIPPING
interface.

GB-8
6. SystemSetup
GeneralStepsofSetup Menu
PresstheSetup button, themainsetup menu appears.
Whenthemainmenu displayed, theDVDsystemwill autopause.
PresstheLeftandRightarrowbuttonstohighlight theiconofthedesired page, thenpresstheDownorRight
arrowbutton toactivatethat page;
PresstheSETUPbutton again, you can exit Setup Menu.
Notes:When setup,the pressing ofthe following buttonswill turnoffthe setup menu,whilethe choicesthat
havebeen changed will be saved:N/P,Subtitle,F.F,F.R,MENU,PlayPause,Stop,Step,Next, Prev,Zoom,
PREV, Repeat, Angle, language, Display, Setup.
6.1SYSTEMSETUP
Thesystemsetupoptionsareillustratedbelow:
6.1.1TVSYSTEM
According totheColorSystemoftheTV, you can choosetheTV System.
AUTO: ChoosethissettingsifyourDVDplayerisconnectedtoamulti-systemTV.
NTSC: ChoosethissettingsifyourDVDplayerisconnectedtoaNTSCTV.
PAL: ChoosethissettingsifyourDVDplayerisconnected toaPALTV.
6.1.2SCREENSAVER
Ifthescreen saverison,when yourDVDplayerisinStop,Open,orNoDiscstate,orthereisaframefrozen
formorethan3minutes, thescreen saverwill bedisplayed.Thisfeaturecan protect thescreen fromdamage.
ON: Choosethissetting toactivatethescreen saver.
OFF: Choosethissettingtocancelthescreen saver
6.1.3HD OUTPUT
Inthisoption, you canselect different resolution.Thedefault set isHDOFF.
WhenyouchangetotheHDMI output withdifferent resolutionfromthenormalvideooutput, ainterfacewill be
displayed. Select yes”toconfirmchange, select no”toexit.
6.1.4VIDEO
VIDEO: ChoosethissettingifyourDVDplayerisconnectedtoTV withAV cable.
6.1.5TVTYPE
16 :9(WideScreen):Choosethissetting ifyourDVDplayerisconnectedtoawidescreen TV.Ifyouchoose
thissetting and youdon’thaveawidescreen TV,theimagesonthescreen mayappeardistorteddueto
verticalcompression.
4:3LB(LetterBox):Choosing thissettingifyourDVDplayerisconnectedtoanormalratioTV.connector
You’ll seethemoviesintheiroriginalaspectratio(height-to-widthratio).You’ll see theentireframeofthe
movie,butitwill takeup asmallerportion ofthescreen vertically.Themoviemightappearwithblackbarsat
thetop and bottomofthescreen.
4: 3PS (Pan & Scan): Choosingthissetting ifyourDVDplayerisconnectedtoanormalratioTV. Youcanfill
themovietotheentirescreen ofyourTV.Thismightmeanthatpartsofthepicture(theleftandrightedges)
won’t beseen.
Notes:The image displayratioisrelated totherecorded disc format. Somedisc can notdisplayimagesinthe
aspect ratioyouchoose.If you playadisc recordedin4:3formatonawide screenTV, black barswill appear
on the left and right side of the screen.
You must adjust thescreen setting depending on thetypeofthetelevisionyouhave.
6.1.6PASSWORD
Thepasswordoptionisinitializedlocked, and you cannotsettheratingslimitorchangethepassword.Inorder
fortheRatingsfeaturework,thepasswordmodemustbeturned on.If youwanttosettheratingslimit, you will
need toenterthedefault password, whichis0000, then pressEnterbutton toconfirm.
6.1.7RATING
TheRating featureisarating limitsystem,likemovieratings.It works withDVDdiscsthathavebeen assigned
arating.Thishelpsyou controlthetypesofDVDsthat yourfamily
watches.
GB-9
Therearetheserating options: 1KIDSAFE,2G,3PG,4PG13,5PG-R,6R,7NC-17,8ADULT.
Notes:Ifthe passwordoptionislocked,youcannotsetthe ratingslimit; therating limitdoenotworkwhen the
passwordoptionunlocked.
6.1.8DEFAULT
Choosethisoption toresumeall thesetupoptionstodefault settings.
6.2LANGUAGESETUP
Thelanguagesetup optionsareillustrated below:
6.2.1 HighlighttheOSDLANGUAGEoption,and press theArrowbuttonstochoosetheOSDlanguageyou
prefer. Press ENTERbuttontoconfirm, andit will displayOSDinthat language.
6.2.2 HighlighttheAUDIOLANGoption,and presstheArrowbuttonstochoosetheaudiolanguageyou
prefer.PressENTERbuttontoconfirm.Ifthediscyou areplayinghasthatlanguageavailable,itwilloutput
audiointhat language.
6.2.3 Highlight theSUBTITLE LANGoption,and presstheArrowbuttonstochoosethesubtitlelanguageyou
prefer.PressENTERbuttontoconfirm.Ifthediscyouareplayinghasthatlanguageavailable,itwilldisplays
subtitlesinthat language.
6.2.4 HighlighttheMENULANGoption,andpresstheArrowbuttonstochoosethemenu languageyou
prefer. PressENTERbuttontoconfirm. Ifthediscyou areplaying hasthat languageavailable, it will displays
menu inthat language
Notes:If yourpreferredlanguageisn’t available, the disc’sdefault languagewill be played.
6.2.5 Highlight theMPEG4SUBTITLEoption,andpresstheArrowbuttonstochoosetheSubtitleyou prefer.
PressENTERbuttontoconfirm.
Notes:If yourpreferredlanguageisn’t available, the disc’sdefault languagewill be played.
6.3AUDIOSETUP
Theaudiosetup optionsareillustrated below:
6.3.1 HighlighttheAUDIOOUToption,andpresstheArrowbuttonstochoosetheaudiooutputmodeyou
prefer. PressENTERbutton toconfirm; Thereare3optionalaudiooutputmodes: SPDIF/OFF, SPDIF/ RAW,
and SPDIF/ PCM.
SPDIF/OFF :FromtheCoaxialOutput, nosignalisoutput. Ifyouselectthisoption,theHDMIhasnotaudio
output.
SPDIF/ RAW: ChoosethissettingifyourDVDplayerisconnectedtoapoweramplifierwithacoaxialcableor
an opticalcable;Whenplaying adiscrecorded withDolbyDigital,DTSand MPEGaudioformats,the
corresponding digitalsignalswill beoutputfromtheCoaxialOutputjackorOpticalOutputjack.Thisplayer’s
digitaloutput jacksaredesigned foraconnectiontoaDolbyDigital, DTS ,orMPEGreceiverordecoder.
SPDIF/PCM:Choosethissetting ifyourDVDplayerisconnected toa2-channeldigitalstereoamplifier;
Whenplaying adiscrecordedwithDolbyDigitaland MPEGaudioformats,audiosignalswill bemodulated
intoa2-channelPCMsignal,and itwill beoutputfromtheCoaxialOutputjackorOpticalOutputjack.(The
default set isSPDIF/PCMfortheHDMIaudiooutput )
6.3.2 KEY
UsetheUpand Downarrowbuttontomovethescroll and adjust thekey.
6.4VIDEO SETUP
Thevideo setup optionsareillustrated below:
BRIGHTNESS\CONTRAST\HUE\SATURATION\SHARPNESS
UsetheUpand Downarrowbuttontomovethescroll and adjust
6.4.1 DEEPCOLOR:OFF/30BIT/36 BIT
6.5SPEAKERSETUP
Thespeakersetupoptionsareillustratedbelow:

GB-10
6.5.1DOWNMIX
UsetheUpand Downarrowbuttontomovethescroll and adjust thesaturation.
LT/ RT: Choosethissetting, it will besound likeinamovietheatreiftheoriginalmoviethediscwasrecorded
fromwasencodedintheProLogicDolbyDigitalformat.
STEREO: when 2-channelsound playing, stereo signalwill beoutput.
VSS: Choosethissetting, when adiscrecorded with5.1-channelsound format playing, the
fictitioussurroundsoundtrackseffect will beheardfromthemainsoundtrack.
6.6DIGITALSETUP
Thevideo setup optionsareillustrated below:
6.6.1OPMODE
LINE OUT: Choosethissetting tolineout theinputsignal. It will bemoresuitableforplaying inthenight time,
fortheoutput volumeislow.
RFREMOD: It will bemoresuitabletochoosethissettingforplayinginthedaytime, forthe
output volumeishigh.
6.6.2DYNAMICRANGE:When LINE OUT”isselected,choosethissetting toadjustthelineoutratioand get
differenteffect. IfadjustingtoFULL,theaudiosignalpeakvaluewill betheminimum; whileadjusting toOFF,
maximum.
NOTE: Thisoptionwill be validatedwhen the DOWNMIX OFF.
8.6.3DUALMONO(LEFT+RIGHT)
Choosethisoption tosetuptheLandRmonooutputmode;Therearefourmodesinthisoption:STEREO,
MONOL,MONOR,andMIX MONO.
7. Specification
Signalsystem PAL/AUTO/NTSC
FrequencyResponse 20HZ-20KHZ(at 1KHz0dB)
Signal-to-NoisyRatio ≥90 dB(at 1KHz0dB)
AudioDistortion+Noise ≤-60dB (at 1KHz0dB)
AudioOutput(Analog audio) 2.0+0-1.0Vrms
VideoOutput Composite:1.0±0.2Vp-p
Load impedance: 75Ω, imbalance, negativepolarity
MAX Resolution >500 lines
PowerSupply ~110-240V/50~60Hzinto5V
Dimensions 245(mm)X178(mm)X43(mm)
SupportedDisc MPEG-4/Xvid/DVD/SVCD/VCD/CD/MP3/KodakPicture/PhotoCD
USB 2.0
REFERENCE:
Toprotect yourDVDplayer, the intervalbetween twoconsecutivePowerbutton operationsmust be above30
seconds.
Nousing foraperiod of time, pleasepull out the plug fromtheelectronicoutlet.
The playershouldbeoperated onlyon conditionthatthe type ofpowersupplycorrespondstothemarking
label. Otherwise, it doesn’t workoreven be damaged.
The playermaynot be compatiblewithsomeencrypted discs.
If the playerstopsplayback byaccident, pleasepowerit on again.

GB-11
8. Troubleshooting
Nopicture:
Ensurethat theequipment isconnected properly.
Connect thevideo cablesecurelyintotheappropriatejacks.
Select theappropriatevideo input modeon theTV
PictureDistorted
Thediscisdirtyandneedstobecleaned.
It isnormalforsomedistortiontoappearwhileFast Motion Playback.
NoSound
Checktheconnections. Checkthevolumeontheequipment you haveconnected.
Connecttheaudiocablesecurelyintotheappropriatejacks.Ensurethattheinputsettingsforthetelevision
and stereosystemarecorrect. Iftheplayerisinmutemode, pleasepressMutebutton againtoturnonsound.
NoStereoSound Effectwhenplaying videoCD orCD
Checktheconnections
TheRemoteControldoes notworkproperly
Removetheobstacleexistingbetween theDVDplayerandtheremotecontrol.
TheremotecontrolistoofarfromtheDVDvideoplayer. Operatetheremotecontrolwithinoperating distance.
Point theremotecontrolat theremotesensoroftheDVDvideo player.
Ifthebatteriesintheremotecontrolareexhausted, pleasereplacebatterieswithnewones.
TheDVDplayerdoesnotstartplayback
Nodiscisinserted.(nodiscsymbolappearson thescreen). Pleaseinsert disc.Thediscisplaceupsidedown.
Placethediscwiththeplaybacksidedown.Thediscisdirty. Pleasecleanthedisc.
9. Recycling
Electricand electronicequipmentand included batteriescontainsmaterials,components
and substancesthatcan behazardoustoyourhealthand theenvironment, ifthewaste
material(discarded electricand electronicequipmentandbatteries)isnothandled
correctly.
Electricandelectronicequipmentand batteriesismarkedwiththecrossed outtrashcan
symbol,seen below.Thissymbolsignifiesthatelectricandelectronicequipmentand
batteriesshouldnotbedisposed of withotherhouseholdwaste,but shouldbedisposedof
separately.
Astheend userit isimportant thatyousubmit yourusedbatteriestotheapproriateand designated facility. In
thismanneryou makesurethat thebatteriesarerecycled inaccordancewithlegislatureand will not harmthe
environment.
All citieshaveestablished collectionpoints,whereelectricandelectronicequipmentandbatteriescaneither
besubmittedfreeofchargeatrecycling stationsand othercollection sites,orbecollectedfromthe
households.Additionalinformationisavailableat thetechnicaldepartment ofyourcity.
Servicemustbecarriedoutbyauthorised personnel.Non-authorised servicemayresultinwarrantyvoid.If
thereareanyproblemswiththeproduct, pleasesee yourretailer.

GB-12
ALLRIGHTSRESERVED
DENVERELECTRONICS A/S
WWW.DENVER-ELECTRONICS.COM
Table of contents
Other Denver DVD Player manuals

Denver
Denver DWM-100 USB BLACK User manual

Denver
Denver DVU-1112 User manual

Denver
Denver DVH-1238 User manual

Denver
Denver DVH-1212 User manual

Denver
Denver DVH-1239 MK2 User manual

Denver
Denver MPG-1013 PLL User manual

Denver
Denver DVD-766 User manual

Denver
Denver DVD-7752 User manual

Denver
Denver DVD-7779 MK2 User manual

Denver
Denver DVH-1212 MK3 User manual

Denver
Denver LDD-2258MC User manual

Denver
Denver DHD-160 User manual

Denver
Denver DVH-1019 MK2 User manual

Denver
Denver DWM-100 User manual

Denver
Denver DVH-7769 BLACK User manual

Denver
Denver DVH-1018 User manual

Denver
Denver DVH-1241 User manual

Denver
Denver DVH-1243 User manual

Denver
Denver DVD-802 User manual

Denver
Denver DVD-7779 User manual