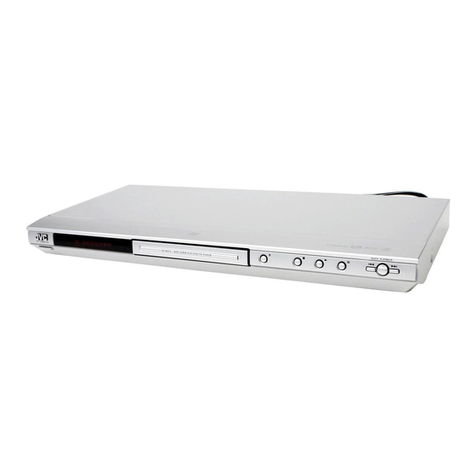
Denver DRS-1218 User manual

DRS-1218
User Manual
DVD/RADIOPLAY/PAUSE
OPEN/CLOSE
POWER VOL- VOL+

Safety Information................................2-3
Notes on Discs......................................4-5
Preparation............................................6
Identification of Control............................7
Remote Control........................................8
Getting Started...................................9-12
Basic Playback......................................13
Operating Your Receiver...........................14
Key function......................................15-17
Functional Menu Operation.................19-23
Troubleshooting....................................24
Technical Specifications.........................25
Terminology ......................................26-27
CD OPERATION...................................18
MPEG4,WMA AND KODAK PICTURE
429*JR1218-001


DVD/RADIO
PLAY/PAUSE
OPEN/CLOSE
POWER VOL- VOL+
Insert batteries (AAAsize).
(Batteries not beincluded)
Make sure tomatch the + and -on
the batteries tothe marks inside the
battery compartment.
ENTER
123
456
789
10+ 0/10
A-B
REPEAT
STEP
PROG
STANDBY OPEN/
CLOSE
V-MODE
A-MODE
GOTO
TITLE
MENU AUDIOSUBTITLE
ANGLE
MO/STMEMORY AUTO
DVD/RADIO
VOLUME
RADIO
SEARCH
CH-LEVEL MUTE
3D RETURN
L/R/ST
OSD
KEY ZOOM

DVD/RADIO
PLAY/PAUSE
OPEN/CLOSE
POWER VOL- VOL+
12 345678
1.POWER On/Off
2.Disc Tray
3.Open/Close
4.LED Display
5.Remote Control Sensor
6.Play/Pause
7.DVD/RADIO
8.Main VolumeKnob
1.DISC TYPE(DVD)
2.DISC TYPE (VCD)
3.PLAY
4.PLAY INDICATOR
5.TITLE AND CHAPTER
6.TIME(MINUTE)
7.TIME(SECOND)
8.DISC TYPE(MP3)
9.PAUSE
10.DISC TYPE(MP4)
11.DOLBYAC-3 INDICATOR
FM ANTENNA
DRS-1218
ML Y/G
Pb/Cb Pr/Cr
MR COAXIAL
CVBS S-VIDEO
OPTICAL
SW CEN SR SL FL
FR
SPEAKER OUTPUT
12345
6 7 8 9 10 11 1312
1.Speaker Output Jack(SW,CEN,SL,SR,FL,FR)
2.Main LeftAudio Output Jack
3.Component Video (Y/G)Output Jack
4.Component Video (CB)Output Jack
5.Component Video (CR)Output Jack
6.FM AntennaInput Jack
7.Main RightAudio Output Jack
8.Digital AudioCOAXIAL OutputJack
9.Composite CVBS OutputJack
10.S-VIDEO Output Jack
11.DigitalAudio OPTICAL Output Jack
12.21-pin SCART Socket
13.POWER IN

ENTER
123
456
789
10+ 0/10
A-B
REPEAT
STEP
PROG
STANDBY OPEN/
CLOSE
V-MODE
A-MODE
GOTO
TITLE
MENU AUDIO SUBTITLE
ANGLE
MO/ST MEMORY AUTO
DVD/RADIO
VOLUME
RADIO
SEARCH
CH-LEVEL MUTE
3D RETURN
L/R/ST
OSD
KEY ZOOM
1
2
3
4
5
6
7
8
9
10
11
12
13
14
15
16
17
18
19
20
21
22
23
24
25
26
27
28
29
30
31
32
33
34
35
36
1.STANDBY
2.PROG
3.V-MODE
4.A-MODE
5.SETUP
6.GOTO
7.AUDIO
8.MENU
9.TITLE
10.DIRECTION KEY
11.DVD/RADIO
12.VOL+
13.NEXT
14.PREV
15.MUTE
16.CH-LEVEL
17.KEY+
18.L/R/ST
19.KEY-
20.OSD
21.OPEN/CLOSE
22.NUMBER BUTTON
23.SUBTITLE
24.ANGLE
25.ENTER
26.PLAY/PAUSE
27.STOP
28.FAST FORWARD
29.FAST BACKWARD
30.VOL-
31.3D
32.RETURN
33.A-B
34.REPEAT
35.ZOOM
36.STEP
7.MEMORY
8.MO/ST
13.CH+
14.CH-
23.AUTO
28.SEARCH+
29.SEARCH-
PLAY ESTATE
RADIO ESTATE

Set up andMaintenance of theDVD unit
DVD/RADIOPLAY/PAUSE
OPEN/CLOSE
POWER VOL- VOL+

FM ANTENNA
DRS-1218
ML Y/G
Pb/Cb Pr/Cr
MR COAXIAL
CVBS S-VIDEO
OPTICAL
SW CEN SR SL FL
FR
SPEAKEROUTPUT


surround and subwooferspeaker.

Topause playback,press thepause button, the
sound will bemuted during stillmode. To resume
playbcak, press thePLAYbutton again.
When playing DVDdisc,press PREV button
to the previouschapter.press the button will
ship to nexttrack.
When playing CD,VCD,MP3disc,press the
NEXT button tothe next track.press the
PREV button onceto restart thetrack,
press the PREV button two times,
will return tolast track

A.Press storing:
1.press the SEARCH+or SEARCH- buttonon the remote control to selectthe radio station.
2.press theAUDIO/MEMORY button once,thenpress the NUMBERbutton on the remote
control to fixchannel.
3.repeat above 1and 2 foranother station
4.press CH+ orCH- button onthe remote control or on thefront panel toselect the location number.
B. Automatic storing:
Press AUTObutton on the remote control, tostart auto scan,FM frequencies will bebrowsed and radio
station stored automatically. When allavailable 20 memory stations are fullystored, the auto preset will stop.
Storing radio stations:
The receiver canstore up to20 FM radio stations in memory. You can enterevery single radio
station yourself orthe receiver canstore all available radio station automaticallyin an ascendingorder.
The DVD hasa built-in tunerthat allows for FM radio function.
Manual tuning
1. Connect theFM antenna accordingly(seepage 10).
2. Press POWERbutton on thefront panel to switch on the DVD.
3. Press DVD/RADIOon the frontpanel or remote control to seiect the radio.
4. When aFM station broadcastStereo sound, Tune the stations by pressing SEARCH+ or SEARCH-
button on theremote control repeatedlyuntil the desired station is found.
5. Press the AUTO onthe remote control to activate the automatic SEARCH function.In this mode
the receiver willactually tune frequenciesuntil it finds a station.
6. Repeat steps4 or 5to tune another radio station.

2X 4X 8X 20X
Upwards, downwards, leftwards, rightwards direction key.
Press the DIRECTION key to select the contents of the
disc, the setup item, the zooming part of the picture and
turning around the picture when playing back the
Picture-CD.
OSD
Press the Mute key at the first time, the disc is still playing
without sound. Press it again, mute will be cancelled and
normal playing back is resumed after seconds.
DIRECTION
MUTE
DVD
CHTT01/08
DVD
CHTT01/08
OFF
ENG4/4OFF
Press the OSD key at thefirst time, the screen will show
the time period of single chapter. (DVD discplaying status)
Press OSD key again to show the current following
status on the screen.
Press the OSD key at the third time, thescreen will
show the time remain of this chapter.
Press the OSD key at the forth time, thescreen will
show the playing time of the title.
Press the OSD key at the fifth time, thescreen will
show the time remain of the title.
Press the OSD key at the sixth time, thescreen will
show the OSD function will be cancelled.
DVD
CHTT01/08
DVD
CHTT01/08

Programming playback setup (For DVD disc playing status):
Programming the disc content as you desired, the unit will
playback the disc in your programming order.
Procedure:
Press the PROG key on the remote controller, the screen
will show the Program Menu.
Press the Number key to select your desired track.
The left side on the program menu is the titles of the track,
the right side is the corresponding songs. You can select
your desired songs by pressing the Number key, then press
the Direction key to start the playback function.
When playing VCD disc, you can shift to the MENU
function by pressing the MENU key. When MENU is off,
you can not use the disc menu to select the songs or chapter.
The disc can only playback in order. Or you can select the
songs by pressing Number key or PREV or NEXT
key. When MENU is on, you can use the disc menu to select
your desired songs of chapter. When playing DVD disc
version, you can select the chapter or songs by pressing the
MENU or RETURN key to turn back to the Main Menu.
Caution: When play back MP3 CD, VCD 1.1, the function
of MENU is ineffective.
Press the Zoom key to zoom in or out the image. When
the unit is in the playback status, press the Zoom key
to zoom in or out the image by 4 times. In the image
zooming out status, press the Direction key to move
on the picture.
When select 5.1ch Press the CH-LEVEL key first time and
then press the volumekey to adjust the volume of front left
speaker,press the key second time and then
press the volume key to adjust the volume of front right
speaker,press the key the third time,adjust
center speaker,the forth time,adjust surround left speaker,the
fifth time,adjust surround right speaker,the sixth time,adjust
subwoofer, all six speaker s volume adjusting operation
steps are the same.
CH-LEVEL
CH-LEVEL
PROG
GOTO
ZOOM
DVD
CHTT01/08
Time setup playback function (For DVD discs).
There are three kinds of selections:
1.Select the desired playingback time of the title.
2.Select the desired playingback time of the chapter.
3.Press the Number key to select the track directly.
After selection, press Enter key to playback.
Cautions: The setup time you enter can not exceed the
total playback time of the disc.
When the playback time of some of the DVD discs can
not be setup, the reason is that their formats are
designed in different way.
A-MODE
(
select 5.1ch
or stereo)
MENU

TITLE
Subtitle on/off function.To select the subtitle of DVD disc
showing on the screen (Statement: The selection of subtitle
is related to the format of the disc. The function can be
available only when the disc has the subtitle function).
The subtitle function can be operated by pressing the
SUBTITLE key on the remote controller and different
subtitles can be shown on the screen by pressing this
key continually.
SUB-T
3D
When play back DVD discs, press the TITLE key
to return to the Title Menu of the disc, press Direction
key or Number key to select the contents, then
press the ENTER key to playback your desired title
or contents.
Multi-angle viewing function. DVD disc can record the
different scenes shooting from different angles. You
can choose any angel to view when play back the disc.
1.Press the ANGLE key on the remote controller to
select the angle 1, the screen will show the following
icon on the left upper side.
2.Press the ANGLE key on the remote controller to
select Angle 2, the screen will show the following icon
on the left upper side.
There are 4 kinds of sound effect in the 3D function: SRND,
EQ, BAND, KEY.
There are 5 kinds of surround sound effect in the SRND
Menu: Concert, Church, Passive, Wide, Live.
There are 6 kinds of EQ effect in the EQ Menu: Standard,
Classic, Rock, Jazz, Pop, User.
Note: When play back DVD disc or Picture-CD, this
function is not available.
ANGLE

The playing fileis a JPEGpictures.
File Switch Region:Displays the filetype of theplaying and theswitching
The playing fileis a MP3/WMAmusic.
Directories: showing allthe name ofdirectories.
7. pressing theplay button fromremote control to1-picture viewing functionof jpeg.
At this time,press or to view previousor next pictures,or press digital
number key toview picture.

SYSTEM SETUP
TV SYSTEM
SCREEN SAVER
VIDEO
TV TYPE
PASSWORD
RATING
DEFAULT
EXIT SETUP
NTSC
PAL 60
PAL
AUTO
SYSTEM SETUP
TV SYSTEM
SCREEN SAVER
VIDEO
TV TYPE
PASSWORD
RATING
DEFAULT
EXIT SETUP
ON
OFF
SYSTEM SETUP
TV SYSTEM
SCREEN SAVER
VIDEO
TV TYPE
PASSWORD
RATING
DEFAULT
EXIT SETUP
SYSTEM SETUP
TV SYSTEM
SCREEN SAVER
VIDEO
TV TYPE
PASSWORD
RATING
DEFAULT
EXIT SETUP
SYSTEM SETUP
TV SYSTEM
SCREEN SAVER
VIDEO
TV TYPE
PASSWORD
RATING
DEFAULT
EXIT SETUP
INTERLACE-YUV
S-VIDEO
P-SCAN YPBPR
TV-RGB
19
Table of contents
Other Denver DVD Player manuals

Denver
Denver DVD-438 User manual

Denver
Denver DVD-826 User manual

Denver
Denver DVD-202 User manual

Denver
Denver DVH-7783 MK2 User manual

Denver
Denver DWM-100 USB BLACK User manual

Denver
Denver LDD-2258MC User manual

Denver
Denver DVH-1243 User manual

Denver
Denver DVD-7779 MK2 User manual

Denver
Denver DVH-1243 User manual
Denver
Denver DVH-7779D User manual

Denver
Denver DVH-1238DVBT User manual

Denver
Denver DVH-7787 User manual

Denver
Denver DVH-7787 MK2 User manual

Denver
Denver DVD-7779 User manual

Denver
Denver DWM-100USBBLACKMK2 User manual

Denver
Denver MT-769 User manual

Denver
Denver DVH-1238 User manual

Denver
Denver DVD-7752 User manual

Denver
Denver DVD-7779 MK2 User manual
Denver
Denver DVD-948 User manual