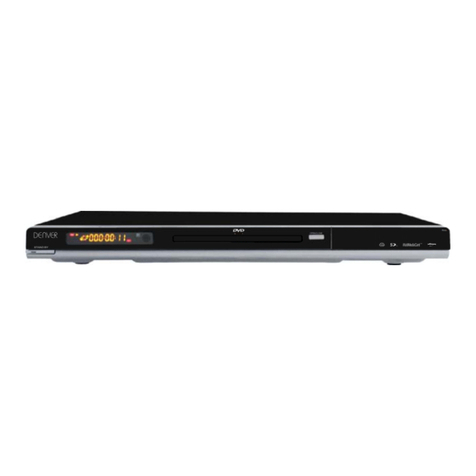
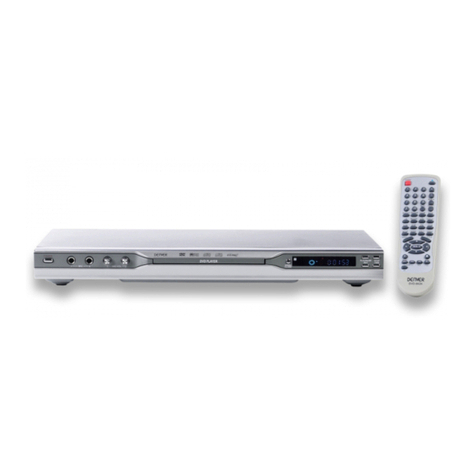
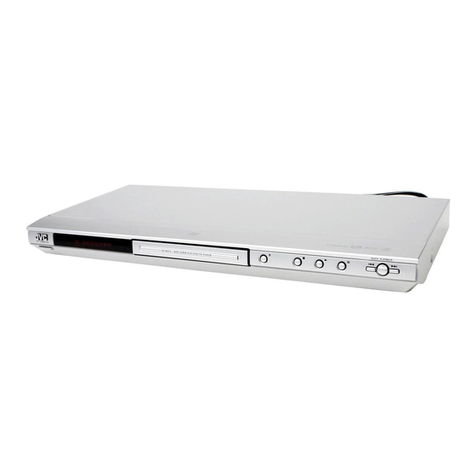
Denver DVD-7402 User manual

DVD-7402

Random 14
DVD OSD 14
Direction 14
Mute 14
Program 15
PBC 15
Return 15
Goto 15
Zoom 15
Digest 16
Angle 16
Title 16
SUB-T 16
LANG/R/L 16
3D 16
FUNCTIONAL MENU OPERATION
Basic operation 17
System setup 17
Language setup 18
Audio setup 19
Video setup 19
Digital setup 20
For MP3/Picture CD 21
Trouble shooting guide 22-23
Technical specification 24
REV 14
Forward 14
Slow 14
Toconnect to the Scart jack 9
13


1.To connect toa TV set/5.1channel/Optical or coaxialjack (AV output)
The standard packingof this unitcontains a setof Audio/Video cable.
To connect to a TV set
Connect the VIDEO OUT jack of this unit to the VIDEO IN jack of the TV set (yellow jack)
by using the video cable.
To connect to coaxial jack
Connect the digital output jack (Coaxial jack) to the AC-3/DTS decoder by using the
power cable.
Press the SETUP key on the remote controller to enter into the AUDIO SETUP menu,
then select the AUDIO OUT item, press the to select the SPDIF/RAW or the SPDIF/
PCM item, press the ENTER key on the remote controller to confirm your operation.
Select the EXIT SETUP item to exit from the SYSTEM SETUP menu.
NOTE:
1. When connecting with the coaxial output jack of this unit, please refer to the operation
instruction of the amplifier.
2.To adjust the different system (PAL/AUTO/NTSC) accordingly when playing
back disc with different system.

a.Connect the SCART OUT jack of this unit to the SCART IN jack
of the TV set.
b.Connect the ML and MR jack of this unit to the audio in jack of
the TV set by using the red/white A/V cables.
c.Press the SETUP key on the remote controller to enter into the
SYSTEM SETUP menu, then select the VIDEO item, press the
to select the RGB item, press the ENTER key on the remote
controller to confirm your operation.
d.Select the EXIT SETUP item to exit from the SYSTEM SETUP
menu.
2.To connect to aTV set byusing the scartcable.
9
SCART OUT

Connect the S-VIDEO out jack of this unit to the S-VIDEO in jack of the TV set.
Connect the L and R jack of this unit to the audio in jack of the TV set by
using the red/white A/V cables.
Press the VIDEO key on the remote controller to adjust the video output
mode to be S-VIDEO.
CAUTIONS:
1.Only when the TV set has the above video output mode, you can make the above
connections.
2.S-VIDEO cable is a selection for you, but it is not contained in the standard packing
of this unit.
3.Please refer to the operating instruction of the TV set and adjust the video output
modes of the unit accordingly.
3.To connect to theS-VIDEO and injack.
SCART OUT
10

1
5
1.MASTER LEFT/RIGHTAUDIO OUTPUT
2.COAXIAL OUTPUT
3.S-VIDEO OUTPUT
4.SCART INPUT JACK
5.COMPOSITE VIDEOOUTPUT
6.POWER IN
11
1.POWER ON/OFF
2.CABIN DOOR
3.OPEN/CLOSE CABINDOOR
4.LEFT/RIGHT SOUNDCHANNEL
5.PLAY/PAUSE
6.STOP
7.SKIP TO THE PREVIOUSTRACK
8.SKIP TO THE NEXTTRACK
12346
78
5
234
6
FRONT PANEL DVD-7402

12
Standby function
Video output mode shifting function
Bookmark/memory playback function
VCD program function
Cancel the programmed track or the
bookmark point
Setup the playback time
Subtitle shifting function
Angle shifting function
Language/sound channel shifting
function
Setup menu function
Resame to default setup
Fast backward function
Fast forward function
Picture digest function
On screen display function.
Repeat from A-B
Repeat playback function.
3D surround sound effect
Sound mute function
Open/close tray function
Number key
Title menu
Menu display/PBC on/off
Direction key
Operation confirmation function.
Image zooming function.
Play/pause function
Skip to the previous track.
Skip to the next track.
Stop/resume playback function
Random playback function
NTSC/PAL shifting function
Playback in slow speed
Step forward function
Volume rise up function
Volume low down function
1. STANDBY
2. VIDEO
3. MARK
4. PROG
5. CLEAR
6. GOTO
7. SUB-T
8. ANGLE
9. LANG/R/L
10. SETUP
11. DEFAULT
12.
13.
14. DIGEST
15. OSD
16. A-B
17. REPEAT
18. 3D
19. MUTE
20.
21. 0-10+
22. TITLE
23. MENU/PBC
24.
25. ENTER
26. ZOOM
27. PLAY/PAUSE
28.
29.
30. STOP/RETURN
31. RANDOM
32. N/P
33. SLOW
34. STEP
35. VOL+
36. VOL-

13

2X 4X 8X 20X
1.Upwards, downwards, leftwards, rightwards moving key.
2.Press the DIRECTION key to select the item desired or
the zooming part of the picture.
3.When playing back Picture-CD discs, press the direction
key to move on the picture.
4.In the Karaoke function on status, press the left/right
direction key to rise up the ECHO volume.
Press the RANDOMkey the firsttime, the unitwill enter
into random playbackstatus, press theRANDOM key the
second time toresume to thenormal playback status.
RANDOM
Press the OSDkey the firsttime, the screenwill show
(For DVD discs):
TITLE ELAPSED
Press the OSDkey the secondtime, the screenwill show:
TITLE REMAIN
Press the OSDkey the thirdtime, the screenwill show:
CHAPTER ELAPSED
Press the OSDkey the forthtime, the screenwill show:
CHAPTER REMAIN
Press the OSDkey the fifthtime, the OSDfunction will be
cancelled.
DVD
OSD
Press the MUTE key the first time, the disc is still playing
back but the sound is mute. Press the MUTE key the second
time, the unit will resume to the normal playback status.
DIRECTION
MUTE
DVD
CHTT01/08
DVD
CHTT01/08
DVD
CHTT01/08
DVD
CHTT01/08
14

Programming playback setup (For DVD discs).
Programming the disc content as you desired, the unit will
play back the disc in your programmed order.
Press the PROG key on the remote controller, the screen
will show the PROGRAM MENU.
Press the number key to select your desired track.
The left side on the PROGRAM MENU is the titles of the
track, the right side is the corresponding songs, you can
select your desired songs by press the number key, and
then press the direction key to start the playback function.
PROG
When the playback VCD disc version is above VCD2.0
and the unit is in the PBC ON status, press the RETURN
key to turn back to the disc menu, when playing back DVD
disc, press the RETURN key to turn back to the MAIN MENU.
RETURN
Time setup playback function (For DVD discs):
There are 3 kinds of selection for you:
1.Select the playback time of the title to start the playback.
2.Select the playback time of the chapter to start the playback.
3.Press the number key to select the track directly.
Cautions: The setup time you enter can not exceed the
total playback time of the disc.
When the playback time of the DVD discs can not be set up,
it is because the format of the DVD discs does not have this
function.
GOTO
Press the ZOOMkey to zoomin or zoomout the image.
When the unitis in theplayback status, pressthe ZOOM
key to zoomin or zoomout the imageby 4 times,in the
image zooming instatus, press thedirection key tomove
on the picture.
ZOOM
DVD
CHTT01/08
15

When playing backthe VCD discs,press the DIGESTkey to
enter into the9 picture viewingfunction. Press thePREV. or
the NEXT keyto select the9 pictures ofthe next page.You
can resume tothe normal playbackstatus by pressingthe
ENTER key orthe key.
DIGEST
When playing backDVD discs, pressthe TITLE keyto return
to the TITLEMENU of thedisc, press thedirection key orthe
number key toselect the contents,then press theENTER key
for confirmation, theunit will startplayback from thecontent
you selected.
TITLE
Subtitle on/off function.
SUB-T
When playing backVCD disc, pressthe LANG/R/L keyto
shift the modeof the soundchannel.
LANG/R/L
The 3D functionhas 4 kindsof sound effect: SRND, EQ,
BAND, KEY
There are 5kinds of surroundsound effect for selection:
CONCERT, CHURCH, PASSIVE, WIDE, LIVE
There are 6kinds of EQsound effect for selection:
STANDARD, CLASSIC, ROCK, JAZZ,POP, USER
NOTE: When playingback DVD discor Picture-CD, this
function is ineffective.
3D
16

a.TV SYSTEM
Press the SETUPkey to enterinto the
SETUP MENU, pressthe Left/right
direction key toselect the contentsof
the main menu,press the up/down
direction key toselect the contentsof
the submenu, pressthe ENTER key
for confirmation.
1.SYSTEM SETUP
Under the mainmenu status, selectthe
SYSTEM SETUP itemto enter into
SYSTEM SETUP page.
SYSTEM SETUP
TV SYSTEM
SCREEN SAVER
VIDEO
TV TYPE
PASSWORD
RATING
DEFAULT
EXIT SETUP
NTSC
PAL 60
PAL
AUTO
If your TV set has multi-system selection,
select the AUTO item.
If your TV set is PAL system, select the
PAL item.
If your TV set is PAL60 system, select the
PAL60 item.
If your TV set is NTSC system, select the
NTSC item.
Note: The default setup of this unit is
PAL system.
b.SCREEN SAVER
SYSTEM SETUP
TV SYSTEM
SCREEN SAVER
VIDEO
TV TYPE
PASSWORD
RATING
DEFAULT
EXIT SETUP
ON
OFF
In the status of STOP/OPEN TRAY DOOR
/NO DISC, this unit will start the screen
protection function automatically after
three minutes. When the screen saver
function is ON, the screen will be in black,
only the DVD icon is moving on the screen.
ON Screen protection function on.
OFF Screen protection function off.
c.VIDEO SETUP
SYSTEM SETUP
TV SYSTEM
SCREEN SAVER
VIDEO
TV TYPE
PASSWORD
RATING
DEFAULT
EXIT SETUP
RGB
S-VIDEO
RGB When you connect the TV set with
the unit by using the scart cable, please
select the RGB item.
S-VIDEO When you connect the TV set
with this unit by using the S-VIDEO cable,
select the S-VIDEO item.
d.TV TYPE
SYSTEM SETUP
TV SYSTEM
SCREEN SAVER
VIDEO
TV TYPE
PASSWORD
RATING
DEFAULT
EXIT SETUP
4 3PS
4 3LB
16 9
You can select the display mode to be 4:3
PS , 4:3LB or 16:9 accordingto your TV
screen aspect ratio.
e.PASSWORD
SYSTEM SETUP
TV SYSTEM
SCREEN SAVER
VIDEO
TV TYPE
PASSWORD
RATING
DEFAULT
EXIT SETUP
The default setup of this unit is password
lock up.
In the password lock up status, you can
not setup the rating of the disc or change
the password. If you need to setup the
rating, enter the default password 0000,
then press the ENTER key for confirmation.
If you want to change the password, you
also need to enter the old password first.
17

2.LANGUAGE SETUP
f.RATING
SYSTEM SETUP
TV SYSTEM
SCREEN SAVER
VIDEO
TV TYPE
PASSWORD
RATING
DEFAULT
EXIT SETUP
NO ADULT
KID SAFE
VIEW ALL
If your disc has the parental control function,
you can setup the parental control function
by using the password.
The parental control rating level can setup to
be NO ADULT or KID SAFE level.
When you select the VIEW ALL item, then the
lock up function will be cancelled.
Only in the status of password lock up function
on, you can setup the RATING function.
g.DEFUALT
SYSTEM SETUP
TV SYSTEM
SCREEN SAVER
VIDEO
TV TYPE
PASSWORD
RATING
DEFAULT
EXIT SETUP
RESTORE
When selecting the RESTORE item, the
unit will resume to the default setup status.
a.OSD LANGUAGE
LANGUAGE SET UP
ENGLISH
SPANISH
SUBTITLE LANG
MENU LANG
EXIT SETUP
OSD LANGUAGE
AUDIO LANG
Press the direction key to select the on
screen display language you desired,
then press the ENTER key for confirmation.
This unit has four kinds of OSD languages
for selection: English, German, Portuguese
and Swedish.
b.AUDIO LANGUAGE
LANGUAGE SET UP
SUBTITLE LANG
MENU LANG
EXIT SETUP
OSD LANGUAGE
AUDIO LANG
CHINESE
ENGLISH
JAPAN
FRENCH
SPANISH
PORTUGUESE
LATIN
GERMAN
Press the directionkey to select the
AUDIO LANGUAGE youdesired, then
press the ENTERkey for confirmation.
There are 8kinds of language for
selection: Chinese, English,Japan,
French, Spanish, Portuguese,Latin and
German.
c.SUBTITLE LANGUAGE
LANGUAGE SET UP
SUBTITLE LANG
MENU LANG
EXIT SETUP
OSD LANGUAGE
AUDIO LANG
CHINESE
ENGLISH
JAPAN
FRENCH
SPANISH
PORTUGUESE
GERMAN
OFF
Press the direction key to select the
SUBTITLE LANGUAGE you desired, then
press the ENTER key for confirmation.
There are 7 kinds of language for selection:
Chinese, English, Japan, French, Spanish,
Portuguese and German.
d.MENU LANGUAGE
LANGUAGE SET UP
SUBTITLE LANG
MENU LANG
EXIT SETUP
OSD LANGUAGE
AUDIO LANG
CHINESE
ENGLISH
JAPAN
FRENCH
SPANISH
PORTUGUESE
GERMAN
LATIN
Press the direction key to select the MENU
LANGUAGE you desired, then press the
ENTER key for confirmation.
There are 8 kinds of language for selection:
Chinese, English, Japan, French, Spanish,
Portuguese, German and Latin.
NOTE: The AUDIO/SUBTITLE/MENU
language selection is subject to the playback
disc, only when the disc supports THE
AUDIO/SUBTITLE/MENU language selection
function, this function will be effective.
18

3.AUDIO SETUP
a.AUDIO OUT
AUDIO SETUP
AUDIO OUT
MIC. SETUP
ECHO
MIC. VOL
KEY
PROLOGIC
EXIT SETUP
SPDIF/OFF
SPDIF/RAW
SPDIF/PCM
Press the direction key to select the AUDIO
OUT item, then press the ENTER key for
confirmation, the submenu has 3 kinds of
mode for selection: SPDIF/OFF, SPDIF/RAW
and SPDIF/PCM.
SPDIF/OFF Coaxial or optical out function off.
SPDIF/RAW When this unit connects with
the 5.1 channel amplifier by using the coaxial
or optical cable, select the SPDIF/RAW item.
When the playback disc adopts the format of
DOLBY or MPEG, the coaxial or optical output
signal of this unit will be the RAW format
of DOLBY or MPEG accordingly.
NOTE: The connected amplifier should have
the DOLBY and MPEG decoding modes.
SPDIF/PCM When the unit connects with the
digital stereo amplifier, please select this item.
When the playback disc has the DOLBY or
MPEG mode, the coaxial or optical output
signal will be PCM format.
.
.
.
4.VIDEO SETUP
a.BRIGHTNESS
VIDEO SETUP
BRIGHTNESS
CONTRAST
HUE
SATURATION
EXIT SETUP
Press the directionkey to move the slider
to adjust thebrightness of the video output.
19
VIDEO SETUP
BRIGHTNESS
CONTRAST
HUE
SATURATION
EXIT SETUP
Press the direction key to move the slider
to adjust the contrast of the video output.
b.CONTRAST
Press the direction key to move the slider
to adjust the hue of the video output.
e.HUE
VIDEO SETUP
BRIGHTNESS
CONTRAST
HUE
SATURATION
EXIT SETUP
f.SATURATION
VIDEO SETUP
BRIGHTNESS
CONTRAST
HUE
SATURATION
EXIT SETUP
Press the direction key to move the slider
to adjust the saturation of the video output.
Table of contents
Other Denver DVD Player manuals

Denver
Denver DVU-1111 User manual

Denver
Denver MPG-1013 PLL User manual

Denver
Denver DVD-748 User manual

Denver
Denver DVD-922 User manual

Denver
Denver DVD-7779 MK2 User manual

Denver
Denver MT-769 User manual

Denver
Denver DVD-182 User manual

Denver
Denver DVD-438 User manual

Denver
Denver DVH-7781 MK2 User manual

Denver
Denver DVD-842K User manual

Denver
Denver TVD-2118 User manual

Denver
Denver DVH-7769 BLACK User manual

Denver
Denver MTW-753 TWIN User manual

Denver
Denver DWM-100 User manual

Denver
Denver DVH-7787 User manual

Denver
Denver DVD-826 User manual

Denver
Denver DVH-1239 MK2 User manual

Denver
Denver DVD-916K Technical manual

Denver
Denver DRS-1110 MK2 User manual

Denver
Denver DWM-100USBBLACKMK2 User manual