Deprag GDS027-320BY User manual

012980EN
Operating Instruction Booklet
PneumaticGrinding Machine
GDS027-320BY 3148457C
GDS027-320BX 3148457D

2
Dear Customer,
Thistool isthe resultofmorethan75yearsofexperiencein the design and
manufacturing ofpneumatictoolsforthe industrial market.
Wekindlyaskthatyou read theseoperating instructionscarefullysothatyou
will be able tousethis
toolsafelyandfor manyyears tocome.
If you need additional information,pleasecontact your DEPRAG
Representative,one ofour international supportofficesorusdirectat
DEPRAG.Wewill be happytoanswer anyquestions.
Pleasevisitour web site: www.deprag.com / www.depragindustrial.cz
Content
1SAFETYTIPS................................................................................................................3
1.1. GeneralSafetyTips....................................................................................................3
1.2. SafetyTipsforGrinders..............................................................................................4
1.3. OwnerObligation........................................................................................................7
1.4. OperatorObligation....................................................................................................8
1.5. WarrantyandLiability.................................................................................................8
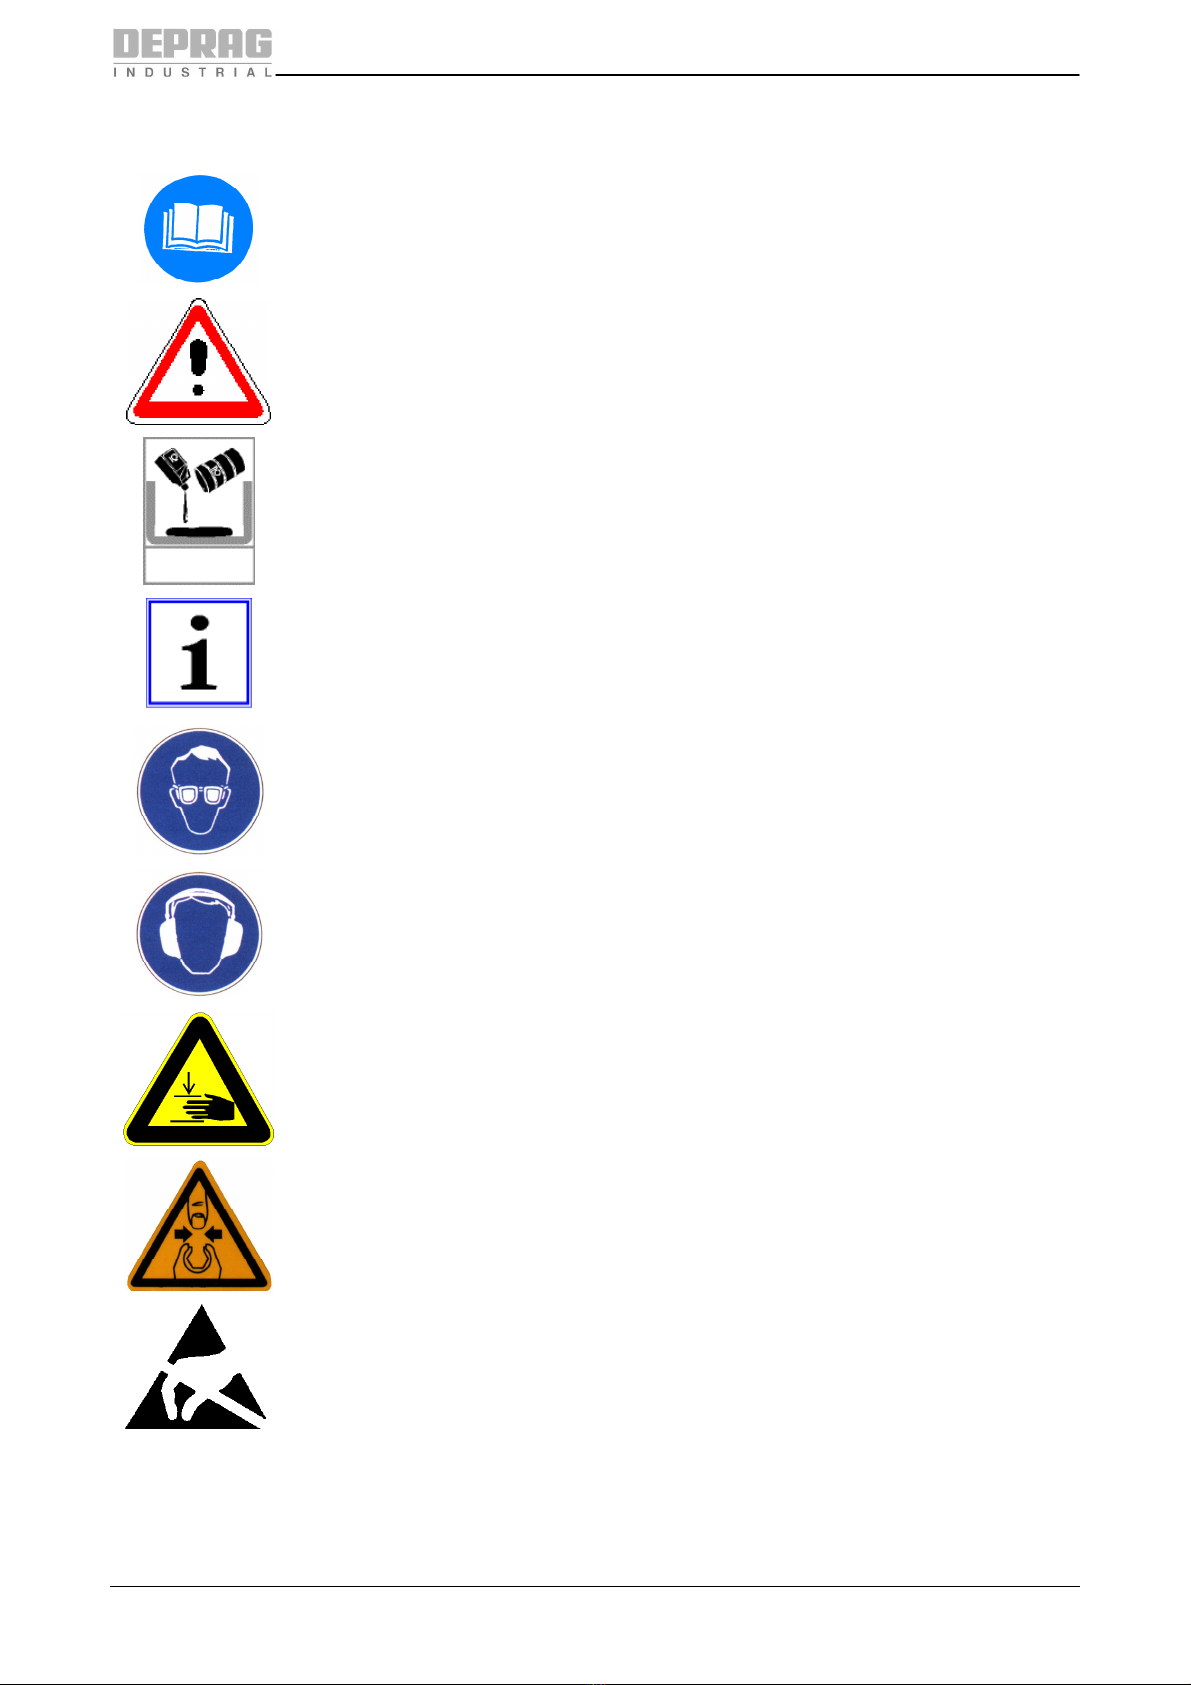
1.6. SymbolDescription.....................................................................................................9
1.7. ObserveEnvironmentalRegulations........................................................................10
2DESIGNATEDEQUIPMENTUSE...............................................................................11
3INSTALLATION............................................................................................................11
4OPERATION................................................................................................................12
5HANDLING...................................................................................................................13
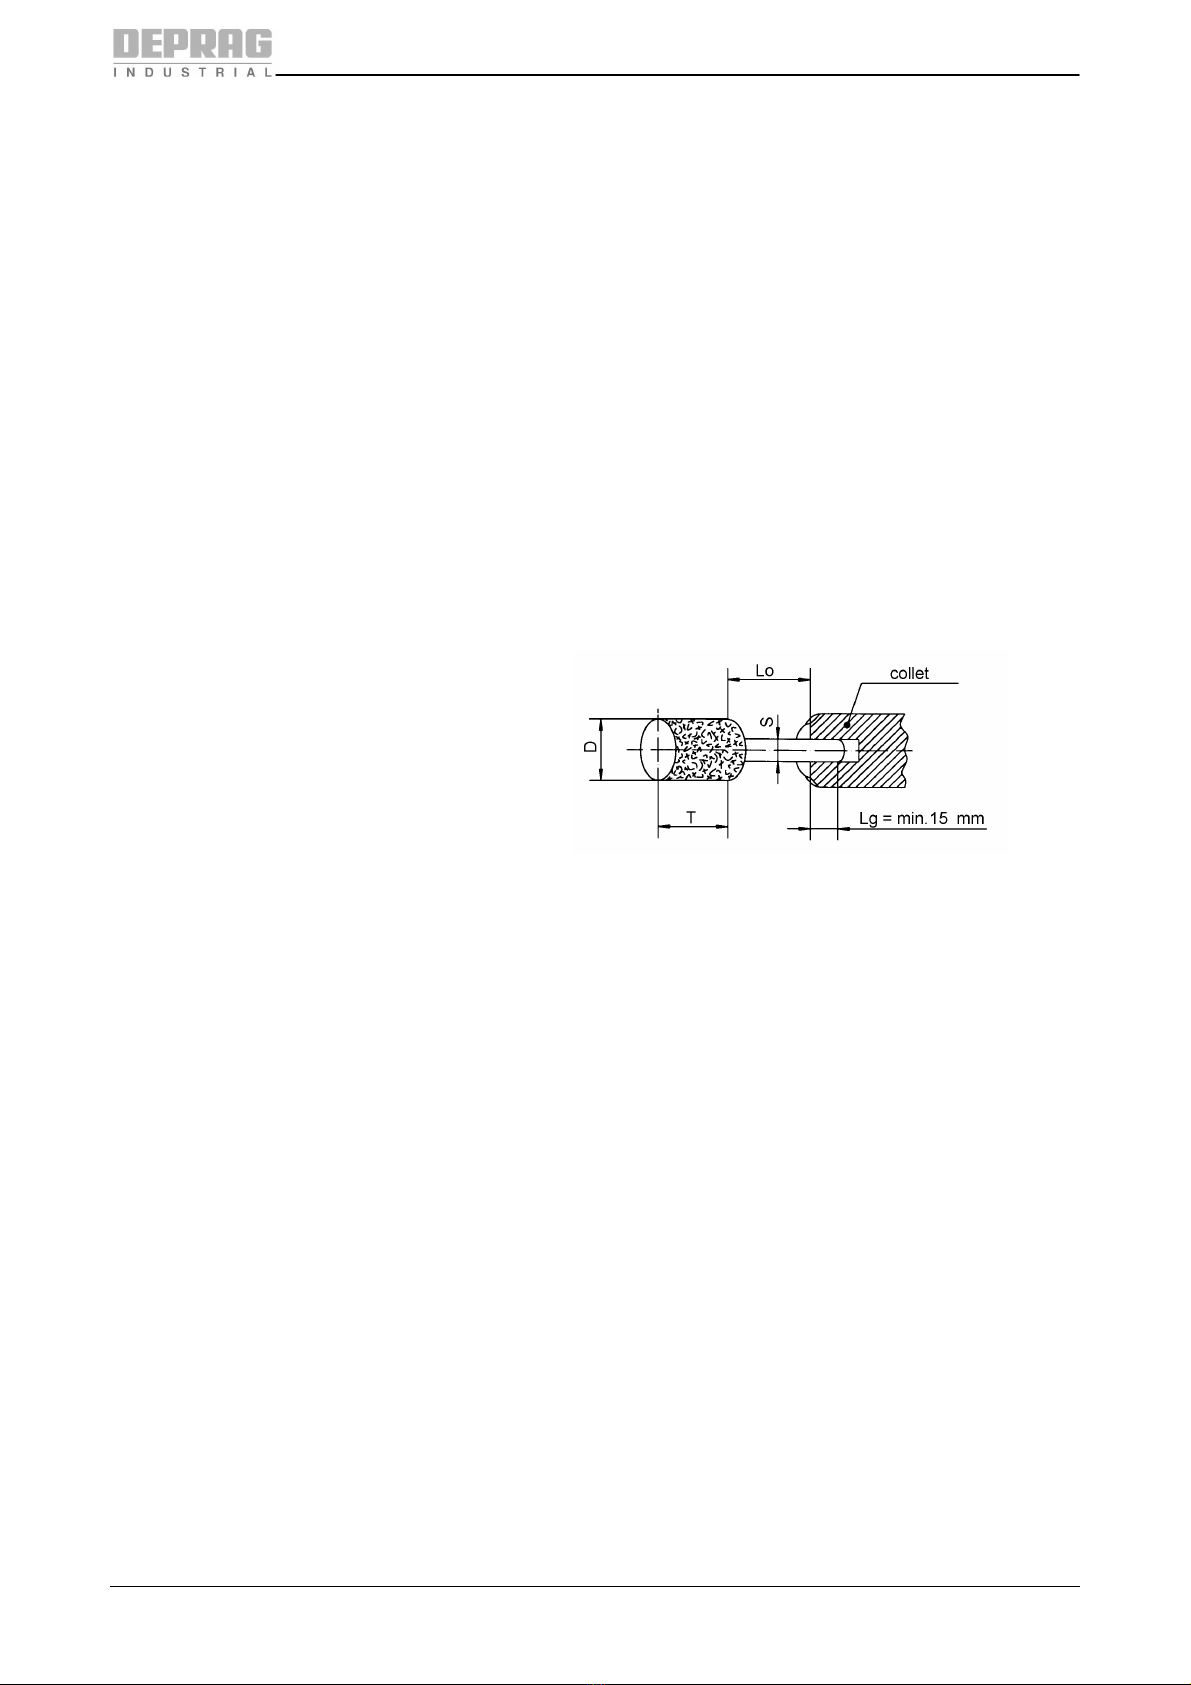
5.1. Partialair extraction atthe spindleend.....................................................................14
6DISASSEMBLY-ASSEMBLY......................................................................................15
6.1. ReplaceO-RinginValve...........................................................................................16
6.2. ReplaceVanes.........................................................................................................16
6.3. SparePartsDrawing.................................................................................................18
6.4. DimensionalDrawing................................................................................................22
7MAINTENANCEAND UPKEEP...................................................................................23
7.1. WearParts................................................................................................................23
8TROUBLE SHOOTING................................................................................................24
9DELIVERYCAPACITY.................................................................................................24
10 ACCESSORIES – OPTIONALEQUIPMENT.............................................................25
11 STORAGE..................................................................................................................25
12 TECHNICAL DATA.....................................................................................................26
13 DISPOSAL..................................................................................................................27
14 CONFORMITYDECLARATION.................................................................................28
15 SERVICELOCATIONS AND AUTHORIZEDPARTNERS.........................................29

3
1SafetyTips
1.1.GeneralSafetyTips
Beforeoperating tool makesureto carefullyreadand
observethisoperating instruction.
Generally,theoperator ofthe equipmentand/ormachineryisresponsible for
the equipment’sperfect condition and operation,while observing all necessary
safetyregulations.The equipmentand/or machineryhasbeen constructed in
accordancewiththe newestlevel oftechnologywhile recognizingall
necessarysafety-related requirements.Nevertheless,while operating the
equipmentand/or machinerythereisariskofbodilyharmtothe operator as
well as damagetoequipmentand/or machineryand other property.
Operatethe equipment and/ormachineryonlyif equipment/machinery
· Isused forthe task it was designed for
· is inperfectworkingcondition andsafetouse.
It isimportanttoobservethe technical dataofthe equipment, especiallyin
regardstotheenvironmental temperatures. The designated area ofuseforthis
equipmentisclearlydescribed in chapter Designated EquipmentUse and
thoserequirementshavetobe observed aswell.Prerequisiteforthe safe
conduct andthe uninterrupted operationofthe equipment, isthe knowledge of
the basicsafetytipsandthesafetyregulations.Additionally,all current
regulationsforasafeoperational area,for accident-prevention guidelinesof
electrical and mechanical installations, aswell asnoisesuppression demands
mustbe observed.Duringanymaintenanceorrepair work, acleanwork
surfaceisrecommended.Also,itisnotrecommended toeither eator smoke
during repair ormaintenance. Arbitrarychangesmade tothe equipment,which
altersitsdesignateduse,voidsthe warrantyand cancelsthe manufacturers
liability.
· The toolis notinsulated toprotectagainstanelectricalpower surge.
· Itisnotrecommended tousethistoolin explosivehazardous
environments,unlessit wasspecificallydesigned forsuchause.
The operating instruction booklet,especiallythe safetysymbolsandsafetytips
attachedtothe equipmentor included inthe documentation,mustbeobserved
at alltimesbyall persons gettingintocontact withtheequipment.

4
1.2.SafetyTipsfor Grinders
·
Useonlyapproved grinding inserts withacorrectshaftdiameter.
· Makesurethe ratedspeed oftheinsert ishigherthan thespeed
ofthegrindingresp. millingmachine.
· Never useagrindingresp.millingmachine thatis notin good
working orderoronewithdefectiveparts.
· The grindinginserts (wheels/disks)mustbehandledandstoredwithcare
and inaccordancewithmanufacturers instructions.
· Checkthe grindinginserts(wheels/disks)fordamagespriortothe usein
grinding resp.millingmachines. Never usedamagedgrinding inserts
(wheels/disks).Onlyusethegrindinginserts(wheels/disks)inaccordance
withthe manufacturers’instructions.
· Incaseofapower interruption,themachinemustbe disconnected from
the air supply.
· Whenconnecting/disconnectingthe grinding resp. milling machineto/from
the air supply-pleasepaycareful attention NOTtoactuatethestartlever
while doing so.
· Disconnect machinefromairsupplyprior tochanginggrinding inserts.
· Never removeprotectivedevicesfrommachineswherefitted and ensure
theyare ingoodconditionandproperlyadjustedbeforestartingthe
machine.
· Guardswhereprovided shouldbe adjustedtodeflectsparksanddebris
awayfromthe operator.
· Strongvibrationsmayoccurbecauseof looseordamagedgrinding
inserts.
· Donotusecut-off wheels (when usingmachineswithacollet).
· Donotexceedthemaximumallowableoperatingspeed. Checkthe
maximumoperatingspeed regularly.
· Checkthe grindinginserts(wheels/disks)forcorrectandtightclamping,
prior tostart-upofoperation.Testthegrinding resp.millingmachine
without loadin asafepositionandenvironmentforatrial period ofsome
30 sec.When feeling considerablevibrations orinanyother caseof
irregularbehaviour or operationswitchoffthe machine immediately.
Analyzeand eliminateall causes of irregular behaviourand vibration prior
tonewstart-up.
· Whenworkingwithspecificmaterials,dustandabrasionas well assteam
outs canbe createdwhichcouldresult inanexplosiveendangered
environment.
· Makesuretosufficientlyfastenthe work piece(s)priortogrinding/milling.
· Donotusethe machine closetoinflammable liquidsorgas.

5
·
Doprovide devicesforcleaningthe airatthe workingplace, incase
explosivedust,steamor aerosolsdangeroustoyour healthmayoccur.
· Afterturning-offthegrindingresp. milling machine, the tool will continueto
rotate(inertia).Layasidethegrinding resp.millingmachinein asafeway
and position.Donot applypressure toitssurface.
· Always wear eyeprotection(EN166 Grade B)andhearing
protection(EN352).Itis alsorecommended towear gloves
(EN388Category2) andsafetyclothing.
· Dependenton thematerialstobe processed,personalsafetyequipment
mustbeusedandadustremoval systemshould beinstalled.
· Donotwear wide clothingorjewelry, fortheycan beseizedbymovable
parts. Wearahairnet ifoperatorhaslong hair.
· Dotakedue noteofspecialmarkings,limitationsoranyother explicit
instructionsofuseatthegrindinginsert orthegrindingresp.milling
machine.
·
Ensurethatthe correct abrasiveproductisselected.Anunsuitableproduct
can produceexcessivedebris,dust, vibrationandnoise.
· Useonlyabrasiveproducts conformingtothe higheststandardsofsafety.
Theseproducts will beartherelevantENstandardnumberand/or the
inscription „oSa“.
· Donotexceed themaximumallowableairpressure.Apressure regulator
hastobeinstalled, whichregulated theairpressurebeforereachingthe
tool.
· Storeabrasives indry, frost-freeconditions avoiding wide variations in
temperature. Ensuretheyareproperlyprotectedandsupportedtoprevent
damage anddistortion.
· Coated abrasives should bestored at18-22°C, 45-65%relativehumidity.
· Abrasivebeltsshould behungon arodor peg notlessthan50 mm
diameter.
· Never useanabrasiveproductbeyond itsexpirydatewhere marked.
· Donotmodifyneither grinding resp. mil
ling machinenorinserting toolafter
receipt!Never forcetheabrasiveproductontothemountingfixture.
· Checkthatthe correctmountingdevices are usedandthattheyare
undistorted, cleanand free fromburrs.
· Donotgrindonthe part oftheproductthatis notdesignedforthe
operation.Avoid grinding withtheedgeofabrasivebelts, usethecentreof
the beltif possible.
· Donotleaveabrasivebelts undertension when notinuse.

6
·
Avoid clogginganduneven wear toensure that the abrasiveproduct is
working efficiently. Dressfrequentlywhere appropriate.
· Beforestart-upoftool makesuretovisuallycheckboththe grinding resp.
milling machineandthegrindinginserts, whethertheyare okayand not
damaged inanywayand whether theyare appropriateforthe workahead.
· Usegrindingresp. milling machineonlywithamaintenanceunit,
consistingofFilter withcondensationreservoir, regulator and oiler(appx.
1-2 dropsprom³). Whenoperatingwithoilfree air,aperformance
reductionofupto20% occursandmaintenancerequirementsincreases!
The pressuremust not drop below6.3bar/90PSI.
· Expert userstrainedbyauthorized, responsibletechnicalpersonnelonly
mustbeallowed towork withthegrinding resp.millingmachine.
· Dowear arespirator(EN149),if usingthe grindingresp. milling machine
for dust-producingjobs.Exposuretodustgeneratedfrom workpiece
and/orabrasivematerialscanresult inlung damageand/orother physical
injury.
· Disassemblyresp.assemblyofthis DEPRAG grindingresp.milling
machinemust bedone eitherbyDEPRAG orother authorizedtrained
personnelonly.
· There is ariskof gettinghurtbyawhip-lashingairhose-pleasepay
careful attention.
· Usethe DEPRAG recommendedlubricationoil only.
· Action needs tobetakeniftingling,pins andneedlesornumbness is
experienced after10minutescontinuous useofthe abrasiveproduct.
Avoid continuoususeoftheabrasiveproduct.
· The effectsofvibration are morepronouncedin coldconditionssokeep
the handswarmandexercisehandsand fingers regularly.
· Maintainmountingflangesandback-up pads ingoodcondition and
replaceif worn ordistorted.
· Donotgripthe workpieceormachinetoo tightlyanddo not exert
excessivepressureon theabrasiveproduct.
· Used ordefectiveabrasivesshouldbedisposedin accordancewithlocal
or nationalregulations.
· Be aware thattheabrasiveproductmaybe contaminatedwithmaterial
from theworkpieceor processaft
eruse.

7
·
Disposedabrasiveproducts shouldbedamaged topreventthem from
being taken fromwasteskipsandre-used.
· Usemountingblotterswhere supplied.
· Donottightenthe mountingdeviceexcessively.
· Never removeguardsfrommachines where fitted and ensuretheyarein
good conditionand properlyadjusted.
· Never start the machine withthe workpiecein contactwiththe abrasive
product.
· Never applyexcessiveforceor shocktotheabrasiveproductorlet it
overheat.
·
It isespeciallyimportant tokeep inmind,that the allowablespeedof the
installed grindinginsert isreduced, if the distancebetween theend of the
collet and thebottomof the insert (overhang“Lo”)isincreased. Observethe
instructionsgiven bythe manufacturerofthe grindinginsertsresp. carbide
burrsaswell astheIndustrialStandardDINEN12413. A minimumshaft
insertionlength“Lg”hastobeguaranteed.
Lo =overhang
S =shaft diameter
D=insert diameter
T=insert length
Lg=shaft insertion length
· The shaft diameterof the insert and collet capacityhastobethe same.
1.3.OwnerObligation
The owner isobligedtoonlyletpersons operatetheequipment,who
· are familiarwithbasicwork environmentsafetyrules andaccident-
preventing regulations.Also,thosepersons musthavebeen instructedin
the correctuseofthe equipment.
· haveread andunderstood all safetyand warning notificationsin the
OperatingInstructionBooklet,aswell as allotherdocumentation
pertainingtothisequipment.
· checkandconfirmat regularintervals,thatasafetyoriented operationis
guaranteed.
Onlyqualifiedandauthorizedpersonnel is allowed tooperate, maintainand
repair this equipment.Amalfunction, whichimpairs operator safety, mustbe
immediatelyremoved.

8
1.4.Operator Obligation
Personnel,who isengaged inthe operationofthe equipment,mustalways be
committed to
· observethebasicsafetyandaccident preventing regulations,
· read andobservethe safetyand warning notifications ofthisoperating
instructionbooklet.
1.5.WarrantyandLiability
Unless otherwisespecified,our “General Salesand DeliveryConditions”
apply.Warrantyand liabilityclaimsin regardstopersonsor equipment
damagesareinvalid, ifone or several ofthefollowing causesapply:
· Useoftheequipment inanon-designated application.
· Improperinstallation, operation, serviceormaintenanceofthemachine.
·
Operationofthe machine witheitherdefectiveor removed safetyand
protectiondevices.
· Non-
observanceofthe requirements stated in the operating instruction
booklet
,in regardstotransportation,storage,mounting,installation,
operation,maintenanceand serviceoftheequipment.
· Structural changeor adjustmentonthe equipmenttoanon-
designated
use.
· Inadequatesupervisionofwear parts.
· Improperrepair,inspection ormaintenance.
·
Catastrophic casesbecauseofawar,actsofgod or otherreasonswhich
are beyond ourcontrol.

9
1.6.Symbol Description
Readand observetheOperating Instruction Booklet, prior
toand during operation oftool.
DANGER
Reference toan immediatedangertoaperson.Mayleadto
seriousinjuriesor evendeath,ifunobserved!
Properlyrecycle environmentallydamaging grease,cooling
agents ordetergents.
RECOMMENDATIONS
Importantoradditional information onthe equipmentor inthe
documentation.
Useeyeprotectionor wear safetygoggles.
Wearhearingprotection.
Warningagainsthand-injuries.
Attention:Keepawayyour handsfromareas,whicharemarked
withthissymbol!
Hands maybe crushed,seizedorotherwiseinjured.
ESD-protected area
Equipmentmaybe damaged ordestroyed byan electrostatic
discharge.
WasteOil

10
Maintenanceand repair onhydraulicand pneumaticequipment
mayonlybe performed byspeciallytrained personnel!
Disconnectequipmentfromairsupply, priortorepair of
pneumatic orhydraulicequipment.
Provide regular preventivemaintenanceon hosesandairlines.
Exchange hoselines,even ifthere isnovisible damage!
(Observecorresponding requirementsofthe manufacturer!)
Afterrepair and maintenance,check thefollowing items:
· makesurealldetached andre-attachedconnectionsare
solid.
· confirm thatremoved covers, screensor filterswere re-
installed
· During disconnecting orreconnectingof anair-operated
equipment, injurymayoccurduetoawhipping air-hose
Afterconclusion of maintenanceor repair andpriortostartof
operation,makesure to
· removeall materials,toolsandothersuppliesneededforthe
maintenanceor repair fromworkarea oftheequipment
· removeleaking liquid oroils
· makesureallsafetydevices onthe equipment workperfectly!
1.7.ObserveEnvironmentalRegulations
Whenworking onorwiththe equipment,itis imperativeto
observeall requirementsinregardstowaste-disposal and
proper recycling.
Especiallyduringinstallation,repairormaintenance,water
damaging agentssuchas
· lubricatinggreaseand oil
· hydraulic fluid
· coolingagents
· solvent-containingcleaningagents
mustnot leakintothe groundorintothesewage system!
Suchmaterialsmustbestored,transported,containedand
recycled insuitablecontainers.

11
2DesignatedEquipment Use
This midgetgrinderisused preferablywithgrindingpinsormillinginserts,
mainlyfor the treatment ofplastic and metalsinfoundries,in theentire
mechanical engineering industry, thetool- anddieindustry, the appliance-
industrytolevel, de-burr ortreatcast-iron parts.
3Installation
·
Blowout airlineandpressure hose,prior toconnection ittothe
equipment.
· The hosesmust befreeofbends andkinks.
· Makesure,thatall air lineshaveasufficientcross-sectionand remove
possiblethrottle areas.
· This DEPRAGGrinder orPolishershould beoperatedwithlubricated
air only(seeparagraph: Maintenanceand Upkeep).Bestresultsare
achieved, when machineislubricatedwith1–2dropsofoil per1m3.
Whenoperatingwithoilfree air,aperformancereductionof upto20%
occursandmaintenancerequirementsincreases!
· ConnectGrinders orPolishersasfollows:
a) for standardoperation connectequipmenttoamaintenanceunit,
consistingofFilter withcondensationreservoir, Regulatorand Oiler.
Whenchoosing amaintenanceunit, observeair consumption ofthe
machine(seeTechnicalData).
Air Consumption Thread Size PartNo.
0,05 -0,5m³/min ¼“ 820454 A
0,15 –1,5m³/min
½“ 820455 A
0,8–6,0m³/min ¾” 821608 A
b) for theusewithminimal lubrication connect toafilter-regulator
consistingofFilter withcondensationreservoir andpressure
regulator
Air Consumption Thread Size PartNo.
0,05 -0,5m³/min ¼“ 822408 A
0,15 –0,9m³/min
3/8“ 826981 A
0,5–1,5m³/min ½“ 822409 A
0,8–6,0m³/min ¾” 826982 A
in connectionwithaPoint-of-UseOiler(Part No.378077A)
· Checkairpressure at F/R/Loutlet. TheRegulator needs tobe adjusted
toanairflowofmax. 6,3bar(90 PSI). Ahigherpressurethan 6,3bar
leadstoincreasedwear and tear.Pressurebelow6,3barleadsto
performa
nceloss.

12
Inregardstoair-qualityaccordingtoISO8573-1, werecommend:
CLASS
RESIDUE
OF OIL
RESIDUEOF DUST RESIDUEOF WATER
Content
mg/m³
Particle
Size mm
Concentration
max. mg/m³
DewPoint
oC
Pressure
Concentration
max. g/m³
Lubricated Air 4 5 15 8 +3 6
DryAir 3 1 5 5 -20 0,88
4Operation
Prior tocommissioning,be suretoinsertthetool asdeeplyas possibleinto
the colletandfastenitusingthesingle-ended open-jawed wrenchincludedin
the delivery(see Safety Tips).
Attention:
Beforeoperating thetool,checkthatgrinding insertis
securelyfastened.Aloose grinding insertmaycause an
injury.
Use onlyacceptablegrinding inserts. Checkand make
surethattheallowablespeedofthegrinding insertis
higher than thespeedofthegrinder.
Keep the pressurelightduringworking.High speedsatlowpressure are
preferable over lowspeedswithhighpressure.Whenselectingamilling
cuttermould, makesure thattheworkpieceradiusofboreholesorangles is
always larger thanthe millingcutterradius,asthemillingcutterotherwiseget
stuck andjag. Whenmillingin recesses andslits,themilling cuttershould be
moved marginallybackandforthduringtheprocess.
Be sure toguidethemachine inamanner ensuringthatneitherspringchuck
nor spindletouchtheworkpiecetoavoid unnecessarywear andtearofthese
parts andtheball bearings.
Howtoclamp inserting tool:
Insertgrinding pinwithshaft(standardshaft Æ6mm)intocollet 312688
(Æ6mm) andfastenitusingthespanner AF9andAF 10.

13
COLLETWITHTHREAD RECOMMENDED TIGHTENING TORQUE
X=M6x0,75 (LH) Appx. 3,5Nm
X=M8x0,75 (LH) Appx. 8Nm
X=M9x1(LH) Ca. 9Nm
X=M12x1(LH) Appx. 11 Nm
COLLETWITHSCREWCAP RECOMMENDED TIGHTENING TORQUE
ÆX=16,1mm Appx. 11 Nm
5Handling
The toolshouldonlybe usedwhile observing all safety-and dangerrecom-
mendations.
GDS027-320BY: Turn twist sleeve314649 andmachinestarts.
GDS027-320BX: Pushlever 302860Aandmachinestarts.

14
5.1.Partialairextraction at thespindleend
NOTE
Turn adjusting ring 315158 tothefollowing position(seepicture
Position ofadjustingring315158withexhaustair),in order to
usetheexhaustairfor blowing awayabraded particles.
The adjustingringhastobein line withthespannerflatofthe
spindlebearing 3149412.
Apart oftheexhaustairwill nowvent through thespindleend of
the grinder.
Picture:Positionof adjustingring with exhaustair
Picture:Positionof adjustingring without exhaust air
adjusting
ring
315158
spannerflatofspindle
bearing 3149412

15
6Disassembly-Assembly
Disassembly: (see SpareParts Drawing)
Prior todisassembly, disconnect equipmentfromair
supply!Onlyexperiencedmaintenance personnelmay
assembleor disassemblethisequipment.
Afterrepair or maintenance,verifythat equipmentrunstospecification!
Principally, useonlyDEPRAG originalspare parts. Otherwise, areductionin
equipmentpower-outputandanincreased maintenance-
requirementoccurs. If
NON-DEPRAG partsareinstalled,DEPRAG is justified tovoid anyexisting
warrantyand liabilityobligations.
Attention:
Never clampmotorhousingintoavice,withouttheusageofthe
protectivechuckingjaws, sincedamagetomotor-housingand
internalparts isunavoidable.
SpecialRepair Tools(OptionalEquipment)
NAME PART NO.
Fixing device(for rotorcylinder 302924) 460474
Arbor (forrotor3658544) 462305
Chuckingjaws (formotor housing 3148432) 461521
Assemblyarbor (forlever 302860A) 462138

16
6.1.Replace O-Ring inValve
1.Disconnectgrinderfromairsupply.
2.Clampmotorhousing 3148432bymeansofchuckingjaws 461521 intoa
vice.
3.Loosenhoseconnection3148562 (AF 27,right-handthread).
4.Unscrewexhausthose3148341Acomplete(AF14).
5.Versionwithlever valve: Pull off sleeve3138341.
Versionwithtwist valve: Pull off twist sleeve314649.
NOTE
Ball 802182 invalvehousing314736maydrop outandget
lost.
6.Unscrewplug312046 (witho-ring 803374) bymeansofasuitablehand
screwdriver fromvalvehousing 314736(right-handthread).
7.Takeoutpressure spring312051andvalvepin 322685 resp.301289
(witho-ring802501).
8.Replaceo-ring802501.
9.Mount valvepin 322685 resp. 301289 (witho-ring802501)andpressure
spring312051.
10.Assembleplug312046 (witho-ring803374) intovalvehousing314736
(right-hand thread).
11.Versionwithlever valve: Mountsleeve3138341.
Versionwithtwist valve: Mounttwistsleeve314649.
12.Assemble exhausthose3148341Acomplete(AF14).
13.Tighten hoseconnection 3148562(AF27,right-handthread).
6.2.Replace Vanes
1.Disconnectgrinderfromairsupply.
2.Clampmotorhousing 3148432bymeansofchuckingjaws 461521 intoa
vice.
3.Loosenhoseconnection3148562 (AF 27,right-handthread).
4.Unscrewexhausthose3148341Acomplete(AF14).
5.Unscrewspindlebearing 314945 Gfrommotorhousing(AF24,left-hand
thread).
6.Unscrewtwistvalve3148192Eresp.lever valve3148192Bbyhand from
motor housing (right-handthread).
7.Slide motor 372798F completelyout ofmotorhousingandtakeoffin-
termediatering 314842.
8.Clampmotoronitsrotorcylinder 302924 intofixing device460474.
9.Pull off shaft-sidebearing cover fromrotor.
10.Removerotorcylinder.

17
NOTE
Exchange only completesets ofvanes.
11.Removevanes andcheckthemthoroughly. Vanesthataretoonarrowor
damaged havetobereplacedin sets.
12.Pull offairconnecting-sidebearing cover fromrotor.
13.Pressthetwoballbearingsfrom thebearing covers.
Minimumvanes widthshouldbe5mm.
14.Clean rotor.
15.Presstheballbearingsintothe twobearing covers.
16.Presstheshaft-sidebearingcover withtheballbearing ontherotor.
17.Insertthenewvanes intotherotor.
18.Puttherotorcylinder over therotor.
After assemblythebearing coversshouldn’thaveanyaxial
gap. Therotormust turnfreely.
19.Press air-connectingside bearingcover withthe ball bearing onthero-
tor.
20.Mount intermediatering314842andslide motor372798 Fcompletely
intomotorhousing3148432.
21.Assemble twistvalve3148192Eresp.lever valve3148192Bbyhand
ontomotorhousing(right-handthread).
22.Mount spindlebearing 314945 Gontomotorhousing(AF24,left-hand
thread).
Makesure,that theclutch3120422engages intothegear-
ing ofgrinding spindle3149911.
23.Assemble exhausthose3148341Acomplete(AF14).
24.Tighten hoseconnection 3148562(AF27,right-handthread).

18
6.3.SparePartsDrawing

19

20
This manual suits for next models
3
Table of contents
Popular Grinder manuals by other brands

Black & Decker
Black & Decker BEG210 Original instructions

Pattfield Ergo Tools
Pattfield Ergo Tools PE-20 AGB Original instructions

Makita
Makita GA036G instruction manual

Ingersoll-Rand
Ingersoll-Rand TX180RH63 Product information

Milwaukee
Milwaukee HEAVY DUTY AGV 17-125 XE Original instructions

Team
Team KALORIK TKG PSGR 1010 manual