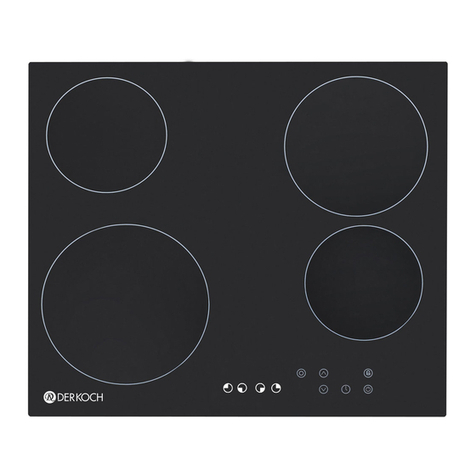
DERKOCH KANDEL Guide

Installation and use manual for induction hobs:
KANDEL y SYKE

2
www.derkochline.com
Contents
Safety instructions......................................................................................................................3
Installing the hob........................................................................................................................5
Kandel - Installation....................................................................................................................6
Syke- Installation........................................................................................................................8
Kandel- Description of the appliance........................................................................................11
Syke- Description of the appliance...........................................................................................15
Fault code.................................................................................................................................17
Pots and pans and how to use them ........................................................................................18
Safety reminding ......................................................................................................................18
Maintenance and cleaning .......................................................................................................20
Troubleshooting........................................................................................................................21
Environmental note ..................................................................................................................22
Warranty Certificate..................................................................................................................23
NOTE: This User Instruction Manual contains important information,
including safety & installation points, which will enable you to get
the most out of your appliance. Please keep it in a safe place so that
it is easily available for future reference; for you or any person not
familiar with the operation of the appliance.

3
www.derkochline.com
Safety instructions
Important
This appliance generates magnetic field in the direct vicinity.
ATTENTION: People with PACEMAKERS must ensure that their pacemaker has been
designed in conformity with the norms in force. It is recommended that the manufacture or your
doctor is consulted to verify any incompatibility.
Important
This appliance generates short range magnetic field therefore people with
other types of electrical medical equipment, such as hearing aids for the deaf,
must ensure they confirm to the norms regarding electromagnetic
disturbances.
•This appliance has been designed for family use only. In case of doubts or questions,
please contact the manufacturer.
•Keep the packing material away from children (plastic bags, parts in foamed plastic, etc.)
they could be potentially dangerous.
•To prevent electrical shocks, contact the technical service centre for any repairs.
•Make sure that installation and electrical connections are carried out by qualified
personnel, following the manufacturer’s instructions and in conformity with local norms in
force.
•The hob must be installed and grounded by qualified personnel. Do not repair or replace
any part of the appliance unless specifically recommended in this manual. All other
interventions must be carried out by qualified technicians.
•This hob comes with a cooling fan with air vent underneath the worktop itself. If there is a
drawer under the worktop, do not put any paper or small light objects in it as they could be
sucked up by the fan, damaging it or compromising its function.
•Do not use aluminium foil to protect parts of the hob.
•Do not leave the kitchen unattended when cooking foods where high contents of oil or fat
are used, the oil could catch fire. If the oil catches fire never put out with water.
Immediately suffocate the fire with a lid and turn off the hob.
•Do not cook on the hob if the glass is broken. Water or cleaning products could filter
through the breakage and cause electrical shocks. Immediately contact qualified personnel
as soon as you notice a breakage.
•Keep the area around the hob free from combustible material (plastic, paper etc.) or
flammable liquids, these can catch fire, metal parts can heat up and cause burns.
•Children must not be along in the kitchen when the hob is in use.
•After use, when the cooking element or entire hob is turned off, a residual heat indicator
will come on, showing an H (hot) for each cooking area that was used: this indicates that
the corresponding cooking area is still dangerous.

4
www.derkochline.com
•If the supply cord is damaged, it must be replaced by the manufacturer, its service agent or
similarly qualified persons in order to avoid a hazard.
•WARNING: If the surface is cracked, switch off the appliance to avoid the possibility of
electric shock.
•A steam cleaner is not to be used.
•Metallic objects such as knives, forks, spoons and lids should not be placed on the hob
surface since they can get hot.
•The appliance is not intended to be operated by means of an external timer or separate
remote-control system.
•Danger of fire: Do not store items on the cooking surfaces.
•CAUTION: The cooking process has to be supervised. A short term cooking process has
to be supervised continuously.
•WARNING: Use only hob guards designed by the manufacturer of the cooking appliance
or indicated by the manufacturer of the appliance in the instructions for use as suitable or
hob guards incorporated in the appliance. The use of inappropriate guards can cause
accidents.
•This appliance can be used by children aged from 8 years and above and persons with
reduced physical, sensory or mental capabilities or lack of experience and knowledge if
they have been given supervision or instruction concerning use of the appliance in a safe
way and understand the hazards involved. Children shall not play with the appliance.
Cleaning and user maintenance shall not be made by children without supervision.
•This appliance is not intended for use by persons (including children) with reduced
physical, sensory or mental capabilities, or lack of experience and knowledge, unless they
have been given supervision or instruction concerning use of the appliance by a person
responsible for their safety.
•Means for disconnection must be incorporated in the fixed wiring in accordance withthe
wiring rules.
•WARNING: The appliance and its accessible parts become hot during use.
•Care should be taken to avoid touching heating elements.
•Children less than 8 years of age shall be kept away unless continuously supervised.
After use, turn off the hob using the command device and do not rely on the pan detector.
Important
The heating elements do not work if the pan has a diameter that is too small or
not magnetically detectable.To verify that the material of the pan is
suitable,thatisferrous, use a magnet.To prevent damage to the electronic circuit,
the hob has a sensor that constantly controls the temperature of the circuit itself:
in the case of overheating the hob automatically reduces power or turns itself off
until a safe temperature is reached.

5
www.derkochline.com
Installing the hob
WARNING
Risk of cutting.
Be careful of cutting edges.
End parts in foamed plastic - be careful.
During transportation these could cause slight injury or cuts.
Remove the material and envelope of documents from the packaging.
Before proceeding with installation read the work instructions carefully.
Step.1
Put a towel or cloth on the work surface. Place the hob face
down on the protected surface.
Step.2
Apply the strip seal, supplied with the hob, which is for sealing it
onto the work surface.
Do not use silicone. Apply the seal to the edge of the bottom of the
hob,leaving about 3mm from the edge of the glass.
Apply the seal all around the circumference.
Cut any excess and bring the two ends of the seal together so
they match.
Step.3
Fix the brackets on the front side and rear side by screw.Put the induction hob in the cut-out
cabinet.
Attention:
•The electric hob is recommended to be installed by professional. Please never conduct the
operation by yourself.
•The wall and the heating area above the table surface shall withstand heat.
•To avoid danger, the hob must be installed into the cabinet before use.
•Applicable cabinet material: wood, marble resin etc.

6
www.derkochline.com
Power Cable Connection
Kandel - Installation
Preparing the unit for a built-in appliance
1. Drill a hole on the table surface according to the size shown in the drawing. For the
purpose of the installation and use, a minimum of 50mm space shall be preserved around
the hole.
Be sure the thickness of the table surface should be at least 30mm.please select heat-
resistant table material to avoid larger deformation caused by the heat radiation from the
cooker, as shown,
2. ATTENTION: important assembly instructions for keeping the induction module cold.
3. Do not install the hob on top of a refrigerator or dishwasher.If the hob is installed on top of a
drawer put a shelf in between as shown (50mm). If shelves are put in between ensure that
they allow air to flow (30mm).

7
www.derkochline.com
WARNING
•The kitchen units that are in direct contact with the appliances must be heat-proof
(min. 95°).
•The appliance can be installed on a work surface with a thickness of between 30 and 40
mm and near to walls which are higher than the work surface,maintaining a minimum
distance of 100 mm.
•Carry out all cutting of the unit and work surface then carefully remove shavings or
sawdust before inserting the appliances.
•To ensure a correct ventilation of the hob please comply with the dimensions shows in
figures .
•Always refer to the manufacturer for specific instructions.
•Make sure the surface is level and square and that no part interferes with the space
required for installation.
•Prepare the cut as indicated (see installation dimensions).

8
www.derkochline.com
Syke- Installation
Preparing the unit for a built-in appliance
1. Drill a hole on the table surface according to the size shown in the drawing. For the
purpose of the installation and use, a minimum of 50mm space shall be preserved
around the hole.
Be sure the thickness of the table surface should be at least 30mm please select heat-
resistant table material to avoid larger deformation caused by the heat radiation from
the cooker.

9
www.derkochline.com
2. Owing to the high temperature inside the induction cooker, make sure good ventilation
is provided to assure its normal operation, as shown:
3. ATTENTION: important assembly instructions for keeping the induction module cold.
4. Do not install the hob on top of a refrigerator or dishwasher.If the hob is installed on top
of a drawer put a shelf in between as shown(50mm).If shelves are put in between
ensure that they allow air to flow(30mm).
WARNING
•The kitchen units that are in direct contact with the appliances must be heat-proof (min.
80°C).
•The appliance can be installed on a work surface with a thickness of between 30 and 40
mm and near to walls which are higher than the work surface, maintaining a minimum
distance of 100 mm.

10
www.derkochline.com
•Carry out all cutting of the unit and work surface then carefully remove shavings or
sawdust before inserting the appliances.
•To ensure a correct ventilation of the hob please comply with the dimensions shows in
figures .
•Always refer to the manufacturer for specific instructions.
•Make sure the surface is level and square and that no part interferes with the space
required for installation.
•Prepare the cut as indicated(see installation dimensions).

11
www.derkochline.com
Kandel- Description of the appliance
Control Panel
Schematic diagram of the control panel
Instruction
1
ON/OFF: Turn on or turn off the machine.
2
CHILD LOCK: Press the button one time,it is lock.Other button can't operation
when it is lock. Long press the button, it is unlock.
3
UP: Increase the power level or add the time.
4
DOWN: Reduce the power level or reduce the time.

12
www.derkochline.com
5
Display: It shows power level and error code.
6
Display: It shows time.
7
The left above burner choose.
8
The right above burner choose.
9
The left bottomburner choose.
10
The right bottom burner choose.
11
Timer: Setting the time as you need.
12
Booster function
13
Keep warm function
Display instructions of the LED light and digital tube
1) Display rule of the LED light.
A. Switch indicator light: Flash display in standby state, long lit display in other states.
B. Function indicator light: When it does not work, the corresponding indicator does not
turn on, and when it starts to work, it will always be displayed.
2) Display rule of the digital tube
A: In normal operation:
One digit digital tube: display the power level of each hob top.
Two digit digital tube: display the timing time of each hob top.
B: When failure occurs, one digit digital tube displays fault code (two digits display) (flash
display); The two digit digital tube is not displayed.
Operation
Operate and display requirement
(1) Standby status:
Plug in and connected to the electrical supply, the buzzer long “beep”a sound, all indicator
lights and all characters on the digital tube are lit for 1S, then the on / off indicator lights
flash, and the child lock indicator lights keep bright to indicate that the induction cooker is in
standby condition.

13
www.derkochline.com
(2) Power on status:
"on / off" buttonused for switching on and off the induction cooker.
A. Under standby state, press child lock, first unlock, then press "on/off" button, power
indicator light always on, child lock indicator light does not show, one digit digital tube
display "-", 20s without any operation, return to standby state. (10s no operation, Child
lock indicator light keep bright, automatically lock.)
B. Under working status, press "on/off" button to return to power on state, 20s no operation
back to standby state.
(3) Work status:
A. Choosing the cooking zone: Under power on state, press the cooking zone select button,
enter to select the cooking zone, the default power level 5, digital tube display "5" and
flash display. (If it is under standby state, it must be turned on first, then enter to select
the cooking zone, and then make appropriate operation.
B. Power level adjustment:
After select the cooking zone, when digital tube flash display the power level, press the
+/- button to adjust the power level. Each press of the“+”button, the power level
increased by one unit; each press of the “-” button, the power level reduced by one unit;
Power level:0,1,2,3,4,5,6,7,8,9.
Max power level:9, Min power level:1, 0 level close the power output.
In the working process, various faults are detected, and if occurs, the appliance will
enter into fault alarm processing state.
(4) The booster function:
To start up booster function,directly press P key,booster function indicator light will keep
bright.
A. The booster function can not timing, the booster function is available at each cooking
zone at any power level while directly pressing P key, but you must select a cooking
zone first.
B. The booster function will run for a maximum of 5 minutes, after 5mins, the power level
will return to what was set previously, and the corresponding indicator light of booster
function will be off.
C. All of the 4 cooking zones can be set for booster at the same time, but total power can
not be over 6000W.
D. If power level and timing are set for a cooking zone, after enter booster function, the set
timing will not be available any more. When booster function operation is end, the power
level will return to what was set previously, the working time will return to the default
working time for that power level.

14
www.derkochline.com
(5) The keep warm function:
To start up keep warm function, directly press L key, keep warm function indicator light will
keep bright.
A. The keep warm function can not timing, the keep warm function is available at each
cooking zone at any power level while directly pressing L key, but you must select a
cooking zone first.
B. All of the 4 cooking zones can be set for keep warm at the same time.
C. If power level and timing are set for a cooking zone, after enter keep warm function,
the set timing will not be available any more, and the appliance will work according
to the keep warm function time till the end.
The keep warm function can be set for 4 power levels by default, the on/off time depending
on temperature. It needs to maintain cooking surface sensor detected temperature to be
70±5℃.
(6) Timer Control:
Under working condition, press cooking zone select button, when digital tube flash, press
"timing" button to set the timer. Digital tube display the timing and flash, press the +/- button
to set the timer.
Each press of the“+”button, the timer increased by one unit; long press “+”button, the timer
is incremented in minute.
Each press of the “-” button, the timer reduced by one unit; long press “-”button, the timer is
descended in minute.
Max time: 99 minutes, min time:1 minute.
Adjustable time range: 0-99 minutes recyclable.
The first time a timer is set, the default timing starts at "00".
Display: After setting the timing time, if there is no operation in 5S, the timing takes effect,
the timer of each cooking zone is alternately displayed 5S, when the cooking zone is
displayed, the point in the lower right corner of “8”will be displayed.
(7) Child Lock:
Standby state: child lock indicator light long lit, you must long press the child lock button to
unlock before entering the standby state.
Power on state or working state: The child lock indicator light is not on, but no operation in
10Swill automatically locked, the child lock indicator light is always on.
Unlock: long press the child lock button.
(8) Fan delay:
After shutdown, if the cooking surface temperature is above 50 ℃, fan will be delay 5
minutes off. If the cooking surface temperature is below 50 ℃, the fan will be shut down
immediately.

15
www.derkochline.com
Syke- Description of the appliance
Control Panel
Schematic diagram of the control panel
Instruction
1
ON/OFF: Turn on or turn off the machine.
2
CHILD LOCK : Press the button one time,it is lock. Other button can't operation
when it is lock. Long press the button, it is unlock.
3
UP: Increase the power level or add the time.
4
DOWN: Reduce the power level or reduce the time.
5
Display: It shows power level and error code.
6
Display: It shows time.
7
The above burner choose.
8
The bottom burner choose.
9
Timer: Setting the time as you need.

16
www.derkochline.com
Operation
When the hob is plugged, the hob is ready for cooking but it is locked as “child-lock” status.
(1) To unlock the hob, press the child lock icon.
(2) Press on/off button to operate the hob.
(3) Press the +/- button to select the power level.
(4) To turn off the hob, Press on/off button.
Power level 9 is the greatest power level. Power level 1 is the lowest power level.
For convenience , the hob is off automatically as per the below table.
Power Level
Time Limit (Hours)
P
5min
9
2
8
2
7
2
6
4
5
4
4
4
3
8
2
8
1
8
Timer Control
There is a timer to control the operation of the hob.
Press the timer button. (If it is unsder standby state, it must be turned on first, then enter to
select the cooking zone, and then make appropriate operation.
(1) Press the +/- button to select the time (1 –99 mins).
Whe the timber time is up, press the timer button to stop the alarm.
Timer/ Power Level Display
The display shows the power level or timer status.
If the display shows the single digit “X”, this is the power level.
If the display shows two digit “XX”, this is the timer status.
Child Lock
Press the child lock button to lock the hob. The red light of the child lock is on.The hob is
locked except the on/off button.
To unlock the child lock, press the child lock button.

17
www.derkochline.com
Fault code
Fault
Code
Possible Cause
Description
E0
No pan or pot,or their
size,material,etc. is not
suitable, or not placed
precisely in the middle of
the cooking area.
If no suitable pan or pot is placed on after
60s, the hob will turn off automatically; if
suitable pan or pot is placed within 60s, the
hob will start to work.
E1
Voltage is too low.
Lower than AC 160V.
E2
Voltage is too high.
Higher than AC 270V.
E3
IGBT overheat.
IGBT reaches 105±5℃for 3s (It can recover
automatically when temperature decrease
50℃-70℃).
E4
Hob surface sensor open-
circuit
Power on and judge within 2 minutes.
Hob surface sensor short-
circuit
Power on and judge within 10S.
E5
IGBT sensor open-circuit
Power on and judge within 2 minutes.
IGBT sensor short-circuit
Power on and judge within 10S.
E6
Hob surface overheat.
Hob surface temperature higher than set
value.
E7
Hob surface sersor become
invalid.
E9
Communication failures.
Unplug or poor contact.
Eb
Line fault.
Coil panel is not connected.
H
Hob surface is of high
temperature.
After the hob is off,if the hob surface
temperature is too high,it will display "H",and
the fan will delay working for 5 minutes.

18
www.derkochline.com
Pots and pans and how to use them
Attention
•The pots and pans that can be used on this hob must be made of ferromagnetic material.
They can be made of enameied steel, cast iron or special pans of stainless steel for
induction. The diameter of the pan should be at least 11cm.
•To make sure a pan is suitable, try using a magnet to see if it sticks to the bottom of the
pan. Never use normal thin steel nor anything containing even just an amount of glass,
terracotta, copper or aluminium.
•The display of the cooking area will show if the pan is suitable, if the power indicator
flashes the pan is not suitable or the diameter of the bottom is too small for the diameter of
the cooking area.
•The pots and pans must be placed precisely in the middle of the cooking area.
•In some cooking areas an internal diameter is indicated,with a lighter outline,which advises
the user to go to a smaller cooking area,if available,with smaller diameter pan.This is to
obtain optimal performance and efficiency. You can however use pans with smaller
diameters than this limit.
Safety reminding
A dedicated power protection Never use the hob in high Never wash the hob with water
air switch must be incorporeted temperature environment. derectly. Steam cleaner is
in the fixed wiring in accordance not to be used.
with the wiring rules.

19
www.derkochline.com
Never have the hob to work For sealed foods such as The appliance is not
without food in pot, otherwise canned goods, please do not intended to be used by
its operational performance heat them before opening children or handicapped
may be affected and danger their covers so as to avoid persons, unless they have
may happen. any dangers of explosion due been supervised by a
to heating expansion. responsible person to
ensure they can use it
safely.
Do not place rough or If the surface is cracked, pull Do not put any detergents
uneven appliances, which out the plug to avoid the or flammable materials in
may damage the ceramic possibility of electric shock. the equipment installed
surface. under the hob.
Because the hob can After being used,the If the supply is damaged, it
generate very high corresponding heating must be replaced by the
temperature, please use a zone of the hob is still hot. manufacturer, its service
pot resistant to a temperature Never touch the hob surface agent or similarly qualified
of over 200. to avoid burn. persons in order to avoid a
hazard.

20
www.derkochline.com
Maintenance and cleaning
1.Please shut off the power and pull out the plug before cleaning of the appliance.
2.Clean the appliance until it cools down completely.
3.To remove dirt, please select illustrious detergent.
4.After removing dirt, please use neat wet cloth to clean the unit.
5.Do not clean by water directly, water gets inside may cause malfunction.
6.Keep the crystal glass plate and pan clean before cook, otherwise dirt after charring is very
difficult to clean and the plate may get discoloration.
7.You may clean air vent / air entry’s dirt using vacuum cleaner to suck up. If there is dirt with
oil, add a little illustrious detergent with tooth-brush to clean.
8.Don’t use caustic impregnates to clean. It may damage the cooker by chemical reaction. Do
not use scrubbing brush or polishing powder to clean the induction cooker.
Important
•Periodically check that dust does not deposit under the fan or in the discharge openings,
this could obstruct ventilation for cooling the electronic system, reducing the efficiency of
your hob.
•The hob could be damaged if hard and sharp edged objects fall on it, it is recommended
that such objects be kept away from the hob where they cannot fall on it.
•Do not put hot pans on the control area or on the edge of the hob, do not use pans with a
raised design or pattern on the base, they could scratch the hob.
Cleaning techniques
•Attention:When chemical products heat up they can
corrode and damage the glass, moreover the fumes can
be dangerous for your health.
•Clean the surface when it is completely cold except for
the following: dried sugar, syrupy sugar, tomato sauce,
milk, these must be removed immediately with the
scraper.
Cleaning after each use:
Dry any splashes with a damp sponge or paper towel, rinse
and dry. If any stains remain, use some vinegar, rinse and
dry.
Cleaning with cream detergents for glass hobs:
Apply a small amount of cream detergent for hobs,
when dry, shine the surface with a soft cloth or paper.
This manual suits for next models
1
Table of contents
Other DERKOCH Hob manuals
Popular Hob manuals by other brands
Exquisit
Exquisit EKI901-2 Installation and user instructions
Miele
Miele KM 5673 OPERATING AND INSTALLATION Manual
Bartscher
Bartscher 1K1500 manual

CDA
CDA HN6112FR Installation, use and maintenance manual
SCHOLTES
SCHOLTES TI 6533/HA operating instructions

Zanussi
Zanussi Domino ZBX 624 SS User instructions

Hotpoint Ariston
Hotpoint Ariston PCN 642 /HA(WH) WE operating instructions

Miele
Miele SmartLine CS 7632 Operating and installation instructions

Brandt
Brandt TI200 Operating and installation guide
CORBERO
CORBERO KNG-PF320SGB Installation and user instructions

Prima
Prima LPR955 operating instructions

Tramontina
Tramontina 81500/102 Use & care instructions
