Exquisit EKI901-2 Guide

Gebruiksaanwijzing
EKI901-2
Inbouw inductiekookplaat
EKI901-2Versie NL 10/2019 Pagina 1 van 10

Lees de gebruiksaanwijzing zorgvuldig door voordat u uw nieuwe kookplaat in gebruik neemt.
Veiligheidsvoorschriften
Uw veiligheid is belangrijk voor ons. Lees deze informatie alstublieft goed door voordat u uw inductie kookplaat in
gebruik neemt.
Installatie
Gevaar voor elektrische schok
• Koppel de kookplaat af van het lichtnet voordat u eraan begint te werken of met onderhoud begint.
• Het is essentieel en verplicht om de kookplaat op een degelijk randaarde systeem aan te sluiten.
•Aanpassingen aan de elektrische bedrading van uw huis mogen alleen worden uitgevoerd door een gekwalificeerde elektricien.
• Het niet opvolgen van deze adviezen kan resulteren in een elektrische schok en kan dodelijk zijn.
Gevaar voor snijwonden
• Let op - de randen van de glasplaat zijn scherp.
• Als u niet voorzichtig bent kunt u letsel of snijwonden oplopen.
Belangrijke veiligheidsinstructies
• Lees deze instructies goed door voordat u dit apparaat installeert of gebruikt.
• Plaats nooit brandbare materialen of producten op de kookplaat.
• Overhandig deze informatie aan de persoon die verantwoordelijk is voor de installatie van dit apparaat.
• Om gevaarlijke situaties te voorkomen dient dit apparaat geïnstalleerd te worden zoals in deze instructies staat omschreven.
• Dit apparaat dient correct geïnstalleerd en geaard te worden door een hiervoor gekwalificeerde persoon.
• Dit apparaat dient op het lichtnet te worden aangesloten via een geïsoleerde schakelaar die de stroom volledig kan
onderbreken.
• Het niet correct installeren van dit apparaat kan garanties en aansprakelijkheidsclaims ongeldig maken.
Gebruik en onderhoud
Gevaar voor elektrische schok
• Kook niet op een kookplaat die gebroken of gebarsten is (gevaar voor elektrische schok). Mocht de kookplaat breken of barsten,
schakel de kookplaat dan onmiddellijk uit (via de wandschakelaar) en neem contact op met een erkende monteur.
• Schakel de kookplaat uit via de wandschakelaar voordat u met schoonmaken of het onderhoud begint.
• Het niet opvolgen van deze adviezen kan resulteren in een elektrische schok en kan dodelijk zijn.
Gevaar voor de gezondheid
• Dit apparaat voldoet aan de elektromagnetische veiligheidsnormen.
• Personen met een pacemaker of andere elektrische implantaten (bijvoorbeeld een insulinepomp) dienen echter hun dokter of de
de kookplaat is afgekoeld.
• Metalen voorwerpen zoals messen, vorken, lepels en deksels nooit op de kookplaat leggen aangezien ze heet kunnen worden.
• Houd kinderen uit de buurt.
• Handvatten van steelpannen kunnen heet worden. Let op dat handvatten niet boven andere kookzones hangen die aan zijn.
Houd handvatten uit de buurt van kinderen.
• Het niet opvolgen van deze adviezen kan resulteren in ernstige brandwonden.
fabrikant van hun implantaat te raadplegen om er zeker van te zijn dat hun implantaten niet door het elektromagnetisch veld
worden beïnvloed.
• Het niet opvolgen van deze adviezen kan dodelijk zijn.
Gevaar voor verbranding aan een heet oppervlak
• Tijdens het gebruik worden alle toegankelijke onderdelen van dit apparaat heet genoeg om brandwonden te veroorzaken.
• Raak de inductiekookplaat niet aan met uw lichaamsdelen, kleding of elk ander voorwerp wat geen geschikt kookgerei is totdat
EKI901-2Versie NL 10/2019 Pagina 2 van 10
WERKMODUS VERMOGENSBEGRENZING:
De twee linker verwarmingszones kunnen op de volledige vermogensstand werken. Als de
rechter twee en de middelste verwarmingszones gelijktijdig worden gebruikt met meer dan
3600W, kan de schuif niet verder worden verhoogd.
Gefeliciteerd met de aanschaf van uw nieuwe inductiekookplaat.
We raden u aan enige tijd te besteden aan het lezen van deze instructie-/installatiehandleiding om volledig te begrijpen
hoe u deze correct installeert en bedient.
Lees voor installatie hetinstallatiegedeelte.
Lees alle veiligheidsvoorschriften zorgvuldig door voor gebruik en bewaar deze instructie/installatiehandleiding voor
toekomstig gebruik.
INSTALLATIE EN GEBRUIKSRICHTLIJNEN
Model: EKI901-2
INDUCTIEKOOKPLAAT
Gevaar voor snijwonden
• Het vlijmscherpe blad van een kookplaat schraper wordt blootgesteld wanneer de beschermkap er af is. Wees hier
erg voorzichtig mee en berg het veilig op buiten het bereik van kinderen.
• Als u niet voorzichtig bent kunt u letsel of snijwonden oplopen.

AC220-240V
50/60Hz 860x520x62 830x490
1500W
(boost 1800W)
1800W
(boost 2200W) (boost 1500W)
1200W
EKI901-2
Belangrijke veiligheidsinstructies
•
MP3-speler in de buurt van de kookplaat, omdat deze beïnvloed kunnen worden door het elektromagnetische veld van de
kookplaat.
• Gebruik uw kookplaat nooit om de keuken of het huis op te warmen.
• Zet na gebruik de kookzones en de gehele kookplaat uit zoals in deze handleiding staat omschreven (door gebruik van de
kookplaat neemt.
• Laat kinderen niet met de kookplaat spelen, erop zitten, staan of klimmen.
• Berg geen zaken waar kinderen bij willen kunnen op in de keukenkastjes boven de kookplaat. Kinderen die op de kookplaat
klimmen kunnen zich ernstig bezeren.
• Laat kinderen niet zonder toezicht achter in de ruimte waar de kookplaat in gebruik is.
• Kinderen en personen met een handicap die dit apparaat niet goed kunnen gebruiken dienen uitleg en hulp te krijgen van een
LET OP: Het kristallietglas is na gebruik nog steeds heet, niet aanraken!
TECHNISCHE GEGEVENS
bedieningstoetsen). Vertrouw niet blindelings op de pan detectiefunctie die de kookzones uitzet nadat u de pannen van de
Laat dit apparaat nooit onbeheerd achter wanneer het in gebruik is. Als er iets overkookt veroorzaakt dit rook en als iets
vettigs overkookt kan het vlam vatten.
• Gebruik uw kookplaat nooit als werkblad of opbergplaats.
• Laat geen voorwerpen of keukengerei op de kookplaat liggen.
• Leg geen magnetiseerbare voorwerpen zoals een creditcard of USB-stick, of elektronische apparaten zoals een laptop of
geestelijke vermogens of gebrek aan ervaring en kennis als ze onder toezicht staan of worden geïnstrueerd over een veilig
•WAARSCHUWING: gebruik alleen kookplaatbeschermers die door de fabrikant zijn geleverd of geschikt worden geacht voor
gebruik met deze inductiekookplaat. Het gebruik van ongeschikte kookplaatbeschermers kan ongelukken veroorzaken.
•Dit apparaat bevat alleen een aardaansluiting voor functionele doeleinden.
Type Stroom-
voorziening
Vermogen
Verwarmings-
gebied(210mm)
Verwarmings-
gebied(180mm)
Verwarmings-
gebied(140mm)
Afmeting
(mm)
Grootte
inbouwgat
(mm)
EKI901-2Versie NL 10/2019 Pagina 3 van 10
deze uw glasplaat kunnen bekrassen.
•Dit apparaat is bedoeld voor gebruik in huishoudelijke of vergelijkbare omgevingen, zoals keukenruimtes voor personeel in
winkels, kantoren en andere woonomgevingen.
• Als de stroomkabel is beschadigd mag deze alleen worden vervangen door de fabrikant, de dealer of overeenkomstig
gekwalificeerde personen om een gevaarlijke situatie te voorkomen.
•WAARSCHUWING: het apparaat en toegankelijke delen worden heet tijdens gebruik. Zorg ervoor om geen
verwarmingselementen aan te raken.
• Kinderen jonger dan 8 jaar uit de buurt houden van het apparaat, tenzij ze continue onder toezicht zijn.
• Dit apparaat kan worden gebruikt door kinderen van 8 jaar en ouder en personen met verminderde lichamelijke, zintuiglijke of
•WAARSCHUWING: zonder toezicht koken op een kookplaat met vet of olie kan gevaarlijk zijn en kan leiden tot een mogelijke
brand. NOOIT proberen een brand met water te blussen, maar het apparaat uitschakelen en vervolgens de vlam afdekken met
bijvoorbeeld een deksel of een blusdeken.
•WAARSCHUWING: brandgevaar: bewaar geen voorwerpen op het kookoppervlak, omdat dit brandgevaar oplevert.
verantwoordelijke en bekwame persoon. De instructeur moet ervan overtuigd zijn dat ze dit apparaat kunnen gebruiken
zonder gevaar voor hunzelf of hun omgeving.
• Ga niet aan de slag met het repareren of vervangen van onderdelen van dit apparaat, tenzij dit uitdrukkelijk in deze
handleiding wordt beschreven. Al het andere onderhoud moet door een gekwalificeerde monteur worden gedaan.
• Gebruik geen stoomreiniger om uw kookplaat schoon te maken.
• Laat geen zware voorwerpen op uw kookplaat vallen en zet geen zware voorwerpen op uw kookplaat neer.
• Ga niet op uw kookplaat staan.
• Gebruik geen pannen met een ruwe of gekartelde rand of bodem en schuif geen pannen heen en weer over de kookplaat,
aangezien dit krassen op de glasplaat kan veroorzaken.
• Gebruik geen schuursponsjes, schuurpoeder of schurende schoonmaakmiddelen om uw kookplaat schoon te maken, omdat
gebruik van het apparaat en de mogelijke gevaren begrijpen.
•WAARSCHUWING: als het oppervlak barst, moet u het apparaat uitschakelen om een elektrische schok te voorkomen.
•Het is niet de bedoeling dat het apparaat wordt bediend door middel van een externe timer of een aparte afstandsbediening.
•LET OP: Het kookproces dient onder toezicht te zijn. Een kort kookproces dient continue onder toezicht te zijn.
•WAARSCHUWING:
om te voorkomen dat het apparaat kantelt, moet het vóór de installatie worden gestabiliseerd.
Raadpleeg de installatie-instructies.

1500W
(boost 1800W)
1500W
(boost 1800W)
1800W (boost 2200W)
(boost 1500W)
1200W
(boost 1500W)
1200W
2
7
56 3
1
4
PRODUCTOVERZICHT
Bovenaanzicht
Bedieningspaneel
1. Keuzetoetsen verwarmingszone
2. Regeltoets voor voeding/timer
3. Kinderslot/vergrendelingstoets
4. AAN/UIT-toets
5. Timer toets
6. Boost toets
7.Schuifregelaar
Voor gebruik van uw nieuwe inductie kookplaat
• Lees deze handleiding goed door en besteed extra aandacht aan het
hoofdstuk "Veiligheidsvoorschriften".
• Verwijder alle beschermfolie die nog op de kookplaat kan zitten.
Het kiezen van het juiste kookgerei
• Gebruik alleen kookgerei met een bodem die geschikt is voor inductie koken. Let op het inductiesymbool op de verpakking of
op de bodem van de pan.
• U kunt met een magneet controleren of uw kookgerei geschikt is voor inductiekoken. Beweeg een magneet
Gebruik van de tiptoetsen
• De bedieningstoetsen zijn aanrakingsgevoelig; u hoeft dus geen druk uit te oefenen.
• Gebruik de bal van uw vinger, niet het topje van uw vinger.
• U hoort een piep voor elke keer dat er een aanraking wordt waargenomen.
• Zorg ervoor dat de toetsen altijd schoon en droog zijn en dat er geen voorwerpen (bijvoorbeeld een gebruiksvoorwerp of een
doekje) op ligt. Zelfs een dun laagje water maken de tiptoetsen moeilijk te bedienen.
bodem, glas, hout, porselein, keramiek en aardewerk.
Gebruik geen pannen met scherpe randen of met een bolle bodem.
De bodem van uw pan dient glad te zijn, vlak op het glas te staan en dezelfde afmeting te hebben als de kookzone. Met een pan die
net iets breder is dan de geselecteerde zone haalt u een maximaal rendement uit de gebruikte energie. Een pan die iets kleiner is
dan de gekozen kookzone is minder efficiënt dan kan worden verwacht. Een pan waarvan de bodem een doorsnede van minder dan
14 cm heeft kan mogelijk niet worden gedetecteerd als u het op de grotere kookzone plaatst. Zet uw pan altijd in het midden van de
kookzone.
Til pannen altijd van de inductie kookplaat af. Glijden kan krassen op de glasplaat veroorzaken.
Goed Fout Fout Fout Fout Fout Fout
(verdiepte bodem) (bolle bodem) (te klein) (te groot) (vocht op de kookplaat) (geen
gebruiksvoorwerp)
Beginnen met koken
1. Raak de AAN/UIT-toets aan.
Na het inschakelen piept de zoemer eenmaal, bij alle keuzetoetsen van de kookzone verschijnt "-" of "- -",
richting de bodem van de pan. Als een magneet wordt aangetrokken door de onderkant van uw pan is deze geschikt voor
EKI901-2Versie NL 10/2019 Pagina 4 van 10
wat aangeeft dat de inductiekookplaat de stand-by modus heeft geactiveerd.
2. Plaats een geschikte pan op de kookzone die u wenst te gebruiken.
• Zorg dat de bodem van de pan en het oppervlak van de kookzone schoon en droog zijn.
3. Raak de keuzeknop voor de verwarmingszones aan en de indicator naast de toets gaat knipperen.
4. Selecteer een kookstand door de "-" of "+" bediening aan te raken.
• Als u binnen 1 minuut geen kookstand kiest, schakelt de inductiekookplaat zich automatisch uit. U moet
opnieuw beginnen bij stap 1.
• U kunt de keuzetoets van de verwarmingszone opnieuw aanraken en de kookstand op elk gewenst
moment tijdens het koken wijzigen.
inductie koken.
• Als u geen magneet (bij de hand) heeft:
1. Doe wat water in de pan die u wilt testen.
2. Als " " niet knippert op de display en het water warmt op, is de pan geschikt.
• Kookgerei gemaakt van de volgende materialen zijn niet geschikt: zuiver roestvrijstaal, aluminium of koper zonder magnetische

6
H
0
or
6
30
--
36
6.
00
1
8
2
8
3
8
4
4
5
4
6
4
7
2
8
2
9
2
Kookstand
Auto-off timer (in uren)
Gebruik van de timer
• U kunt het instellen om één kookzone uit te schakelen nadat de ingestelde tijd voorbij is.
• U kunt de timer instellen tot maximaal 99 minuten.
Eerder aangezette andere kookzones blijven gewoon actief.
Bediening vergrendelen
• U kunt de bediening vergrendelen om onbedoeld gebruik te voorkomen (bijvoorbeeld door kinderen die per
Als de weergave van de kookzone afwisselend knippert “ ” met de warmte-
instelling betekent dit dat:
• u geen pan op de correcte kookzone heeft geplaatst of,
• de pan die u gebruikt niet geschikt is voor inductie koken of,
• de pan te klein is of niet goed gecentreerd op de kookzone is geplaatst.
Wanneer u klaar bent met koken
1. Raak de keuzetoets aan van de verwarmingszone die u wilt uitschakelen.
2. Schakel de kookzone uit door naar "0" te scrollen. Zorg ervoor dat het display "0" en vervolgens "H" toont .
3. Schakel het hele kookvlak uit door de AAN/UIT-toets aan te raken.
4. Pas op voor hete oppervlakken, indicator "H" geeft aan welke kookzone te heet is om aan te raken. Het
zal verdwijnen als het oppervlak is afgekoeld tot een veilige temperatuur. Het kan ook worden gebruikt als
energiebesparingsfunctie - als u nog meer pannen wilt verwarmen, gebruik dan de nog warme kookplaat.
De timer instellen om één kookzone uit te schakelen
1. Aanraken van de keuzetoets voor de verwarmingszone waarvoor u de timer wilt instellen.
2. Raak timerbesturing aan, de kookwekkerindicator zal beginnen te knipperen en "30" zal in de timerweergave
verschijnen.
3. Stel de tijd in door de "-" of "+" toetsen aan te raken. Tip: Raak de "-" of "+" knop van de timer
Er vindt geen verhitting plaats tenzij er een geschikte pan op de kookzone is geplaatst.
Het bedieningspaneel gaat na 1 minuut automatisch uit als er geen geschikte pan op de
kookzone staat.
Schuifregelaar kan alleen het vermogensniveau aanpassen, kan de timerfunctie niet aanpassen!
eenmaal aan om te verminderen of te verhogen met 1 minuut. Door de "-" of "+" toets van de timer aan te raken en
vast te houden zal de tijd met 10 minuten afnemen of toenemen.
4. Door de "-" aan te raken, om de uitstaande tijd tot nul te reduceren, of door op de "timerbesturing" te drukken,
6. Als de kooktijd afloopt, zal de overeenkomstige kookzone automatisch worden uitgeschakeld.
wanneer de "00" in het minutenscherm verschijnt, wordt de timer geannuleerd.
5. Wanneer de tijd is ingesteld begint de timer meteen met aftellen. Het scherm toont de resterende tijd en de
timerindicator knippert gedurende 5 seconden.
OPMERKING: De rode stip naast de indicator van de warmte-instelling gaat branden om aan te geven dat de zone
is geselecteerd.
OPMERKING: schuifregelaar kan niet worden gebruikt voor de timeraanpassing.
OPMERKING: Timerweergave toont de kortste ingestelde tijd van de geselecteerde zones, en die kookzone met
de kortste ingestelde tijd zal zijn waar de rode stip knippert.
EKI901-2Versie NL 10/2019 Pagina 5 van 10
ongeluk een kookzone aanzetten).
• Wanneer de bediening is vergrendeld zijn alle toetsen, behalve de AAN/UIT-toets, uitgeschakeld.
Bediening vergrendelen:
Raak de vergrendeltoets aan. De timer indicator laat “Lo” zien.
Bediening ontgrendelen:
1. Zorg ervoor dat de inductiekookplaat is ingeschakeld.
2. Houd de toetsvergrendeling even ingedrukt.
3. U kunt nu beginnen met het gebruik van uw inductiekookplaat.
Als de kookplaat is vergrendeld, zijn alle bedieningstoetsen uitgeschakeld behalve de AAN/UIT-toets. U kunt
de inductiekookplaat altijd uitschakelen met de AAN/UIT-toets in een noodgeval, maar u moet de kookplaat de
eerstvolgende keer dan wel eerst ontgrendelen.
Oververhittingsbeveiliging
Een aangebrachte temperatuursensor kan de temperatuur in de inductiekookplaat controleren. Wanneer een te hoge
temperatuur wordt waargenomen stopt de inductiekookplaat automatisch.
Detectie van kleine artikelen
Wanneer een ongeschikte maat of niet-magnetische pan (bijv. aluminium) of een ander klein voorwerp (bijv. mes, vork,
sleutel) is achtergelaten op de kookplaat, knippert " " op de display en de kookplaat gaat automatisch in de stand-by
stand binnen 1 minuut. De ventilator laat de inductiekookplaat gedurende 2 minuten verder afkoelen.
Automatische uitschakelbeveiliging
Automatische uitschakeling is een veiligheidsfunctie voor uw inductiekookplaat. Het wordt automatisch uitgeschakeld na
een bepaalde tijdsperiode. De standaard instellingen voor uitschakeltijden bij de verschillende kookstanden
vind u in de tabel hieronder:
Wanneer u de pan van de kookplaat haalt, stopt de kookplaat onmiddellijk met verhitten en schakelt
zichzelf automatisch na 1 minuut uit.
Personen met een pacemaker dienen hun dokter te raadplegen alvorens dit apparaat te gebruiken.
Schuifregelaar
Schakel de inductiekookplaat in, druk op de keuzetoets om de verwarmingszone te selecteren, de indicator naast de toets
knippert gedurende 5 seconden, tijdens deze periode kan het vermogen met de schuifregelaar worden aangepast van
niveau 2 tot 8; schuif de regelaar van links naar rechts en de stappen worden verhoogd, schuif van rechts naar links en de
stappen worden verlaagd.

Schroeven dienen te worden verwijderd
EKI901-2Versie NL 10/2019 Pagina 6 van 10
3-4
5-6
7-8
9
!
diehtkihcseGgnilletsni-etmraW
1-2
Verzorging en onderhoud
1. Alledaagse vettigheid op de glasplaat (vingerafdrukken, vlekken van gemorst eten of niet-suikerhoudende
voedselresten op de glasplaat)
1)Schakel de kookplaat uit;
2)
Gebruik een kookplaatreiniger terwijl de glasplaat nog warm is (naar niet heet!)
3)
Veeg na met schoon water en droog af met keukenrol of een theedoek.
2. Overgekookt eten, gesmolten vloeistoffen of heet overgekookt voedsel wat suikerhoudend is op de glasplaat
3. Gemorst eten op de tiptoetsen
● voorzichtig opwarmen van kleine hoeveelheden eten
● chocolade of boter smelten; eten koken dat gemakkelijk aanbrandt
● laagsudderen ● langzaam opwarmen
● opwarmen ● snel(ler) sudderen ● rijst koken
● pannekoeken
● pasta koken
● roerbakken ● schroeien ● soep aan de kook brengen ● water koken
4. Demontage onderkant
4 grotere schroeven moeten eerst worden verwijderd voordat de onderkant wordt gedemonteerd. (Het
verwijderen van de onderkant moet gebeuren door een professionele persoon. De normale gebruiker mag de
onderkant niet demonteren).
Boost toets
Tijdens het werken met de kookplaat, de toets van de selectie van de verwarmingszone aanraken en vervolgens de
boost-toets aanraken, de zoemer piept eenmaal, "P" verschijnt op het scherm, de kookplaat gaat in de BOOST-functie, het
vermogen wordt verhoogd. De BOOST-functie loopt gedurende 5 minuten, stopt dan automatisch en de kookplaat keert
terug naar de vorige instelling. Door in de BOOST-modus op de "BOOST" toets te drukken, verlaat de kookplaat de
BOOST-functie en keert terug naar de vorige instelling.
Kookrichtlijnen
Pas op bij het bakken omdat olie en vet snel opwarmen, vooral als u de BOOST-functie gebruikt. Bij extreem hoge
temperaturen zullen olie en vet spontaan ontbranden en dit vormt een serieus brandgevaar.
Warmte-instellingen
De onderstaande instellingen zijn alleen richtlijnen. De exacte instelling hangt af van verschillende factoren, waaronder uw
kookgerei en de hoeveelheid die u aan het koken bent. Experimenteer met de inductiekookplaat om de instellingen te vinden
die het beste bij u passen.
4)
Schakel de kookplaat weer aan.
LET OP:
● Wanneer de kookplaat uit is, is er geen 'heet oppervlak' indicator actief, maar de kookzones kunnen nog wel steeds
heet zijn! Wees bijzonder voorzichtig hiermee.
● Sommige metalen en nylon schuursponsjes en schurende schoonmaakmiddelen kunnen krassen op de glasplaat
veroorzaken. Lees de label van uw schuursponsjes en schoonmaakmiddel om te zien of ze geschikt zijn voor deze
glasplaten.
● Zorg dat er geen resten schoonmaakmiddel op de plaat achterblijven. Hierdoor kunnen vlekken op het glas ontstaan.
Verwijder onmiddellijk met een paletmes of een voor de inductiekookplaat geschikte schraper, maar pas op voor hete
kookzones:
1). Schakel de stroom naar het kookveld uit via de isolatieschakelaar.
2). Houd de schraper onder een hoek van 30° en schraap de gemorste waar naar een koele plaats op de kookplaat.
3). Reinig het gemorste voedsel met een vaatdoek of keukenrol.
4). Volg stap 2 en 4 voor 'dagelijkse vervuiling' op het glas (zie hierboven).
LET OP: ● Verwijder vlekken van suikerhoudend overkooksel zo snel mogelijk. Als u het op de glasplaat laat afkoelen kan
het een stuk lastiger zijn om te verwijderen en zelfs permanente schade aan de glasplaat opleveren.
● Gevaar voor snijwonden: na verwijdering van de beschermhoes, het mes van de schraper uiterst voorzichtig
gebruiken en altijd veilig en buiten bereik van kinderen bewaren.
1). Schakel de stroom van de kookplaat uit.
2). Dep de gemorste waar op.
3). Veeg het tiptoetsendeel af met een vochtige spons of doek.
4). Goed afdrogen met keukenrol.
5). Schakel de stroom naar de kookplaat weer in.
LET OP:
De kookplaat kan gaan piepen en vanzelf uitgaan en de tiptoetsen kunnen het niet goed doen of
helemaal niet werken als er vloeistof op ligt. Zorg ervoor dat u het gedeelte met de tiptoetsen helemaal
droog veegt voordat u de kookplaat weer aan zet.

U
E2
E1
F3
F4
E5
E3
F9
FA
EKI901-2Versie NL 10/2019 Pagina 7 van 10
Suggesties en tips
2. De tiptoetsen reageren niet
De toetsen zijn vergrendeld: Ontgrendel de toetsen. Zie hoofdstuk 'Gebruik van uw inductie kookplaat' voor instructies.
6. De inductie kookplaat maakt een laag bromgeluid in een hoge kookstand.
Dit wordt veroorzaakt door de inductie kooktechnologie. Dit is normaal, maar het geluid zou minder moeten worden of
helemaal verdwijnen als u de kookstand lager zet.
7. Er komt een ventilatorgeluid uit de kookplaat
De ingebouwde ventilator is aangeslagen om te zorgen dat de elektronica niet oververhit raakt. De ventilator kan
eventueel nog een tijdje blijven werken nadat u de kookplaat heeft uitgezet. Dit is normaal en u hoeft geen actie te
ondernemen. Zet de kookplaat niet uit met de wandschakelaar als de ventilator nog draait.
8. Pannen worden niet heet en " " verschijnt op het scherm
De inductie kookplaat kan de pan niet detecteren, omdat de pan niet geschikt is voor inductie koken. De inductie
kookplaat kan de pan niet detecteren, omdat de pan te klein is voor de kookzone of omdat de pan niet goed gecentreerd
op de kookzone staat. Gebruik kookgerei wat geschikt is voor inductie koken. Zie hoofdstuk 'Het kiezen van het juiste
kookgerei'. Centreer de pan en zorg dat de bodem van de pan (ongeveer) even groot is als de kookzone.
9. De gehele kookplaat of een van de kookzones heeft zichzelf onverwacht uitgeschakeld, er klinkt een pieptoon en
er verschijnt een foutmelding (doorgaans 1 of 2 afwisselend knipperende getallen in de timer display.
Technische fout. Noteer de cijfers en letters van de foutmelding, zet de kookplaat uit via de wandschakelaar en neem
contact op met een gekwalificeerde monteur.
Foutmelding scherm en inspectie
3. De tiptoetsen werken niet zo goed
Er kan een dun laagje water op de toetsen liggen of u probeert de toetsen met het topje van uw vinger in plaats van de
bal van uw vinger te bedienen.
Zorg dat het tiptoetsengedeelte helemaal droog (en schoon) is en gebruik de bal van uw vinger om de toetsen te
bedienen.
1. De kookplaat gaat niet aan
Controleer of de kookplaat is aangesloten op een stroombron en of de kookplaat aan staat. Kijk of de stroom in uw
huis of uw buurt misschien is uitgevallen. Als u alles heeft gecontroleerd en de kookplaat doet nog steeds niets, bel
dan een gekwalificeerde monteur.
5. Sommige pannen maken kraak- en klikgeluiden
Dit kan komen door de constructie van uw kookgerei (verschillende lagen metaal vibreren op verschillende golflengten).
Dit is normaal voor kookgerei en duidt niet op een defect.
4. Er zitten krassen op de glasplaat
Pannen met een scherpe/ruwe rand. Ongeschikte schuursponsjes of reinigingsmiddel gebruikt. Gebruik pannen met een
platte en gladde bodem. Zie 'Het kiezen van het juiste kookgerei' en 'Verzorging en reiniging' voor meer informatie.
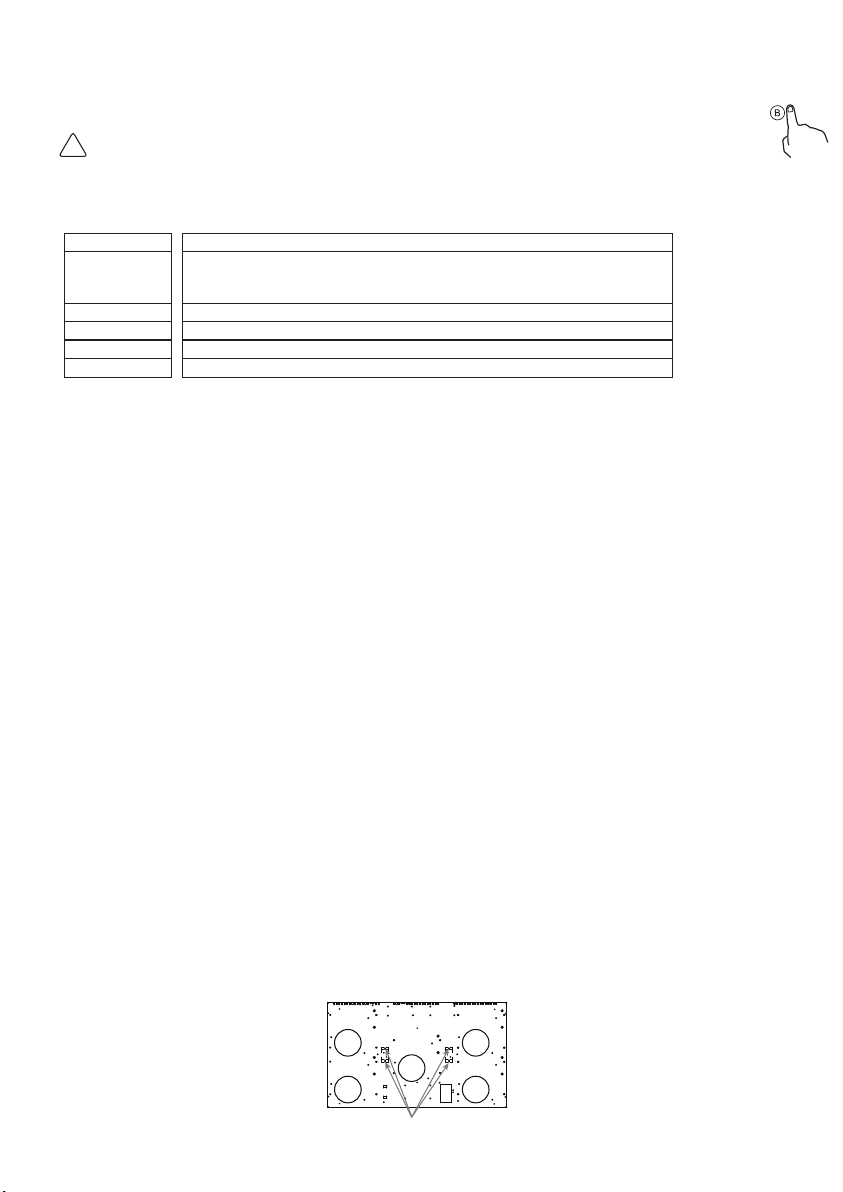
Als er een storing optreedt, schakelt de inductiekookplaat automatisch over naar de beschermende status en
geeft de bijbehorende beschermende codes weer:
Probleem Mogelijke oorzaken Te nemen actie
Het apparaat
werkt niet Stroomonderbreking
Bovenstaande lijst zijn de beoordelingen en inspecties van de meest voorkomende storingen. Probeer alstublieft niet zelf
de kookplaat uit elkaar te halen om gevaarlijke situaties of schade aan de inductiekookplaat te voorkomen.
Controleer of de stroomtoevoer normaal is; of de aardlekschakelaar is uitgeschakeld; of er een doorgebrande
zekering is, vervang deze dan door een nieuwe; of de hoofdvoeding normaal is, controleer dan of de stekker
op de juiste manier is aangesloten op een stopcontact; Als de kookplaat van het type draadverbinding is,
koppelt u de stroom los en controleert u of het snoer los zit; stroomtoevoer loskoppelen, controleer of de
stekker uit het stopcontact is; Sluit bovenstaande redenen uit, dan moet het een apparaatstoring zijn, stuur het
naar het servicecentrum voor reparatie.
Tijdens verwarmen
stopt apparaat
Geen pan of pan ongeschikt
Ingangsvermogen te laag
Ingangsvermogen te hoog
Spoelthermistor kortsluiting
Spoelthermistor open circuit
Te hoge temperatuur
IGBT-temperatuursensor
Te hoge temperatuur
inductiespoel-temperatuur-
sensor
Spoelthermistor kortsluiting
Spoelthermistor open circuit
Uitschakeltimer wordt
geactiveerd
Lage spanning, spanning van de hoofdstroom is minder dan 180V. Controleer of de spanning van de
hoofdstroom normaal is. Zodra de spanning van de hoofdstroom weer normaal is, start u het apparaat
opnieuw. Spanning van printplaat fout, stuur het apparaat voor reparatie naar het servicecentrum.
Controleer of de functie Uitgestelde vertraging is ingesteld. Als de functie Uitgestelde vertraging is
ingesteld, stopt het apparaat na de ingestelde tijd en schakelt zich uit.
Geen pan, zet de juiste pan erop. Synchronisatie van de printplaat of fout in het aandrijfcircuit, stuur het
apparaat voor reparatie naar het servicecentrum.
Hoogspanning, spanning van de hoofdstroom overschrijdt 250V. Controleer of de spanning van de
hoofdstroom normaal is. Zodra de spanning van de hoofdstroom weer normaal is, start u het apparaat
opnieuw. Spanning printplaat fout, stuur het apparaat voor reparatie naar servicecentrum.
Verbindingsfout van de spoelthermistor of een storing in detectiedeel printplaat spoelthermistor, naar het
servicecentrum sturen voor reparatie.
Te hoge temperatuur op oppervlak van inductieglas, controleer of er geen water in de pan zit. Maak na de
behandeling opnieuw verbinding met de voeding. Als het nog steeds niet is opgelost, is het mogelijk dat de
sensor van de kookplaat defect is, stuur deze naar het servicecentrum voor reparatie.
Sensor van IGBT-thermistor heeft verbindingsfout of detectiedeel van IGBT-printplaatsensor heeft een
fout, stuur dit naar het reparatiecentrum voor reparatie.
Te hoge temperatuur van IGBT-themperatuursensor, luchtuitlaat is geblokkeerd. Open luchtuitlaat en start
het apparaat opnieuw. Als het probleem blijft, is er mogelijk een verbindingsfout van de koelventilator, de
koelventilator is beschadigd of het aandrijfcircuit van een ventilator heeft storing, stuur apparaat voor
reparatie naar servicecentrum. IGBT-temperatuursensor open circuit/kortsluiting. Temperatuurdetectie
onderdeel van printplaat IGBT storing, stuur naar servicecentrum voor reparatie.

!
F
>35mm
G
<50mm
D
E
A
C
B
>2cm
F
G
!
EKI901-2Versie NL 10/2019 Pagina 8 van 10
Installatie
Selecteren van installatiemateriaal
Maak een gat in het werkblad ter grootte van de in de tekening aangegeven maten.
Ten behoeve van installatie en gebruik moet rond het gat minimaal 5 cm ruimte worden vrijgehouden.
Zorg ervoor dat de dikte van het werkblad minstens 35 mm is. Selecteer hittebestendig werkbladmateriaal om vervorming te
voorkomen die wordt veroorzaakt door de warmtestraling van de kookplaat.
HD
L
X
X
A
F
STRIP
B
Achterwand
Voorkant werkblad
bedragen.
Zorg ervoor dat de inductie kookplaat te allen tijde goed geventileerd is en dat de luchtinlaat en -uitlaat niet geblokkeerd
zijn. Controleer of alles aan de inductie kookplaat goed werkt.
Let op: voor de veiligheid moet de afstand tussen de kookplaat en de keukenkast erboven minstens 600 mm
A(mm) B(mm) C(mm) D E
nim02nim05nim006
Luchtinlaat Luchtuitlaat
≥5mm
Opmerking: Er moet een opening zijn van 560x5 mm
aan de voorkant van de kookplaat (positie E) om de
lucht te kunnen afvoeren.
Nadat de kookplaat op het werkblad is geïnstalleerd,
dient u ervoor te zorgen dat het ventilatiegat niet
wordt geblokkeerd door het werkblad.
OF
Klemmen
te warm worden, om contact met de hand of andere ontvlambare verbranding te voorkomen, is een
thermische beveiligingsplaat onder de kookplaat gemonteerd.
• de wandschakelaar makkelijk toegankelijk is.
Voordat u de bevestigingsklemmen vastmaakt
Leg de kookplaat op een stabiele, gladde ondergrond om schade te voorkomen.
Zet geen kracht op de knoppen die uitsteken.
De klempositie aanpassen
Maak de kookplaat aan het werkblad vast door na de installatie 4 klemmen
aan de onderkant van de kookplaat te schroeven (zie tekening).
De kookplaat heeft een speciale afdichting die voorkomt dat vloeistof de kast binnendringt. Volg deze instructies om deze
afdichting correct aan te brengen: Maak de afdichtingen los van hun achterkant. Draai de kookplaat om en plaats de afdichting
correct onder de rand van de kookplaat, zodat het buitenste gedeelte van de afdichting perfect overeenkomt met de buitenrand
van de kookplaat. Bevestig de afdichting gelijkmatig en veilig op de kookplaat en druk hem stevig op zijn plaats.
L(mm) B(mm) H(mm) D(mm) A(mm) I
I
(mm) X(mm)
860 520 62 56
830 490 50 min
X
Voordat u de kookplaat installeert, zorg ervoor dat:
• het werkblad haaks en waterpas is en dat er geen structurele keukenonderdelen in de weg zitten in de benodigde ruimte.
• het werkblad van hittebestendig materiaal is gemaakt.
• als de kookplaat boven een oven wordt geïnstalleerd, de oven een ingebouwde ventilator heeft.
• de installatie voldoet aan alle eisen en geldende regels en wetten.
• er een geschikte isolerende schakelknop, die de kookplaat volledig van het lichtnet kan afsluiten, is ingebouwd in de
permanente bedrading en dat deze gemonteerd en gepositioneerd is in overeenstemming met lokale bekabelingsregels en de
lokale wetgeving.
• deze schakelaar van een goedgekeurd type is en een minimale afstand van 3 mm tussen de contacten heeft voor alle
polen (of in alle fasegeleiders als lokale wetten deze variatie toestaan).
• de schakelaar goed toegankelijk en makkelijk te bedienen is nadat de kookplaat is geïnstalleerd.
• u uw lokale bouw-authoriteiten en relevante regels en wetten raadpleegt als u twijfels heeft over de installatie.
• u hittebestendige materialen gebruikt (zoals keramische tegels) op de muur rond de kookplaat.
Nadat u de kookplaat heeft geïnstalleerd, zorg ervoor dat:
• de stroomkabel niet toegankelijk is door keukenkastjes of laden.
• er voldoende toevoer van verse lucht is van buiten de keukenkastjes naar de onderkant van de kookplaat.
• als de kookplaat boven een lade of keukenkastruimte is geïnstalleerd, kan de onderkant van de kookplaat

E
2L 2N1N1L
L L N N
2L 2N1N1L
Ø
--
--
--
--
210 mm
180 mm
140 mm
Φ210 zone: 202
Φ180 zone: 187
Φ140 zone: 189
mm
mm
Wh/kg
Wh/kg
191
EKI901-2
EKI901-2Versie NL 10/2019 Pagina 9 van 10
!
4. De muur en de door de kookplaat verwarmde zone boven het werkblad moeten bestand zijn tegen de hitte die door de kookplaat wordt gegenereerd.
5. Om schade te voorkomen moet de kit en het materiaal waar de rand van de kookplaat op het werkblad rust hittebestendig zijn.
De kookplaat aansluiten op het lichtnet
Deze kookplaat dient door een gekwalificeerde monteur op het lichtnet te worden
aangesloten. Controleer voor u met installeren begint of:
Waarschuwingen
1. De inductie kookplaat dient door gekwalificeerd personeel of techniciens te worden geïnstalleerd.
2. Installeer de kookplaat niet direct boven een vaatwasser, koelkast, vriezer, wasmachine of droger, omdat de vochtigheid de elektronica van de
kookplaat kan beschadigen.
3. De inductie kookplaat dient zo te worden geïnstalleerd dat een betere warmtestraling kan worden gewaarborgd om de betrouwbaarheid te vergroten.
1. de aanwezige stroomvoorziening geschikt is voor de stroom die de kookplaat nodig heeft.
2. het aanwezige voltage overeenkomt met de voltage die op het typeplaatje staat.
3. de stroomtoevoerkabel de belasting aankan die op het typeplaatje staat aangegeven.
Gebruik bij het aansluiten van de kookplaat geen adapters, verloopstukken of verlengsnoeren, omdat deze kunnen leiden tot oververhitting en
brand kunnen veroorzaken.
De stroomkabel mag geen van de onderdelen die heet worden aanraken en moet zo worden geplaatst dat de temperatuur ervan nooit hoger dan
75ºC kan worden.
Laat een elektricien controleren of de aanwezige stroomvoorziening in uw huis geschikt is voor het aansluiten van deze kookplaat, zonder
aanpassingen te maken. Als er aanpassingen aan uw stroomvoorziening gedaan moeten worden, laat dit dan altijd doen door een gekwalificeerde
elektricien.
De voeding moet worden aangesloten in overeenstemming met de relevante norm, of een eenpolige stroomonderbreker. De verbindingsmethode
wordt hieronder getoond.
• Als de kabel is beschadigd of moet worden vervangen, moet de bewerking worden uitgevoerd door een serviceagent of
een gekwalificeerde professional.
• De kabel mag niet verbogen of samengeperst worden.
• De kabel moet regelmatig worden gecontroleerd en mag alleen door een gekwalificeerd persoon worden vervangen.
• Als u de kookplaat direct op het lichtnet aansluit dient een meerpolige zekeringsautomaat met een minimum afstand van 3 mm tussen
de contactpunten te worden geïnstalleerd.
• De installateur dient ervoor te zorgen dat de juiste elektrische verbinding gemaakt is en dat het in overeenstemming is met alle geldende
normen en veiligheidsvoorschriften.
Neem voor meer informatie over de behandeling, terugwinning en recycling van dit product contact op met uw plaatselijke
gemeente, uw afvalverwerkingsbedrijf of de winkel waar u het product hebt gekocht.
Dit apparaat is gekenmerkt in overeenstemming met de Europese richtlijn 2012/19/EC voor elektrisch en elektronisch afval
(AEEA). Door ervoor te zorgen dat dit apparaat op de juiste wijze wordt verwijderd helpt u mee om mogelijke schade aan
het milieu of de menselijke gezondheid te voorkomen, welke anders mogelijk veroorzaakt had kunnen worden als het niet
op de juiste manier zou worden verwijderd.
Dit apparaat vereist gespecialiseerde afvalverwerking. Neem voor meer informatie over de behandeling, terugwinning en
recycling van dit product contact op met uw gemeente, uw afvalverwerkingsbedrijf of de winkel waar u het product heeft
gekocht.
Symbool Waarde Eenheid
Inbouw kookplaat
5
Inductie zones
L, B
N.V.T.
ECelektrisch koken
ECelektrische kookplaat
Identificatienummer model
Type kookplaat
Aantal elektrische kookzones en/of gebieden
platen)
Verwarmingstechniek (inductiekookzones en
kookgebieden, stralingskookzones, massieve
Voor cirkelvormige kookzones of gebied:
diameter van nuttig oppervlak per elektrisch
verwarmde kookzone, afgerond op 5 mm
Voor niet-ronde kookzones of gebieden: lengte
en breedte van het nuttig oppervlak per
elektrisch verwarmde kookzone of -gebied,
afgerond op 5 mm
Energieverbruik per kookzone of gebied
berekend per kg
Energieverbruik voor de kookplaat berekend
per kg
Aanbevolen type
aansluitkabel
AANSLUITINGSDIAGRAM
Let op! Spanning van verwarmingselementen
220-240V.
Let op! In geval van een verbinding moet de
veiligheidsdraad worden aangesloten op de
E-terminal.
Het symbool op het product geeft aan dat het niet als gewoon huishoudelijk afval mag worden behandeld. Het moet naar
een inzamelpunt voor recycling van elektrische en elektronische apparaten worden gebracht.


INDUCTION HOB
Model: EKI901-2
INSTALLATION AND USER INSTRUCTIONS
Please read the instruction manual carefully before operating your new hob.
1
Congratulations on the purchase of your new Induction Hob.
We recommend that you spend some time to read this Instruction / Installation Manual in order to fully understand how to
install correctly and operate it.
For installation, please read the installation section.
Read all the safety instructions carefully before use and keep this Instruction / Installation Manual for future reference.
Safety Warnings
Your safety is important to us. Please read this information before using your cooktop.
Installation
Electrical Shock Hazard
• Disconnect the appliance from the mains electricity supply before carrying out any work or maintenance on it.
• Connection to a good earth wiring system is essential and mandatory.
• Alterations to the domestic wiring system must only be made by a qualified electrician.
• Failure to follow this advice may result in electrical shock or death.
Cut Hazard
• Take care - panel edges are sharp.
• Failure to use caution could result in injury or cuts.
Important Safety Instructions
• Read these instructions carefully before installing or using this appliance.
• No combustible materials or products should be placed on this appliance at any time.
• Please make this information available to the person responsible for installing the appliance.
• In order to avoid a hazard, this appliance must be installed according to these instructions for installation.
• This appliance must be installed and earthed only by a suitably qualified person.
• This appliance should be connected to a circuit which incorporates an isolating switch, providing full disconnection from the
power supply.
• Failure to install the appliance correctly could invalidate any warranty or liability claims.
Operation and Maintenance
Electrical Shock Hazard
• Do not cook on a broken or cracked cooktop. If the cooktop surface should break or crack, immediately switch off the
appliance at the mains power supply (wall switch) and contact a qualified technician.
• Switch the cooktop off at the wall before cleaning or maintenance.
• Failure to follow this advice may result in electrical shock or death.
Health Hazard
• This appliance complies with electromagnetic safety standards.
• However, persons with cardiac pacemakers or other electrical implants (such as insulin pumps) must consult with their
doctor or implant manufacturer before using this appliance to make sure that their implants will not be affected by the
electromagnetic field.
• Failure to follow this advice may result in death.
Hot Surface Hazard
• During use the appliance becomes hot. Care should be taken to avoid touching heating elements inside the oven.
• Do not let your body, clothing or any item other than suitable cookware contact the induction glass until the surface is cool.
• Metallic objects such as knives, forks, spoons and lids should not be placed on the hob surface since they can get hot.
• Keep children away.
• Handles of saucepans may be hot to touch. Ensure that the saucepan handles do not overhang other cooking zones that
are switched on. Make sure children can’t reach the cookware handles.
• Failure to follow this advice could result in burns and scalds.
Cut Hazard
• The razor-sharp blade of a cooktop scraper is exposed when the safety cover is retracted. Use with extreme care and
always store safely and out of reach of children.
• Failure to use caution could result in injury or cuts.
POWER LIMIT WORKING MODE:
The left two heating zones can operate on the full power setting. The right two and the middle
heating zones if operated simultaneously more than 3600W, shift can't be increased further.

TECHNICAL DATA
2
Important Safety Instructions
• Never leave the appliance unattended when in use. Boil-over causes smoking and greasy spillovers may ignite.
• Never use your appliance as a work or storage surface.
• Never leave any objects or utensils on the appliance.
• Do not place or leave any magnetisable objects (e.g. credit cards, memory cards)or electronic devices (e.g. computers, MP3
players) near the appliance as they may be affected by its electromagnetic field.
• Never use your appliance for warming or heating the room.
• After use, always turn off the cooking zones and the cooktop as described in this manual (i.e. by using the touch controls). Do
not rely on the pan detection feature to turn off the cooking zones when you remove the pans.
• Do not allow children to play with the appliance nor sit, stand or climb on it.
• Do not store items of interest to children in cabinets above the appliance. Children climbing on the cooktop could be seriously injured.
• Do not leave children alone or unattended in the area where the appliance is in use.
• Children or persons with a disability which limits their ability to use the appliance should have a responsible and competent
person to instruct them in its use. The instructor should be satisfied that they can use the appliance without danger to
themselves or their surroundings.
• Do not repair or replace any part of the appliance unless specifically recommended in the manual. All other servicing should
be done by a qualified technician.
• Do not use a steam cleaner to clean your cooktop.
• Do not place or drop heavy objects on your cooktop.
• Do not stand on your cooktop.
• Do not use pans with jagged edges or drag pans across the induction glass surface as this can scratch the glass.
• Do not use scourers or any other harsh abrasive cleaning agents to clean your cooktop as these can scratch the induction glass.
•This appliance is intended to be used in a household or similar environments such as staff kitchen areas in shops, offices and
other residential environments.
• If the supply cord is damaged, it must be replaced by the manufacturer, its service agent or a similarly qualified person in
order to avoid a hazard.
•WARNING: The appliance and its accessible parts become hot during use.
Care should be taken to avoid touching heating elements.
Children less than 8 years of age should be kept away unless continuously supervised.
•This appliance can be used by children aged 8 and above and persons with reduced physical, sensory or mental capabilities or
lack of experience and knowledge, if they have been given supervision or instructions concerning the use of the appliance in a
safe way and understand the hazards involved.
•WARNING: Unattended cooking on the hob with fat or oil can be dangerous and may result in a fire. NEVER try to extinguish
such fire with water, rather switch off the appliance and then cover the flame with a lid or a fire blanket.
•WARNING: Do not store items on the cooking surfaces as this presents a fire hazard.
•WARNING: If the surface is cracked, switch off the appliance to avoid the possibility of an electric shock.
•The appliance is not intended to be operated by means of an external timer or separate remote-control system.
CAUTION: The cooking process has to be supervised.
WARNING: In order to prevent tipping of the appliance, it must be stabilised prior to installation. Please refer to the installation instructions.
WARNING:Only use hob guards that are either provided or deemed suitable by the manufacturer for use with this induction hob.
The use of inappropriate guards can cause accidents. The use of inappropriate guards can cause accidents.
This appliance incorporates an earth connection for functional purposes only.
WARNING: Unattended cooking on a hob with fat or oil can be dangerous and may result in fire. NEVER try to extinguish a fire
with water, but switch off the appliance and then cover flame e.g. with a lid or a fire blanket.
WARNING: Danger of fire: do not store items on the cooking surfaces.
CAUTION: The cooking process has to be supervised. A short term cooking process has to be supervised continuously.
NOTICE: The crystallite glass is still hot after use, please do not touch!
Model Power supply
AC220-240V
50/60Hz
Size (mm) Built-in hole
Size (mm)
Power
Heating area
(180mm)
Heating area
(210mm)
Heating area
(140mm)
860x520x62 830x490
1500W
(boost 1800W)
1800W
(boost 2200W) (boost 1500W)
1200W
EKI901-2

PRODUCT OVERVIEW
Top View
3
Good Bad Bad Bad Bad Bad Bad
(recessed base) (convex base) (undersize) (oversize) (moisture on hotplate) (no utensil)
Before Using Your New Induction Hob
• Read this guide, taking special note of the ‘Safety Warnings’ section.
• Remove any protective film that may still be on your induction hob.
Using the Touch Controls
• The controls respond to touch so you don’t need to apply any pressure.
• Use the ball of your finger, not its tip.
• You will hear a beep each time a touch is registered.
• Make sure the controls are always clean, dry and that there are no objects (e.g. a utensil or a cloth) covering them. Even a
thin layer of water may make the controls difficult to operate.
Choosing the Right Cookware
• Only use cookware with a base suitable for induction cooking. Look for the induction symbol on the packaging or on the
bottom of the pan.
• You can check whether your cookware is suitable by carrying out a magnet test. Move a magnet towards the base of the pan.
If it is attracted, the pan is suitable for induction.
• If you do not have a magnet:
1. Put some water in the pan you want to check.
2. If “ ” does not flash in the display and the water is heating, the pan is suitable.
• Cookware made from the following materials is not suitable: pure stainless steel, aluminium or copper without a magnetic
base, glass, wood, porcelain, ceramic and earthenware.
Do not use cookware with jagged edges or a curved base.
Make sure that the base of your pan is smooth, sits flat on the glass and is the same size as the cooking zone. Using a pot that
is slightly wider means energy will be used at its maximum efficiency. If you use a smaller pot, efficiency could be less than
expected. Pots with a diameter of less than 140 mm could be undetected by the hob if placed on the larger cooking zone.
Always centre your pan on the cooking zone.
Always lift pans off the induction hob – do not slide as they may scratch the glass.
To Start Cooking
1. Touch the ON/OFF control.
With the power on, the buzzer beeps once, all displays show “ – “ or “ – – “, indicating that the induction hob has
entered the standby mode.
2. Place a suitable pan on the cooking zone that you wish to use.
• Make sure the bottom of the pan and the surface of the cooking zone are clean and dry.
3. Touch the heating zone selection control and the indicator next to the key will flash.
4. Select a heat setting by touching the “-“ or “+” control.
• If you don’t choose a heat setting within 1 minute, the induction hob will automatically switch off. You will need
to start again at step 1.
• You can touch the heating zone selection again and modify the heat setting at any time during cooking.
1. Heating zone selection controls
2. Power / Timer regulating key
3. keylock control
4. ON/OFF control
5. Timer control
6. Boost control
7.Slider controller
Control panel
1500W
(boost 1800W)
1500W
(boost 1800W)
1800W (boost 2200W)
(boost 1500W)
1200W
(boost 1500W)
1200W
2
7
56 3
1
4

Power level
Default working timer (hour)
1
8
2
8
3
8
4
4
5
4
6
4
7
2
8
2
9
2
!
4
If the Display Flashes “ ” Alternately with the Heat Setting
This means that:
• you have not placed a pan on the correct cooking zone or,
• the pan you’re using is not suitable for induction cooking or,
• the pan is too small or not properly centred on the cooking zone.
No heating takes place unless there is a suitable pan on the cooking zone.
The display will automatically turn off after 1 minute if no suitable pan is placed on it.
!
When You Have Finished Cooking
1. Touch the heating zone selection control that you wish to switch off.
2. Turn the cooking zone off by scrolling down to”0” . Make sure the display shows“0” and then “H”.
3. Turn the whole cooktop off by touching the ON/OFF control.
4. Beware of hot surfaces indicator “H” will show which cooking zone is hot to touch. It will disappear when the
surface has cooled down to a safe temperature. It can also be used as an energy saving function - if you
want to heat further pans, use the hotplate that is still hot.
Locking the Controls
• You can lock the controls to prevent unintended use (for example children accidentally turning the cooking zones on).
• When the controls are locked, all the controls except the ON/OFF control are disabled.
To lock the controls:
Touch the keylock control. The timer indicator will show “Lo”.
To unlock the controls:
1. Make sure the induction hob is turned on.
2. Touch and hold the keylock control for a while.
3. You can now start using your induction hob.
When the hob is in lock mode, all controls are disabled, except the ON/OFF. You can always turn the induction hob off
with the ON/OFF control in an emergency, but you would have to unlock the hob first in the next operation.
Overheating Protection
The appliance is equipped with a temperature sensor which can monitor the temperature inside the induction hob.
When an excessive temperature is monitored, the Induction hob will stop operation automatically.
Detection of Small Articles
When an unsuitably sized or non-magnetic pan (e.g. aluminium), or some other small item (e.g. knife, fork, key) has
been left on the hob, the display flashes “ ” and the hob will automatically go in the standby mode in 1 minute. The
fan will keep cooling down the induction hob for a further 2 minutes.
Auto Shutdown Protection
Auto shutdown is a safety protection function for your induction hob. It will automatically turn off after a certain period of
time. The default working times for various power levels are shown in the below table:
When a pot is removed, the induction hob can stop heating immediately and automatically switch off after 1
minute.
People with a heart pacemaker should consult their doctor before using this unit.
Using the Timer
• You can set it to turn one cooking zone off after the set time is up.
• You can set the timer up to 99 minutes.
Setting the Timer to Turn off One Cooking Zone
1. Touch the heating zone selection control that you want to set the timer for.
2. Touch timer control, the minder indicator will start flashing and “30” will show in the timer display.
3. Set the time by touching the “+” and “-” buttons.
Hint: Touch the “-“ or “+” control of the timer once - time will decrease or increase by 1 minute.
Touch and hold the ”-“ or “+” control of the timer - time will decrease or increase by 10 minutes.
4. Touch the “-” control to reduce the time outstanding to zero or press the “timer control” when the “00”
shows in the minute display to cancel the timer.
5. When the time is set, it will begin to count down immediately. The display will show the remaining time and the
timer indicator will flash for 5 seconds.
NOTE: The red dot next to power level indicator will illuminate, indicating that zone is selected.
NOTE: Slider switch cannot be used for the timer adjustment.
NOTE: Timer display will show the shortest set time of the selected zones, and that cooking zone with the
shortest set time will be with the red dot flashes.
6. When cooking timer expires, the corresponding cooking zone will switch off automatically.
!Other cooking zones will keep operating if they have been turned on previously.
6
H
0
or
6
30
--
36
6.
00
Slider controller
Switch on the induction hob, press the optional key to select heating zone, the indicator next to the key will flash
for 5 seconds, during this period, during this period, it's power can be adjusted from level 2 to 8 by the slider
controller; Slide a scontroller from left to right, it is increase steps, slide from right to left to reduce steps.
!Slider controller can adjust power level only,can't adjust timer function!

Heat setting Suitability
1-2
3-4
5-6
7-8
9
● Delicate warming for small amounts of food
● Melting chocolate, butter, and foods that burn quickly
● Gentle simmering ● Slow warming
● Reheating ● Rapid simmering ● Cooking rice
● Pancakes
● Cooking pasta
● Stir-frying ● Searing ● Bringing soup to the boil ● Boiling water
5
Heat Settings
The settings below are guidelines only. The exact setting will depend on several factors, including your cookware and the
amount you are cooking. Experiment with the induction hob to find the settings that best suit you.
Care and cleaning
1. Everyday soiling on glass (fingerprints, marks, stains left by food of non-sugary spillovers on the glass).
1)Switch off the power to the cooktop.
2)Apply a cooktop cleaner while the glass is still warm (but not hot!)
3)Rinse and wipe dry with a clean cloth or paper towel.
4)Switch the power to the cooktop back on.
● When the power to the cooktop is switched off, there will be no hot surface indication but the cooking zones may
still be hot! Take extreme care.
● Heavy-duty or some nylon scourers and harsh/abrasive cleaning agents may scratch the glass surface, so please
do check that they are suitable for induction hob care before use.
● Never leave cleaning residue on the cooktop: the glass may become stained.
2. Boil-overs, melts and hot sugary spills on the glass
Remove these immediately with a palette knife or razor blade scraper suitable for induction glass cooktops but
beware of hot cooking zone surfaces:
1). Switch off the power to the cooktop via the isolation switch.
2). Hold the blade or utensil at a 30°angle and scrape the soiling or spill to a cool area of the cooktop.
3). Clean the soiling or spill up with a dish cloth or paper towel.
4). Follow steps 2 to 4 for everyday soiling on glass above.
● Remove stains left by melts and sugary food or spillovers as soon as possible. If left to cool on the glass, they
may be difficult to remove or even permanently damage the glass surface.
● Cut hazard: when the safety cover is retracted, use with extreme care and always store safely and out of reach
of children.
3. Spillovers on the touch controls
1). Switch off the power to the cooktop.
2). Soak up the spill.
3). Wipe the touch control area with a clean damp sponge or cloth.
4). Wipe the area completely dry with a paper towel.
5). Switch the power to the cooktop back on.
The cooktop may beep and turn itself off, and the touch controls may not function while there is liquid on them.
Make sure you wipe the touch control area dry before turning the cooktop back on.
NOTE:
NOTE:
NOTE:
!
Cooking Guidelines
Take care when frying as the oil and fat heat up very quickly, particularly if you’re using the “Boost” function.
At extremely high termperatures oil and fat will ignite spontaneously and this presents a serious fire risk.
Boost Control
During hob working, touching the heating zone selection control, then touching boost control,the buzzer beeps once, “P” will
show in the display, the hob enters BOOST function, the power increases . BOOST function will run for 5 minutes, then quit
automatically and the hob return previous running status. In BOOST mode, touching “BOOST” button , the hob quits BOOST
function and then return previous running status.
4. Disassembly bottom base
4 bigger screws need to be removed first before bottom base disassembly. (Bottom base removal
need to be done by professional person. Normal user is not allowed to disassembly bottom base)
Screws need to removed

6
Hints and Tips
1. The induction hob cannot be turned on.
Make sure the induction hob is connected to the power supply and that it is switched on.
Check whether there is a power outage in your home or local area. If you’ve checked everything and the problem persists,
call a qualified technician.
2. The touch controls are unresponsive.
The controls are locked: Unlock the controls. See section using your induction cooktop for instructions.
3. The touch controls are difficult to operate.
There may be a slight film of water over the controls or you may be using the tip of your finger when touching the controls:
Make sure the touch control area is dry and use the ball of your finger when touching the controls.
6. The induction hob makes a low humming noise when used on a high heat setting.
This is caused by the technology of induction cooking: This is normal, the noise should quieten down or disappear
completely when you decrease the heat setting.
7. Fan noise coming from the induction hob.
A cooling fan built into your induction hob has come on to prevent the electronics from overheating. It may continue to run
even after you’ve turned the induction hob off: This is normal and needs no action. Do not switch the power to the
induction hob off at the wall while the fan is running.
8. Pans do not become hot and “ ” appears in the display.
The induction hob cannot detect the pan because it is not suitable for induction cooking. The induction hob cannot detect
the pan because it is too small for the cooking zone or not properly centred on it: Use cookware suitable for induction
cooking. See section “Choosing the Right Cookware”.
Centre the pan and make sure that its base matches the size of the cooking zone.
9. The induction hob or a cooking zone has turned itself off unexpectedly, a tone sounds and an error code is
displayed (typically alternating with one or two digits in the cooking timer display).
Technical fault: Please note down the error letters and numbers, switch the power to the induction hob off at the wall, and
contact a qualified technician.
4. The glass is being scratched.
Tough-edged cookware. Unsuitable, abrasive scourer or cleaning products being used: Use cookware with flat and
smooth bases. See “Choosing the Right Cookware” and “Care and Cleaning” for further advice.
5. Some pans make crackling or clicking noises.
This may be caused by the construction of your cookware (layers of different metals vibrating differently): This is normal,
the noise should quieten down or disappear completely.
Failure Display and Inspection
If an abnormality comes up, the induction hob will automatically enter the protective state and display
corresponding protective codes:
The above are the judgment and inspection of common failures.
Please do not disassemble the unit by yourself to avoid any danger or damage to the induction hob.
Problem
U
Possible causes What to do
The appliance
does not work Break in power supply
Please check the main power is normal; if the leakage protection switch is off; if there is a blown fuse,
replace it with a new one; if the main power is normal, check if the plug is connect with socket
appropriately; If the hob is wire connection type, disconnect the power, check if the wire is loose;
disconnect the power, check if main plug is off; Exclude above reasons, should be appliance fault, send
it to service center for repairing.
During heating,
the unit stop work. Delay off timer activates.
No pan or pan unsuitable
Input power too low
Input power too high
Thermistor of coil short circuit.
Thermistor of coil open circuit.
Too high temperature
of IGBT thermistor.
Too high temperature
of coil thermistor.
IGBT thermistor short circuit
IGBT thermistor open circuit
Please check if set delay off function. If set delay off function, the unit will stop once delay off time out.
No pan, please put proper pan. PCB synchronization or drive circuit fault, please send the
appliance to service center for repairing.
E2
E1
F3
F4
E5
E3
F9
FA
Low voltage, voltage of the main power is less 180V. Please check if voltage of the main power is normal.
Once voltage of the main power returns normal, re-start the unit. Voltage of PCB fault, please send the
unit to service center for repairing.
High voltage, voltage of the main power exceeds 250V. Please check if voltage of the main power is
normal. Once voltage of the main power returns normal, re-start the unit. Voltage of PCB fault, please
send the unit to service center for repairing.
Sensor of coil thermistor connection error. Or detection part of PCB coil thermistor failure,
send to service center for reparing.
Too high temperature of IGBT thermistor, air outlet is blocked. Open air outlet, re-start the unit. If still
unsolved, it is possible that cooling fan connection error, cooling fan damaged, or drive circuit of fan
failure, send to service center for repairing. IGBT temperature sensor open circuit /short circuit.
Temperature detection part of PCB IGBT failure, send to service center for repairing.
Too high temperature on induction glass surface, please check if there is no water in pan. After
treatment, connect with power again. If still unsolved, it is possible that sensor of cooktop failure, send to
service center for repairing.
Senor of IGBT thermistor connection error. Or detection part of IGBT PCB sensor failure,
send to service center for repairing.

!
A(mm) B(mm) C(mm) D E
600min 50 min 20 min Air intake Air exit ≥5mm
F
>35mm
G
<50mm
D
E
A
C
B
>2cm
F
G
7
!
Installation
Selection of Installation Equipment
Cut out the work surface according to the sizes shown in the drawing.
For the purpose of installation and use, a minimum of 5cm space should be preserved around the hole.
Ensure the thickness of the work surface is at least 35mm. Please select a heat-resistant work surface material to avoid
deformation caused by the heat radiation from the hotplate.
Make sure the induction hob is well ventilated and the air inlet and outlet are not blocked. Ensure the induction hob is in good
working order.
Note: The distance between the hotplate and the cupboard above should be at least 600mm.
The hob has a special seal which prevents liquid from entering the cabinet. Follow these instructions in order to correctly apply
this seal: Detach the seals from their backing. Turn the hob over and correctly position the seal under the edge of the hob so
that the outer part of the seal perfectly matches the outer edge of the hob. Fix the seal to the hob evenly and securely, pressing
it firmly in place.
Note: There must be a 560x5mm opening in the front
(position E) to dissipate the air.
After installation, ensure the airflow opening is not
blocked by the worktop.
Before you install the hob, make sure that:
• The work surface is square and level, and that no structural units interfere with the space requirements.
• The work surface is made of a heat-resistant material.
• If the hob is installed above an oven, the oven has a built-in cooling fan.
• The installation will comply with all clearance requirements and applicable standards and regulations.
• A suitable isolating switch providing full disconnection from the mains power supply is incorporated in the permanent wiring,
mounted and positioned to comply with the local wiring rules and regulations.
The isolating switch must be of an approved type and provide a 3 mm air gap contact separation in all poles (or in all active
[phase] conductors if the local wiring rules allow for this variation of the requirements).
• The isolating switch will be easily accessible after installation.
• You consult local building authorities and by-laws if in doubt regarding installation.
• You use heat-resistant materials (such as ceramic tiles) for the wall surfaces surrounding the hob.
When you have installed the hob, make sure that:
• The power supply cable is not accessible through cupboard doors or drawers.
• There is adequate flow of fresh air from outside the cabinets to the base of the
hob.
• If the hob is installed above a drawer or cupboard space, the hob bottom
temperature may be too high,in order to prevent hand or other flammable
/combustion contact,a thermal protection barrier is installed below the base of the
hob.
• The isolating switch is easily accessible.
Before locating the fixing brackets
The unit should be placed on a stable, smooth surface to prevent damage. Do not
apply force onto the controls protruding from the hob.
Adjusting the bracket position
Fix the hob on the work surface by screwing 4 brackets on the bottom of hob (see picture) after installation.
L(mm) W(mm) H(mm) D(mm) A(mm) B(mm) X(mm)
860 520 62 56 830 490 50 min
B
X
HD
LW
X
X
A
F
r
o
n
t
e
d
g
e
o
f
w
o
rk
t
o
p
R
e
a
r
w
a
l
l
SEAL
OR
Brackets

Connecting the hob to the mains power supply
This hob must be connected to the mains power supply only by a suitably qualified person.
Before connecting the hob to the mains power supply, check that:
1. the domestic wiring system is suitable for the power drawn by the hob.
2. the voltage corresponds to the value given in the rating plate
3. the power supply cable sections can withstand the load specified on the rating plate.
To connect the hob to the mains power supply, do not use adapters, reducers, or branching devices, as they can cause
overheating and fire.
The power supply cable must not touch any hot parts and must be positioned so that itstemperature will not exceed 75˚C at any point.
Check with an electrician whether the domestic wiring system is suitable without alterations. Any alterations must only be made
by a qualified electrician.
The power supply should be connected in compliance with the relevant standard,or a single-pole circuit breaker.the method of
connection is shown below.
!
8
Cautions
1. The induction hot must be installed by qualified personnel or technicians.
2. The hob must not be installed directly above a dishwasher, fridge, freezer, washing machine or a dryer as the humidity may
damage the hob electronics.
3. The induction hot must be installed in a way that better heat radiation can be ensured to enhance its reliability.
4. The wall and induced heating zone above the worksurface must withstand heat generated by the hob.
5. To avoid any damage, the sandwich layer and adhesive must be resistant to heat.
• If the cable is damaged or to be replaced, the operation must be carried out the by a service agent or a suitably qualified
professional.
• If the appliance is being connected directly to the mains, an omnipolar circuit breaker must be installed with a minimum
opening of 3mm between contacts.
• The installer must ensure that the correct electrical connection has been made and that it is compliant with all applicable
standards and safety regulations.
• The cable must not be bent or compressed.
• The cable must be checked regularly and replaced by authorised technicians only.
This appliance is labelled in compliance with European directive 2012/19/EC for Waste Electrical and Electronic
Equipment (WEEE). By ensuring that this appliance is disposed of correctly, you will help prevent any possible harm
to the environment and to human health which might otherwise be caused if disposed of in the wrong way.
The symbol on the product indicates that it may not be treated as normal household waste.
It should be taken to a collection point for the recycling of electrical and electronic goods.
This appliance requires specialist waste disposal. For further information regarding the treatment, recovery and
recycling of this product, please contact your local council, household waste disposal service or the shop where you
purchased the product.
For more detailed information about treatment, recovery and recycling of this product, please contact your local local
council, household waste disposal service or the shop where you purchased the product.
CONNECTION DIAGRAM
Caution! Voltage of heating
elements 220-240V Caution! In the event
of any connection the safety Wire
must be connected to the E terminal.
Recommended
type of
connection lead
E
L1 N1 N2L2
L L N N
L1 N1 N2L2
Symbol Value Unit
Model identification
Type of hob
Number of electric cooking zones and/or areas
Heating technology (induction cooking zones
and cooking areas, radiant cooking zones,
solid plates)
For circular cooking zones or area: diameter
of useful surface area per electric heated
cooking zone, rounded to the nearest 5 mm
For non-circular cooking zones or areas:
length and width of useful surface area per
electric heated cooking zone or area, rounded
to the nearest 5 mm
Energy consumption per cooking zone or area
calculated per kg
Energy consumption for the hob calculated
per kg
Ø
L, W
--
--
--
--
EC
electric cooking
EC
electric hob
Built-in hob
5
210 mm
N/A
180 mm
140 mm
Φ210 zone: 202
Φ180 zone: 187
Φ140 zone: 189
mm
mm
Wh/kg
Wh/kg
Induction zones
191
EKI901-2
Table of contents
Languages:
Other Exquisit Hob manuals

Exquisit
Exquisit EKI801-2 Guide

Exquisit
Exquisit EKI801-5 Operation manual

Exquisit
Exquisit EKI701-5 Operation manual

Exquisit
Exquisit EKC801-5Z Operation manual

Exquisit
Exquisit EKI600-2 Guide

Exquisit
Exquisit EKI301-5 Operation manual

Exquisit
Exquisit EKI1.5 User manual

Exquisit
Exquisit KP3102 User manual

Exquisit
Exquisit EKI601-2 Guide

Exquisit
Exquisit KC6201we User manual