DESKHAUS APEX PRO/4 User manual

APEX PRO/4
APEX PRO/4
PRODUCT ASSEMBLY INSTRUCTIONS
APEX PRO/4
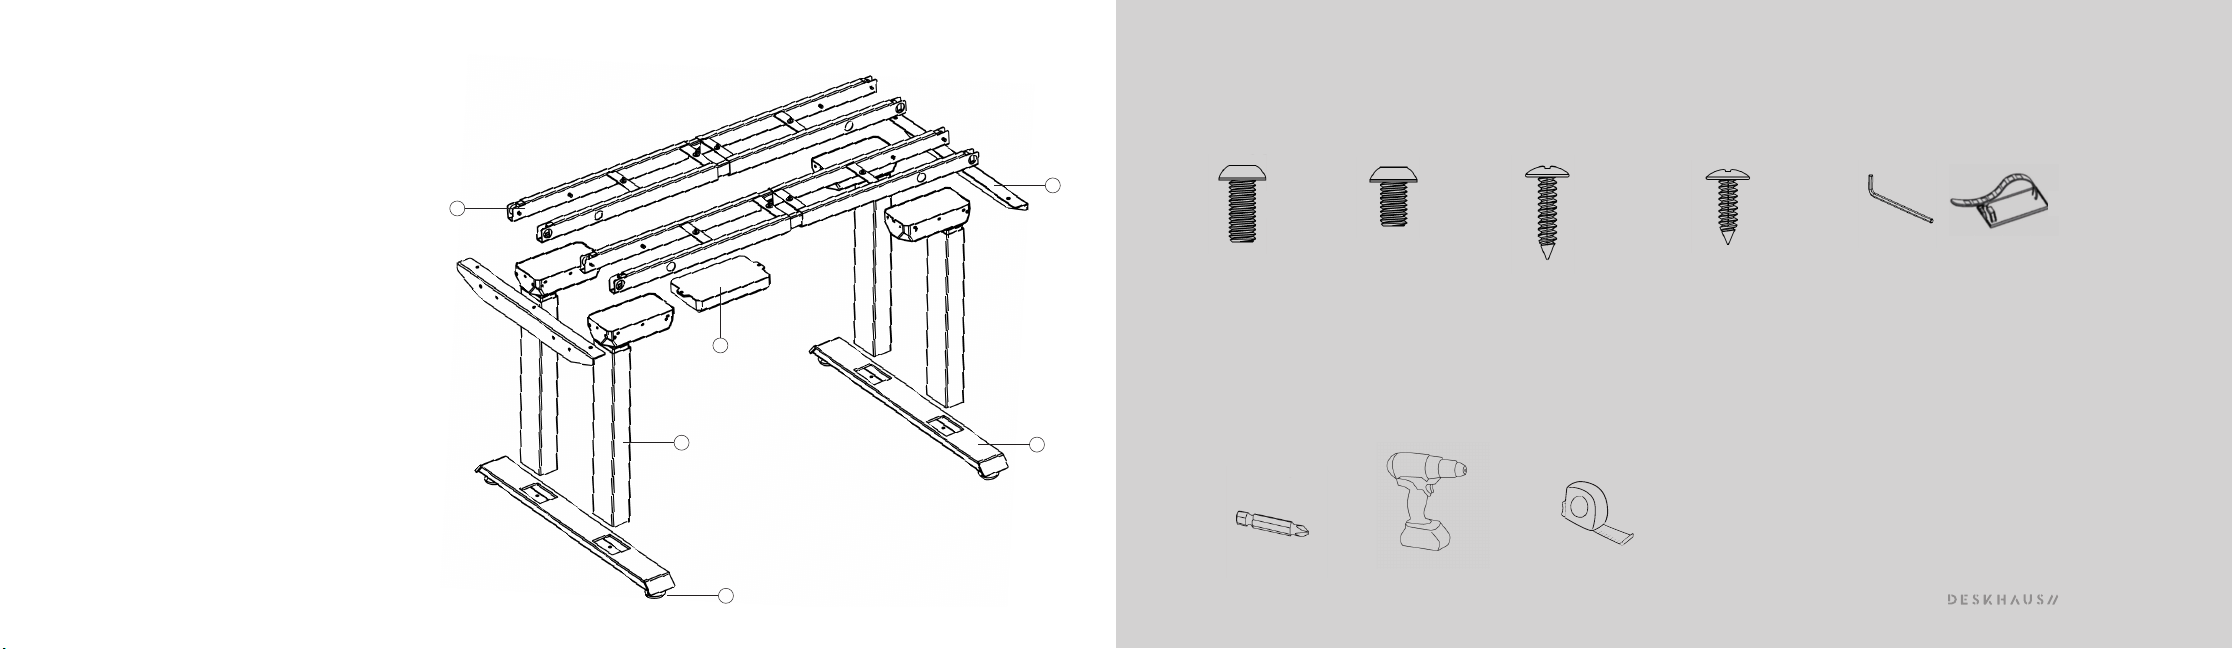
PARTS QTY
1. Column 4
2. Top Supports 2
3. Foot 2
4. Collapsing Channel 2
5. Control Box 1
6. Hand Switch 1
7. Power Cord 1
8. M6 14mm Screw 24
9. M6 10mm Screw 32
10. 7/8" Wood Screw 14
11. 16mm Wood Screw 2
12. Feet Pads 4
13. Cable Ties 20
14. Cable Extensions 4
PARTS INCLUDED:
X32
X24 X14 X2
4mm HEX KEY
APEX PRO/4
X20
1
2
3
4
5
12
M6 14mm M6 10mm 7/8 WOOD SCREW 16mm WOOD SCREW CABLE TIES
TOOLS NEEDED:
TAPE MEASURE
CORDLESS DRIVERPHILLIPS BIT

APEX PRO/4
ASSEMBLE COLUMNS TO
COLLAPSING CHANNELS
Assemble using the M6 10mm length screws.
These are the shorter screws that are included.
(4 per column)
Notes
*You may need to extend the channels out to expose the screw holes
when attaching columns.
1
PARTS QTY
Column 4
Collapsing Channel 2
M6 10mm Screw 16
X16
X2
IMPORTANT: Do not tighten machine screws fully until the end of each step to allow for proper centering.
*Please note orientation of all screw holes
making sure channels are not upside down.

APEX PRO/4
ASSEMBLE TOP SUPPORTS TO COLUMNS
Assemble using the M6 14mm length screws.
These are the longer screws that are included.
(4 per top support)
2
X8
PARTS QTY
Top Supports 2
M6 14mm Screw 8
IMPORTANT: Do not tighten machine screws fully until the end of each step to allow for proper centering.
APEX PRO/4
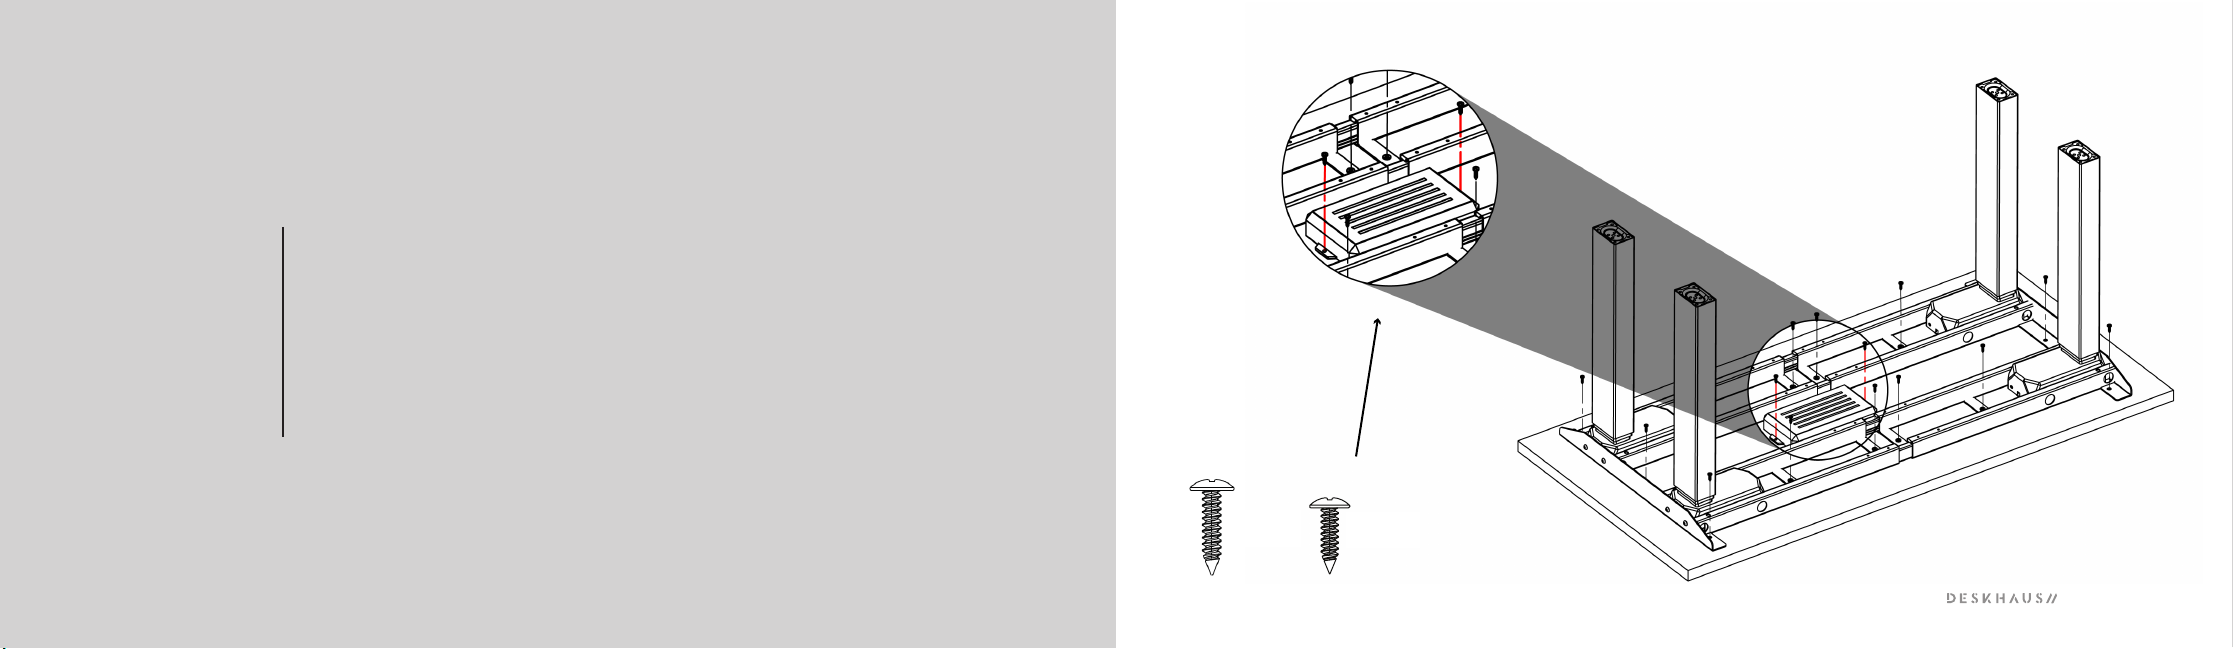
3FASTEN FRAME AND CONTROL BOX
TO DESK SURFACE
Assemble using the 7/8" length wood screws.
(14 screws total) Secure control unit with 16mm
wood screws (2 screws total)
*Notes - Center base on desk surface leaving 2" on right and left sides.
Pre-drilling holes is required for solid wood tops and optional for HPL tops.
X14 X2
Table of contents
Other DESKHAUS Indoor Furnishing manuals


Popular Indoor Furnishing manuals by other brands

Regency
Regency LWMS3015 Assembly instructions

Furniture of America
Furniture of America CM7751C Assembly instructions

Safavieh Furniture
Safavieh Furniture Estella CNS5731 manual

PLACES OF STYLE
PLACES OF STYLE Ovalfuss Assembly instruction

Trasman
Trasman 1138 Bo1 Assembly manual

Costway
Costway JV10856 manual


