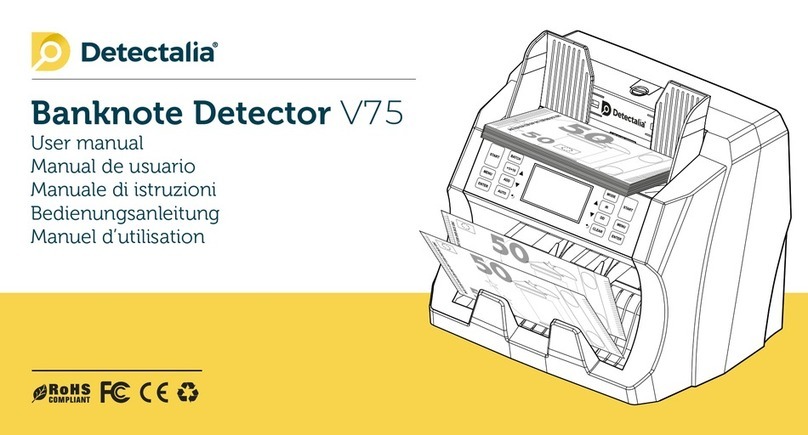
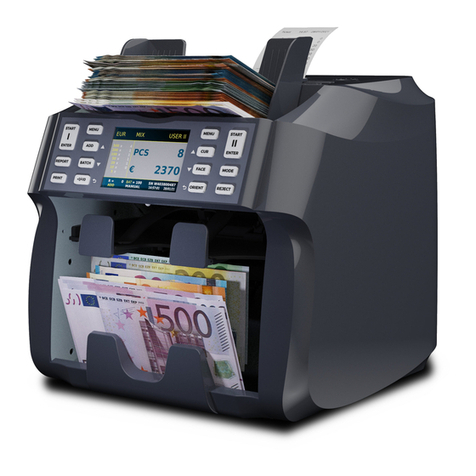
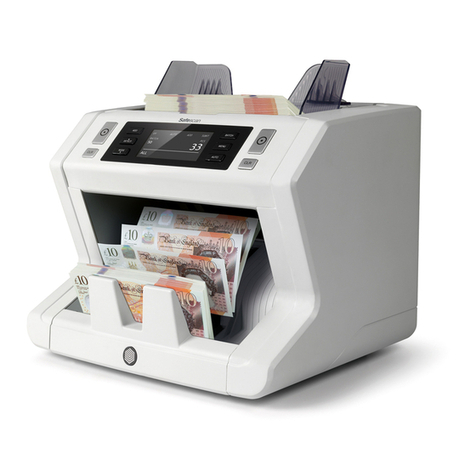
Detectalia D7T+ User manual


3
D7T+
CONTENT
1. Safety instructions 05
2. Product overview 06
3. Product operation 07
4. Self test error code display 10
5. Detecting error codes display 11
6. Troubleshooting 12
7. Maintenance 12
8. Features and specications 13
Counterfeit detector Detectalia D7T+
Language
Idioma
Linguaggio
Sprache
Langue
English
Español
Italiano
Deutsch
Français
03
15
27
39
51
User Manual
Manual de uso
Manuale d’uso
Manuel d’utilisation
Bedienungsanleitung

5
D7T+
4
D7T+ 1. Safety instructions
Please read the safety instructions before use. Please read all warnings and cautions carefully to avoid damage to the machine and personal injury.
WARNING
1. Do not operate the machine in areas with high temperature or high humidity since it may cause the unit to malfunction.
2. Do not disassemble this product. Incorrect re-assembly can cause electric shock. Take it to qualify personnel if repair is required.
3. Before turning on the power, please make sure that there are no objects obstructing the operation of the rollers and wheels.
4. Unplug this product from the outlet before cleaning. Do not use liquid cleaners or aerosol cleaners. Use a damp cloth for cleaning the cover.
5. To prevent shock hazard, do not disconnect the plug of AC/DC adapter when hands are wet.
6. To prevent re or short circuit, unplug the unit if you want to move it to another position.
7. Hold the plug disconnecting the unit from the power outlet, do not pull the cord as it can be damaged.
8. Keep the AC/DC cord from damage. Avoid placing heavy objects on the cord.
9. The unit should be connected to a power supply through this type of AC/DC adapter.
10. The battery storage shall be in the clean and dry ventilation room at the temperature of -5-35 cº and shall keep out of re or heat and
avoid touching corrosion elements.
11. When the battery is unused for a long period, please take the battery out from the machine and need to be recharged once every 6 months.
12. Do not change the position o the optical sensors.
We recommend the user to verify that the box contains all of the items listed here:
• Banknote Detector / 1 Unit • Power Adapter / 1 Unit • User Manual / 1 Unit
• Rechargeable Lithium Battery (optional).

7
D7T+
6
D7T+ 2. Product overview
DC Input socket
TFT Display
Sound / clear button
Direction button
Banknote feeding sensor
Power switch
USB port
Battery cover
50€
Units :100 :200 :500
:5 :10 :20 :5
0
EUR
x
3. Product operation
1. Turning the machine on and off
■ Connect the power adapter to a 110V or 220V outlet, then connect to the machine. NOTE: Insert lithium battery (OPTIONAL).
■ Once connected, press the power switch button to turn on the machine.
□ The indicator light will light up and machine will run a self test.
□ If the test is successful, the TFT display will show the software version and currency interface.
■ Hold the power switch button for about 2 seconds to turn off machine. when the indicator lights off, it means the machine has been
successfully turned off.
2. Button Introduction
■ Press the button to choose the exiting direction of the valid banknotes. Take your nger away when hear the beep sound, as the direc-
tion indicator will be changed. The denotation of direction will be shown on the top part of the display. ↑ means the valid banknote will go
out from the back of the machine, ↓ means the valid banknote will retreat and come back to you where your inserted the banknote.
■ Press the button to clear the records. Hold the button for about 2 seconds to turn on or off the sound.
x

9
D7T+
8
D7T+
EUR
E-11
50€
Units :100 :200 :500
:5 :10 :20 :5
0
EUR
3. Product operation
4. Detection
If the banknotes are genuine, the pieces of each denomination and the total value will be shown on display, with the banknotes
exiting form the selected direction (see figure 1).
If a banknote is a suspicious, it will be rejected and exit the machine from the currency feeding with three beeps. At the same time,
the power switch light will glint, and the corresponding error code will be shown on the display (See figure 2).
5. Sleep (Power Saving) Mode
The detector will enter sleep mode after 3 minutes of being idling to save power. The information on the display window will turn off and only
the blue power button indicator light will remain on. The machine can be woken up and return to working mode by touching any key or by
feeding a banknote through the machine. If the machine is idle for more than 30 minutes, the machine will power off automatically.
3. Product operation
3. Inserting the banknote correctly
Please insert the banknotes as shown in the pictures below. On the right side of the insertion. If a banknote is incorrectly inserted, the
machine will refuse it and alert the user that an error has occurred. This machine is equipped with 4-Way orientation. This allows the
user to insert the banknote in any direction they want.
Error Code
50€
Units :100 :200 :500
:5 :10 :20
:5
0
EUR
x
50€
Units :100 :200 :500
:5 :10 :20
:5
0
EUR
x
50€
Units :100 :200 :50
0
:5 :10 :20
:5
0
EUR
x
Error Code
Total Value
Sound
Exit direction
Pieces of Each
Denomination
Battery
Figure 1
Currency Type
Figure 2

11
D7T+
10
D7T+ 4. Self test error code display
The detector automatically performs a self test after powered on. If one of the following codes is showed on the display window, it is
probable that the sensor is blocked by banknotes or dust. Please use a brush or a piece of soft cloth to clean the dust on the sensor or
remove the blocking banknote. Once complete, restart the machine.
5. Error codes display
If the following error code is showed on the display window during the course of detecting, you can handle them as per the error type
when the machine is stopped.
Error Code Reason
C1 The code disc or motor is abnormal.
C2 The feeding sensor is abnormal.
C3 The left IR penetrating sensor is abnormal.
C4 The right IR penetrating sensor is abnormal.
C5 The bottom left IR reflection is abnormal.
C6 The bottom right IR reflection is abnormal.
C7 The upper left IR reflection is abnormal.
C8 The upper right left IR reflection is abnormal.
C9 The 850nm IR reflection is abnormal.
C10 The 960nm IR reflection is abnormal.
C11 The left MG sensor is abnormal.
C12 The right MG sensor is abnormal.
Error Code Reason
E1 Banknote length error.
E2/E3 Magnetic ink properties error.
E4/E5 Infrared properties error.
E6 Banknote thickness error / Double note error.
E7 Slant note (note not inserted straight).
E10 Banknote retreat abnormal.
E11/E15/E16/E17 Infrared image abnormal.
E13 Banknote without magnetic.
E14 Magnetic feature abnormal.

13
D7T+
12
D7T+ 6. Troubleshooting
Problem Solution
Machine alarm keeps beeping. • Check whether the main power supply is within the specified range(AC 100-240V/50-60Hz).
• Check whether the DC output is within the specified range : DC 12V±5%.
• Check whether the supply plug is well connected.
• Check whether the built-in battery is sufficient to work.
• Clear the dust on the sensors.
Banknote is jammed. • Please open the top cover to remove the banknote.
7. Maintenance
This machine is a precise financial detecting equipment that needs periodic maintenance.
■ Periodically check the voltage of the power supply to ensure that the voltage is within the specified range.
■ Keep the banknote detector in ventilated place and beyond strong sunshine and magnetic field.
■ Periodically clean the sensors: use a piece of cotton within a small amount of alcohol to clean all sensors, rubber wheels
and rubber synchronous belt. Keep the surface of sensors away from sharp and hard articles to avoid damage.
■ Do not attempt to disassemble the detector.
8. Features and specifications
Features:
■ Identify the currency automatically.
■ Show pieces of each denomination and total value of each currency type.
■ 4 way orientation - insert bills In any direction.
■ Optional battery for portability.
■ Easy to update for new currency releases via USB port.
■ Suitable for detecting EUR & USD.
Specifications:
■ Operating Temperature: 0ºC~40ºC
■ Storage Temperature: -20ºC~65ºC
■ Dimension: 155x137x82 (mm)
■ Net Weight: 0.5 kg
■ Power Supply: AC100-240V 50/60Hz or DC 12V/1.0A
■ Battery: rechargeable lithium battery 11.1V/500mAH
■ Power Consumption: <10W
■ Detecting Speed: <0.5 seconds/piece
Notice:
If the machine has some faults that you can’t solve, please contact the technical support departament of our company
or our agent for services.

15
D7T+
CONTENIDO
Instrucciones de seguridad 17
Partes del detector 18
Funcionamiento 19
Códigos de errores del autotest 22
Códigos de errores de detección 23
Solución de problemas 24
Mantenimiento 24
Características y especicaciones técnicas 25
Detector de billetes falsos Detectalia D7T+

17
D7T+
16
D7T+ 1. Instrucciones de seguridad
Lea las instrucciones de seguridad antes usar el equipo. Lea todas las advertencias y precauciones cuidadosamente para evitar daños a la máquina o lesiones.
WARNING
1. No opere la máquina en áreas con alta temperatura o alta humedad, ya que puede causar una avería.
2. No desmonte este producto. El ensamblaje incorrecto puede causar descargas eléctricas. Llévelo a personal cualicado si se requiere reparación.
3. Antes de encender la alimentación, asegúrese de que no haya objetos que obstruyan el correcto funcionamiento de los rodillos y las ruedas.
4. Desenchufe este producto de la toma de corriente antes de limpiarlo. No use limpiadores líquidos o en aerosol.
Use un paño húmedo para limpiar la cubierta.
5. Para evitar el riesgo de descarga eléctrica, no desconecte el enchufe del adaptador de CA/CC cuando tenga las manos mojadas.
6. Para evitar incendios o cortocircuitos, desenchufe la unidad si desea moverla a otra posición.
7. No tire del cable ya que puede dañarse.
8. Evite colocar objetos pesados sobre el cable de red.
9. La unidad debe conectarse a una fuente de alimentación a través de este tipo de adaptador de AC/DC.
10. El almacenamiento de la batería debe estar en la sala de ventilación limpia y seca a una temperatura de -5 a -35 ºC y debe mantenerse
alejado del fuego o del calor y evitar tocar elementos de corrosión.
11. Cuando la batería no se use durante un período prolongado, retírela de la máquina y debe recargarla una vez cada 6 meses.
12. No cambie la posición ni los sensores ópticos.
Le recomendamos que verique si los siguientes ítems están en el paquete:
• Detector de billetes / 1 Unidad • Adaptador de corriente / 1 Unidad • Manual de usuario / 1 Unidad
• Batería de litio recargable (opcional, se vende por separado).

19
D7T+
18
D7T+
50€
Units :100 :200 :500
:5 :10 :20 :5
0
EUR
x
2. Partes del detector
Conector AC/DC
Pantalla TFT
Botón de sonido / borrar
Selección de salida de billetes
Sensor de entrada de billetes
Botón de encendido
Puerto USB
Cubierta de la batería
3. Funcionamiento
1. Encendido y apagado de la máquina
■ Conecte el adaptador de corriente a la red de 110V o 220V, luego conéctelo a la máquina. NOTA: Inserte la batería de litio (OPCIONAL))
■ Una vez conectado, presione el botón del interruptor de encendido para arrancar la máquina.
□ La luz indicadora se encenderá y la máquina realizará una autocomprobación.
□ Si la prueba es exitosa, la pantalla TFT mostrará la versión del software y el símbolo de la divisa.
■ Mantenga presionado el botón de encendido durante aproximadamente 2 segundos para apagar la máquina. Cuando el indicador se
apaga, significa que la máquina se ha apagado correctamente.
2. Botones
■ Presione el botón para elegir la dirección de salida de los billetes válidos. Retire el dedo cuando escuche el pitido, ya que el indicador
de dirección cambiará. La selección de dirección se mostrará en la parte superior de la pantalla. ↑ significa que el billete válido saldrá de la
parte posterior de la máquina, ↓ significa que el billete válido saldrá por la entrada frontal.
■ Presione el botón para borrar los resultados. Mantenga presionado el botón durante aproximadamente 2 segundos para activar o
desactivar el sonido.
x

21
D7T+
20
D7T+
EUR
E-11
3. Funcionamiento
4. Detección
Si los billetes son genuinos, las unidades de cada denominación y el valor total se mostrarán en la pantalla, con los billetes que salen de la
dirección seleccionada (consulte la imagen 1).
Si un billete es sospechoso, será rechazado y saldrá de la máquina de la alimentación de moneda con tres pitidos. Al mismo tiempo, la luz del
interruptor de encendido parpadeará y el código de error correspondiente se mostrará en la pantalla (consulte la imagen 2).
5. Modo de suspensión (ahorro de energía)
El detector entrará en modo de suspensión después de 3 minutos de estar inactivo para ahorrar energía. La información en la ventana de visuali-
zación se apagará y solo la luz indicadora azul del botón de encendido permanecerá encendida. La máquina se puede despertar y volver al modo
de trabajo tocando cualquier tecla o introduciendo un billete a través de la máquina. Si la máquina está inactiva durante más de 30 minutos, la
máquina se apagará automáticamente.
3. Funcionamiento
3. Insertar el billete correctamente
Inserte los billetes como se muestra en las imágenes a continuación. En el lado derecho de la inserción. Si un billete se inserta incorrec-
tamente, la máquina lo rechazará y alertará al usuario de que se ha producido un error. Esta máquina está equipada con orientación en
4 direcciones. Esto permite al usuario insertar el billete en la dirección que desee.
50€
Units :100 :200 :500
:5 :10 :20 :50
EUR
x
50€
Units :100 :200 :500
:5 :10 :20 :50
EUR
x
50€
Units :100 :200 :500
:5 :10 :20 :50
EUR
x
Código de error
Valor total
Sonido
Salida
Parciales
Batería
Imagen 1
Divisa
Imagen 2
50€
Units :100 :200 :500
:5 :10 :20 :50
EUR

23
D7T+
22
D7T+ 4. Códigos de error del autotest
El detector realiza automáticamente una autocomprobación después de encenderlo. Si se muestra uno de los siguientes códigos en la
ventana de visualización, es probable que el sensor esté bloqueado por billetes o polvo. Utilice un cepillo o un paño suave para limpiar el
polvo del sensor o retire el billete de bloqueo. Una vez completado, reinicie la máquina.
5. Códigos de error de detección
Estos son los códigos que pueden aparecer.
Error Code Reason
C1 El motor está fallando.
C2 El sensor de alimentación está fallando.
C3 El sensor de penetración de infrarrojos izquierdo está fallando.
C4 El sensor de penetración de infrarrojos derecho está fallando.
C5 El reflejo de infrarrojos inferior izquierdo está fallando.
C6 El reflejo de infrarrojos inferior derecho está fallando.
C7 El reflejo de infrarrojos superior izquierdo está fallando.
C8 El reflejo de infrarrojos superior derecho izquierdo está fallando.
C9 La reflexión de infrarrojos de 850 nm está fallando.
C10 La reflexión de infrarrojos de 960 nm está fallando.
C11 El sensor MG izquierdo está fallando.
C12 El sensor MG derecho está fallando.
Error Code Reason
E1 Error de longitud del billete.
E2/E3 Error de propiedades de la tinta magnética.
E4/E5 Error de propiedades infrarrojas.
E6 Error de grosor del billete / Error de billete. doble
E7 Billete inclinado, no insertado recto.
E10 Retirada anormal de billetes.
E11/E15/E16/E17 Imagen infrarroja anormal.
E13 Billete sin magnetismo.
E14 Característica magnética anormal.

25
D7T+
24
D7T+ 6. Solución de problemas
Problema Solución
La alarma suena sin parar. • Compruebe si la fuente de alimentación principal está dentro del rango especificado (AC 100-240V / 50-60Hz).
• Compruebe si la salida de DC está dentro del rango: DC 12 V ± 5%.
• Compruebe si el enchufe de alimentación está bien conectado.
• Compruebe si la batería incorporada es suficiente para funcionar.
• Limpie el polvo en los sensores.
Billete atascado. • Abra la cubierta superior para quitar el billete.
7. Mantenimiento
Esta máquina es un equipo de detección profesional preciso que necesita mantenimiento periódico.
■ Verifique periódicamente el voltaje de la fuente de alimentación para asegurarse de que el voltaje esté dentro del rango especificado.
■ Mantenga el detector de billetes en un lugar ventilado y más allá de la luz solar intensa y el campo magnético.
■ Limpie periódicamente los sensores: use un trozo de algodón con una pequeña cantidad de alcohol para limpiar todos los sensores,
ruedas de goma y correa de goma. Mantenga la superficie de los sensores lejos de artículos afilados y duros para evitar daños.
■ No intente desmontar el detector.
8. Características y especificaciones técnicas
Caracteristicas:
■ Identica la divisa automáticamente.
■ Muestra piezas de cada denominación y valor total de cada tipo de moneda.
■ Orientación en 4 direcciones: inserte billetes en cualquier dirección.
■ Batería opcional para portabilidad.
■ Fácil de actualizar para nuevos lanzamientos de divisas a través del puerto USB.
■ Adecuado para detectar EUR y USD.
Especificaciones:
■ Temperatura de funcionamiento: 0 ºC ~ 40 ºC
■ Temperatura de almacenamiento: -20 ºC~ 65 ºC
■ Dimensiones: 155x137x82 (mm)
■ Peso neto: 0.5 kg
■ Fuente de alimentación: AC100-240V 50 / 60Hz o DC 12V / 1.0A
■ Batería: batería de litio recargable 11.1V / 500mAH
■ Consumo de energía: <10W
■ Velocidad de detección: <0.5 segundos / billete
Aviso: si la máquina tiene algunas errores que no puede resolver, comuníquese con el departamento de soporte técnico de nuestra
compañía o con nuestro agente para obtener servicios.

27
D7T+
29
30
31
34
35
36
36
37
INDICE
Istruzioni di Sicurezza
Informazioni Generali
Funzioni e operazioni
Codici d’errore del Test d’Avvio
Codici d’errore di rilevazione
Risoluzione dei problemi
Manutenzione
Caratteristiche e speciche tecniche
Rilevatore di false banconote Detectalia D7T+

29
D7T+
28
D7T+ 1. Istruzioni di sicurezza
Per favore porre attenzione alle seguenti istruzioni di sicurezza prima di utilizzare la macchina. Per favore
leggere attentamente tutti gli avvertimenti e precauzioni per evitare danni all’apparecchio o alle persone. WARNING
1. Non utilizzare l’apparecchio in locali con alte temperature o molto umidi poiché potrebbe causarne il malfunzionamento.
2. Non smontare l’apparecchio. Un errato rimontaggio potrebbe causare shock elettrici. L’apparecchio deve essere riparato solo da un
personale autorizzato e qualicato.
3. Prima dell’accensione per favore vericare che non siano presenti oggetti che possano ostruire o impedire il normale funzionamento delle
cinghie e delle ruote.
4. Scollegare dalla rete elettrica prima di effettuare la pulizia dell’apparecchio. Non utilizzare detergenti liquidi o spray. Utilizzare un panno
morbido per pulire le parti esterne.
5. Per evitare scosse elettriche, non scollegare il trasformatore AC/DC con le mani bagnate.
6. Per evitare incendi o corto circuiti, scollegare dalla presa di corrente l’apparecchio se desiderate cambiarne la posizione di utilizzo.
7. Scollegare il trasformatore dalla presa di corrente tenendo la spina, non tirare il cavo elettrico che potrebbe danneggiarsi.
8. Evitare di danneggiare il trasformatore AC/DC. Evitare di appoggiare oggetti pesanti sopra il cavo elettrico.
9. L’apparecchio deve essere collegato alla presa di corrente attraverso il trasformatore AC/DC fornito all’interno della confezione. Non utilizza
re altri tipi di trasformatori.
10. Il vano batteria deve essere mantenuto pulito e asciutto per evitare la corrosione dei collegamenti. La temperatura di utilizzo deve
essere compresa tra 5°C e 35°C e deve essere tenuta lontano da fonti di calore.
11. In caso di inutilizzo della batteria per lunghi periodi, rimuoverla dall’apparecchio e conservarla in luogo secco e ventilato. Si raccomanda
di effettuare una carica completa ogni 6 mesi.
12. Non modicare la posizione dei sensori ottici.
Vi raccomandiamo di vericare che all’interno della confezione siano contenuti:
• Rilevatore di banconote / 1 Unità • Trasformatore elettrico / 1 Unità • Manuale d’uso / 1 Unità
• Batteria ricaricabile al litio (optional - da acquistare separatamente).

31
D7T+
30
D7T+
50€
Units :100 :200 :500
:5 :10 :20 :5
0
EUR
x
3. Funzioni e operazioni
1. Accensione e spegnimento della macchina:
■ Collegare per primo il trasformatore a una presa da 120V o 220V, dopodiché collegare il trasformatore alla macchina o in alternativa
inserire la batteria opzionale senza collegare il trasformatore.
■ Una volta collegato premere il bottone d’accensione per accendere l’apparecchio.
□ Si accenderà la spia d’accensione e l’apparecchio effettuerà un test di funzionamento.
□ Se il test avrà successo, lo schermo a TFT mostrerà la versione del software installato e la valuta settata.
■ Premere il tasto d’accensione per circa 2 secondi per spegnere l’apparecchio. Quando la spia d’accensione sarà spenta, significherà che
l’apparecchio è stato spento correttamente.
2. Funzionamento dei pulsanti
■ Premere per scegliere la direzione d’uscita delle banconote valide. Una volta udito il bip potrete rilasciare il pulsante e l’indicatore della
direzione sarà cambiato. La direzione d’uscita viene indicate nell’angolo in alto a destro del display. ↑ Significa che le banconote riconosciute
come valide verranno espulse dalla parte posteriore dell’apparecchio. ↓ Significa che la banconota riconosciuta come valida verrà espulsa
nella stessa direzione in cui è stata inserita.
■ Premere il pulsante per cancellare il conteggio. Premendo lo stesso pulsante per circa 2 secondi verrà attivato o disattivato il suono.
x
2. Informazioni Generali
Presa di ingresso CC
Display TFT
Pulsante Sound / Clear
Pulsante di direzione
Sensore alimentazione
banconote
Interruttore di alimentazione
Porta USB
Coperchio della batteria

33
D7T+
32
D7T+
EUR
E-11
50€
Units :100 :200 :500
:5 :10 :20 :50
EUR
3. Funzioni e operazioni
4. Rilevazione
Se la banconota è valida, sul display comparirà il numero di unità secondo ciascun valore e la banconota verrà espulsa secondo nella direzio-
ne prescelta (vedi punto 2 e figura 1).
Se la banconota viene riconosciuta come falsa, verrà espulsa sempre nella direzione del suo inserimento e l’apparecchio emetterà tre bip.
Allo stesso tempo la spia d’accensione lampeggerà e sul display TFT comparirà un codice d’errore (figura 2).
5. Modalità Stand-By (Risparmio energetico)
Dopo 3 minuti di non utilizzo il rilevatore entrerà in modalità stand-by (risparmio energetico). Il display TFT si spegnerà lasciando solo un indica-
tore blu acceso. Inserendo una nuova banconota o premendo qualsiasi pulsante la macchina si riaccenderà automaticamente. Dopo 30 minuti
di non utilizzo la macchina in automatico si spegnerà completamente.
3. Funzioni e operazioni
3. Inserire correttamente le banconote
Per favore inserire le banconote come indicato nell’immagine qui sotto, sul lato destro della fessura d’entrata. Se una banconota viene
inserita in modo non corretto, l’apparecchio la rifiuterà emettendo un suono e indicando un codice d’errore sul display. Il rilevatore è
in grado di leggere le due facce della banconota in entrambi direzioni, pertanto è possibile inserire le banconote in qualsiasi direzione
desiderata.
Codici di errore
Valore totale
Allarme
Direzione di uscita
Parziali
Batteria
Figura 1
Tipo di valuta
Figura 2
50€
Units :100 :200 :500
:5 :10 :20 :50
EUR
x
50€
Units :100 :200 :500
:5 :10 :20 :50
EUR
x
50€
Units :100 :200 :500
:5 :10 :20 :50
EUR
x

35
D7T+
34
D7T+ 4. Codici d’errore del Test d’Avvio
Al momento dell’accensione il rilevatore effettua automaticamente un self-test. Se uno dei seguenti codici appare sullo schermo, è pro-
babile che il corretto funzionamento di uno dei sensori sia impedito dalla presenza di polvere o da una banconota inceppata all’interno.
Per favore spegnere l’apparecchio, pulire i sensori con un panno morbido o aria compressa oppure rimuovere la banconota rimasta
bloccata all’interno. Una volta completata l’operazione riaccendere la macchina.
5. Codici d’errore di rilevazione
La lista seguente riporta il significato dei codici d’errore che possono comparire durante la fase di rilevazione.
Codice errore Motivo
C1 Il disco del codice o il motore è anormale.
C2 Il sensore di alimentazione è anormale.
C3 Il sensore penetrante IR sinistro è anormale.
C4 Il sensore penetrante IR destro è anormale.
C5 Il riflesso IR in basso a sinistra è anormale.
C6 La riflessione IR in basso a destra è anormale.
C7 Il riflesso IR in alto a sinistra è anormale.
C8 La riflessione IR in alto a sinistra è anormale.
C9 La riflessione IR a 850 nm è anormale.
C10 La riflessione IR a 960 nm è anormale.
C11 Il sensore MG sinistro è anormale.
C12 Il sensore MG destro è anormale.
Codice errore Motivo
E1 Errore di lunghezza delle banconote.
E2/E3 Errore nelle proprietà dell’inchiostro magnetico.
E4/E5 Errore nelle proprietà degli infrarossi.
E6 Errore spessore banconota / Errore doppia banconota.
E7 Banconota obliqua (banconota non inserita diritta).
E10 Ritiro delle banconote anormale.
E11/E15/E16/E17 Immagine a infrarossi anormale.
E13 Banconota senza magnetica.
E14 Caratteristica magnetica anormale.

37
D7T+
36
D7T+ 6. Risoluzione dei problemi
Problema Soluzione
L’apparecchio emette un suono • Verificare che l’alimentazione elettrica si trovi all’interno del range corretto (AC 100-240V/50-60Hz).
d’allarme (beep) continuo. • Verificare se l’emissione DC si trovi all’interno del range corretto: DC 12V±5%.
• Verificare che la spina sia inserita correttamente nella presa.
• Verificare, se presente, che la batteria sia sufficientemente carica per poter funzionare correttamente.
• Rimuovere eventuale polvere e/o sporcizia presente sui sensori.
Banconota inceppata. • Sollevare il coperchio superiore (display) e rimuovere la banconota.
7. Manutenzione
Questa macchina è un’apparecchiatura di precisa rilevazione del denaro che necessita, per il suo corretto funzionamento, di manutenzione
ordinaria periodica.
■ Periodicamente verificare il trasformatore per assicurarsi che il suo voltaggio si trovi all’interno del range corretto.
■ Tenere il rilevatore di banconote in un luogo ventilato e non esposto direttamente alla luce del sole o a forti campi magnetici.
■ Periodicamente effettuare la pulizia degli elementi principali: con un cotton-fioc leggermente imbevuto d’alcol pulire i sensori, le ruote di gomma
e le cinghie di trascinamento. Per evitare il danneggiamento dei sensori, per la pulizia assolutamente non utilizzare un oggetto appuntito o ruvido.
■ Non smontare l’apparecchio in nessun modo.
8. Caratteristiche e specifiche tecniche
Caratteristiche:
■ Identificazione automatica della valuta della banconota inserita.
■ Mostra il valore e il numero dei pezzi totale e parziale per ciascun valore delle banconote.
■ Lettura della banconota in tutte e quattro le direzioni.
■ Batteria opzionale al litio ricaricabile per il suo utilizzo portatile o in assenza di corrente elettrica.
■ Facile aggiornamento tramite porta USB.
■ Lettura di tutte le banconote dell’Euro (EUR) e del Dollaro Statunitense (USD).
Specifiche tecniche:
■ Temperatura d’uso: 0ºC~40ºC
■ Temperatura si conservazione: -20ºC~65ºC
■ Dimensioni: 155x137x82 (mm)
■ Peso netto: 0.5 kg
■ Alimentazione elettrica: AC100-240V 50/60Hz o DC 12V/1.0A
■ Batteria (opzionale): ricaricabile al Litio 11.1V/500mAH
■ Consumo elettrico: <10W
■ Velocità di lettura: <0.5 sec/unità
Nota: per qualsiasi malfunzionamento dell’apparecchio non risolvibile attraverso le indicazioni precedentemente date, per favore mettetevi
in contatto con il servizio tecnico della nostra azienda o del vostro rivenditore di fiducia.

39
D7T+
41
42
43
46
47
48
48
49
INHALT
Sicherheitshinweise
Produktübersicht
Betrieb des Produkts
Selbsttest Fehlercode-Anzeige
Erkennen von Fehlercode-Anzeige
Fehlerbehebung
Wartung
Merkmale und Spezikationen
Detectalia D7T+ Geldscheinprüfer
This manual suits for next models
1
Table of contents
Languages:
Other Detectalia Banknote Counter manuals
Popular Banknote Counter manuals by other brands
Betec
Betec EuroTester operating instructions
erc
erc Shark-100N instruction manual

Yoosol Electronics
Yoosol Electronics PRIMO-P1 Operation manual
Cassida
Cassida PRO Series Service manual

Royal Sovereign
Royal Sovereign RBC-EG100 owner's manual
CUMMINS ALLISON
CUMMINS ALLISON JetCount Series Cleaning procedure
