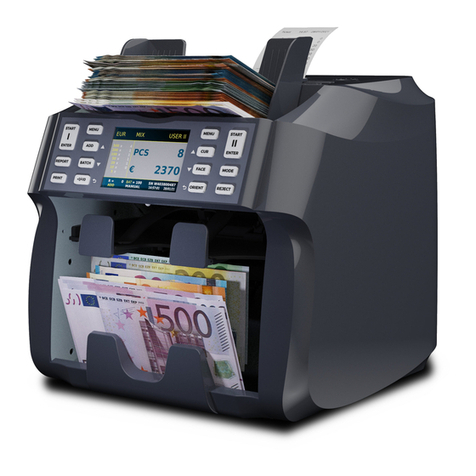
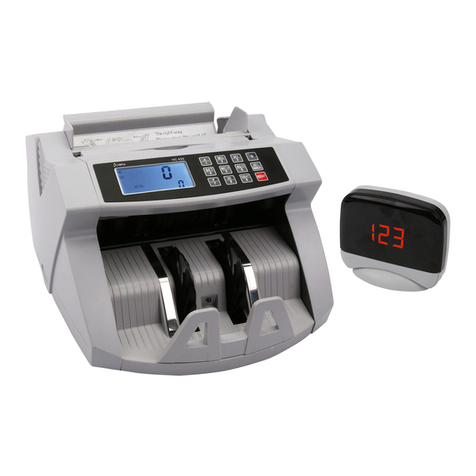
Detectalia V75 User manual

Banknote Detector V75
User manual
Manual de usuario
Manuale di istruzioni
Bedienungsanleitung
Manuel d’utilisation

2
V75

3
V75
Language
Idioma
Linguaggio
Sprache
Langue
English
Español
Italiano
Deutsch
Français
04
21
39
57
75

4
V75
Preface
Thank you for supporting and choosing our products! In order to make the best use of the machine,
please read this manual carefully before using. For the products safety performance, please use
our products correctly. Our company will continue to improve and optimize the product, so the
actual product maybe slightly different from this manual. Our company will keep trying to provide
customers with better quality products.

5
V75
CONTENT
Banknote Counter Detectalia V75
1. Safety usage instructions 7
2. The introduction of the main parts 8
3. Specications 9
4. The introduction of the panel 10
5. The introduction of the main display 11
6. Operation 12
7. Detection function setting 13
8. Fault code and solution 17
9. Error code and solution 18
10. Precaution for handing the machine 19
11. Cautions 19
12. Maintenance 20
13. Warning 20


7
V75
1. Safety usage instructions
To avoid machine damage and personal injury, please read all the warnings and caution carefully before rst use, thank you.
1. It is strictly prohibited for unprofessional personnel to disassemble the machine.
2. Keep the unit away from heavy humidity and strong sunlight, otherwise will do harm to the machine.
3. Keep the unit away from electric heater, volatile gases, ammable material, etc.
4. Before moving the unit, please turn off the machine and unplug the power code, otherwise maybe damaged resulting in re and electrical shock.
5. Do not use sharp or hard objects to press the keyboard, otherwise it will cause the keys poor connect.
6. Don’t touch the power code with wet hand.
7. Please avoid any other objects dropping into the unit, otherwise will affect the note feeding or harm to the machine.
8. The machine maybe inuence by the wireless device, it may require the user to take feasible measure against the interference.
9. Keep the machine in the dry condition, this machine is not waterproof.

8
V75
2. The introduction of the main parts
Front cover
Rear cover
Feeding wheel
Adjusting screw
Banknote twiddling wheel
Resistance wheel
Hopper guide
Banknote transporting wheel
Start sensor
Panel
LCD display
Banknote receiving wheel
Transporting platform
Banknote receiving sensor External Display

9
V75
Voltage/Frequency 100—240V~/50—60Hz/600mA
Power Consumption 60W(Max)
Counting range 4 digit
Counting speed 900 banknotes/min
Batch range 1-999 banknotes
Countable banknote size MIN: 50*90 mm MAX: 100*190 mm
Banknote thickness 0.075~0.15 mm
Hopper capacity 300 banknotes
Stacker capacity 200 banknotes
Net weight 4.02 kg
Machine size L: 268 mm *W: 210 mm *H: 237 mm
3. Specifications
USB
RJ11
Label
Power socket
Power switch

10
V75
4. The introduction of the panel
START:
MENU:
ENTER:
BATCH:
+1/+10 :
ADD :
AUTO :
MODE:
IR :
DD :
CLEAR :
In the manual counting mode, press this key to start
counting.
Press this key to enter into the MENU Interface.
In the MENU interface, press this key can save the
change and back to the previous interface. Press this
key to confirm or enter into the sub-menu.
Press this key can turn on/off the batch function, and
the user can select the batch number among “100, 50,
20, 10, 5, off” by short pressing.
In the BATCH interface short press this key to “+1”; long
press this key to “+10”. In the MENU interface, press this
key to increase the number.
Press this key to turn on/off the ADD (accumulation)
function. In the MENU interface, press this key to
decrease the number.
Press this key to choose AUTO/MANU counting mode.
In the MENU interface, press this key to return to the
previous interface.
Press this key to switch the counting mode for UV and MG.
Can active or inactive UV and/or MG.
Press this key to turn on/off the IR (Infrared) function. In the
MENU interface, press this key to switch settings.
Press this key to turn on/off the DD (SIZE) function.
In the MENU interface, press this key to switch settings.
1. Clear the counting result.
2. In the MENU interface Press this key to return to the
previous interface.
3. Long press this key will restore to the factory setting.

11
V75
5. The introduction of the main display
1
2
3
4
5
6
7
8
9
10
11
UV function mode
MG function mode
IR function mode
DD function mode
Last count number
Current count number
MNL (manual) mode
AUTO (automatic) mode
Batching number
Batch function
ADD function
1 2 3 4 5
789
10
11
6

12
V75
Press the power switch to turn on/off the unit.
Note: When turn on , it will start self-check and all the function words on the LCD are lit up. If there is some problem with
the sensors, then it will show the error code in the display. (details please refer to the point 7: Error code and resolution).
Press AUTO to switch the counting mode.
AUTO: when put the banknotes on the hopper, the machine will start counting automatically.
MNL: when put the banknotes on the hopper, the user should press START to start counting the banknotes.
Notes: In the “AUTO” counting, if the notes are very soft or dirty, then it will lead to the start sensor not work.
Press ADD to turn on/off the ADD function, When the display show “ADD”, it means the ADD function is on; otherwise, the
ADD function is off. The ADD function can work with Batch function.
Press “ BATCH” to turn on/off the batch function, if the user press this key again, then the user can choose the batch num-
ber among “100, 50, 20, 10, off”, or the user can press“+1/10” to set a batch number, the batch range is “0-999.
When the banknote feeding clearance is too loose, the machine will come up with the problem of “double note” and
inaccurate counting number, etc. Then the user can rotate the adjusting screw to the anti-clockwise direction little by little
until the counting is smooth. Please noted that do not rotate it too much in case it will break the notes.
When the banknote feeding clearance is too tight, then the machine will have unsmooth counting, and the notes will be
deformed and damaged. The user should rotate the adjusting screw to the clockwise direction until the problem solved.
Notes: the adjusting screw has been set to a good position before shipping from the factory, so the user is no need to do
the adjustment when they receive the machine. Only when after a long time usage, it may need to do some adjustment.
6.1 Turn on/off
6.2 MNL/AUTO
count setting
6.3 ADD function
6 .4 Batch function
6.5 Banknote feeding
clearance adjustment
6. Operation

13
V75
7.1 UV detection
7.2 MG detection
7.3 IR detection
The users can choose the detection function according to their needs.
• Press MODE choose to turn on the UV function, when the display show “UV”, it means the UV function is on; otherwise, the
UV function is off.
• Check the banknote with UV feature.
• During the counting, if the machine detects a dubious note, the machine will stops counting and emit beeping sound,
while the display will show the message, the user should take away the last banknotes from the stacker and check.
Then the user can press “START” to continue counting or take all the banknotes from the stacker to count again.
• UV sensitivity setting (details please refer to the Point 7.7: machine sensitivity parameters setting).
• Press MODE choose to turn on the MG function, when the display show “MG”, it means the MG function is on; otherwise,
the MG function is of.
• Check the banknote with MG feature.
• During the counting, if the machine detects a dubious note, the machine will stops counting and emit beeping sound,
while the display will show the message, the user should take away the last banknotes from the stacker and check.
Then the user can press “START” to continue counting or take all the banknotes from the stacker to count again.
• MG sensitivity setting (details please refer to the Point 7.7: machine sensitivity parameters setting).
• Press IR to choose to turn on the IR function, when the display show “IR”, it means the IR function is on; otherwise, the IR
function is off.
• Check the banknote with IR feature or double.
• During the counting, if the machine detects double or dubious note, the machine will stops counting and emit beeping
sound, while the display will show the message, the user should take away the last banknotes from the stacker and
check. Then the user can press “START” to continue counting or take all the banknotes from the stacker to count again.
• IR sensitivity setting (details please refer to the Point 7. 7: machine sensitivity parameters setting).
7. Detection function setting

14
V75
• Press DD choose to turn on the DD function, When the display show “DD”, it means the DD function is on;
otherwise, the DD function is off.
• Check the banknote with DD(size) feature.
• During the counting, if the machine detects double or dubious note, the machine will stops counting and emit beeping
sound, while the display will show the message, the user should take away the last banknotes from the stacker and
check. Then the user can press “START” to continue counting or take all the banknotes from the stacker to count again.
• DD sensitivity setting (details please refer to the Point 7.7 - machine sensitivity parameters setting).
• Long press CLEAR after hearing the “beep” sound, then the machine restore to default successfully.
• Calibration paper: 80g/A6 (10.5cm×14.8cm) white paper 1pc.
• First should turn off the machine, place 80g/A6 calibration paper into the machine (show as below pic.), make sure the paper
cover the counting and UV sensor.
• Long press START 3 seconds to make the machine enter the self-calibration (display show as the right picture). After success,
the machine will take out the calibration paper automatically.
7.4 DD detection
7.5 Restore to
factory setting
7.6 Self-calibration
function
7. Detection function setting

15
V75
• Press MENU open menu setting, then press IR or DD again to switch the setting.
• Press +1/+10 increase or ADD to decrease the sensitivity parameter setting, and press ENTER to save the change
and back to the previous interface.
1. P01/UU--* UV sensitivity: 0 is off, 9 is the highest, the default is 5 (ref. picture 6-1.).
2. P02/nng-* MG sensitivity: 0 is off, 9 is the highest, the default is 5 (ref. Pictur 6-2).
3. P03/dbL-* DOUBLE sensitivity, 0 is off, 9 is the highest, the default is 5 (ref. Picture 6-3).
4. P04/dd--* DD sensitivity: 0 is off, 9 is the highest, the default is 5 (ref. Picture 6-4).
5. P05/*-*** mold setting: 0-UU is UV, 1-CNT is COUNT, 2-nng is MG (ref. picture 6-6~7).
Note This setting base on the machine actual situation.
6. P06/Un-5* UV reference value: 0 is off , 9 is highest, the default is 5; (ref. picture 6-8).
7. P08/J-*** Dubious note count or not: J-OFF is dubious note no counted, J-ON is dubious note count; the default
is J-OFF; (ref. Picture 6-9~10).
7.7 Machine sensitivity
parameters setting
6-1
6-6
6-3
6-8
6-2
6-7
6-4 6-5
6-9 6-10
7. Detection function setting

16
V75
8. P10/H-*** Note hole filling function Settings: H-OFF is off, H--ON is open; the default is H--ON(open); (ref. Picture 6-11~12).
9. P11/***** Speed setting: 1000, 1200, 1500, the default is 1000; (ref. Picture 6-13~15).
10. P17/Ir--* IR sensitivity: 0 is off, 9 is highest, the default is 5 (ref. Picture 6-16).
11. P18/JC--* Notes feeding sensitivity: 0 is off, 9 is the highest, the default is 5 (ref. Picture 6-17).
12. P19/CC--* Notes stacker sensitivity: 0 is off, 9 is the highest, the default is 5 (ref. Picture 6-18).
13. P20/SLO-* Notes oblique sensitivity: 0 is off, 9 is the highest, the default is 5 (ref. Picture 6-19).
7. Detection function setting
7.7 Machine sensitivity
parameters setting

17
V75
Fault code Reason Solution
Problem with the left count sensor error or the
relative circuit.
1. Poor contact of the emitter tube, re-plugging. 4. Check the circuit connection.
2. Poor contact of the receiving tube, re-plugging. 5. Replace the main board.
3. Replace the right counting sensor.
Problem with the right count sensor error or the
relative circuit.
1. Poor contact of the emitter tube, re-plugging. 4. Check the circuit connection.
2. Poor contact of the receiving tube, re-plugging. 5. Replace the main board.
3. Replace the right counting sensor.
Something or dust covered the banknote
receiving sensor.
1. Remove all things in the stacker
3. Check the circuit
and clean the sensor. connection.
2. Replace the reset sensor or plug well.
4. Replace the main board.
Problem with the reset sensor.
1. Problem with the main motor error. 1. Replace the main motor. 4. Check the circuit connection.
2. Replace the driving belt. 5. Replace the main board.
2. Problem with the driving belt error.
3. Replace the speed sensor or plug well.
3. Problem with spend(dial)sensor.
Judge the feeding sensor error or not. Cover the sensor then turn on the machine, if the display show”EA4” means the
sensor is in good working condition, otherwise the feeding sensor or the connect
circuit fault.
8. Fault code and solution

18
V75
Fault code Reason Solution
Suspicious notes checked by UV detection. Take away the suspicious banknote, and press ”ENTER” to continue.
Problem with the UV detection. Lower the UV sensitivity level.
Suspicious notes checked by MG detection. Take away the suspicious banknote, and press ” ENTER” to continue.
Problem with the MG detection. Lower the MG sensitivity level.
Suspicious notes checked by IR detection. Take away the suspicious banknote, and press ” ENTER” to continue.
Problem with the IR detection. Lower the IR sensitivity level.
Suspicious notes checked by DD detection. Take away the suspicious banknote, and press ” ENTER” to continue.
Problem with the DD detection. Lower the DD sensitivity level.
Chain not. Remove all the banknotes from the stacker and press “ENTER” to continue.
Adjust the banknote clearance screw (detail ref.4.2).
Half note. Remove all the banknotes from the stacker and press “ENTER” to continue.
Slope note. Remove all the banknotes from the stacker and press “ENTER” to continue.
And putting notes in correct way.
9. Error code and solution

19
V75
Warning: When putting notes
• Forbidden use banknote mixed with other things, wet notes, damaged
notes and so on.
• Please take care fingers, hair, clothes and other things into the machine
when the machine counting.
• Folded or curled notes should be straightened before counting.
• Notes should be tidied up before putting in the hopper shown as below.
11. Cautions
Please read all the instructions as below before using the machine, or it will lead to some danger and fault.
• Avoid exposing the product to the sunlight.
• The product should have well earthing performance.
• The product may be affected by the wireless device interference (like phone, intercom etc).
• Please use the qualified power cable.
• Turn off the machine or pull out the power plug before moving it.
• Do not put tools, hand, hair or cloth close to the rotating parts of the machine, in case of some danger happened.
• Do not press the keys with something pointed.
• Keep the machine in the dry condition, this machine is not waterproof.
• Do not repair the machine by yourself, should ask qualified service person to repair and maintain it.
10. Precaution for handing the machine

20
V75
12. Maintenance
• The counting sensor and feeding sensor belong to the optical equipment. If there is some dust and dirty things
covering the sensor, it will lead to the fault when the machine is working.
• The user should clean the machine after using.
13. Warning
• Please unplug the power cable or turn off the machine before do some cleaning.
• Don’t use chemical wash detergent to clean the machine.
Table of contents
Languages:
Other Detectalia Banknote Counter manuals


