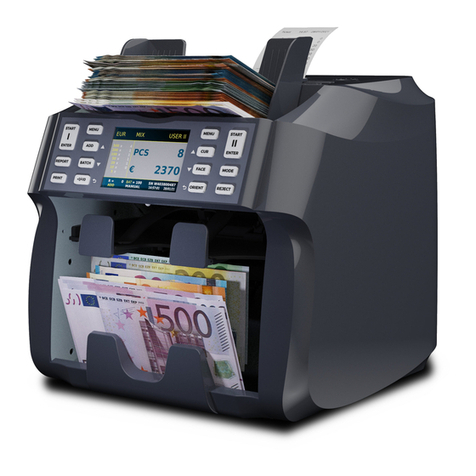
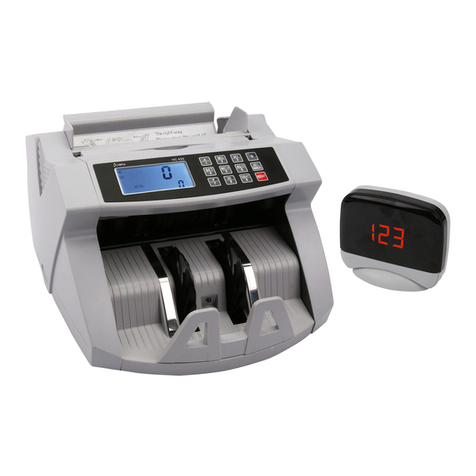
Detectalia V100 User manual

Banknote Counter V100
User Manual
Manual de uso
Manuale d’uso
Manuel d’utilisation
Bedienungsanleitung

2
V100

3
V100
Language
Idioma
Linguaggio
Sprache
Langue
English
Español
Italiano
Deutsch
Français
04
18
32
46
60

4
V100
Preface
Thank you for supporting and choosing our products! In order to make the best use of the machine,
please read this manual carefully before using. For the products safety performance, please use
our products correctly. Our company will continue to improve and optimize the product, so the
actual product maybe slightly different from this manual. Our company will keep trying to provide
customers with better quality products.

5
V100
CONTENT
Banknote Counter Detectalia V100
1. The introduction of the main parts 6
2. Specications 7
3. The introduction of the panel 8
4. The introduction of the main display 9
5. Operation 9
6. Detection function setting 11
7. Error code and solution 13
8. Fault code and solution 14
9. Precaution for handling the machine 15
10. Cautions 16
11. Maintenance 16
12. Warning 16

6
V100
1. The introduction of the main parts
External Display
Front cover
Rear cover
Feeding wheel
Adjusting screw
Banknote twiddling wheel
Resistance wheel
Hopper guide
Banknote transporting wheel
Start sensor
Panel
LCD display
Banknote receiving wheel
Transporting platform
Banknote receiving sensor

7
V100
2. Specifications
Voltage/Frequency/Current 100-240V~/50-60Hz/600mA
Power Consumption 60W(Max)
Counting range 4 digit
Counting speed 900 banknotes/min
Batch range 1-999 banknotes
Countable banknote size MIN: 50*90 mm MAX: 100*190 mm
Banknote thickness 0.075~0.15mm
Hopper capacity 300 banknotes
Stacker capacity 200 banknotes
Net weight 4.02 Kg
Machine size L: 268 mm *W: 210 mm* H: 237 mm
USB
RJ11
Label
Power socket
Power switch

8
V100
Key Function
START In the manual counting mode, press this key to start counting.
MENU
Press this key to enter into the MENU Interface.
Long press this key and turn on the machine in the
meantime, can enter into the calibration mode.
ENTER
In the MENU interface, press this key can save the change and back
to the previous interface.
Press this key to conrm or enter into the sub-menu.
BATCH Press this key can turn on/off the batch function, and the user can se-
lect the batch number among “100, 50, 20, 10, 5, off” by short pressing.
+1/+10
In the normal counting interface, press this key to turn on the BATCH
function; short press this key to “+1”; long press this key to “+10”.
In the MENU interface, press this key to adjust up sensitivity level or
other setting.
In the time setting, press this key to increase.
Key Function
REP
Press this key to check the current counting report.
In the MENU interface, press this key to decrease sensitivity level or
other setting.
In the time setting, press this key to decrease.
PRINT Press this key to print the current counting report.
In the MENU interface, press this key to return previous interface.
MODE
1.Press this key to switch the counting mode: UV/MG, MIX, SGL, CNT.
(UV/MG: count the banknote with UV/MG detection.
MIX: count different denomination of one kind of currency together,
showing the counting amount.
SGL: count one denomination of one kind of currency together,
showing the counting amount.
CNT: only with counting function, without any detection. )
CUR
Press this key to choose the currency.
In the MENU interface, press this key to switch settings forward.
In the time setting, press this key to move right.
ADD
Press this key to turn on/off the ADD (accumulation) function.
In the MENU interface, press this key to switch settings backwards.
In the time setting, press this key to decrease.
In the time setting, press this key to move left.
CLEAR
Clear the counting result.
In the MENU interface, press this key to return previous interface.
In the time setting, press this key to change the time.
3. The introduction of the panel
START
MENU
ENTER
START
MENU
ENTERPRINT
REP
+1/+10
BATCH
CLEAR
ADD
CUR
MODE

9
V100
4. The introduction of the main display
5. Operation
The users can choose the function by themselves. This device is with the memory function, when the user turn on the machine, it will
show the previous function selection and setting.
5.1 Turn on/off -Power switch
NOTE: If there is a need to do the calibration on the machine. Please long press “MENU” and turn on the machine in the meantime,
then follow the notice showing in the display “IN WHITE PAPER” and “IN BLACK PAPER” to put in the paper in turn , then press “MENU”
to conrm for each step.
Only when receive the notice from the supplier then can do the calibration on the machine. Wrong calibration can damage
this banknote counter.
Counting mode
Currency
Batch function
Batch number
MNL/AUTO counting mode
Counting amount
Counting number
ADD function

10
V100
5.2 MNL/AUTO count setting
Press MENU and press “CUR or ADD” to switch setting, in P06 START MODE press “+1/+10 or REP” to select desired
option then press “ENTER” to conrm.
AUTO: when put the banknotes on the hopper, the machine will start counting automatically.
MNL: when put the banknotes on the hopper, the user should press “START” to start counting the banknotes.
5.3 ADD function
Press ADD to turn on/off the ADD function, When the display show “ADD”, it means the ADD function is on; otherwise, the ADD
function is off. The ADD function can work with Batch function.
5.4 Batch function
Press “ BATCH” to turn on/off the batch function, if the user press this key again, then the user can choose the batch number among
“100, 50, 20, 10, 5, off”, or the user can press“+1/10” to set a batch number, the batch range is “0-999”.
5.5 Banknote feeding clearance adjustment
When the banknote feeding clearance is too loose, the machine will come up with the problem of “double note” and inaccurate
counting number, etc. Then the user can rotate the adjusting screw to the anti-clockwise direction little by little until the counting is
smooth. Please noted that do not rotate it too much in case it will break the notes.
When the banknote feeding clearance is too tight, then the machine will have unsmooth counting, and the notes will be deformed
and damaged. The user should rotate the adjusting screw to the clockwise direction until the problem solved.
Notes: In the “AUTO” counting, if the notes are very soft or dirty, then it will lead to the start sensor not work.
Notes: In the BATCH mode, when the machine nished counting, if the counting amount is the same as the batch number,
the user should remove the banknotes from the stacker and check if there is one banknotes inside the machine or not.

11
V100
Notes: the adjusting screw has been set to a good position before shipping from the factory, so the
user is no need to do the adjustment when they receive the machine. Only when after a long time
usage, it may need to do some adjustment.
6. Detection function setting
The users can choose the detection function according to their needs.
6.1 UV detection
• Check the banknote with UV feature.
• During the counting, if the machine stops counting and showing “UV ALARM” in the display, the user should take away the last banknotes
from the stacker and check. Then the user can press “RESET”to continue counting or take all the banknotes from the stacker to count again.
• The UV level range is from “0” to “9”. “0” means the UV detection is off. “1” is the lowest level, and “9” is the highest level. The user can press
“+1/10” to do the setting and press “RESET” to conrm.
6.2 MG detection
• Check the banknote with MG feature.
• During the counting, if the machine stops counting and showing “MG ALARM” in the display, the user should take away the last banknotes from
the stacker and check. Then the user can press “RESET” to continue counting or take all the banknotes from the stacker to count again.
• The MG level range is from “0” to “9”. “0” means the MG detection is off. “1” is the lowest level, and “9” is the highest level. The user can press
“+1/10” to do the setting and press “RESET” to conrm.

12
V100
6.3 DOUBLE detection
• Check the banknote with double notes feature.
• During the counting, if the machine stops counting and showing “DOUBLE NOTE ALARM” in the display, the user should take away the
last banknotes from the stacker and check. Then the user can press “START” to continue counting or take all the banknotes from the
stacker to count again.
• The DOUBLE level range is from “0” to “9”. “0” means the DOUBLE detection is off. “1” is the lowest level, and “9” is the highest level. Press
MENU and press “CUR or ADD” to switch setting, in P03 DOUBLE LEVEL press “+1/+10 or REP” to select desired level then press “ENTER”
to confirm.
6.4 COLOR detection
• Check the banknote with COLOR feature.
• During the counting, if the machine stops counting and showing “COLOR ALARM” in the display, the user should take away the last
banknotes from the stacker and check. Then the user can press “RESET” to continue counting or take all the banknotes from the stac-
ker to count again.
• The COLOR level range is from “0” to “9”. “0” means the COLOR detection is off. “1” is the lowest level, and “9” is the highest level. The user
can press “+1/10” to do the setting and press “RESET” to confirm.
6.5 IR detection
• Check the banknote with IR feature.
• The IR detection is checking based on the data of the first banknote.
• During the counting, if the machine stops counting and showing “IR ALARM” in the display, the user should take away the last banknotes
from the stacker and check. Then the user can press “RESET”to continue counting or take all the banknotes from the stacker to count again.
• The IR level range is from “0” to “9”. “0” means the IR detection is off. “1” is the lowest level, and “9” is the highest level. The user can press
“+1/10” to do the setting and press “RESET” to confirm.

13
V100
7. Error code and solution
When there is some suspicious banknotes during the counting, the display will
show the error code, but the user should check it again to conrm.
Code Reason Solution
UV ALARM Suspicious notes checked by UV detection.
Take away the suspicious banknote, and press ”RESET” to continue.
Remove all the banknotes from the stacker
and press “RESET” to continue.
Problem with the UV detection. Lower the UV sensitivity level.
MG ALARM
Suspicious notes checked by MG detection.
Take away the suspicious banknote, and press ”RESET” to continue.
Remove all the banknotes from the stacker and press “RESET” to continue.
Problem with the MG detection. Lower the MG sensitivity level.
IR ALARM
Suspicious notes checked by IR detection. Remove all the banknotes from the stacker
and press “RESET” to continue.
Problem with the IR detection.
DOUBLE NOTE
ALARM
Suspicious notes checked by LENGTH
detection.
Remove all the banknotes from the stacker
and press “RESET” to continue.
Lower the DOUBLE sensitivity level.

14
V100
Fault code Reason Solution
FEEDING SENSOR ERROR Problem with the feeding sensor.
RESET SENSOR ERROR Problem with the reset sensor.
MG SENSOR ERROR Problem with the MG sensor.
LEFT COUNT SENSOR ERROR Problem with the left counting sensor.
RIGHT COUNT SENSOR ERROR Problem with the right counting sensor.
LENGTH SENSOR ERROR Problem with the length sensor.
LEFT COLOR SENSOR ERROR Problem with the left color sensor.
RIGHT COLOR SENSOR ERROR Problem with the right color sensor.
UV SENSOR ERROR Problem with the UV sensor.
ENCODER ERROR Problem with the encoder.
8. Fault code and solution
1. Replace the feeding sensor.
2. Replace the main board.
1. Replace the right counting sensor.
2. Replace the main board.
1. Replace the reset sensor.
2. Replace the main board.
1. Replace the length sensor.
2. Replace the main board.
1. Replace the magnetic sensor.
2. Replace the main board.
1. Replace the left color sensor.
2. Replace the main board.
1. Replace the UV sensor.
2. Replace the main board.
1. Replace the left counting sensor.
2. Replace the main board.
1. Replace the right color sensor.
2. Replace the main board.
1. Replace the encoder.
2. Replace the main board.
3. Check the circuit connection.
3. Check the circuit connection.
3. Check the circuit connection.
3. Check the circuit connection.
3. Check the circuit connection.
3. Check the circuit connection.
3. Check the circuit connection.
3. Check the circuit connection.
3. Check the circuit connection.
3. Check the circuit connection.

15
V100
9. Precaution for handling the machine
The user should pay attention to the following items when using this product:
Curled note Folded note
1. Damp and/or badly stained notes should be avoided.
2. Check no other things(paper clip, rubber band, pieces of paper etc.)mixed in the notes
3. Folded or curled notes should be straightened before counting
4. As for the bundle of new notes, should bend and flex before counting
5. The notes should be tidied up before counting, or it will lead to the some problem when the machine work
1. 2. 3. 4. 5.
Damp and/or badly
stained note
Clip
Piece
of paper Rubber
hand
Stack of notes mixed
other things

16
V100
10. Cautions
Please read all the instructions as below before using the machine, or it will lead to some danger and fault.
• Avoid exposing the product to the sunlight.
• The product should have well earthing performance.
• The product may be affected by the wireless device interference(like phone, intercom etc).
• Please use the qualied power cable.
• Turn off the machine or pull out the power plug before moving it.
• Do not put tools, hand,hair or cloth close to the rotating parts of the machine ,in case of some danger happened.
• Do not press the keys with something pointed.
• Keep the machine in the dry condition, this machine is not waterproof.
• Do not repair the machine by yourself, should ask qualied service person to repair and maintain it.
11. Maintenance
The counting sensor and the feeding sensor belong to the optical equipment. If there is some dust and dirty things covering the sensor, it will lead to
the fault when the machine is working. The user should clean the machine after using.
12. Warning
Please unplug the power cable or turn off the machine before do some cleaning.
Don’t use chemical wash detergent to clean the machine.

17
V100

18
V100
Prefacio
¡Gracias por elegir nuestros productos! Para hacer el mejor uso de la máquina, lea atentamente este
manual antes de usarla. Nuestra empresa continuará mejorando y optimizando el producto, por
lo que el producto real puede ser ligeramente diferente de este manual. Nuestra empresa seguirá
tratando de proporcionar a los clientes productos de la mejor calidad.

19
V100
Contador de billetes Detectalia V100
CONTENIDO
1. Introducción de las partes principales 20
2. Especicaciones 21
3. Panel de control 22
4. Pantalla principal 23
5. Operación 23
6. Conguración de la función de detección 25
7. Código de error y solución 27
8. Código de falla y solución 28
9. Precaución para manejar la máquina 29
10. Precauciones 30
11. Mantenimiento 30
12. Advertencia 30

20
V100
1. Introducción de las partes principales
Cubierta frontal
Cubierta posterior
Rueda de alimentación
Tornillo de ajuste
Rueda de giro de billetes
Rueda de resistencia
Guía de Tolva
Rueda de transporte de billetes
Sensor de inicio
Panel
Pantalla LCD
Rueda receptora de billetes
Plataforma de transporte
Sensor de recepción de billetes Pantalla externa
Table of contents
Languages:
Other Detectalia Banknote Counter manuals
