DEVOLA DVRH1200B User manual

www.devola.eo.uk/warranty
0
DEVlO
Product Registration 0
Comfortable living everyday
Instruction Manual
10% OFF
Scan for technical details
DVRH1200B,DVRH1800B

C-T.
This marking indicates that this product should not be disposed with other household
wastes throughout the EU. To prevent possible harm to the environment or human
health from uncontrolled waste disposal, recycle it responsibly to promote the
sustainable reuse of material resources. To return your used device, please use the
return and collecon systems or contact the retailer where the product was purchased.
They can take this product for environmentally safe recycling.
Congratulations on the purchase of your new Devol
□
product. Pleose read the
following instructions carefully ond follow them to prevent possi le damages.
We assume no lia ility for damage caused y disregard of the instructions and improper use.
INDEX
01. SAFETY INSTRUCTIONS
03. INSTALLATION
05. OPERATION
07. OPERATION VIA WIFI
08. USING THE SMART LIFE APP
11. OTHER FEATURES
12. TECHNICAL DATA
I Correct Disposal of this product

TECHNICAL
DATA
SAFETY
INSTRUCTIONS
ERP LABEL
BEFORE FIRST USE
Read and follow all the inslructions in lhis manual even if you feel you are familiar with
the product and find a place lo keep ii handy for fulure reference.
NOTE: The rating of lhis product (as marked on lhe product rating la el) is ased on
specific loading lests. Normal use or lhe use of other recommended attachmenls may draw
significantly less power.
IMPORTANT SAFE UARDS
When using any electrically powered product, asic safety precaulions should always e
Followed.
PLEASE
READ THE
FOLLOWING
INSTRUCTIONS
CAREFULLY
BEFORE
USING
THE
PRODUCT.
WARNIN
-TO
REDUCE
THE
RISK
OF
FIRE,
ELECTRICAL
SHOCK
OR
INJURY
TO
PERSONS
OR
PROPERTY:
·Read all inslructions efore using lhis appliance and keep them for future reference.
·
Before use, check that lhe heater and all supplied accessories are present and intact.
· Use only the voltage specified on lhe rating plate of the heater.
·
Do not cover the grilles or lock enlry or exit of airFlow y placing appliance against any surface.
Keep all o jects at least l metre from the front, side and rear of appliance.
·
Do not place the product close to a radiant heat source.
·
Do not use in areas where gasoline, paint or other Flamma le liquids are used or stored.
·
CAUTION-Some parts of this product can ecame very hot and cause urns.
To
avoid urns,
do not allow are skin to come in contacl wilh lhe heater while it is in use. Parlicular attention should
e given where children and vulnera le people are presenl.
·
Do not immerse the healer in liquid or allow liquid to enter the interior of the heater, as this could
cause an electric shock.
·
Do not operale the appliance if lhe cord or plug are damaged, or if lhe appliance malfunctions or
hos een dropped or damaged in any manner. Seek assistance from a qualified electrician for any
mechanical adjustments, service or repairs.
·
Do not touch lhe appliance with wet hands.
· The mosl common cause of overheating is deposits of dust or Fluff in the heater. Ensure these deposits
ore removed regularly y unplugging the heater and vacuum cleaning air vents and grilles.
·
Use a soft damp cloth to clean the appliance. Ensure thal it is swilched off and disconnected from the
mains eforehand.
·
Do not connecl lhe appliance to the mains voltage until ii is fully inslalled in lhe desired position.
·
Do not use the appliance in lhe immediale surroundings of a ath/shower, swimming pool or any
liquid container.
·
Switch off and let lhe surface cool efore moving and storing.
·Wedo not recommend use of an extension lead to operate lhis appliance.
·Please ensure that the power supply is switched off when the appliance is not in use.
·Do not allow the card to came into contact with the healed surface during operation.
·
CAUTION: lhis healer is not suila le lo e used on long pile carpets or Flokati rugs.
·
Do not run the cord in areas where it can cause someone to trip or fall. Do not twist, kink or warp the
cord around lhe heater, as lhis may cause the insulation lo waken and splil. Always ensure that cord
hos een removed from any cord storage area.
Type
Power
Lenglh
Imm) Width
Imm)
Height
Imm)
DVRH1200B
1200W 940
150
65
DVRHIS00B
1800W
1240150
65
Model identifier(s):
DVRH
12OOB
DVRH
I
BOOB
Item
!symbol IValue
IValue
I
Unit
Item
Unit
Heat output
ype of heot input,
for
electric
storoge
locolspoce
heoters
only !select
one)
Nominal heal output
Pnom
1.2 1.8
kW
manual heat charge control, with
integrated thermostat No
Minimum heat output
(indicative)
Pmin
.6
0.9
kW manual heat charge control with room
and/or outdoor temperature feedback
No
Maximum continuous
heat output
Pm□x,c
I.I 1.8
kW
electronic heat charge control with room
and/oroutdoor temperature feedback No
Auxiliary electricity
consumption fan assisted heat output
No
At nominal heat output
elmox
1.137
l.76
kW
ype of
heat output/room temperature control(select
one)
At
minimum
heat output
elmin
0.567
.878
kW
single stage heat output and no room
temperature control
No
In standby mode
elSB
.3
0.4
w
Two or more manual stages, no room
temperature control
No
with mechanic thermostat room
temperature control
No
with electronic room temperature control
No
electronic roam temperature control plusday
timer
Yes
electronic roam temperature control plusweek
timer
No
Other control options (multiple selections
possible)
room temperature control, with presence
detection
No
room temperature control, with open
window detection
Yes
with distance control option
Yes
with adaptive start control
No
with working time limitation
No
with black bulb sensor
Yes
Contact details

SAFETY INSTRUCTIONS OTHER FEATURES
·
If the supply cord is damaged it must e replaced y a quali ed electrician to avoid o hazard.
·
This appliance is not to e used y young children without supervision.
·
Do not place this appliance elow the socket-outlet.
·
All covers of this appliance are intended to protect direct access to the heating elements and must e
in place when the appliance is in operation. Please only use this product as per its intended use
outlined in this manual. Any other use is not recommended y the manufacturer and may cause fae,
electric shock or injury.
·
Children of less than 3 years should e kept away from the appliance unless continuously supervised.
Children should not plug in, clean or perform user maintenance on the appliance at any time.
· When installing the heater, please ensure that it is at least l .Bm a ove Floor level.
·
WARINING: This heater is not equipped with a device to control the room temperatrure.
Do not use this heater in small rooms when they are occupied y persons not capa le of leaving the
room on their awn,unless constant supervision is provided.
SCENES
"Scenes" ring all your devices together ta respond to environmental conditions. Triggers
of
events
include the temperature, humidity levels, air quality, sunrise and sunset, and device ehavior. So, for
example, you could set your windows to close every time your heater switches on; or set your lights to
switch on, curtains to close and heater to switch on whenever the sun sets. Only devices connected to
the opp can e used in scenes.
SHARIN
You con share control of your devices with family mem ers. Go to "device sharing", toggle which
devices you want ta share, and tap Share with New Mem er. You can then add their email address
or phone num er. If they have the opp, the device will appear on their device list. If they don't hove the
opp, they will e sent a link to download the opp.
Note you can only share to num ers and email addresses that are connected to opp- compati le
devices: smartphones or ta lets.
VOICE INTE RATION
Smart life is compatile with oth Amazon Echo and Google Home.
FAQs
Find the answer ta many trou leshooting pro lems in the opp's FAQ section.

Ll
INSTALLATION
SCHEDULIN YOUR HEATIN
You con program your heating y creating o schedule of "events", where the heoter switches on or off.
These events con e temporary, like setting o timer, or they can e recurring, so the heoter switches
on at the same time every week. You can set an unlimited num er of events, switching the heater on
ond off across the week.
For every event, you must set a stort time. Then, choose whether you want it to repeat. Select
"Only Once" if you just want to set a timer for now. If you wont the event to repeat, select which
doys you wont it to occur. Finally, choose whether you wont the heater to switch on or off. Make sure
you confam your settings at every stage and press save to keep the event.
Each event will oppeor in your schedule. You can activate and de-activate events using the toggle.
You can also delete events y swiping left and topping Delete.
WALL INSTALLATION
l.
Use the screws to install two of the fixed frames to the device, as shown in figure
A.
2.
Use the screws to install the fixed frames to the wall or ceiling, as shown in figure B.
3. Affix the device to the chosen area with screws, as shown in figure C.
The heater will eep when it egins a new heating event. The heater will heat at whatever mode it was
lost set to and you cannot schedule mode changes. Note, if you change the heater's setting during on
event - i.e. turning it on when it is scheduled to e off - the heoter will remain as it is until the
next scheduled event.
If the appliance is to e wall mounted it must e at least 20cm from oth the ground and ceiling, as
shown in figure l
CEILIN INSTALLATION
0
The device must e installed
al
least 200mm from the wall, as shown in figure 2.
C
Ceiling
I
t
Wall
J

I,
-
l
·q,
OoO
o"
_)
DOUBLE HAN IN CEILIN INSTALLATION
Ceiling
Two electrical appliances ore connected though o connecting frame installed on the ceiling.
(Additional ports sold separately)
EXTENDED INSTALLATION
USIN THE SMART LIFE APP
·
OfFline (Device is off ot the wall)
·
Turned Off (Device is in stand y mode)
·
Turned On (Device is in heating mode)
When the heater is online, tap the device name to go to the control interface. Note: when the heater is
olnine, you will not e o le to control it with the opp.
CONTROLLIN THE HEATER
a1
b1
Set Temperature
-----
Current Temperature
•
Sling appliances will hook up and hong from the ceiling. (Additional parts sold separately)
Temperature
Adjust
Programming
_
ON/OFF-----
_
Select
Mode
You con change the heater's current mode y topping the mode uttons. You con adjust the mode's
temperature using the+ and - uttons when you're on that mode.

OPERATION
4.
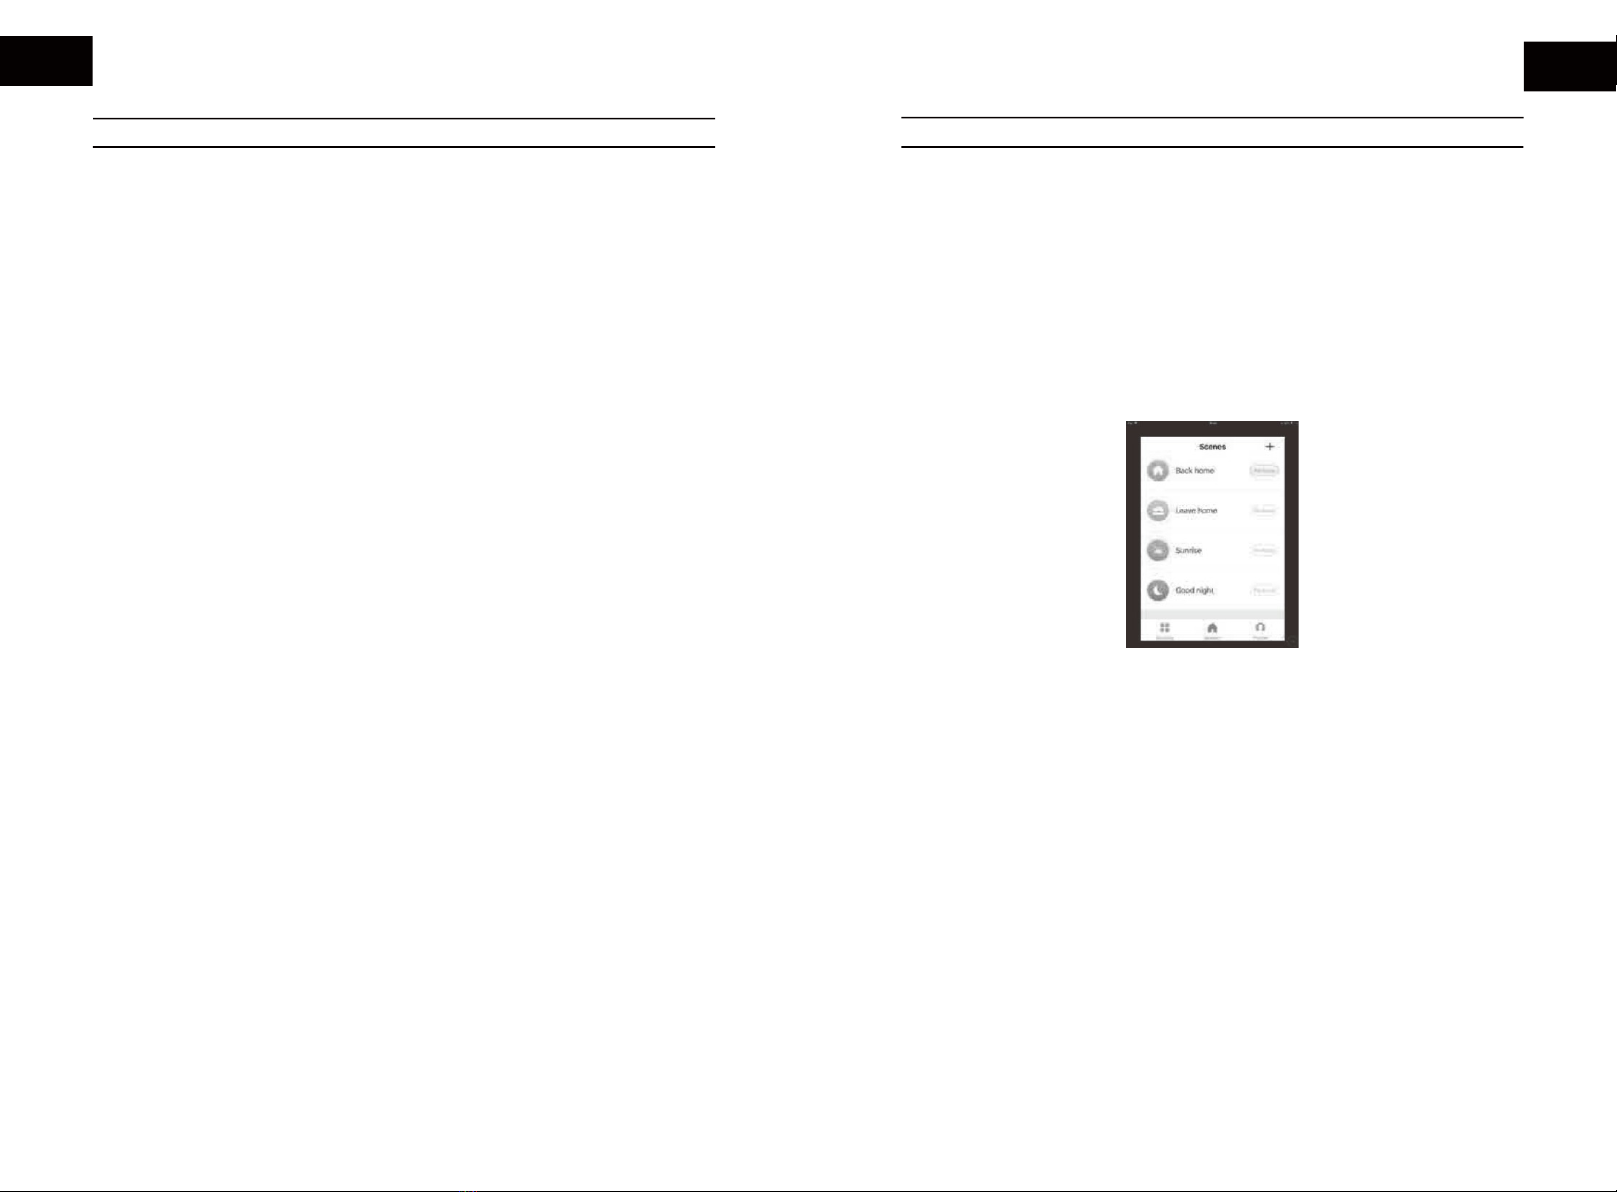
The opp will then display its connecting screen, as per the image elow.
HEATER CONTROL
Switch On
l. On/ off button
2.
Adjustment button
3.
High/low switch button
4.
Switch button
5.
Set button
6.
Display button
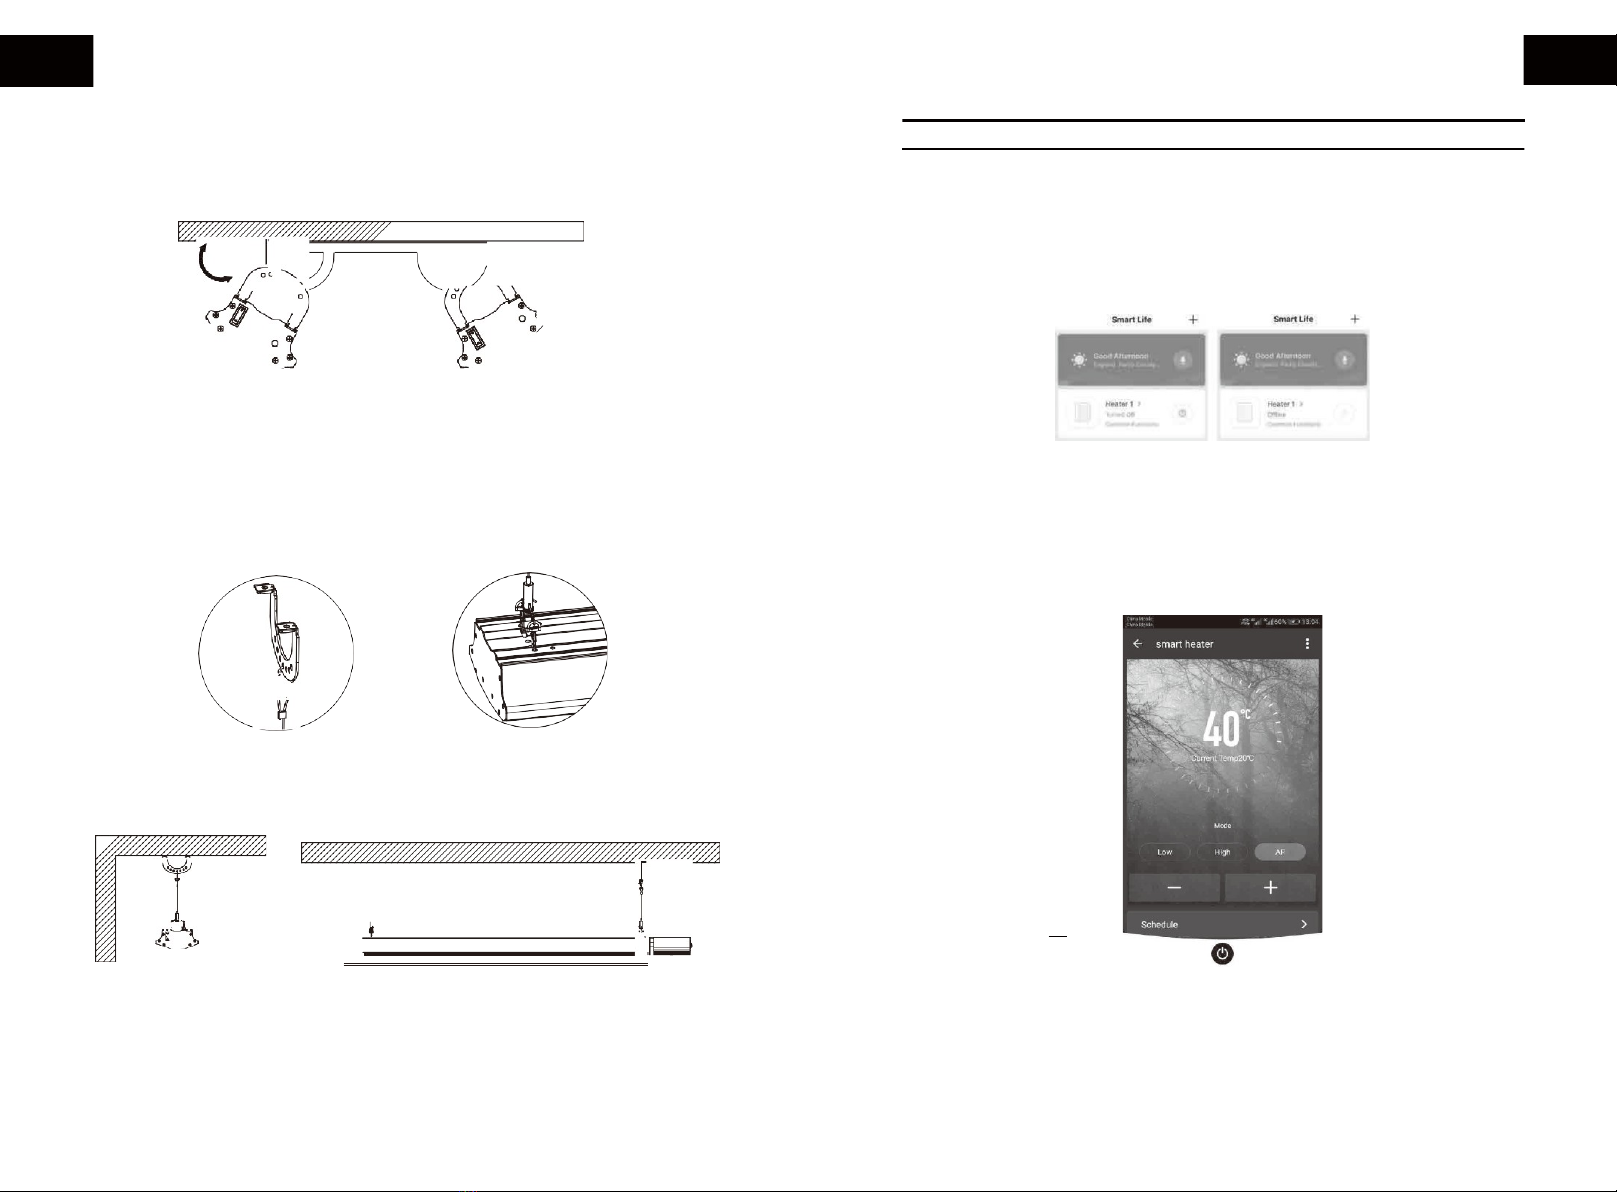
NOTE: The heater hos two connection modes: one where the Wi-Fi icon Flashes slowly
(once per second) and one where the Wi-Fi icon Flashes quickly (three times per second).
Most devices will connect via the mode where the icon is linking rapidly (EZ Mode) If the heater is
foiling to connect in EZ mode, hold the utton on the control panel for three seconds. The heater will
then switch to its secondary connection mode (AP Mode). You must ensure that the heater and
smartphone/ta let are operating in the same mode to pair the devices. If you switch to the AP mode
on the heater, you must also do the some on the smart device. Press EZ mode in the top right-hand
side of the display and select AP Mode from the dropdown menu
to switch the mode (see elow image for reference).
5.
The heater will eep and display o solid Wi-Fi icon when the device is connected.
The opp will confirm that the heater has een added. You can now name the device, shore it with
family mem ers, or proceed to scheduling your heating.
Press" l ." to turn the heater on and the screen will display the room temperature.
If the current room temperature is lower than the pre-set temperature the heating function will egin
to operate, and the indicator light will link.
NOTE: When the heater is fast used you may detect on odor. This is ecause the protective layers of
oil that the devices elements ore coated in during production will urn off in fast use. This should not
cause concern and you should allow the appliance to heat up in an open environment to
make the smell disappear.
Lock Function
Press"4 ." followed y" l ." and the "LOCK" indicator light will illuminate. All keys ore invalid when the
lock function is activated.
Display Screen On/Off
Press" 6. " to switch off the display. Press the
"6. "
utton again for the display to illuminate.
Temperature Setting
To set the temperature press" 5." then press "2." to increase or decrease the temperature y l
0C.
The maximum temperature is 45°C. Once the desired temperature is set the system will
automatically update and return to its normal operational status where the screen displays the room
temperature.
Timing Switch Setting
Press "5. "and the "00" will Flash, use "2." to set the time. The minimum time set up is l hour and
the maximum is 24 hours. Each time you press "2." the time will increase or decrease y l hour.
When the time is set the system will automatically save and return to its normal operating status,
however, it will now display the time on the screen.
Open Window Detection
When the temperature reduces y 3°C or more within two minutes the intelligent window detection
function kicks in and the heater will stop working. The LED display will flash and the heater will
make a clicking sound. The heater will only resume working when it is manually reset y hand.
Press "4" utton and then immediotly press "5" utton and hold this utton for
5
seconds.
Now the Open Window function is activated and the display shows "ON". "ON" will flash for
5
seconds and ofter that the display will change to the original display.
Press "4" utton and then immediotly press "5" utton and hold this utton for 5 seconds again
will turn "OFF" the Window Function.
Note: Open Window function is turned OFF in factory setting.
2. 2. @
4.
@\5.
6.

Wi-Fi reset setting (with Wi-Fi model)
When the heater is in operation press "4." followed y "3." within
5
seconds. Then hold "2. (up)" for
around 10 seconds and the Wi-Fi will reset.
Bluetooth connection requirements
l .You must use a mo ile phone device that is successfully connected to the heater.
2. Ensure the Bluetooth function is activated on the mo ile phone.
3 .The user must e in proximity of the heater.
4.If the network ecomes ad or the phone cannot e controlled y Wi-Fi, wait for
3-5 minutes for the device to connect to Bluetooth to continue operation.
High/Low Setting
When the heater is in operation press "3." to switch etween the high and low heating setting.
Temperature Change(choice):
Press the "4" ,then press "3",press"2"within 5 second,the temperature can change etween
Fahrenheit and Cerlsius.
Switch Off
Press" l ." to turn off the device.
OPERATION VIA WIFI
To operate your heater using Wi-Fi, the fast step is to download the Smart Life opp onto your
smartphone or ta let. You can Flnd the opp y scanning the QR code elow or searching "Smart Life"
in Google Play or App store.
2.
Download and install the opp. Unless you already have a registered Smart Life account, you will
need to create an account y tapping Register.
The device will automatically determine your country, although you can change this if necessary.
Enter your phone num er or email address. If you enter a phone num er, a veriFlcation num er will
e sent to your phone: enter this num er to verify, then create a password. If you enter your email
address, you will need to create a password.
3. To add your heater to the opp, Flrst put the heater in Wi-Fi connection mode. The heater is in Wi-Fi
connection mode when the Wi-Fi icon is Flashing. If the icon is not Flashing hold down the power
utton for three seconds to reset the Wi-Fi.
4.
Once the Wi-Fi icon is Flashing, go to the opp and press Add a Device. Select the device type
(heater) in the Small Home Appliances ta and confirm that the indicator is Flashing. You will then e
prompted to enter your Wi-Fi password. This allows the opp to Flnd your heater using Wi-Fi. Your
Wi-Fi must e running ot 2.4GHz frequency as oppose to 5GHz, otherwise the heater will not
connect to the opp.
This manual suits for next models
2
Table of contents
Other DEVOLA Electric Heater manuals