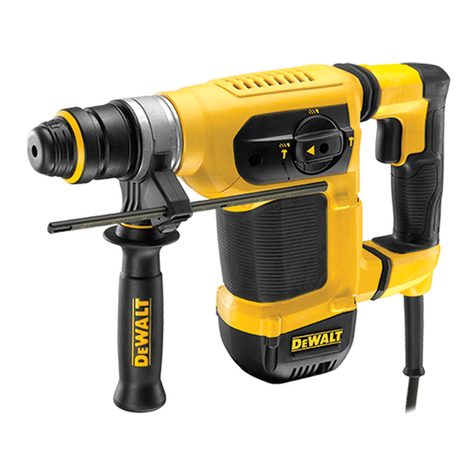
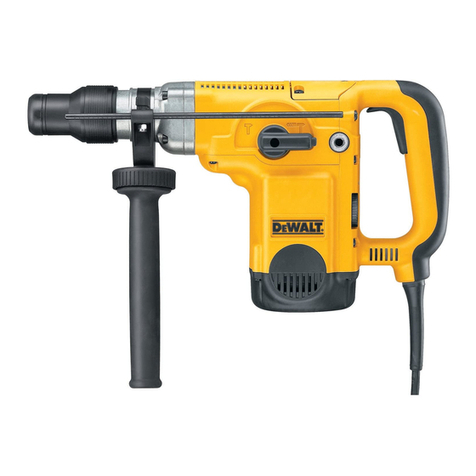
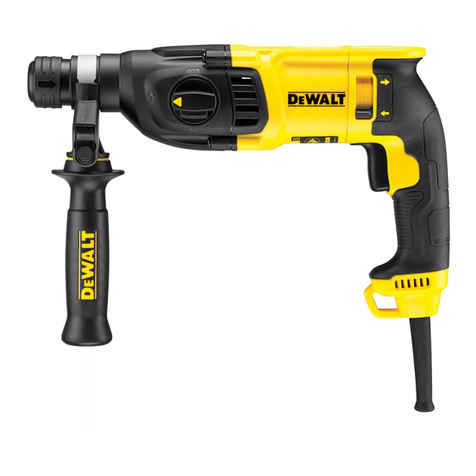
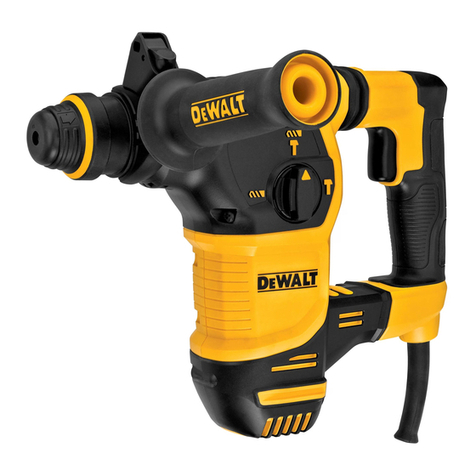
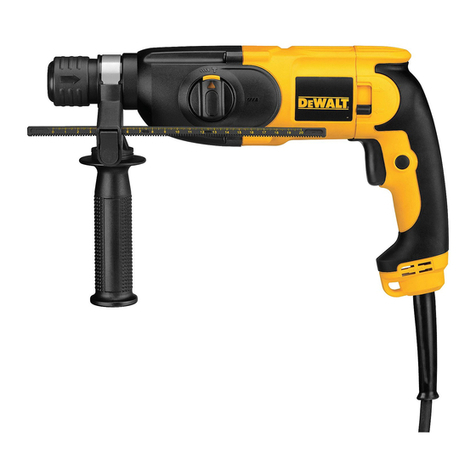
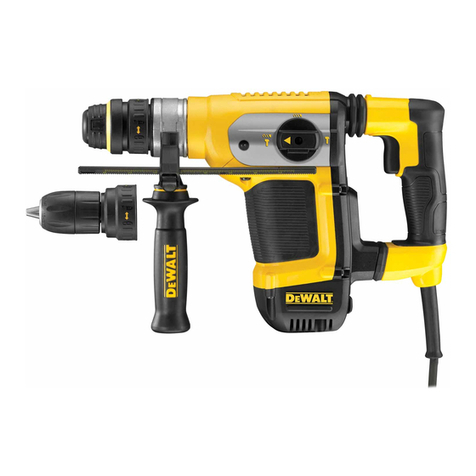
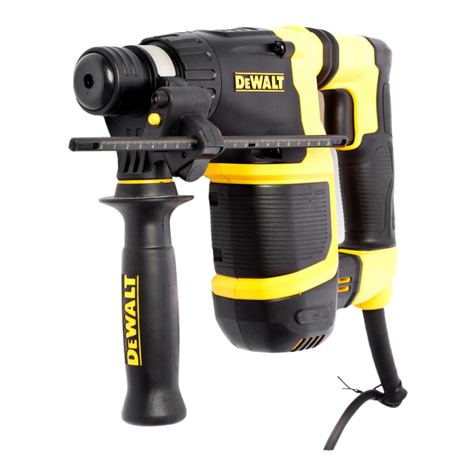
DeWalt SDS Plus D25013 User manual

D25013
Pistol Grip Three-Mode SDS Plus® Rotary Hammer
Rotomartillo SDS Plus®3 Modos
Martelete Eletropneumático Perfurador/Rompedor SDS Plus®
INSTRUCTION MANUAL
MANUAL DE INSTRUCCIONES
MANUAL DE INSTRUÇÕES INSTRUÇÕES DE OPERAÇÃO, CENTRO DE SERVIÇOS E CERTIFICADO
DE GARANTIA. ADVERTÊNCIA: LEIA ESTAS INSTRUÇÕES ANTES DE
UTILIZAR O PRODUTO.
Questions? See us on the World Wide Web at www.dewalt.com
¿Dudas? Visítenos en Internet: www.dewalt.com
Dúvidas? Visite-nos na Internet em www.dewalt.com.br
INSTRUCTIVO DE OPERACIÓN, CENTROS DE SERVICIO Y PÓLIZA DE
GARANTÍA. ADVERTENCIA: LÉASE ESTE INSTRUCTIVO ANTES DE USAR
EL PRODUCTO.


1
English
Definitions: Safety Guidelines
The definitions below describe the level of severity for each
signal word. Please read the manual and pay attention to these
symbols.
DANGER: Indicates an imminently hazardous situation
which, if not avoided, will result in death or serious injury.
WARNING: Indicates a potentially hazardous situation
which, if not avoided, could result in death or serious injury.
CAUTION: Indicates a potentially hazardous situation which,
if not avoided, may result in minor or moderate injury.
NOTICE: Indicates a practice not related to personal injury
which, if not avoided, may result in property damage.
WARNING: To reduce the risk of injury, read the instruction
manual.
General Power Tool Safety Warnings
WARNING! Read all safety warnings and all instructions
Failure to follow the warnings and instructions may result in
electric shock, fire and/or serious injury.
SAVE ALL WARNINGS AND INSTRUCTIONS
FOR FUTURE REFERENCE
The term “power tool" in the warnings refers to your mains-operated
(corded) power tool or battery-operated (cordless) power tool.
1) WORK AREA SAFETY
a) Keep work area clean and well lit. Cluttered or dark areas
invite accidents.
b) Do not operate power tools in explosive atmospheres,
such as in the presence of flammable liquids, gases or
dust. Power tools create sparks which may ignite the dust or
fumes.
c) Keep children and bystanders away while operating a
power tool. Distractions can cause you to lose control.
2) ELECTRICAL SAFETY
a) Power tool plugs must match the outlet. Never modify
the plug in any way. Do not use any adapter plugs with
earthed (grounded) power tools. Unmodified plugs and
matching outlets will reduce risk of electric shock.
b) Avoid body contact with earthed or grounded surfaces
such as pipes, radiators, ranges and refrigerators. There
is an increased risk of electric shock if your body is earthed or
grounded.
c) Do not expose power tools to rain or wet conditions.
Water entering a power tool will increase the risk of electric
shock.
d) Do not abuse the cord. Never use the cord for carrying,
pulling or unplugging the power tool. Keep cord away
from heat, oil, sharp edges or moving parts. Damaged or
entangled cords increase the risk of electric shock.
e) When operating a power tool outdoors, use an extension
cord suitable for outdoor use. Use of a cord suitable for
outdoor use reduces the risk of electric shock.
f) If operating a power tool in a damp location is unavoidable,
use a ground fault circuit interrupter (GFCI) protected supply.
Use of a GFCI reduces the risk of electric shock.
3) PERSONAL SAFETY
a) Stay alert, watch what you are doing and use common
sense when operating a power tool. Do not use a power
tool while you are tired or under the influence of drugs,
alcohol or medication. A moment of inattention while
operating power tools may result in serious personal injury.
b) Use personal protective equipment. Always wear eye
protection. Protective equipment such as dust mask, non-

2
English
skid safety shoes, hard hat, or hearing protection used for
appropriate conditions will reduce personal injuries.
c) Prevent unintentional starting. Ensure the switch is in
the off position before connecting to power source and/
or battery pack, picking up or carrying the tool. Carrying
power tools with your finger on the switch or energising power
tools that have the switch on invites accidents.
d) Remove any adjusting key or wrench before turning the
power tool on. A wrench or a key left attached to a rotating
part of the power tool may result in personal injury.
e) Do not overreach. Keep proper footing and balance at
all times. This enables better control of the power tool in
unexpected situations.
f) Dress properly. Do not wear loose clothing or jewellery.
Keep your hair, clothing and gloves away from moving
parts. Loose clothes, jewellery or long hair can be caught in
moving parts.
g) If devices are provided for the connection of dust
extraction and collection facilities, ensure these are
connected and properly used. Use of dust collection can
reduce dust-related hazards.
4) POWER TOOL USE AND CARE
a) Do not force the power tool. Use the correct power tool
for your application. The correct power tool will do the job
better and safer at the rate for which it was designed.
b) Do not use the power tool if the switch does not turn it
on and off. Any power tool that cannot be controlled with the
switch is dangerous and must be repaired.
c) Disconnect the plug from the power source and/or the
battery pack from the power tool before making any
adjustments, changing accessories, or storing power
tools. Such preventive safety measures reduce the risk of
starting the power tool accidentally.
d) Store idle power tools out of the reach of children and do
not allow persons unfamiliar with the power tool or these
instructions to operate the power tool. Power tools are
dangerous in the hands of untrained users.
e) Maintain power tools. Check for misalignment or binding
of moving parts,breakage of parts and any other condition
that may affect the power tool’s operation. If damaged,
have the power tool repaired before use. Many accidents
are caused by poorly maintained power tools.
f) Keep cutting tools sharp and clean. Properly maintained
cutting tools with sharp cutting edges are less likely to bind
and are easier to control.
g) Use the power tool, accessories and tool bits etc., in
accordance with these instructions taking into account
the working conditions and the work to be performed.
Use of the power tool for operations different from those
intended could result in a hazardous situation.
5) SERVICE
a) Have your power tool serviced by a qualified repair
person using only identical replacement parts. This will
ensure that the safety of the power tool is maintained.
Additional Safety Instructions for
Rotary Hammers
• Wear ear protectors. Exposure to noise can cause hearing
loss.
• Use auxiliary handles supplied with the tool. Loss of control
can cause personal injury.
• Hold power tools by insulated gripping surfaces when
performing an operation where the cutting tool may contact
hidden wiring or its own cord. Contact with a “live” wire will
make exposed metal parts of the tool “live” and shock the
operator.

3
English
•Use clamps or other practical way to secure and support
the workpiece to a stable platform. Holding the work by
hand or against your body is unstable and may lead to loss of
control.
• Wear safety goggles or other eye protection. Hammering
operations cause chips to fly. Flying particles can cause
permanent eye damage. Wear a dust mask or respirator for
applications that generate dust. Ear protection may be required
for most applications.
• Keep a firm grip on the tool at all times. Do not attempt
to operate this tool without holding it with both hands.
It is recommended that the side handle be used at all times.
Operating this tool with one hand will result in loss of control.
Breaking through or encountering hard materials such as re-bar
may be hazardous as well. Tighten the side handle securely
before use.
• The hammer is only for light chiselling applications.
• The forward/reverse switch must be in the forward position when
chiselling.
• Do not use this tool to mix or pump easily combustible or
explosive fluids (benzine, alcohol, etc.).
• Do not mix or stir inflammable liquids labelled accordingly.
• Do not operate this tool for long periods of time. Vibration
caused by hammer action may be harmful to your hands and
arms. Use gloves to provide extra cushion and limit exposure by
taking frequent rest periods.
• Do not recondition bits yourself. Chisel reconditioning should
be done by an authorized specialist. Improperly reconditioned
chisels could cause injury.
• Wear gloves when operating tool or changing bits. Accessible
metal parts on the tool and bits may get extremely hot during
operation. Small bits of broken material may damage bare
hands.
• Never lay the tool down until the bit has come to a complete
stop. Moving bits could cause injury.
• Do not strike jammed bits with a hammer to dislodge them.
Fragments of metal or material chips could dislodge and cause
injury.
• Slightly worn chisels can be resharpened by grinding.
• Keep the power cord away from the rotating bit. Do not
wrap the cord around any part of your body. An electric cord
wrapped around a spinning bit may cause personal injury and
loss of control.
• Air vents often cover moving parts and should be avoided.
Loose clothes, jewellery or long hair can be caught in moving
parts.
• An extension cord must have adequate wire size for safety.
An undersized cord will cause a drop in line voltage resulting
in loss of power and overheating. When using more than one
extension to make up the total length, be sure each individual
extension contains at least the minimum wire size. The following
table shows the correct size to use depending on cord length
and nameplate ampere rating. If in doubt, use the next heavier
gauge. The smaller the gauge number, the heavier the cord.
Voltage (Volts) Total length of cord in meters (m)
120 - 127V 0 - 7 7 - 15 15 - 30 30 - 50
220 - 240V 0 - 15 15 - 30 30 - 60 60 - 100
Rated Ampere
range Minimal cross-sectional area of the
cord in meters (mm2)
0 - 6A 1.0 1.5 1.5 2.5
6 - 10A 1.0 1.5 2.5 4.0
10 - 12A 1.5 1.5 2.5 4.0
12 - 16A 2.5 4.0 Not Recommended

4
English
NOTE: Do not overheat the bit (discoloration) while grinding a new
edge. Badly worn chisels require reforging. Do not reharden and
temper the chisel.
WARNING: Always use eye protection. All users and
bystanders must wear eye protection that conforms to ANSI Z87.1.
WARNING: Always wear proper personal hearing protection
that conforms to ANSI S12.6 (S3.19) during use. Under some
conditions and duration of use, noise from this product may
contribute to hearing loss.
WARNING: ALWAYS use safety glasses. Everyday eyeglasses
are NOT safety glasses.Also use face or dust maskifcuttingoperation
is dusty. ALWAYS WEAR CERTIFIED SAFETY EQUIPMENT:
• ANSI Z87.1 eye protection (CAN/CSA Z94.3),
• ANSI S12.6 (S3.19) hearing protection,
• NIOSH/OSHA/MSHA respiratory protection.
WARNING: Some dust created by power sanding, sawing,
grinding, drilling, and other construction activities contains chemicals
known to cause cancer, birth defects or other reproductive harm.
Some examples of these chemicals are:
• lead from lead-based paints,
• crystalline silica from bricks and cement and other masonry
products, and
• arsenic and chromium from chemically-treated lumber
(CCA).
Your risk from these exposures varies, depending on how often you
do this type of work. To reduce your exposure to these chemicals:
work in a well ventilated area, and work with approved safety
equipment, such as those dust masks that are specially designed
to filter out microscopic particles.
• Avoid prolonged contact with dust from power sanding,
sawing, grinding, drilling, and other construction activities.
Wear protective clothing and wash exposed areas with soap
and water. Allowing dust to get into your mouth, eyes, or lay on
the skin may promote absorption of harmful chemicals.
WARNING: Use of this tool can generate and/or disburse dust,
which may cause serious and permanent respiratory or other injury.
Always use NIOSH/OSHA approved respiratory protection
appropriate for the dust exposure. Direct particles away from face
and body.
•The label on your tool may include the following symbols. The
symbols and their definitions are as follows:
V ...........volts A........ amperes
Hz .........hertz W....... watts
min........minutes ..... alternating current
......direct current ..... alternating or direct current
..........Class I Construction no...... no load speed
..............(grounded) ...... earthing terminal
..........Class II Construction ...... safety alert symbol
..............(double insulated) BPM.. beats per minute
…/min ...per minute RPM.. revolutions per minute
IPM .......impact per minute
Motor
Your DEWALT tool is powered by a DEWALT-built motor. Be
sure your power supply agrees with the nameplate markings.
Voltage decrease of more than 10% will cause loss of power and
overheating. All DEWALT tools are factory tested.

5
English
COMPONENTS (Fig. 1)
WARNING: Never modify the power tool or any part of it. Damage
or personal injury could result.
A. Variable speed F. Mode selector button
trigger switch G. Mode selector
B. Main handle H. Reversing lever
C. Side handle I. Lock-on button
D. Depth rod J. Depth rod release button
E. SDS Plus®chuck
C
J
FIG. 1 H
A
D
G
I
EF
B
C
INTENDED USE
This heavy-duty rotary hammer has been designed for professional
drilling and hammerdrilling, screwdriving and light chipping at
various work sites (i.e., construction sites). DO NOT use under wet
conditions or in presence of flammable liquids or gases.
This heavy-duty rotary hammer is a professional power tool. DO
NOT let children come into contact with the tool. Supervision is
required when inexperienced operators use this tool.
ASSEMBLY AND ADJUSTMENTS
WARNING: To reduce the risk of injury, turn unit off and
disconnect machine from power source before installing and
removing accessories, before adjusting or changing set-ups or
when making repairs. Be sure the trigger switch is in the OFF
position. An accidental start-up can cause injury.
Side Handle (Fig. 1)
WARNING: To reduce the risk of personal injury, ALWAYS
operate the tool with the side handle properly installed and securely
tightened. Failure to do so may result in the side handle slipping
during tool operation and subsequent loss of control. Hold tool with
both hands to maximize control.
A side handle comes assembled with this rotary hammer. The
side handle (C) can be fitted to suit both right-hand and left-hand
users.
TO ADJUST THE SIDE HANDLE
1. Loosen the side handle (C) by turning it counterclockwise.
2. Rotate the side handle to the desired position.
3. Tighten the side handle by turning it clockwise.
TO CHANGE SIDES
For right-hand users: slide the side handle clamp over the
chuck, handle at the left.
For left-hand users: slide the side handle clamp over the chuck,
handle at the right.

6
English
Trigger Switch (Fig. 1)
To start the rotary hammer, depress the trigger switch (A). To stop
rotary hammer, release the switch.
NOTE: Use lower speeds for starting holes without a centerpunch,
drilling in metal, plastics or ceramics, or driving screws. Higher
speeds are better for drilling in masonry for maximum efficiency.
VARIABLE SPEED
The variable speed trigger switch (A) permits speed control. The
farther the trigger switch is depressed, the higher the speed of the
drill.
LOCK-ON BUTTON
WARNING: Be sure to release the locking mechanism before
disconnecting the plug from the power supply. Failure to do so will
cause the hammerdrill to start immediately the next time it is
plugged in. Damage or personal injury could result.
The lock-on button (I) is for use only when the rotary hammer
is stationary, mounted in a drill press stand or for chipping
applications.
Before using the tool each time, be sure that the lock-on button
release mechanism is working freely.
For continuous operation, press and hold the trigger switch (A);
press the lock-on button (I); release the trigger switch and then
release the lock-on button. The tool will continue to run.
To stop the tool in continuous operation, quickly press and release
the trigger switch.
Reversing Lever (Fig. 1)
The reversing lever (H) is used to reverse the rotary hammer for
backing out fasteners or jammed bits in drill-only mode.
CAUTION: When reversing to clear jammed bits, be ready for
strong reactive torque.
To reverse the rotary hammer, turn it off and align the reversing
lever (H) with the yellow arrow pointing backward (viewed when
holding drill in operating position).
To position the lever for forward operation, turn the rotary hammer
off and align the reversing lever (H) with the yellow arrow pointing
forward (viewed when holding drill in operating position).
Mode Selector (Fig. 2)
NOTICE: Tool must come to a complete stop before activating the
mode selector button or damage to the tool may result.
FIG. 2
DRILL-ONLY MODE
F
G
HAMMER/DRILL MODE
FG
HAMMER-ONLY MODE
G
F

7
English
DRILL-ONLY MODE
To use drill-only mode, press mode selector button (F) and turn the
mode selector (G) so the yellow arrow points to the corresponding
symbol as shown. Use drill-only mode for wood, metal, and
plastics.
HAMMERDRILL MODE
To use hammerdrill mode, press the mode selector button (F)
and turn the mode selector (G) so the yellow arrow points to the
corresponding symbol as shown. Use this mode for masonry
drilling.
HAMMER-ONLY MODE
For light chiseling, press the mode selector button (F) and turn the
mode selector (G) so the yellow arrow points to the corresponding
symbol as shown.
NOTE: The yellow arrow on the mode selector MUST be aligned
with the one of the symbols at all times. There are no operable
positions between the positions.
SDS-plus®Chuck (Fig. 1)
WARNING: To reduce the risk of serious personal injury,
turn tool off and disconnect tool from power source before
making any adjustments or removing/installing attachments
or accessories.
WARNING: Burn Hazard. ALWAYS wear gloves when changing
bits. Accessible metal parts on the tool and bits may get extremely
hot during operation. Small bits of broken material may damage
bare hands.
WARNING: Do not attempt to tighten or loosen drill bits (or any
other accessory) by gripping the front part of the chuck and turning
the tool on. Damage to the chuck and personal injury may occur.
To insert bit, insert shank of bit about 3/4" (19 mm), no further than
7/8" (22 mm) into chuck. Push and rotate bit until it locks in place.
The bit will be securely held.
To release bit, pull the chuck sleeve (E) back and remove the bit.
OPERATION
WARNING: Always observe the safety instructions and applicable
regulations.
WARNING: To reduce the risk of serious personal injury,
turn tool off and disconnect tool from power source before
making any adjustments or removing/installing attachments
or accessories.
WARNING: To reduce the risk of personal injury, ALWAYS
ensure workpiece is anchored or clamped firmly. If drilling thin
material, use a wood “back-up” block to prevent damage to the
material.
WARNING: To reduce the risk of personal injury, ALWAYS
operate the tool with the side handle properly installed and
securely tightened. Failure to do so may result in the side handle
slipping during tool operation and subsequent loss of control. Hold
tool with both hands to maximize control.
Proper Hand Position (Fig. 3)
WARNING: To reduce the risk of serious personal injury,
ALWAYS use proper hand position as shown.
WARNING: To reduce the FIG. 3
B
C
risk of serious personal injury,
ALWAYS hold securely in
anticipation of a sudden
reaction.
Proper hand position requires
one hand on the side handle
(C), with the other hand on the
main handle (B).

8
English
Overload Clutch
If the drill bit becomes jammed or caught, the drive to the drill
spindle is interrupted by the overload clutch. Because of the forces
that occur as a result, always hold the machine securely with both
hands and take a firm stance.
Drilling Tools
The machine is intended for hammerdrilling in concrete, brick and
stone. It is also suitable for drilling without impact in wood, metal,
ceramic and plastic.
Drilling (Fig. 1)
WARNING: To reduce the risk of serious personal injury,
turn tool off and disconnect tool from power source before
making any adjustments or removing/installing attachments
or accessories.
WARNING: To reduce the risk of personal injury, ALWAYS
ensure workpiece is anchored or clamped firmly. If drilling thin
material, use a wood “back-up” block to prevent damage to the
material.
Press mode selector button (F) and turn the mode selector (G) to the
drill bit symbol for drilling, to the hammer symbol for hammering or to
the hammerdrill symbol for hammerdrilling.
DRILLING OPERATION
1. For WOOD, use twist bits, spade bits, power auger bits or
hole saws. For METAL, use high-speed steel twist drill bits or
hole saws. Use a cutting lubricant when drilling metals. The
exceptions are cast iron and brass which should be drilled
dry. For MASONRY, use carbide-tipped bits or masonry bits. A
smooth, even flow of dust indicates the proper drilling rate.
2. Always apply pressure in a straight line with the bit. Use enough
pressure to keep the drill bit biting, but do not push hard enough
to stall the motor or deflect the bit.
3. Hold tool firmly with both hands to control the twisting action of
the drill.
WARNING: Drill may stall if overloaded causing a sudden twist.
Always expect the stall. Grip the drill firmly with both hands to
control the twisting action and avoid injury.
4. IF DRILL STALLS, it is usually because it is being overloaded.
RELEASE TRIGGER IMMEDIATELY, remove drill bit from
work, and determine cause of stalling. DO NOT CLICK
TRIGGER OFF AND ON IN AN ATTEMPT TO START A
STALLED DRILL – THIS CAN DAMAGE THE DRILL.
5. To minimize stalling or breaking through the material, reduce
pressure on drill and ease the bit through the last fractional part
of the hole.
6. Keep the motor running when pulling the bit back out of a drilled
hole. This will help prevent jamming.
7. With variable speed drills there is no need to center punch
the point to be drilled. Use a slow speed to start the hole and
accelerate by squeezing the trigger harder when the hole is
deep enough to drill without the bit skipping out.
DRILLING IN METAL
An SDS Plus®to round shank adaptor chuck is required. Ensure
that tool is in drill-only mode. Start drilling with slow speed and
increase to full power while applying firm pressure on the tool. A
smooth even flow of metal chips indicates the proper drilling rate.
Use a cutting lubricant when drilling metals.The exceptions are cast
iron and brass which should be drilled dry.
NOTE: Large [5/16" to 1/2" (7.9 mm to 12.7 mm)] holes in steel can
be made easier if a pilot hole [5/32" to 3/16" (4 mm to 4.8 mm)] is
drilled first.
DRILLING IN WOOD
An SDS Plus®to round shank adaptor chuck is required. Ensure that
tool is in drill-only mode. Start drilling with slow speed and increase
to full power while applying firm pressure on the tool. Holes in wood

9
English
can be made with the same twist drills used for metal. These bits
may overheat unless pulled out frequently to clear chips from the
flutes. For larger holes, use spade bits, power auger bits, or hole
saws. Work that is apt to splinter should be backed up with a block
of wood.
HAMMERDRILL OPERATION
1. When drilling, use just enough force on the hammer to keep
it from bouncing excessively or “rising” off the bit. Too much
force will cause slower drilling speeds, overheating, and a lower
drilling rate.
2. Drill straight, keeping the bit at a right angle to the work. Do not
exert side pressure on the bit when drilling as this will cause
clogging of the bit flutes and a slower drilling speed.
3. When drilling deep holes, if the hammer speed starts to drop
off, pull the bit partially out of the hole with the tool still running
to help clear debris from the hole.
4. For masonry, use carbide-tipped bits or masonry bits. A smooth
even flow of dust indicates the proper drilling rate.
Chipping and Chiselling
1. To switch from hammer drilling to chiselling, first insert the SDS-
plus® chisel and check if it is properly locked.
2. When switching from hammer drilling mode to chiselling mode,
turn the chisel to the desired position. If you find resistance
during mode change, turn the chisel slightly to engage the
spindle lock.
Depth Rod (Fig. 4)
TO ADJUST THE DEPTH ROD
1. Push in and hold the depth rod release button (J) on the side
handle.
2. Move the depth rod (D) so the distance between the end of the
rod and the end of the bit equals the desired drilling depth.
3. Release the button to lock rod into position. When drilling
with the depth rod, stop when end of rod reaches surface of
material.
FIG. 4
J
D
MAINTENANCE
Your DEWALT power tool has been designed to operate over a
long period of time with a minimum of maintenance. Continuous
satisfactory operation depends upon proper tool care and regular
cleaning.
WARNING: To reduce the risk of injury, turn unit off and
disconnect tool from power source before installing and removing
accessories, before making any adjustments or removing/installing
attachments or accessories.
Cleaning
WARNING: Blow dirt and dust out of all air vents with dry air at
least once a week. Wear proper ANSI Z87.1 (CAN/CSA Z94.3) eye
protection and proper NIOSH/OSHA/MSHA respiratory protection
when performing this.
WARNING: Never use solvents or other harsh chemicals for
cleaning the non-metallic parts of the tool. These chemicals may
weaken the plastic materials used in these parts. Use a cloth
dampened only with water and mild soap. Never let any liquid get
inside the tool; never immerse any part of the tool into a liquid.

10
English
Lubrication
Your tool was properly lubricated before leaving the factory. In from
two to six months, depending upon use, take or send your tool to
an authorized service center for a complete cleaning, inspection
and lubrication. Tools used constantly on production jobs will need
relubrication more often. Also, tools “out of service” for long periods
should be relubricated before being put back to work.
Accessories
WARNING: Since accessories, other than those offered by
DEWALT, have not been tested with this product, use of such
accessories with this tool could be hazardous. To reduce the risk of
injury, only DEWALT, recommended accessories should be used
with this product.
Recommended accessories for use with your tool are available at
extra cost from your local dealer or authorized service center.
MAXIMUM RECOMMENDED CAPACITIES
D25013
Masonry 7/8" (22 mm)
Steel 1/2" (13 mm)
Wood 1-1/8" (30 mm)
OPTIMUM CAPACITY
Masonry 5/32"–1/2"
(4 mm–13 mm)
Repairs
To assure product SAFETY and RELIABILITY, repairs, maintenance
and adjustment (including brush inspection and replacement)
should be performed by authorized service centers or other qualified
service personnel, always using identical replacement parts.
SPECIFICATIONS
D25013
Voltage: 120 V AC~ / 220 V AC~
Frequency: 50-60 Hz
Watts 650 W
RPM: 0–1 550/min
Beats per minute 0–4 550

11
Español
Definiciones: Normas
de seguridad
Las siguientes definiciones describen el nivel de gravedad de
cada advertencia. Lea el manual y preste atención a estos
símbolos.
PELIGRO:
indica una situación de peligro inminente que, si
no se evita,
provocará
la
muerte o lesiones graves.
ADVERTENCIA:
Indica una situación de peligro potencial
que, si no se evita,
podría
provocar la
muerte o lesiones
graves
ATENCIÓN:
Indica una situación de peligro potencial que, si
no se evita,
puede
provocar
lesiones leves o moderadas.
AVISO: Se refiere a una práctica
no relacionada a lesiones
corporales
que de no evitarse
puede resultar
en
daños a la
propiedad.
ADVERTENCIA: para reducir el riesgo de lesiones, lea el
manual de instrucciones.
Advertencias generales de seguridad
para las herramientas eléctricas
ADVERTENCIA: Lea todas las advertencias de seguridad e
instrucciones.Elincumplimientodelasadvertenciasoinstrucciones
puede provocar descargas eléctricas, incendios o lesiones graves.
GUARDE LAS ADVERTENCIAS E
INSTRUCCIONES PARA PODER
CONSULTARLAS EN EL FUTURO
El término “herramienta eléctrica” incluido en todas las advertencias
se refiere a su herramienta eléctrica conectada a la red (cable
eléctrico) o a su herramienta eléctrica accionada con baterías
(inalámbrica).
1) SEGURIDAD DEL ÁREA DE TRABAJO
a) Mantenga el área de trabajo limpia y bien iluminada. Las
áreas abarrotadas u oscuras propician accidentes.
b) No haga funcionar las herramientas eléctricas en
atmósferas explosivas, como ambientes donde haya
polvo, gases o líquidos inflamables. Las herramientas
eléctricas originan chispas que pueden encender el polvo o
producir humo.
c) Mantenga alejados a los niños y a los espectadores de la
herramienta eléctrica en funcionamiento. Las distracciones
pueden provocar la pérdida de control.
2) SEGURIDAD ELÉCTRICA
a) Los enchufes de la herramienta eléctrica deben adaptarse
a la toma de corriente. Nunca modifique el enchufe de
ninguna manera. No utilice ningún enchufe adaptador
con herramientas eléctricas con conexión a tierra. Los
enchufes no modificados y que se adaptan a las tomas de
corrientes reducirán el riesgo de descarga eléctrica.
b) Evite el contacto corporal con superficies con toma de
tierra como, por ejemplo, tuberías, radiadores, cocinas y
refrigeradores. Existe mayor riesgo de descarga eléctrica si
su cuerpo está puesto a tierra.
c) No exponga las herramientas eléctricas a la lluvia ni a
condiciones de humedad. Si entra agua en una herramienta
eléctrica, aumentará el riesgo de descarga eléctrica.
d) No use el cable indebidamente. Nunca utilice el cable para
transportar, tirar o desenchufar la herramienta eléctrica.
Mantenga el cable alejado del calor, el aceite, los bordes
afilados o las piezas móviles. Los cables dañados o
enredados aumentan el riesgo de descarga eléctrica.
e) Al operar una herramienta eléctrica en el exterior, utilice
un cable prolongador adecuado para tal uso. Utilice un
cable adecuado para uso en exteriores a fin de reducir el
riesgo de descarga eléctrica.

12
Español
f) Si no se puede evitar el uso de una herramienta eléctrica
en una zona húmeda, utilice un dispositivo de corriente
residual (residual current device, RCD) de seguridad.
El uso de un RCD reduce el riesgo de sufrir una descarga
eléctrica.
3) SEGURIDAD PERSONAL
a) Permanezca alerta,controle lo que está haciendo y utilice el
sentido común cuando emplee una herramienta eléctrica.
No utilice una herramienta eléctrica si está cansado o
bajo el efecto de drogas, alcohol o medicamentos. Un
momento de descuido mientras se opera una herramienta
eléctrica puede provocar lesiones personales graves.
b) Utilice equipo de seguridad personal. Utilice siempre
protección ocular. El uso de equipo de seguridad, como
mascarillas para polvo, calzado de seguridad antideslizante,
cascos o protección auditiva en las condiciones adecuadas
reducirá las lesiones personales.
c) Evite poner en marcha la herramienta involuntariamente.
Asegúrese de que el interruptor está apagado antes de
conectar la fuente de alimentación y/o la batería, coger
o transportar la herramienta. Transportar herramientas
eléctricas con su dedo apoyado sobre el interruptor o
enchufar herramientas eléctricas con el interruptor en la
posición de encendido puede propiciar accidentes.
d) Retire la clavija de ajuste o la llave de tuercas antes de
encender la herramienta eléctrica. Una llave de tuercas
o una clavija de ajuste que quede conectada a una pieza
giratoria de la herramienta eléctrica puede provocar lesiones
personales.
e) No se estire demasiado. Conserve el equilibrio y
posiciónese adecuadamente en todo momento. Esto
permite un mejor control de la herramienta eléctrica en
situaciones inesperadas.
f) Use la vestimenta adecuada. No use ropas holgadas ni
joyas. Mantenga el cabello, la ropa y los guantes alejados
de las piezas en movimiento. Las ropas holgadas, las joyas
o el cabello largo pueden quedar atrapados en las piezas
en movimiento.
g) Si se suministran dispositivos para la conexión de
accesorios con fines de recolección y extracción de
polvo, asegúrese de que estén conectados y que se
utilicen correctamente. El uso del extractor de polvo puede
reducir los riesgos relacionados con el polvo.
4) USO Y MANTENIMIENTO DE LA HERRAMIENTA
ELÉCTRICA
a) No fuerce la herramienta eléctrica. Utilice la herramienta
eléctrica correcta para el trabajo que realizará. La
herramienta eléctrica correcta hará el trabajo mejor, y de un
modo más seguro, a la velocidad para la que fue diseñada.
b) No utilice la herramienta eléctrica si no puede encenderla
o apagarla con el interruptor. Las herramientas que no
puedan ser controladas con el interruptor constituyen un
peligro y deben repararse.
c) Desconecte el enchufe de la fuente de alimentación o
la batería de la herramienta eléctrica antes de realizar
cualquier ajuste, cambio de accesorios o almacenar
las herramientas eléctricas. Estas medidas de seguridad
preventivas reducen el riesgo de encender la herramienta
eléctrica de forma accidental.
d) Guarde la herramienta eléctrica que no esté en uso fuera
del alcance de los niños y no permita que otras personas
no familiarizadas con ella o con estas instrucciones
operen la herramienta. Las herramientas eléctricas son
peligrosas si son operadas por usuarios que no tienen
formación.

13
Español
e) Mantenimiento de las herramientas eléctricas. Revise que
no haya piezas en movimiento mal alineadas o trabadas,
piezas rotas o cualquier otra situación que pueda afectar
el funcionamiento de las herramientas eléctricas. Si
encuentra daños, haga reparar la herramienta eléctrica
antes de utilizarla. Se producen muchos accidentes a
causa de las herramientas eléctricas que carecen de un
mantenimiento adecuado.
f) Mantenga las herramientas de corte afiladas y limpias.
Las herramientas de corte con mantenimiento adecuado y
con los bordes de corte afilados son menos propensas a
trabarse y son más fáciles de controlar.
g) Utilice las herramientas eléctricas, sus accesorios y
piezas, etc. de acuerdo con las presentes instrucciones,
teniendo siempre en cuenta las condiciones de trabajo y
el trabajo que deba llevar a cabo. El uso de la herramienta
eléctrica para operaciones diferentes de aquellas para las que
fue diseñada podría originar una situación peligrosa.
5) MANTENIMIENTO
a) Solicite a una persona cualificada en reparaciones que
realice el mantenimiento de su herramienta eléctrica
y que solo utilice piezas de repuesto idénticas. Esto
garantizará la seguridad de la herramienta eléctrica.
Instrucciones de seguridad adicionales
para los rotomartillos
•Utilice protectores auditivos. La exposición a ruidos puede
causar pérdida auditiva.
• Utilice los mangos auxiliares que vienen con la herramienta.
Perder el control de la herramienta podría causar lesiones
corporales.
• Sostenga la herramienta eléctrica por sus superficies de
empuñadura aisladas cuando realice una operación en la
cual la herramienta para cortar pudiera entrar en contacto
con instalaciones eléctricas ocultas o con su propio
cable. El contacto con un conductor “activo” hará que las
piezas metálicas de la herramienta que estén expuestas a él
conduzcan electricidad y que el operador reciba una descarga
eléctrica.
• Use abrazaderas u otra manera práctica de fijar y sujetar la
pieza de trabajo a una plataforma estable. Sujetar la pieza
con la mano o contra el cuerpo es inestable y resultará en que
pierda el control.
•Lleve lentes de seguridad u otra protección ocular. Las
operaciones de martilleo provocan la expulsión de virutas. Las
partículas despedidas pueden provocar lesiones irreversibles en
los ojos. Lleve una mascarilla antipolvo o un respirador cuando
realice aplicaciones que generen polvo. En la mayoría de las
aplicaciones puede ser necesaria una protección auditiva.
• Mantenga siempre la herramienta bien sujeta. No opere la
herramienta si no puede sujetarla con ambas manos. Es
recomendable usar siempre el mango lateral. Si opera esta
herramienta con una sola mano, perderá el control de la misma.
Atravesar o topar con materiales duros, tales como un refuerzo
posterior, también podría resultar peligroso. Ajuste bien el
mango lateral antes de usar la herramienta.
• El martillo sólo debe utilizarse para aplicaciones de cincelado
ligeras.
• El selector de avance/reversa debe encontrarse en posición de
avance cuando use la herramienta para cincelar.
• No utilice esta herramienta para mezclar o mover con mayor
facilidad líquidos combustibles o explosivos (bencina, alcohol,
etc.).
• No mezcle ni remueva líquidos categorizados como
inflamables.
• No opere esta herramienta durante períodos largos de
tiempo. La vibración provocada por la acción de percusión

14
Español
puede ser peligrosa para sus manos y brazos. Utilice guantes
para mayor amortiguación y descanse con frecuencia para
limitar el riesgo de exposición.
• No renueve las brocas usted mismo. La renovación de las
brocas debe realizarla un especialista autorizado. Una broca
mal renovada puede provocar lesiones.
• Lleve guantes al operar la herramienta y al cambiar las
brocas. Las piezas metálicas de la herramienta y las brocas
pueden calentarse mucho durante la operación. Los pequeños
trozos de material roto pueden dañar las manos desprotegidas.
• Nunca suelte la herramienta hasta que la broca haya
dejado de girar totalmente. Las brocas en movimiento pueden
provocar lesiones.
• Si una broca se atasca, no la golpee con un martillo para
desbloquearla. Podrían saltar fragmentos de metal o virutas de
material y provocar lesiones.
• Las brocas ligeramente desgastadas pueden afilarse de
nuevo.
• Mantenga el cable alejado de la broca en movimiento. No
enrolle el cable alrededor de ninguna parte de su cuerpo.
Un cable eléctrico enrollado alrededor de una broca que gira
puede provocar lesiones y pérdida de control.
• Los orificios de ventilación suelen cubrir piezas en
movimiento, por lo que también se deben evitar. Las partes
móviles pueden atrapar las prendas de vestir sueltas, las joyas
y el cabello.
• Los hilos del alargador deben ser de un calibre apropiado
para su seguridad. Un cable de un calibre insuficiente causará
una caída en la tensión de la línea dando por resultado una
pérdida de energía y sobrecalentamiento. Cuando se utilice más
de un alargador para completar el largo total, asegúrese que
los hilos de cada alargador tengan el calibre mínimo. La tabla
siguiente muestra el tamaño correcto a utilizar, dependiendo
de la longitud del cable y del amperaje nominal de la placa de
identificación. Si tiene dudas sobre cuál calibre usar, use un
calibre mayor.
Ténsion (Volts) Longitud del cable en metros (m)
120 - 127V 0 - 7 7 - 15 15 - 30 30 - 50
220 - 240V 0 - 15 15 - 30 30 - 60 60 - 100
Corriente
nominal
(Ampéres)
Sección nominal mínima del cable en
milímetros cuadrados (mm2)
0 - 6A 1,0 1,5 1,5 2,5
6 - 10A 1,0 1,5 2,5 4,0
10 - 12A 1,5 1,5 2,5 4,0
12 - 16A 2,5 4,0 No recomendado
NOTA: No sobrecaliente la broca (decoloración) mientras la afila
de nuevo. Las brocas muy gastadas precisan un reforjado. No
reendurezca ni temple la broca.
ADVERTENCIA: Si el enchufe o el cable de alimentación están
dañados lo debe reemplazar el fabricante o su representante o por
una persona igualmente calificada para evitar peligro.
ADVERTENCIA: Siempre use protección ocular. Todos los
usuarios y personas circunstantes deben llevar protección ocular
en conformidad con ANSI Z87.1.
ADVERTENCIA: Siempre lleve la debida protección auditiva
personal en conformidad con ANSI S12.6 (S3.19) durante el
uso de esta herramienta. Bajo algunas condiciones y duraciones
de uso, el ruido producido por este producto puede contribuir a la
pérdida auditiva.
ADVERTENCIA: Use SIEMPRE lentes de seguridad. Los
anteojos de uso diario NO son lentes de seguridad. Utilice también
máscaras faciales o para polvo si los cortes producen polvillo.
UTILICE SIEMPRE EQUIPOS DE SEGURIDAD CERTIFICADOS:
• Protección para los ojos ANSI Z87.1 (CAN/CSA Z94.3),
• Protección auditiva ANSI S12.6 (S3.19),

15
Español
• Protección respiratoria según las normas NIOSH/OSHA/
MSHA.
ADVERTENCIA: Parte del polvo creado al lijar, aserruchar,
moler o perforar con máquina, así como al realizar otras actividades
de la construcción, contiene substancias químicas que se sabe
producen cáncer, defectos congénitos u otras afecciones
reproductivas. Algunos ejemplos de esas substancias químicas
son:
• plomo de pinturas a base de plomo,
• sílice cristalizado de ladrillos y cemento y otros productos de
albañilería, y
• arsénico y cromo de la madera químicamente tratada
(CCA).
El riesgo al contacto con estas substancias varía, según la
frecuencia en que se haga este tipo de trabajo. Para reducir la
exposición a esas substancias químicas: trabaje en un área bien
ventilada, y trabaje con equipos de seguridad aprobados, tales
como máscaras contra el polvo especialmente diseñadas para filtrar
las partículas microscópicas.
• Evite el contacto prolongado con polvos originados por lijar,
aserrar, esmerilar, taladrar y otras actividades constructivas.
Vista ropas protectoras y lave las áreas expuestas con agua
y jabón. Permitir que el polvo se introduzca en su boca, ojos,
o dejarlo sobre la piel promueve la absorción de químicos
dañinos.
ADVERTENCIA: La utilización de esta herramienta puede
originar polvo o dispersarlo, lo que podría causar daños graves y
permanentes al sistema respiratorio, así como otras lesiones.
Siempre use protección respiratoria aprobada por NIOSH/OSHA,
apropiada para su uso en condiciones de exposición al polvo.
Procure que las partículas no se proyecten directamente sobre su
rostro o su cuerpo.
• La etiqueta de la herramienta puede incluir los siguientes
símbolos. A continuación se indican los símbolos y sus
definiciones:
V ......... voltios A ...........amperios
Hz ....... hertz W ..........vatios
min...... minutos .........corriente alterna
... corriente directa .........corriente alterna o
........ Construcción Clase I ..............directa
........... (con conexión a tierra) no..........velocidad sin carga
........ Construcción Clase II ..........terminal a tierra
............ (con aislamiento doble) ..........símbolo de alerta de
RPM.... revoluciones o .............. seguridad
............ reciprocidad por minuto …/min ...por minuto
GPM ... golpes por minuto IPM .......impactos por minutos
Motor
Esta herramienta DEWALT está impulsada por un motor fabricado
por DEWALT. Compruebe que el suministro eléctrico concuerde
con el indicado en la placa de características. Una reducción
del voltaje superior al 10% provocará pérdida de potencia y
sobrecalentamiento. Todas las herramientas DEWALT se prueban
de fábrica.
DESCRIPCIÓN (FIG. 1)
ADVERTENCIA: Nunca modifique la herramienta eléctrica ni
ninguna pieza de esta. Puede producir daños o lesiones
corporales.
A. Gatillo selector G. Selector de modo
de velocidad variable H. Palanca de reversa
B. Mango principal I. Botón de bloqueo en
C. Mango lateral encendido (sólo con D25013)
D. Varilla de profundidad J. Botón de liberación
E. Broquero/Mandril de la varilla de profundidad
SDS Plus®
F. Interruptor selector de modo

16
Español
C
J
FIG. 1 H
A
D
G
I
EF
B
C
USO DEBIDO
Este rotomartillo para trabajo pesado ha sido diseñado para el
taladrado, el taladrado con el percusor, el atornillado y el corte
por capas ligero a un nivel profesional en varios sitios de trabajo
(por ejemplo, sitios de construcción). NO utilice la herramienta
en condiciones húmedas o en la presencia de líquidos o gases
inflamables.
Este rotomartillo para trabajo pesado es una herramienta eléctrica
de uso rudo. NO permita que un niño juegue con ellos. Si el
operador no tiene experiencia operando esta herramienta, su uso
deberá ser supervisado.
MONTAJE Y AJUSTES
ADVERTENCIA: Para reducir el riesgo de lesiones, apague y
desconecte la máquina de la fuente de energía antes de
instalar y de retirar los accesorios, antes de regular o cambiar
los ajustes o cuando se realicen reparaciones. Compruebe que
el interruptor esté en la posición OFF. Un encendido accidental
puede causar lesiones.
Mango lateral (Fig. 1)
ADVERTENCIA: Para reducir el riesgo de lesiones corporales,
SIEMPRE opere la herramienta con el mango lateral debidamente
instalado y ajustado. El incumplimiento con lo anterior podría
resultar en que el mango lateral se suelte durante la operación
de la herramienta y que el operador pierda el control como
consecuencia. Sostenga la herramienta con ambas manos para
maximizar control.
El mango lateral viene ensamblado a este rotomartillo. El mango
lateral (C) puede ser instalado para acomodar zurdos y diestros.
PARA AJUSTAR EL MANGO LATERAL
1. Afloje el mango lateral (C) girándolo en el sentido contrario a
las manecillas del reloj.
2. Rote el mango lateral a la posición deseada.
3. Ajuste el mango lateral girándolo en el sentido de las manillas
del reloj.
PARA CAMBIAR DE LADO
Para usuarios diestros: deslice el soporte del mango lateral por
encima del broquero/mandril, con el pomo hacia la izquierda.
Para usuarios zurdos: deslice el soporte del mango lateral por
encima del broquero/mandril, con el pomo hacia la derecha.
Interruptor de gatillo (Fig. 1)
Para encender el rotomartillo, presione el interruptor de gatillo (A).
Para detener el rotomartillo, suelte el interruptor.

17
Español
NOTA: Use velocidades menores para perforar el comienzo de
orificios sin guía para indicar el centro, perforar en metal, plástico
o cerámica o atornillar. Las velocidades altas son preferibles para
obtener la máxima eficacia en la perforación de mamposterías.
VELOCIDAD VARIABLE
El gatillo selector de velocidad variable (A) permite controlar la
velocidad. Cuanto más fuerte se pulse el gatillo selector, mayor
será la velocidad de taladrado.
BOTÓN DE BLOQUEO EN ENCENDIDO (SÓLO CON D25013)
ADVERTENCIA: Suelte el mecanismo de trabado antes de
desconectar la clavija de la toma de corriente. Si no lo hace el
rotomartillo se encenderá cuando vuelva a conectarlo, con el
posible riesgo de daños o lesiones.
El botón de bloqueo en encendido (I) se usa sólo cuando el
rotomartillo está estacionario, montado en una base de soporte
vertical o usado en aplicaciones de corte por capas.
Asegúrese de que el botón de bloqueo en encendido se mueva con
normalidad cada vez que desee usar la herramienta.
Para una operación continua, presione y sostenga el interruptor de
gatillo (A); presione el botón de bloqueo en encendido (I); suelte
el interruptor de gatillo y luego suelte el botón de bloqueo en
encendido. La herramienta seguirá funcionando.
Para detener la herramienta cuando esté en funcionamiento
continuo, presione y suelte el interruptor de gatillo rápidamente.
Palanca de reversa (Fig. 1)
La palanca de reversa (H) se usa para invertir la marcha del
rotomartillo con el fin de sacar clavos o desatascar brocas en el
modo de sólo taladrado.
ATENCIÓN: Cuando invierta la marcha para desatascar brocas,
esté preparado para el fuerte par reactivo que se producirá.
Para invertir la marcha del rotomartillo, apáguelo y alinee la palanca
de reversa (H) con la flecha amarilla que apunta hacia atrás (se ve
sujetando el taladro en la posición de operación).
Para operar la unidad hacia delante, apague el rotomartillo y
mueva la palanca de reversa (H) de forma que la flecha amarilla
apunte hacia delante (se ve sujetando el taladro en la posición de
operación).
Selector de modo (Fig. 2)
AVISO: La herramienta debe estar completamente parada antes
de activar el botón del actuador de modo, a fin de evitar daños a
la herramienta.
FIG. 2
MODO DE
ROTACION
F
G
MODO DE ROTO
PERCUSION
FG
MODO DE CINCELADO
G
F

18
Español
MODO DE SÓLO TALADRADO
Para utilizar el modo de sólo taladrado, presione el botón de selector
de modo (F) y gire el selector de modo (G) de forma que la flecha
amarilla apunte al correspondiente símbolo, tal como se muestra.
Utilice el modo de sólo taladrado en madera, metal y plástico.
MODO DE TALADRO PERCUTOR
Para utilizar el modo de taladro percutor, presione el botón de
selector de modo (F) y gire el selector de modo (G) de forma que
la flecha amarilla apunte al correspondiente símbolo, tal como se
muestra. Utilice este modo para perforar mamposterías.
MODO DE SÓLO MARTILLADO
Para cincelados suaves, presione el botón de selector de modo
(F) y gire el selector de modo (G) de forma que la flecha amarilla
apunte al correspondiente símbolo, tal como se muestra.
NOTA: La flecha amarilla del selector de modo DEBE estar
siempre alineada con alguno de los símbolos. No hay posiciones
de operación entre ellos.
Broquero/mandril SDS Plus® (Fig. 1)
ADVERTENCIA: Para reducir el riesgo de lesiones corporales
graves, apague la herramienta y desconéctela de la fuente de
alimentación antes de realizar ajustes o de quitar o poner
accesorios.
ADVERTENCIA: Peligro de quemaduras. SIEMPRE use guantes
al cambiar las brocas. Las piezas metálicas de la herramienta
y las brocas pueden calentarse mucho durante la operación.
Los pequeños trozos de material roto pueden dañar las manos
desprotegidas.
ADVERTENCIA: No intente ajustar o soltar las brocas (ni ningún
otro accesorio) sujetando la parte frontal del broquero/mandril y
encendiendo la herramienta. Esto podría dañar el broquero/mandril
y causar lesiones corporales.
Para insertar la broca, inserte el vástago aproximadamente 19
mm (3/4"), no más de 22 mm (7/8") en el broquero/mandril. Empuje
y gire la broca hasta que encaje en la posición correcta. La broca
quedará firmemente ajustada.
Para soltar la broca, tire hacia atrás el broquero/mandril (E) y
retírela.
FUNCIONAMIENTO
ADVERTENCIA:Respete siempre las instrucciones de seguridad
y la reglamentación aplicable.
ADVERTENCIA: Para reducir el riesgo de lesiones corporales
graves, apague la herramienta y desconéctela de la fuente de
alimentación antes de realizar ajustes o de quitar o poner
accesorios.
ADVERTENCIA: Para reducir el riesgo de lesiones
corporales, SIEMPRE asegúrese de que la pieza de trabajo
esté debidamente sujeta. Si va a perforar un material delgado,
utilice un bloque de madera como “respaldo” para evitar dañarlo.
ADVERTENCIA: Para reducir el riesgo de lesiones
corporales, SIEMPRE opere la herramienta con el mango
lateral debidamente instalado y ajustado. El incumplimiento con
lo anterior podría resultar en que el mango lateral se suelte durante
la operación de la herramienta y que el operador pierda el control
como consecuencia. Sostenga la herramienta con ambas manos
para maximizar control.
Bien colocar las FIG. 3
B
C
manos (Fig. 3)
ADVERTENCIA: Para
reducir el riesgo de lesiones
personales, SIEMPRE
coloque bien las manos, tal
como se muestra.
Table of contents
Languages:
Other DeWalt Rotary Hammer manuals

DeWalt
DeWalt DCH775 User manual

DeWalt
DeWalt D25123 User manual

DeWalt
DeWalt DC228 User manual

DeWalt
DeWalt DCH243 User manual

DeWalt
DeWalt XR DCH072 User manual

DeWalt
DeWalt DCH733B User manual

DeWalt
DeWalt DCH172 User manual

DeWalt
DeWalt D25721 User manual

DeWalt
DeWalt D25113-XE User manual

DeWalt
DeWalt SDS plus DCH072 User manual

DeWalt
DeWalt D25500 User manual

DeWalt
DeWalt D25011K User manual

DeWalt
DeWalt DCH273P2 User manual

DeWalt
DeWalt DC232-XE User manual

DeWalt
DeWalt DW570K User manual

DeWalt
DeWalt D25012 User manual

DeWalt
DeWalt D25112(K) User manual

DeWalt
DeWalt DC212 User manual

DeWalt
DeWalt 582429-00 User manual

DeWalt
DeWalt D25012 User manual