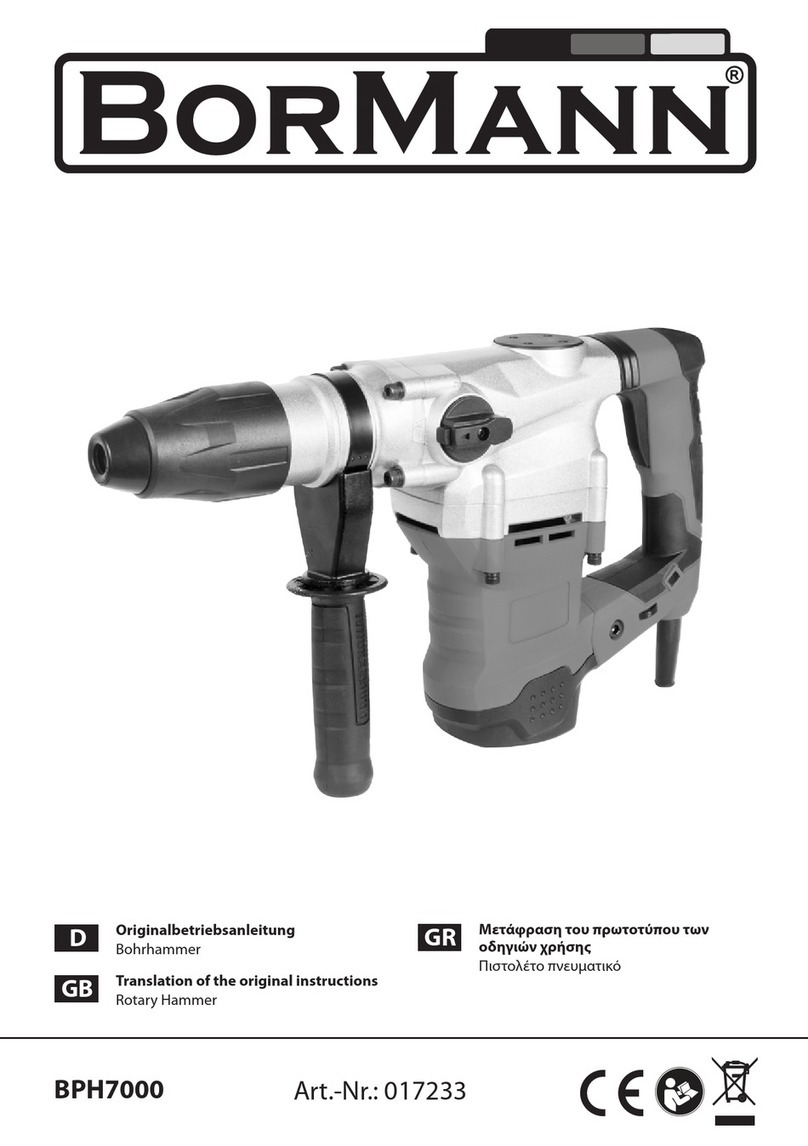
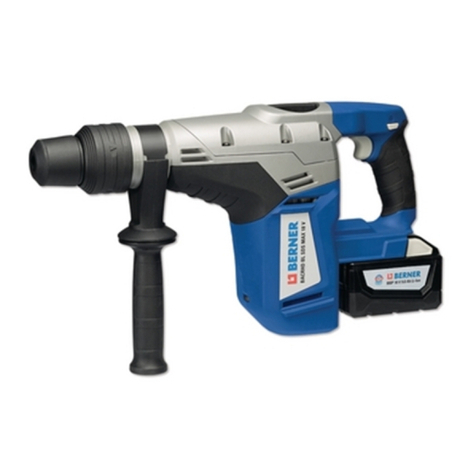
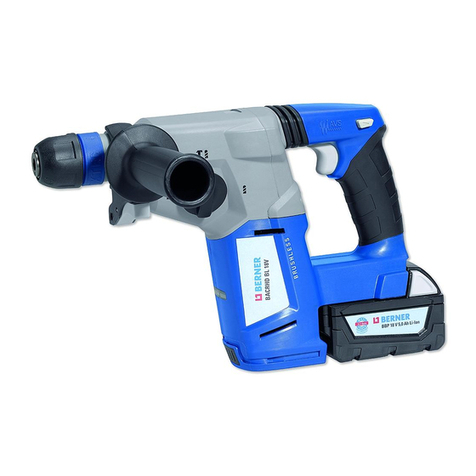
Berner BHD-2/24 SDS+ BC+2 User manual

Manuel d‘instructions
Article Number:
152117, 152118
Languages:
en, fr, de, pt, es
BERNER_Manuel_d‘instructions__71012[PDF]_fr.pdf 2016-11-10

Originalbetriebsanleitung
Original instructions
Notice originale
Manual original
Manual original
Istruzioni originali
Oorspronkelijke
gebruiksaanwijzing
Original brugsanvisning
Bruksanvisning i original
Original driftsinstruks
Alkuperäiset ohjeet
Πρωτüτυπο οδηγιών χρήσης
Orijinal iúletme talimatõ
Instrukcja oryginalna
Původní návod k používání
Pôvodný návod na použitie
Eredeti használati utasítás
Оригинальное руко-
водство по эксплуатации
Originalno uputstvo za rad
Originalne upute za rad
Instrukcijas oriìinālvalodā
Originali instrukcija
BHD-2/24 SDS+
BHD-2/28 EC SDS+
Deutsch
English
Français
Español
Português
Italiano
Nederlands
Dansk
Svenska
Norsk
Suomi
Ελληνικά
Türkçe
Polski
Česky
Slovensky
Magyar
Русский
Srpski
Hrvatski
Latviešu
Lietuviškai

21 619 929 L30 • 31.7.12
Deutsch . . . . . . . . . . . . . . . . . . . . . . . . . . . . Seite 3
English . . . . . . . . . . . . . . . . . . . . . . . . . . . . . Page 10
Français . . . . . . . . . . . . . . . . . . . . . . . . . . . . Page 16
Español . . . . . . . . . . . . . . . . . . . . . . . . . . . Página 23
Português . . . . . . . . . . . . . . . . . . . . . . . . . Página 30
Italiano . . . . . . . . . . . . . . . . . . . . . . . . . . . . Pagina 37
Nederlands . . . . . . . . . . . . . . . . . . . . . . . . Pagina 44
Dansk . . . . . . . . . . . . . . . . . . . . . . . . . . . . . . . Side 51
Svenska . . . . . . . . . . . . . . . . . . . . . . . . . . . . . Sida 57
Norsk . . . . . . . . . . . . . . . . . . . . . . . . . . . . . . . Side 63
Suomi. . . . . . . . . . . . . . . . . . . . . . . . . . . . . . . Sivu 69
Ελληνικά. . . . . . . . . . . . . . . . . . . . . . . Σελίδα 75
Türkçe . . . . . . . . . . . . . . . . . . . . . . . . . . Sayfa 83
Polski. . . . . . . . . . . . . . . . . . . . . . . . . . Strona 90
Česky. . . . . . . . . . . . . . . . . . . . . . . . . . Strana 97
Slovensky . . . . . . . . . . . . . . . . . . . . . . Strana 104
Magyar . . . . . . . . . . . . . . . . . . . . . . . . . Oldal 111
Русский. . . . . . . . . . . . . . . . . . . . . Страница 118
Srpski . . . . . . . . . . . . . . . . . . . . . . . . . Strana 126
Hrvatski . . . . . . . . . . . . . . . . . . . . . . . Stranica 133
Latviešu . . . . . . . . . . . . . . . . . . . . . . Lappuse 140
Lietuviškai . . . . . . . . . . . . . . . . . . . . .Puslapis 147

Deutsch | 3
1 619 929 L30 • 31.7.12
Deutsch
Allgemeine Sicherheitshin-
weise für Elektrowerkzeuge
Lesen Sie alle Sicherheitshin-
weise und Anweisungen. Ver-
säumnisse bei der Einhaltung der Sicherheitshinwei-
se und Anweisungen können elektrischen Schlag,
Brand und/oder schwere Verletzungen verursachen.
Bewahren Sie alle Sicherheitshinweise und An-
weisungen für die Zukunft auf.
Der in den Sicherheitshinweisen verwendete Begriff
„Elektrowerkzeug“ bezieht sich auf netzbetriebene
Elektrowerkzeuge (mit Netzkabel) und auf akkubetrie-
bene Elektrowerkzeuge (ohne Netzkabel).
Arbeitsplatzsicherheit
fHalten Sie Ihren Arbeitsbereich sauber und
gut beleuchtet. Unordnung oder unbeleuchtete
Arbeitsbereiche können zu Unfällen führen.
fArbeiten Sie mit dem Elektrowerkzeug nicht
in explosionsgefährdeter Umgebung, in der
sich brennbare Flüssigkeiten, Gase oder
Stäube befinden. Elektrowerkzeuge erzeugen
Funken, die den Staub oder die Dämpfe entzünden
können.
fHalten Sie Kinder und andere Personen wäh-
rend der Benutzung des Elektrowerkzeugs
fern. Bei Ablenkung können Sie die Kontrolle über
das Gerät verlieren.
Elektrische Sicherheit
fDer Anschlussstecker des Elektrowerkzeu-
ges muss in die Steckdose passen. Der Ste-
cker darf in keiner Weise verändert werden.
Verwenden Sie keine Adapterstecker ge-
meinsam mit schutzgeerdeten Elektrowerk-
zeugen. Unveränderte Stecker und passende
Steckdosen verringern das Risiko eines elektri-
schen Schlages.
fVermeiden Sie Körperkontakt mit geerdeten
Oberflächen wie von Rohren, Heizungen,
Herden und Kühlschränken. Es besteht ein er-
höhtes Risiko durch elektrischen Schlag, wenn Ihr
Körper geerdet ist.
fHalten Sie Elektrowerkzeuge von Regen
oder Nässe fern. Das Eindringen von Wasser in
ein Elektrowerkzeug erhöht das Risiko eines elektri-
schen Schlages.
fZweckentfremden Sie das Kabel nicht, um
das Elektrowerkzeug zu tragen, aufzuhängen
oder um den Stecker aus der Steckdose zu
ziehen. Halten Sie das Kabel fern von Hitze,
Öl, scharfen Kanten oder sich bewegenden
Geräteteilen. Beschädigte oder verwickelte Ka-
bel erhöhen das Risiko eines elektrischen Schla-
ges.
fWenn Sie mit einem Elektrowerkzeug im
Freien arbeiten, verwenden Sie nur Verlänge-
rungskabel, die auch für den Außenbereich
geeignet sind. Die Anwendung eines für den Au-
ßenbereich geeigneten Verlängerungskabels ver-
ringert das Risiko eines elektrischen Schlages.
fWenn der Betrieb des Elektrowerkzeuges in
feuchter Umgebung nicht vermeidbar ist, ver-
wenden Sie einen Fehlerstromschutzschal-
ter. Der Einsatz eines Fehlerstromschutzschalters
vermindert das Risiko eines elektrischen Schlages.
Sicherheit von Personen
fSeien Sie aufmerksam, achten Sie darauf,
was Sie tun, und gehen Sie mit Vernunft an
die Arbeit mit einem Elektrowerkzeug. Be-
nutzen Sie kein Elektrowerkzeug, wenn Sie
müde sind oder unter dem Einfluss von Dro-
gen, Alkohol oder Medikamenten stehen. Ein
Moment der Unachtsamkeit beim Gebrauch des
Elektrowerkzeuges kann zu ernsthaften Verletzun-
gen führen.
fTragen Sie persönliche Schutzausrüstung
und immer eine Schutzbrille. Das Tragen per-
sönlicher Schutzausrüstung, wie Staubmaske,
rutschfeste Sicherheitsschuhe, Schutzhelm oder
Gehörschutz, je nach Art und Einsatz des Elektro-
werkzeuges, verringert das Risiko von Verletzun-
gen.
fVermeiden Sie eine unbeabsichtigte Inbe-
triebnahme. Vergewissern Sie sich, dass das
Elektrowerkzeug ausgeschaltet ist, bevor Sie
es an die Stromversorgung und/oder den Ak-
ku anschließen, es aufnehmen oder tragen.
Wenn Sie beim Tragen des Elektrowerkzeuges den
Finger am Schalter haben oder das Gerät einge-
schaltet an die Stromversorgung anschließen, kann
dies zu Unfällen führen.
fEntfernen Sie Einstellwerkzeuge oder
Schraubenschlüssel, bevor Sie das Elektro-
werkzeug einschalten. Ein Werkzeug oder
WARNUNG

4| Deutsch 1 619 929 L30 • 31.7.12
Schlüssel, der sich in einem drehenden Geräteteil
befindet, kann zu Verletzungen führen.
fVermeiden Sie eine abnormale Körperhal-
tung. Sorgen Sie für einen sicheren Stand
und halten Sie jederzeit das Gleichgewicht.
Dadurch können Sie das Elektrowerkzeug in uner-
warteten Situationen besser kontrollieren.
fTragen Sie geeignete Kleidung. Tragen Sie
keine weite Kleidung oder Schmuck. Halten
Sie Haare, Kleidung und Handschuhe fern
von sich bewegenden Teilen. Lockere Kleidung,
Schmuck oder lange Haare können von sich bewe-
genden Teilen erfasst werden.
fWenn Staubabsaug- und -auffangein-
richtungen montiert werden können,
vergewissern Sie sich, dass diese ange-
schlossen sind und richtig verwendet werden.
Verwendung einer Staubabsaugung kann Gefähr-
dungen durch Staub verringern.
Verwendung und Behandlung des
Elektrowerkzeuges
fÜberlasten Sie das Gerät nicht. Verwenden
Sie für Ihre Arbeit das dafür bestimmte Elek-
trowerkzeug. Mit dem passenden Elektrowerk-
zeug arbeiten Sie besser und sicherer im angege-
benen Leistungsbereich.
fBenutzen Sie kein Elektrowerkzeug, dessen
Schalter defekt ist. Ein Elektrowerkzeug, das
sich nicht mehr ein- oder ausschalten lässt, ist ge-
fährlich und muss repariert werden.
fZiehen Sie den Stecker aus der Steckdose
und/oder entfernen Sie den Akku, bevor Sie
Geräteeinstellungen vornehmen, Zubehörtei-
le wechseln oder das Gerät weglegen. Diese
Vorsichtsmaßnahme verhindert den unbeabsichtig-
ten Start des Elektrowerkzeuges.
fBewahren Sie unbenutzte Elektrowerkzeuge
außerhalb der Reichweite von Kindern auf.
Lassen Sie Personen das Gerät nicht benut-
zen, die mit diesem nicht vertraut sind oder
diese Anweisungen nicht gelesen haben.
Elektrowerkzeuge sind gefährlich, wenn sie von un-
erfahrenen Personen benutzt werden.
fPflegen Sie Elektrowerkzeuge mit Sorgfalt.
Kontrollieren Sie, ob bewegliche Teile ein-
wandfrei funktionieren und nicht klemmen,
ob Teile gebrochen oder so beschädigt sind,
dass die Funktion des Elektrowerkzeuges
beeinträchtigt ist. Lassen Sie beschädigte
Teile vor dem Einsatz des Gerätes reparieren.
Viele Unfälle haben ihre Ursache in schlecht gewar-
teten Elektrowerkzeugen.
fHalten Sie Schneidwerkzeuge scharf und
sauber. Sorgfältig gepflegte Schneidwerkzeuge
mit scharfen Schneidkanten verklemmen sich weni-
ger und sind leichter zu führen.
fVerwenden Sie Elektrowerkzeug, Zubehör,
Einsatzwerkzeuge usw. entsprechend diesen
Anweisungen. Berücksichtigen Sie dabei die
Arbeitsbedingungen und die auszuführende
Tätigkeit. Der Gebrauch von Elektrowerkzeugen
für andere als die vorgesehenen Anwendungen
kann zu gefährlichen Situationen führen.
Service
fLassen Sie Ihr Elektrowerkzeug nur von qua-
lifiziertem Fachpersonal und nur mit Origi-
nal-Ersatzteilen reparieren. Damit wird sicher-
gestellt, dass die Sicherheit des
Elektrowerkzeuges erhalten bleibt.
Sicherheitshinweise für
Hämmer
fTragen Sie Gehörschutz. Die Einwirkung von
Lärm kann Gehörverlust bewirken.
fBenutzen Sie Zusatzgriffe, wenn diese mit
dem Elektrowerkzeug mitgeliefert werden.
Der Verlust der Kontrolle kann zu Verletzungen füh-
ren.
fHalten Sie das Gerät an den isolierten Griff-
flächen, wenn Sie Arbeiten ausführen, bei de-
nen das Einsatzwerkzeug oder die Schraube
verborgene Stromleitungen oder das eigene
Netzkabel treffen kann. Der Kontakt mit einer
spannungsführenden Leitung kann auch metallene
Geräteteile unter Spannung setzen und zu einem
elektrischen Schlag führen.
Weitere Sicherheits- und
Arbeitshinweise
fBeachten Sie die Netzspannung! Die Span-
nung der Stromquelle muss mit den Angaben auf
dem Typenschild des Elektrowerkzeuges überein-
stimmen.

Deutsch | 5
1 619 929 L30 • 31.7.12
fVerwenden Sie geeignete Suchgeräte, um
verborgene Versorgungsleitungen aufzuspü-
ren, oder ziehen Sie die örtliche Versor-
gungsgesellschaft hinzu. Kontakt mit Elektrolei-
tungen kann zu Feuer und elektrischem Schlag
führen. Beschädigung einer Gasleitung kann zur
Explosion führen. Eindringen in eine Wasserleitung
verursacht Sachbeschädigung.
fZiehen Sie den Zusatzhandgriff fest an, hal-
ten Sie das Elektrowerkzeug beim Arbeiten
fest mit beiden Händen und sorgen Sie für ei-
nen sicheren Stand. Das Elektrowerkzeug wird
mit zwei Händen sicher geführt.
fSichern Sie das Werkstück. Ein mit Spannvor-
richtungen oder Schraubstock festgehaltenes
Werkstück ist sicherer gehalten als mit Ihrer Hand.
fZum Bohren ohne Schlag in Holz, Metall, Keramik
und Kunststoff sowie zum Schrauben werden
Werkzeuge ohne SDS-plus (z.B. Bohrer mit zylind-
rischem Schaft) verwendet. Für diese Werkzeuge
benötigen Sie ein Schnellspannbohrfutter bzw.
Zahnkranzbohrfutter.
fBHD-2/28 EC SDS+: Verwenden Sie nur Wech-
selbohrfutter mit 3 Kennrillen (Standardlieferum-
fang) oder 2 Kennrillen (Zubehör/Ersatzteil).
fDas Wechselbohrfutter verriegelt sich selbst-
tätig. Überprüfen Sie die Verriegelung durch
Ziehen am Wechselbohrfutter.
fSDS-plus-Einsatzwerkzeug einsetzen: Über-
prüfen Sie die Verriegelung durch Ziehen am Werk-
zeug.
fLassen Sie eine beschädigte Staubschutz-
kappe sofort ersetzen. Die Staubschutzkappe
verhindert weitgehend das Eindringen von Bohr-
staub in die Werkzeugaufnahme während des Be-
triebes. Achten Sie beim Einsetzen des Werkzeu-
ges darauf, dass die Staubschutzkappe nicht
beschädigt wird.
fStäube von Materialien wie bleihaltigem An-
strich, einigen Holzarten, Mineralien und Me-
tall können gesundheitsschädlich sein und
zu allergischen Reaktionen, Atemwegser-
krankungen und/oder Krebs führen. Asbest-
haltiges Material darf nur von Fachleuten bearbeitet
werden.
– Benutzen Sie möglichst eine für das Material
geeignete Staubabsaugung.
– Sorgen Sie für gute Belüftung des Arbeitsplat-
zes.
– Es wird empfohlen, eine Atemschutzmaske mit
Filterklasse P2 zu tragen.
Beachten Sie in Ihrem Land gültige Vorschriften für
die zu bearbeitenden Materialien.
fVermeiden Sie Staubansammlungen am Ar-
beitsplatz. Stäube können sich leicht entzünden.
fSollte das Einsatzwerkzeug blockieren,
schalten Sie das Elektrowerkzeug aus. Lösen
Sie das Einsatzwerkzeug.
fÜberzeugen Sie sich vor dem Einschalten des
Elektrowerkzeugs von der Freigängigkeit des
Einsatzwerkzeugs. Beim Einschalten mit einem
blockierten Bohrwerkzeug entstehen hohe Reakti-
onsmomente.
fWenn Sie das Elektrowerkzeug nicht benut-
zen, schalten Sie es aus, um Energie zu spa-
ren.
fWarten Sie, bis das Elektrowerkzeug zum
Stillstand gekommen ist, bevor Sie es able-
gen. Das Einsatzwerkzeug kann sich verhaken und
zum Verlust der Kontrolle über das Elektrowerk-
zeug führen.
Symbole
Die nachfolgenden Symbole sind für das Lesen und
Verstehen der Betriebsanleitung von Bedeutung. Prä-
gen Sie sich die Symbole und ihre Bedeutung ein. Die
richtige Interpretation der Symbole hilft Ihnen, das
Elektrowerkzeug besser und sicherer zu gebrauchen.
Symbol Bedeutung
BHD-2/24 SDS+
BHD-2/28 EC SDS+:
Bohrhammer
grau markierter Bereich: Handgriff
(isolierte Grifffläche)
Sachnummer
Lesen Sie alle Sicherheitshinweise
und Anweisungen
Ziehen Sie vor allen Arbeiten am
Elektrowerkzeug den Netzstecker
aus der Steckdose
Tragen Sie Schutzhandschuhe
Tragen Sie Gehörschutz.

6| Deutsch 1 619 929 L30 • 31.7.12
Lieferumfang
Bohrhammer, Zusatzhandgriff und Tiefenanschlag.
Einsatzwerkzeug und weiteres abgebildetes oder be-
schriebenes Zubehör gehören nicht zum Standard-
Lieferumfang.
Das vollständige Zubehör finden Sie in unserem Zu-
behörprogramm.
Bestimmungsgemäßer Ge-
brauch
Das Elektrowerkzeug ist bestimmt zum Hammerboh-
ren in Beton, Ziegel und Gestein sowie für leichte Mei-
ßelarbeiten. Es ist ebenso geeignet zum Bohren ohne
Schlag in Holz, Metall, Keramik und Kunststoff sowie
zum Schrauben.
Tragen Sie eine Schutzbrille
Bewegungsrichtung
Reaktionsrichtung
Verbotene Handlung
Erlaubte Handlung
Nächster Handlungsschritt
Rechts-/Linkslauf
Bohren ohne Schlag
Hammerbohren
Meißeln
Schrauben
Vario-Lock
Einschalten
Ausschalten
Ein-/Ausschalter feststellen
Ein-/Ausschalter entriegeln
Kleine Dreh-/Schlagzahl
Große Dreh-/Schlagzahl
Werkzeugaufnahme
Fetten Sie das Einsteckende des
Einsatzwerkzeugs leicht ein
Symbol Bedeutung
P1Nennaufnahmeleistung
E Einzelschlagstärke entsprechend
EPTA-Procedure 05/2009
n0Leerlaufdrehzahl
ØBohrdurchmesser max.
Beton
Stahl
Holz
Mauerwerk
Hohlbohrkrone
Gewicht entsprechend EPTA-Pro-
cedure 01/2003
Schutzklasse
LwA Schallleistungspegel
LpA Schalldruckpegel
ahSchwingungsgesamtwert
K Unsicherheit
Symbol Bedeutung

Deutsch | 7
1 619 929 L30 • 31.7.12
Technische Daten
Die Technischen Daten des Produkts sind in der Ta-
belle auf Seite 154 angegeben.
Die Angaben gelten für eine Nennspannung [U] von
230 V. Bei abweichenden Spannungen und in länder-
spezifischen Ausführungen können diese Angaben
variieren.
Bitte beachten Sie die Sachnummer auf dem Typen-
schild Ihres Elektrowerkzeugs. Die Handelsbezeich-
nungen einzelner Elektrowerkzeuge können variieren.
Konformitätserklärung
Wir erklären in alleiniger Verantwortung, dass das un-
ter „Technische Daten“ beschriebene Produkt mit den
folgenden Normen oder normativen Dokumenten
übereinstimmt: EN 60745 gemäß den Bestimmungen
der Richtlinien 2011/65/EU, 2004/108/EG,
2006/42/EG.
Technische Unterlagen (2006/42/EG) bei:
Berner Trading Holding GmbH, Bernerstr. 6,
D-74653 Künzelsau
31.07.2012, Berner Trading Holding GmbH, Bernerstraße 6,
D-74653 Künzelsau
Geräusch-/Vibrationsinfor-
mation
Die Messwerte des Produkts sind in der Tabelle auf
Seite 154 angegeben.
Geräusch- und Schwingungsgesamtwerte (Vektor-
summe dreier Richtungen) ermittelt entsprechend
EN 60745.
Der in diesen Anweisungen angegebene Schwin-
gungspegel ist entsprechend einem in EN 60745 ge-
normten Messverfahren gemessen worden und kann
für den Vergleich von Elektrowerkzeugen miteinander
verwendet werden. Er eignet sich auch für eine vorläu-
fige Einschätzung der Schwingungsbelastung.
Der angegebene Schwingungspegel repräsentiert die
hauptsächlichen Anwendungen des Elektrowerk-
zeugs. Wenn allerdings das Elektrowerkzeug für an-
dere Anwendungen, mit abweichenden Einsatzwerk-
zeugen oder ungenügender Wartung eingesetzt wird,
kann der Schwingungspegel abweichen. Dies kann
die Schwingungsbelastung über den gesamten Ar-
beitszeitraum deutlich erhöhen.
Für eine genaue Abschätzung der Schwingungsbe-
lastung sollten auch die Zeiten berücksichtigt werden,
in denen das Gerät abgeschaltet ist oder zwar läuft,
aber nicht tatsächlich im Einsatz ist. Dies kann die
Schwingungsbelastung über den gesamten Arbeits-
zeitraum deutlich reduzieren.
Legen Sie zusätzliche Sicherheitsmaßnahmen zum
Schutz des Bedieners vor der Wirkung von Schwin-
gungen fest wie zum Beispiel: Wartung von Elektro-
werkzeug und Einsatzwerkzeugen, Warmhalten der
Hände, Organisation der Arbeitsabläufe.
Montage und Betrieb
Die folgende Tabelle zeigt die Handlungsziele für Montage und Betrieb des Elektrowerkzeugs. Die Anweisun-
gen der Handlungsziele werden im angegebenen Bild gezeigt. Je nach Art der Anwendung sind unterschiedli-
che Kombinationen der Anweisungen erforderlich. Beachten Sie die Sicherheitshinweise.
Armin Hess
Senior Vice President
Handlungsziel Bild Beachten Sie Seite
Bohrfutter auswählen
(BHD-2/28 EC SDS+)
1155
Wechselbohrfutter entnehmen
(BHD-2/28 EC SDS+)
2156

8| Deutsch 1 619 929 L30 • 31.7.12
Wechselbohrfutter einsetzen
(BHD-2/28 EC SDS+)
3156
SDS-plus-Einsatzwerkzeug ein-
setzen
4157
SDS-plus-Einsatzwerkzeug ent-
nehmen
5157
Rundschaftwerkzeug einsetzen
(BHD-2/28 EC SDS+)
6158
Betriebsart und Drehrichtung
wählen
7158
Meißelstellung verändern (Vario-
Lock)
8159
Zusatzhandgriff schwenken 9160
Bohrtiefe Xeinstellen 10 160
Ein-/Ausschalten und Drehzahl
einstellen
11 161
Ein-/Ausschalter arretieren 12 161
Ein-/Ausschalter entriegeln 13 161
Handlungsziel Bild Beachten Sie Seite
X

Deutsch | 9
1 619 929 L30 • 31.7.12
Wartung und Reinigung
fHalten Sie das Elektrowerkzeug und die Lüf-
tungsschlitze sauber, um gut und sicher zu
arbeiten.
Kundendienst und Kunden-
beratung
Sollte das Elektrowerkzeug trotz sorgfältiger Herstel-
lungs- und Prüfverfahren einmal ausfallen, ist die Re-
paratur von einer autorisierten Kundendienststelle für
Berner-Elektrowerkzeuge ausführen zu lassen.
Bei allen Rückfragen und Ersatzteilbestellungen bitte
unbedingt die 6-stellige Art.-Nr. laut Typenschild des
Elektrowerkzeuges angeben.
Zubehör
Entsorgung
Elektrowerkzeuge, Zubehör und Verpackungen sollen
einer umweltgerechten Wiederverwertung zugeführt
werden.
Werfen Sie Elektrowerkzeuge nicht in den Hausmüll!
Nur für EU-Länder:
Gemäß der Europäischen Richtlinie
2002/96/EG über Elektro- und Elek-
tronik-Altgeräte und ihrer Umsetzung
in nationales Recht müssen nicht mehr
gebrauchsfähige Elektrowerkzeuge
getrennt gesammelt und einer umwelt-
gerechten Wiederverwertung zuge-
führt werden.
Änderungen vorbehalten.
Sachnummer
Schnellspannbohrfutter 13 mm 34115
SDS-plus-Wechselbohrfutter 34114

10 | English 1 619 929 L30 • 31.7.12
English
General Power Tool Safety
Warnings
Read all safety warnings and all
instructions. Failure to follow the
warnings and instructions may result in electric shock,
fire and/or serious injury.
Save all warnings and instructions for future
reference.
The term “power tool” in the warnings refers to your
mains-operated (corded) power tool or battery-oper-
ated (cordless) power tool.
Work area safety
fKeep work area clean and well lit. Cluttered or
dark areas invite accidents.
fDo not operate power tools in explosive at-
mospheres, such as in the presence of flam-
mable liquids, gases or dust. Power tools cre-
ate sparks which may ignite the dust or fumes.
fKeep children and bystanders away while op-
erating a power tool. Distractions can cause you
to lose control.
Electrical safety
fPower tool plugs must match the outlet. Nev-
er modify the plug in any way. Do not use any
adapter plugs with earthed (grounded) power
tools. Unmodified plugs and matching outlets will
reduce risk of electric shock.
fAvoid body contact with earthed or grounded
surfaces, such as pipes, radiators, ranges and
refrigerators. There is an increased risk of electric
shock if your body is earthed or grounded.
fDo not expose power tools to rain or wet con-
ditions. Water entering a power tool will increase
the risk of electric shock.
fDo not abuse the cord. Never use the cord for
carrying, pulling or unplugging the power
tool. Keep cord away from heat, oil, sharp
edges and moving parts. Damaged or entangled
cords increase the risk of electric shock.
fWhen operating a power tool outdoors, use
an extension cord suitable for outdoor use.
Use of a cord suitable for outdoor use reduces the
risk of electric shock.
fIf operating a power tool in a damp location
is unavoidable, use a residual current device
(RCD) protected supply. Use of an RCD reduces
the risk of electric shock.
Personal safety
fStay alert, watch what you are doing and use
common sense when operating a power tool.
Do not use a power tool while you are tired or
under the influence of drugs, alcohol or med-
ication. A moment of inattention while operating
power tools may result in serious personal injury.
fUse personal protective equipment. Always
wear eye protection. Protective equipment such
as dust mask, non-skid safety shoes, hard hat, or
hearing protection used for appropriate conditions
will reduce personal injuries.
fPrevent unintentional starting. Ensure the
switch is in the off-position before connect-
ing to power source and/or battery pack,
picking up or carrying the tool. Carrying power
tools with your finger on the switch or energising
power tools that have the switch on invites acci-
dents.
fRemove any adjusting key or wrench before
turning the power tool on. A wrench or a key left
attached to a rotating part of the power tool may re-
sult in personal injury.
fDo not overreach. Keep proper footing and
balance at all times. This enables better control
of the power tool in unexpected situations.
fDress properly. Do not wear loose clothing or
jewellery. Keep your hair, clothing and gloves
away from moving parts. Loose clothes, jewel-
lery or long hair can be caught in moving parts.
fIf devices are provided for the connection of
dust extraction and collection facilities, en-
sure these are connected and properly used.
Use of dust collection can reduce dust-related haz-
ards.
Power tool use and care
fDo not force the power tool. Use the correct
power tool for your application. The correct
power tool will do the job better and safer at the
rate for which it was designed.
fDo not use the power tool if the switch does
not turn it on and off. Any power tool that cannot
WARNING

English | 11
1 619 929 L30 • 31.7.12
be controlled with the switch is dangerous and
must be repaired.
fDisconnect the plug from the power source
and/or the battery pack from the power tool
before making any adjustments, changing ac-
cessories, or storing power tools. Such preven-
tive safety measures reduce the risk of starting the
power tool accidentally.
fStore idle power tools out of the reach of chil-
dren and do not allow persons unfamiliar
with the power tool or these instructions to
operate the power tool. Power tools are danger-
ous in the hands of untrained users.
fMaintain power tools. Check for misalign-
ment or binding of moving parts, breakage of
parts and any other condition that may affect
the power tool’s operation. If damaged, have
the power tool repaired before use. Many acci-
dents are caused by poorly maintained power tools.
fKeep cutting tools sharp and clean. Properly
maintained cutting tools with sharp cutting edges
are less likely to bind and are easier to control.
fUse the power tool, accessories and tool bits
etc. in accordance with these instructions,
taking into account the working conditions
and the work to be performed. Use of the pow-
er tool for operations different from those intended
could result in a hazardous situation.
Service
fHave your power tool serviced by a qualified
repair person using only identical replace-
ment parts. This will ensure that the safety of the
power tool is maintained.
Hammer Safety Warnings
fWear ear protectors. Exposure to noise can
cause hearing loss.
fUse auxiliary handle(s), if supplied with the
tool. Loss of control can cause personal injury.
fHold the tool by the insulated gripping sur-
faces when performing operations where the
application tool or the screw could contact
hidden wiring or its own power cord. Contact
with a “live” wire will also make exposed metal parts
of the power tool “live” and shock the operator.
Products sold in GB only: Your product is fitted
with an BS 1363/A approved electric plug with inter-
nal fuse (ASTA approved to BS 1362).
If the plug is not suitable for your socket outlets, it
should be cut off and an appropriate plug fitted in its
place by an authorised customer service agent. The
replacement plug should have the same fuse rating as
the original plug.
The severed plug must be disposed of to avoid a pos-
sible shock hazard and should never be inserted into
a mains socket elsewhere.
Products sold in AUS and NZ only: Use a residual
current device (RCD) with a rated residual current of
30 mA or less.
Additional Safety and Work-
ing Instructions
fObserve the mains voltage! The voltage of the
power source must correspond with the data on
the type plate of the machine.
fUse appropriate detectors to determine if
utility lines are hidden in the work area or call
the local utility company for assistance. Con-
tact with electric lines can lead to fire and electric
shock. Damaging a gas line can lead to explosion.
Penetrating a water line causes property damage.
fFirmly tighten the auxiliary handle, hold the
machine firmly with both hands while work-
ing and keep proper footing and balance at
all times. The machine is securely guided with
both hands.
fSecure the workpiece. A workpiece clamped
with clamping devices or in a vice is held more se-
cure than by hand.
fFor drilling without impact in wood, metal, ceramic
and plastic as well as for screwdriving, tools with-
out SDS-plus are used (e.g., drills with cylindrical
shank). For these tools, a keyless chuck or a key
type drill chuck are required.
fBHD-2/28 EC SDS+: Only use quick change
chucks with 3 identification grooves (standard
delivery scope) or 2 identification grooves (ac-
cessory/spare part).
fThe quick change chuck is automatically locked.
Check the locking effect by pulling the quick
change chuck.
fInserting SDS-plus Drilling Tools: Check the
latching by pulling the tool.
fReplace a damaged dust protection cap im-
mediately. The dust protection cap largely pre-
vents the penetration of drilling dust into the tool
holder during operation. When inserting the tool,

12 | English 1 619 929 L30 • 31.7.12
pay attention that the dust protection cap is not
damaged.
fDusts from materials such as lead-containing
coatings, some wood types, minerals and
metal can be harmful to one’s health and
cause allergic reactions, lead to respiratory
infections and/or cancer. Materials containing
asbestos may only be worked by specialists.
– As far as possible, use a dust extraction system
suitable for the material.
– Provide for good ventilation of the working
place.
– It is recommended to wear a P2 filter-class res-
pirator.
Observe the relevant regulations in your country for
the materials to be worked.
fPrevent dust accumulation at the workplace.
Dusts can easily ignite.
fIf the application tool should become
blocked, switch the machine off. Loosen the
application tool.
fBefore switching on the power tool, make
sure that the application tool moves freely.
When switching on with a blocked drilling tool, high
torque reaction can occur.
fWhen not using the power tool, switch it off in order
to save energy.
fAlways wait until the machine has come to a
complete stop before placing it down. The tool
insert can jam and lead to loss of control over the
power tool.
Symbols
The following symbols are important for reading and
understanding the operating instructions. Please take
note of the symbols and their meaning. The correct in-
terpretation of the symbols will help you to use the ma-
chine in a better and safer manner.
Symbol Meaning
BHD-2/24 SDS+
BHD-2/28 EC SDS+:
Rotary Hammer
Grey-marked area: Handle (insu-
lated gripping surface)
Article number
Read all safety warnings and all in-
structions
Before any work on the machine it-
self, pull the mains plug from the
socket outlet
Wear protective gloves
Wear ear protection.
Wear safety glasses/goggles
Movement direction
Reaction direction
Prohibited action
Permitted action
Next step of action
Right/left rotation
Drilling without impact
Hammer Drilling
Chiselling
Screwdriving
Vario-Lock
Switching On
Switching Off
On/Off switch lock-on
Symbol Meaning

English | 13
1 619 929 L30 • 31.7.12
Delivery Scope
Rotary hammer, auxiliary handle and depth stop.
Application tools and other accessories shown or de-
scribed are not part of the standard delivery scope.
A complete overview of accessories can be found in
our accessories program.
Intended Use
The machine is intended for hammer drilling in con-
crete, bricks and masonry, as well as for light chisel-
ling work. It is also suitable for drilling without impact
in wood, metal, ceramics and plastic, as well as for
screwdriving.
Technical Data
The technical data of the machine are listed in the ta-
ble on page 154.
The values given are valid for a nominal voltage [U] of
230 V. For different voltages and models for specific
countries, these values can vary.
Please observe the article number on the type plate of
your machine. The trade names of the individual ma-
chines may vary.
Declaration of Conformi-
ty
We declare under our sole responsibility that the
product described under “Technical Data” is in con-
formity with the following standards or standardization
documents: EN 60745 according to the provisions of
the directives 2011/65/EU, 2004/108/EC,
2006/42/EC.
Technical file (2006/42/EC) at:
Berner Trading Holding GmbH, Bernerstr. 6,
D-74653 Künzelsau
31.07.2012, Berner Trading Holding GmbH, Bernerstraße 6,
D-74653 Künzelsau
Noise/Vibration Informa-
tion
The measured values of the machine are listed in the
table on page 154.
Releasing the On/Off switch
Low speed/impact rate
High speed/impact rate
Tool holder
Apply a light coat of grease to the
shank end of the application tool
P1Rated power input
EImpact energy per stroke accord-
ing to EPTA-Procedure 05/2009
n0No-load speed
ØDrilling diameter, max.
Concrete
Steel
Wood
Brickwork
Core bit
Weight according to
EPTA-Procedure 01/2003
Protection class
LwA Sound power level
LpA Sound pressure level
ahVibration total value
K Uncertainty
Symbol Meaning
Armin Hess
Senior Vice President

14 | English 1 619 929 L30 • 31.7.12
Noise and vibrational values (vector sum of three di-
rections) determined according to EN 60745.
The vibration emission level given in this information
sheet has been measured in accordance with a stand-
ardised test given in EN 60745 and may be used to
compare one tool with another. It may be used for a
preliminary assessment of exposure.
The declared vibration emission level represents the
main applications of the tool. However if the tool is
used for different applications, with different accesso-
ries or poorly maintained, the vibration emission may
differ. This may significantly increase the exposure lev-
el over the total working period.
An estimation of the level of exposure to vibration
should also take into account the times when the tool
is switched off or when it is running but not actually
doing the job. This may significantly reduce the expo-
sure level over the total working period.
Identify additional safety measures to protect the op-
erator from the effects of vibration such as: maintain
the tool and the accessories, keep hands warm, or-
ganise work patterns.
Mounting and Operation
The following table indicates the action objectives for mounting and operation of the power tool. The instruc-
tions for each action objective are shown aside. Depending on the type of application, various instruction com-
binations are required. Observe the safety instructions.
Action Figure Please observe Page
Selecting a drill chuck
(BHD-2/28 EC SDS+)
1155
Removing the Quick Change
Chuck
(BHD-2/28 EC SDS+)
2156
Inserting the Quick Change
Chuck
(BHD-2/28 EC SDS+)
3156
Inserting SDS-plus Drilling
Tools
4157
Removing SDS-plus Drilling
Tools
5157
Inserting round shank applica-
tions tools
(BHD-2/28 EC SDS+)
6158
Selecting the operating mode
and rotation direction
7158

English | 15
1 619 929 L30 • 31.7.12
Maintenance and Cleaning
fFor safe and proper working, always keep the
machine and ventilation slots clean.
After-sales Service and Cus-
tomer Assistance
If the machine should fail despite the care taken in
manufacturing and testing procedures, repair should
be carried out by an after-sales service centre for
Berner power tools.
In all correspondence and spare parts orders, please
always include the 6-digit order number given on the
nameplate of the machine.
Accessories
Disposal
The machine, accessories and packaging should be
sorted for environmental-friendly recycling.
Do not dispose of power tools into household waste!
Only for EC countries:
According to the European Guideline
2002/96/EC for Waste Electrical and
Electronic Equipment and its imple-
mentation into national right, power
tools that are no longer usable must be
collected separately and disposed of
in an environmentally correct manner.
Subject to change without notice.
Changing the chisel position
(Vario-Lock)
8159
Changing the position of the
auxiliary handle
9160
Adjusting the drilling depth X 10 160
Switching on and off and set-
ting the speed
11 161
Locking-on the On/Off switch 12 161
Releasing the On/Off switch 13 161
Action Figure Please observe Page
X
Article number
Keyless Chuck 13 mm 34115
SDS-plus quick change chuck 34114

16 | Français 1 619 929 L30 • 31.7.12
Français
Avertissements de sécurité
généraux pour l’outil
Lire tous les avertisse-
ments de sécurité et tou-
tes les instructions. Ne pas suivre les avertisse-
ments et instructions peut donner lieu à un choc
électrique, un incendie et/ou une blessure sérieuse.
Conserver tous les avertissements et toutes les
instructions pour pouvoir s’y reporter ultérieu-
rement.
Le terme « outil » dans les avertissements fait référen-
ce à votre outil électrique alimenté par le secteur
(avec cordon d’alimentation) ou votre outil fonction-
nant sur batterie (sans cordon d’alimentation).
Sécurité de la zone de travail
fConserver la zone de travail propre et bien
éclairée. Les zones en désordre ou sombres sont
propices aux accidents.
fNe pas faire fonctionner les outils électriques
en atmosphère explosive, par exemple en
présence de liquides inflammables, de gaz
ou de poussières. Les outils électriques produi-
sent des étincelles qui peuvent enflammer les
poussières ou les fumées.
fMaintenir les enfants et les personnes pré-
sentes à l’écart pendant l’utilisation de l’outil.
Les distractions peuvent vous faire perdre le con-
trôle de l’outil.
Sécurité électrique
fIl faut que les fiches de l’outil électrique
soient adaptées au socle. Ne jamais modifier
la fiche de quelque façon que ce soit. Ne pas
utiliser d’adaptateurs avec des outils à bran-
chement de terre. Des fiches non modifiées et
des socles adaptés réduiront le risque de choc
électrique.
fEviter tout contact du corps avec des surfaces
reliées à la terre telles que les tuyaux, les ra-
diateurs, les cuisinières et les réfrigérateurs.
Il existe un risque accru de choc électrique si votre
corps est relié à la terre.
fNe pas exposer les outils à la pluie ou à des
conditions humides. La pénétration d’eau à l’in-
térieur d’un outil augmentera le risque de choc
électrique.
fNe pas maltraiter le cordon. Ne jamais utiliser
le cordon pour porter, tirer ou débrancher
l’outil. Maintenir le cordon à l’écart de la cha-
leur, du lubrifiant, des arêtes ou des parties
en mouvement. Les cordons endommagés ou
emmêlés augmentent le risque de choc électrique.
fLorsqu’on utilise un outil à l’extérieur, utiliser
un prolongateur adapté à l’utilisation exté-
rieure. L’utilisation d’un cordon adapté à l’utilisa-
tion extérieure réduit le risque de choc électrique.
fSi l’usage d’un outil dans un emplacement
humide est inévitable, utiliser une alimenta-
tion protégée par un dispositif à courant dif-
férentiel résiduel (RCD). L’usage d’un RCD ré-
duit le risque de choc électrique.
Sécurité des personnes
fRester vigilant, regarder ce que vous êtes en
train de faire et faire preuve de bon sens dans
l’utilisation de l’outil. Ne pas utiliser un outil
lorsque vous êtes fatigué ou sous l’emprise
de drogues, d’alcool ou de médicaments. Un
moment d’inattention en cours d’utilisation d’un
outil peut entraîner des blessures graves des per-
sonnes.
fUtiliser un équipement de sécurité. Toujours
porter une protection pour les yeux. Les équi-
pements de sécurité tels que les masques contre
les poussières, les chaussures de sécurité antidé-
rapantes, les casques ou les protections acousti-
ques utilisés pour les conditions appropriées rédui-
ront les blessures des personnes.
fEviter tout démarrage intempestif. S’assurer
que l’interrupteur est en position arrêt avant
de brancher l’outil au secteur et/ou au bloc
de batteries, de le ramasser ou de le porter.
Porter les outils en ayant le doigt sur l’interrupteur
ou brancher des outils dont l’interrupteur est en po-
sition marche est source d’accidents.
fRetirer toute clé de réglage avant de mettre
l’outil en marche. Une clé laissée fixée sur une
partie tournante de l’outil peut donner lieu à des
blessures de personnes.
fNe pas se précipiter. Garder une position et
un équilibre adaptés à tout moment. Cela per-
met un meilleur contrôle de l’outil dans des situa-
tions inattendues.
fS’habiller de manière adaptée. Ne pas porter
de vêtements amples ou de bijoux. Garder les
cheveux, les vêtements et les gants à distan-
AVERTISSEMENT

Français | 17
1 619 929 L30 • 31.7.12
ce des parties en mouvement. Des vêtements
amples, des bijoux ou les cheveux longs peuvent
être pris dans des parties en mouvement.
fSi des dispositifs sont fournis pour le raccor-
dement d’équipements pour l’extraction et la
récupération des poussières, s’assurer qu’ils
sont connectés et correctement utilisés. Utili-
ser des collecteurs de poussière peut réduire les
risques dus aux poussières.
Utilisation et entretien de l’outil
fNe pas forcer l’outil. Utiliser l’outil adapté à
votre application. L’outil adapté réalisera mieux le
travail et de manière plus sûre au régime pour le-
quel il a été construit.
fNe pas utiliser l’outil si l’interrupteur ne per-
met pas de passer de l’état de marche à arrêt
et vice versa. Tout outil qui ne peut pas être com-
mandé par l’interrupteur est dangereux et il faut le
faire réparer.
fDébrancher la fiche de la source d’alimenta-
tion en courant et/ou le bloc de batteries de
l’outil avant tout réglage, changement d’ac-
cessoires ou avant de ranger l’outil. De telles
mesures de sécurité préventives réduisent le risque
de démarrage accidentel de l’outil.
fConserver les outils à l’arrêt hors de la portée
des enfants et ne pas permettre à des person-
nes ne connaissant pas l’outil ou les présen-
tes instructions de le faire fonctionner. Les
outils sont dangereux entre les mains d’utilisateurs
novices.
fObserver la maintenance de l’outil. Vérifier
qu’il n’y a pas de mauvais alignement ou de
blocage des parties mobiles, des pièces cas-
sées ou toute autre condition pouvant affec-
ter le fonctionnement de l’outil. En cas de
dommages, faire réparer l’outil avant de l’uti-
liser. De nombreux accidents sont dus à des outils
mal entretenus.
fGarder affûtés et propres les outils permet-
tant de couper. Des outils destinés à couper cor-
rectement entretenus avec des pièces coupantes
tranchantes sont moins susceptibles de bloquer et
sont plus faciles à contrôler.
fUtiliser l’outil, les accessoires et les lames
etc., conformément à ces instructions, en te-
nant compte des conditions de travail et du
travail à réaliser. L’utilisation de l’outil pour des
opérations différentes de celles prévues pourrait
donner lieu à des situations dangereuses.
Maintenance et entretien
fFaire entretenir l’outil par un réparateur qua-
lifié utilisant uniquement des pièces de re-
change identiques. Cela assurera que la sécurité
de l’outil est maintenue.
Avertissements de sécurité
pour les marteaux
fPortez des protections auditives. L’exposition
aux bruits peut provoquer une perte de l’audition.
fUtiliser la(les) poignée(s) auxiliaire(s) four-
nie(s) avec l’outil. La perte de contrôle peut pro-
voquer des blessures.
fTenir l’outil par les surfaces de préhension
isolantes, pendant les opérations au cours
desquelles l’accessoire coupant ou la vis
peut être en contact avec des conducteurs ca-
chés ou avec son propre câble. Le contact de
l’accessoire coupant avec un fil sous tension peut
également mettre sous tension les parties métalli-
ques visibles de l’outil électrique et entraîner l’élec-
trocution de l’opérateur.
Autres instructions de sécu-
rité et d’utilisation
fTenez compte de la tension du réseau ! La ten-
sion de la source de courant doit correspondre aux
indications se trouvant sur la plaque signalétique
de l’outil électroportatif.
fUtiliser des détecteurs appropriés afin de dé-
celer des conduites cachées ou consulter les
entreprises d’approvisionnement locales. Un
contact avec des conduites d’électricité peut pro-
voquer un incendie ou un choc électrique. Un en-
dommagement d’une conduite de gaz peut provo-
quer une explosion. La perforation d’une conduite
d’eau provoque des dégâts matériels.
fSerrez la poignée supplémentaire, tenez
l’outil électrique fermement des deux mains
lors du travail et veillez à toujours garder une
position de travail stable. Avec les deux mains,
l’outil électroportatif est guidé en toute sécurité.
fBloquer la pièce à travailler. Une pièce à tra-
vailler serrée par des dispositifs de serrage appro-

18 | Français 1 619 929 L30 • 31.7.12
priés ou dans un étau est fixée de manière plus sûre
que tenue dans les mains.
fPour le perçage sans frappe du bois, du métal, de
la céramique ou de matières plastiques ainsi que
pour le vissage, des outils sans SDS-plus (par ex.
forets à queue cylindrique) sont utilisés. Pour ce ty-
pe d’outil, vous avez besoin d’un mandrin à serrage
rapide ou d’un mandrin à couronne dentée.
fBHD-2/28 EC SDS+: N’utiliser qu’un mandrin in-
terchangeable avec 3 rainures code (fourni avec
l’outil) ou 2 rainures code (accessoire/pièce de
rechange).
fLe mandrin interchangeable s’encliquette de lui-
même. Contrôler que l’outil soit bien encliqueté en
tirant sur le mandrin interchangeable.
fMettre un outil de travail SDS-plus en place:
Vérifiez si l’outil est bien encliqueté en tirant sur ce
dernier.
fFaire immédiatement remplacer un capot an-
ti-poussière endommagé. Le capot anti-pous-
sière empêche dans une large mesure la pénétra-
tion de poussière dans le porte-outil pendant le
fonctionnement de l’appareil. Lors du montage de
l’outil, veillez à ne pas endommager le capot anti-
poussière.
fLes poussières de matières comme les pein-
tures contenant du plomb, certaines essen-
ces de bois, certains minéraux ou métaux
peuvent être nuisibles à la santé et peuvent
causer des réactions allergiques, des mala-
dies des voies respiratoires et/ou un cancer.
Les matériaux contenant de l’amiante ne doivent
être travaillés que par des personnes qualifiées.
– Si possible, utilisez un dispositif d’aspiration
des poussières approprié au matériau.
– Veillez à bien aérer la zone de travail.
– Il est recommandé de porter un masque respira-
toire avec un niveau de filtration de classe P2.
Respectez les règlements spécifiques aux maté-
riaux à traiter en vigueur dans votre pays.
fEvitez toute accumulation de poussières à
l’emplacement de travail. Les poussières peu-
vent facilement s’enflammer.
fAu cas où l’outil de travail serait bloqué, arrê-
tez l’outil électroportatif. Desserrez l’outil de
travail.
fAvant de mettre en marche l’outil électropor-
tatif, s’assurer que l’outil de travail puisse li-
brement bouger. Lorsqu’on met l’appareil en mar-
che, l’outil de travail étant bloqué, il peut y avoir de
fortes réactions.
fPour des économies d’énergie, éteignez l’outil élec-
troportatif quand vous ne l’utilisez pas.
fAvant de déposer l’outil électroportatif, at-
tendre que celui-ci soit complètement à l’ar-
rêt. L’outil risque de se coincer, ce qui entraînerait
une perte de contrôle de l’outil électroportatif.
Symboles
Les symboles suivants sont importants pour pouvoir li-
re et mieux comprendre le mode d’emploi. Veuillez
mémoriser ces symboles et leur signification. L’inter-
prétation correcte des symboles vous permettra de
mieux utiliser votre outil électroportatif en toute sécu-
rité.
Symbole Signification
BHD-2/24 SDS+
BHD-2/28 EC SDS+:
Marteau perforateur
Partie marquée en gris : poignée
(surface de préhension isolante)
N° d’article
Toutes les consignes de sécurité
et toutes les instructions doivent
être lues
Avant d’effectuer des travaux sur
l’outil électroportatif, retirez la fi-
che de la prise de courant
Portez des gants de protection
Portez une protection acoustique.
Portez des lunettes de protection
Direction de déplacement
Direction de réaction
Interdit

Français | 19
1 619 929 L30 • 31.7.12
Accessoires fournis
Marteau perforateur, poignée supplémentaire et bu-
tée de profondeur.
L’outil de travail et d’autres accessoires décrits ou il-
lustrés ne sont pas tous compris dans la fourniture.
Vous trouverez les accessoires complets dans notre
programme d’accessoires.
Utilisation conforme
Cet outil électroportatif est destiné au perçage à per-
cussion dans le béton, la brique et dans la pierre na-
turelle ainsi qu’à des travaux de burinage légers. Il est
également approprié pour le perçage sans percus-
sion dans le bois, le métal, la céramique et les matiè-
res plastiques ainsi que pour le vissage.
Caractéristiques techniques
Les caractéristiques techniques du produit sont indi-
quées dans le tableau à la page 154.
Ces indications sont valables pour une tension nomi-
nale de [U] 230 V. Ces indications peuvent varier
pour des tensions plus basses ainsi que pour des ver-
sions spécifiques à certains pays.
Respectez impérativement le numéro d’article se trou-
vant sur la plaque signalétique de l’outil électroporta-
tif. Les désignations commerciales des différents
outils électroportatifs peuvent varier.
Action permise
Prochaine action
Rotation droite/gauche
Perçage sans percussion
Perçage à percussion
Burinage
Vis
Vario-Lock
Mise en marche
Arrêt
Verrouiller l’interrupteur
Marche/Arrêt
Déverrouillage de l’interrupteur
Marche/Arrêt
Vitesse de rotation/fréquence de
frappe faible
Vitesse de rotation/fréquence de
frappe élevée
Porte-outil
Graissez légèrement l’emmanche-
ment de l’outil de travail
P1Puissance nominale absorbée
EPuissance de frappe individuelle
suivant EPTA-Procedure 05/2009
n0Vitesse à vide
ØDiamètre max. de perçage
Béton
Acier
Bois
Symbole Signification
Maçonnerie
Couronne trépans
Poids suivant EPTA-Procedure
01/2003
Classe de protection
LwA Niveau d’intensité acoustique
LpA Niveau de pression acoustique
ahValeurs totales des vibrations
K Incertitude
Symbole Signification
Other manuals for BHD-2/24 SDS+ BC+2
1
This manual suits for next models
3
Table of contents
Languages:
Other Berner Rotary Hammer manuals
Popular Rotary Hammer manuals by other brands

Gude
Gude BH 20-201-24 K Translation of the original instructions

Stomer Professional
Stomer Professional SRD-1700-K user manual

Makita
Makita HR2800 instruction manual

Bosch
Bosch GBH 36 V-LI Professional Original instructions

Ozito
Ozito RHR-850 Operation manual

Panasonic
Panasonic EY6813 - HAMMER COR.DRILL&DRI operating instructions