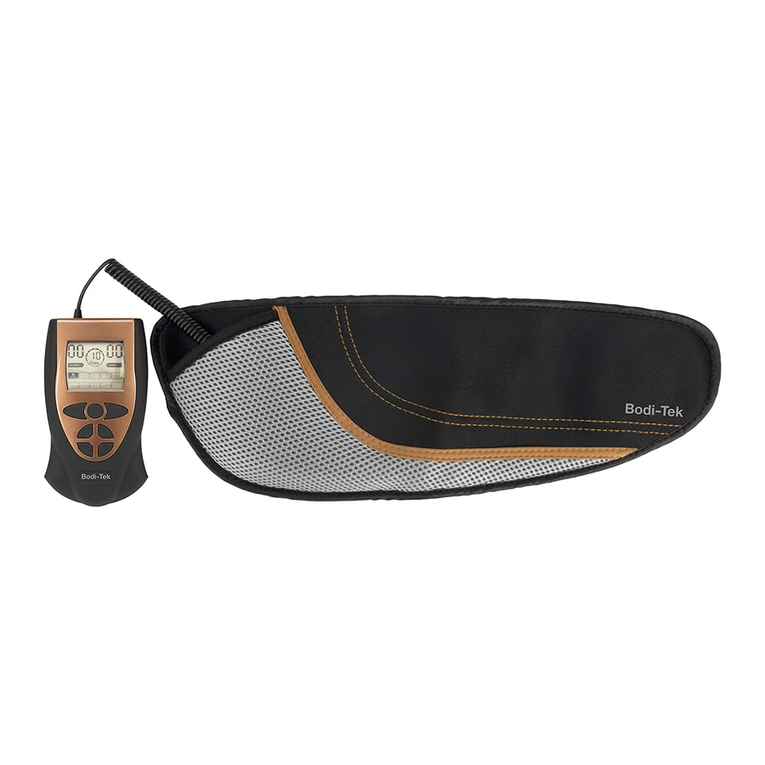
Dezac Abs & Arms Toning Belt TB-40 User manual

Abs & Arms Toning Belt™
TB-40
User Guide

2
!
Warnings
Please read all instructions thoroughly before use and retain for future reference.
If exercise is inadvisable due to ill health, then a medical practitioner should be consulted before
undertaking exercise, using this unit or any other device.
NOT for use:
• On areas of skin with disorders such as rosacea, pustular acne, abraded skin, sensitive skin, or over
scars, moles or varicose veins.
• In the following cases: benign and malignant tumours, haemorrhages, inflammations of the skin,
open and fresh wounds, bruises or broken skin.
• If you have an electronic implant (e.g. heart pacemaker).
• If you suffer from high/low blood pressure or from any other heart problems.
• If you are pregnant.
• Over the abdominal area during your menstrual cycle.
• On persons, including children, with reduced physical, sensory or mental capabilities, or lack of
experience and knowledge, unless they have been given supervision or instruction concerning use
of the appliance by a person responsible for their safety.
Get your doctor’s permission before using the Abs & Arms Toning Belt if:
• You have a history of heart disease or cardiac condition.
• You have an orthopedic implant.
• You suffer from epilepsy, multiple sclerosis, phlebitis in its active phase (inflammation of a vein),
inflamed tissue through disease or injury or varicose veins in its later stage.
• You have suffered acute trauma, fracture or are recovering from recent surgery.
• You have swollen, inflamed or injured parts of the body.
• You have diabetes and it affects the sensory perception of your extremities.
If you are in any doubt about using the Abs & Arms Toning Belt for any reason, please consult your
doctor before use.
Do NOT place the Abs & Arms Toning Belt:
• Over sore or broken skin, scars, moles, infected areas or parts of the body where normal sensation
is limited. In very rare cases, skin irritation occurs around the electrode area. If this happens
discontinue use.
• Over any conductive body jewellery.

3
Precautions
• Keep out of reach of children and pets.
• NOT for use on or by children under 14 years old.
• Do NOT use if you are under the influence of alcohol.
• Do NOT use whilst driving or operating machinery.
• Do NOT touch the conductive side of the belt during operation.
• Do NOT drop, place heavy objects on the unit or immerse in water.
• Do NOT clean with solvents or abrasives.
• Should you experience any discomfort, firstly reduce the intensity, if discomfort persists discontinue
use and contact our Customer Care line.
• Always consult your doctor and obtain a diagnosis if you do not know what is causing your pain.
• E-Sculpt will not accept responsibility if the guidelines and instructions supplied with the unit are
not followed.
General Care
• DO NOT immerse the unit in water.
• Never machine wash your belt, you can hand wash it with warm water.
• Do not place the unit close to excessive heat.
• Remove batteries from the unit if you do not plan to use it for a long period of time.
• Always use the correct type of batteries (2x 1.5V AAA) and make sure that the batteries are placed
correctly as indicated in the battery compartment.
• Do NOT dissemble or repair. Repair and service must only be undertaken by E-Sculpt or an
authorised distributor.
• There are no user serviceable parts inside the unit. If you have any problems using the product,
contact our Customer Care Department.

4
Thank you for purchasing the Abs & Arms Toning Belt.
The Abs & Arms Toning Belt is extremely easy to use with automatic features, simple operation keys
and an easy to read informative display. The 6 programmes take you through various levels of exercise
and are optimized to give you a tighter, firmer stomach and to tone your arms easily and effectively.
How does the Abs & Arms Toning Belt work?
The Abs & Arms Toning Belt works on the principle of EMS (Electrical Muscle Stimulation). It generates
safe, gentle electrical pulses that are delivered onto your skin through the pads placed on the inside of
the belt. These electrical pulses activate the nerves which control the muscles. The pulses generated
have been designed to imitate natural muscular contractions, which are effective and comfortable.
The programmes send out the pulses at regular intervals, which contract and relax the muscles, in a
similar way to doing regular exercise.
How does it feel?
To begin with the pulses give a mild tingling sensation and as the intensity is increased you will start
to notice muscle contractions. Contraction and relaxing periods vary depending on the programme
used. The muscle contractions are smooth and each contraction will start with a slow rise, hold itself
in a contracted position for a few seconds and then gently relax.
Introduction

5
Connecting Leads
Arm Toners
Ab Belt
Pads
Control Unit
Belt Extension
What is included

6
Battery Compartment
Unclip the battery cover on the main unit to reveal the battery
compartment.
Fitting Batteries
Insert 2 x 1.5V AAA Alkaline batteries in the compartment. The
batteries should be placed with the correct polarity as shown in the
compartment. Placing the batteries in the wrong direction can cause
damage to the unit.
Control Unit
ON/OFF
• Press to turn unit ON and OFF
MODE
• Press to select workout programme
INT-UP/INT-DOWN
• Increases or decreases intensity
FRE-UP/FRE-DOWN
• Increases or decreases the frequency

7
Frequency & Intensity Steps
There are 10 steps for both ‘Frequency’ and ‘Intensity’ levels.
Mode
The mode displays which workout programme you have selected.
Auto Functions
• The unit has an auto-timer. The output level will go to zero after 30 minutes.
• If you change the exercise mode within the 30 minutes, the timer will count-down from the original
leftover time.
HIGH HIGH
STIMULATION
ACTION
LOW LOW
30 MINUTE
TIMER
MODE
SELECTION
Display Information
MODE PROGRAMME DESCRIPTION
1 Toning Short tap-toning pulses
2Regular Crunch Medium length pulses with pauses
3Core Condition Long deep contractions with pauses
4Body Trim General mixed exercise with pauses
5Athletic Build-up Routine with increasing intensity
6 Pro Full exercise routine with mixed elements

8
Toning arms only
Plug one end of the connecting lead into each
arm toner (either socket) and the other end into
the output socket on the top of the control unit.
Both arm toners can be connected at the same
time.
Toning abs only
Locate the connecting lead from within the
side pocket. The lead extends to 60cm and will
auto-retract. Plug the connecting lead into either
socket on the top of the control unit.
Getting Started
Belt & Arm Toner set-up
The Abs & Arms Toning Belt is designed to fit a wide range of waist sizes from 27” to 63”. To increase
the size of the Ab Belt, use the Belt Extension supplied.
1. Make sure the unit is switched off. If you have switched on the unit accidentally, then switch it off
by pressing the ON/OFF button.
2. Locate the 2 output sockets on top of the control unit.
3. Choose your toning workout:
Toning abs & arms
Both the ab belt and arm toner can be used
together, however, you will notice a reduction
in a maxiumum intensity level. Run the ab belt
from one output socket on the control unit. Then
use one of the connecting leads to link the two
arm toners and the other lead to connect to the
control unit.

9
Fitting pads and belt placement
1. Connect each pad using the metal poppers. Remove the clear plastic pad protector (keep for
replacing after use). If the pad loses its stickyness/moistness, dampen with a few drops of water.
Ensure both pads are fitted to the ab belt and 2 pads are used with each arm toner.
2. Important: When positioning the belt on the body make sure the pads remain connected to the
poppers.
3. Place the belt centrally around the waist. Ensure the pads make
good contact with the skin. For larger waist sizes, use the belt
extender.
4. When using the arm toner, place the main pad over the bicep
muscle.
5. Once positioned correctly, refer to the Operating Guide.

10
Operating Guide
Operation
1. Only switch the unit on when wearing the ab belt or arm toners and you have checked that the pads
are in contact with the skin. Switch on by pressing the ON/OFF button.
2. Select the workout programme by pressing the MODE button.
3. Press the INT-UP button to increase the intensity - the intensity has 10 steps. To decrease the
intensity, press the INT-DOWN button.
4. You will notice a tingling sensation prior to the muscle contracting. Adjust the intensity according
to your comfort level. You should feel a strong but comfortable contraction of the muscles.
5. The frequency has 10 steps. Press the FRE-UP button to increase. To decrease press the FRE-DOWN
button.
6. To switch the unit off, press the ON/OFF button.
Important Tips
• When moving the belt, make sure that the pads remain attached to the poppers.
• Always make sure that the pads are sticky/moist before use.
• If your skin turns red or there is irritation, stop using the belt for a little while until the irritation goes
away. Sometimes this is caused by moist electrodes drying up.
• Occasionally the body develops excessive oils on the skin and this could inhibit pulse conduction.
Cleaning the skin area with a warm damp cloth before using the belt is a good solution.
• When you put the belt on, make sure that the electrodes are in good contact with your skin and the
belt is firmly placed around your stomach.
• Always have a resting period of at least 4 hours between work-outs.
Exercise Guidance
We suggest that you start with a mild workout and change to more intense programmes later. Within
the first week you should give your muscles time to adjust to the new work-out. Use the unit once or
twice (with a minimum of 4 hours resting in-between) a day for a maximum of 12 minutes. After that,
you can use the belt for a maximum of 30 minutes, 3 times a day.

11
Troubleshooting Guide
PROBLEM POSSIBLE CAUSE SOLUTION
No LCD Display Batteries not installed Install batteries
Batteries installed incorrectly Check polarity matches
Batteries are dead Replace batteries
LCD Display shown
but no function
No skin contact Ensure pads are sticky/moist (if not
replace pads), ensure pads are in
contact with the skin.
Unit not connected to
belt correctly
Check that the connecting lead is
fully pushed into output socket.
Intensity level at minimum Push INT-UP button to increase
intensity. Replace batteries
Batteries are low Replace batteries
LCD Display not functioning
correctly, all buttons do not
work
Batteries are low Replace batteries
No stimulation felt Exhausted battery Replace batteries
Pads not connected Check pads are connected
to poppers
Lead not connected Check lead is firmly pushed
into socket
Defective unit Contact E-Sculpt
Prickling sensation but no
contraction
Incorrect pad placement Move the pad/belt until you
feel a stong contraction
Intensity too low Increase intensity
Gel pad not in good
contact with the skin
Check pads are sticky.
Moisten pads if required.
Maintenance
Disconnect the control unit. Use a damp cloth to wipe clean the control unit and belt.

12
Warranty
For product support contact Ideal Shopping Direct on 0330 3321300*
*Calls cost 9p per minute plus your phone company’s access charges (correct at time of printing).
Disposal
The Waste of Electrical and Electronic Equipment (WEEE) Directive (2012/19/EU) has been put in
place to recycle products using best available recovery and recycling techniques to minimise the
impact on the environment, saving energy and resources and avoiding hazardous materials from
going to landfill.
The product is classed as Electrical or Electronic equipment so please ensure that at the end of the life
of this product it is disposed of in the correct manner in accordance with local authority requirements.
It must NOT be disposed of with household waste.

13
Environment
Operating Conditions: 0 - 40°C 20 - 65% RH
Storage Conditions: 0 - 55°C 10 - 65% RH
Read these instructions carefully before use and then retain for future use.
This means that the unit complies with current product legislation
OUTPUT VOLTAGE 90V p-p across 500 ohm load
OUTPUT CURRENT 180mA across 500 ohm load
OUTPUT FREQUENCY 1 - 50Hz
PULSE WIDTH 150 - 200 µs
POWER SUPPLY 2 x 1.5V AAA batteries - Type LR033
Technical Specifications

14

15

Dezac and Abs & Arms Toning Belt are trademarks of The Dezac Group Ltd 2018
©The Dezac Group Ltd 2018
Manufactured by The Dezac Group Ltd. Dezac House, Montpellier St., Cheltenham, GL50 1SS, UK
1-IN-BT-AATB-I004/1.0
Table of contents
Other Dezac Fitness Equipment manuals
