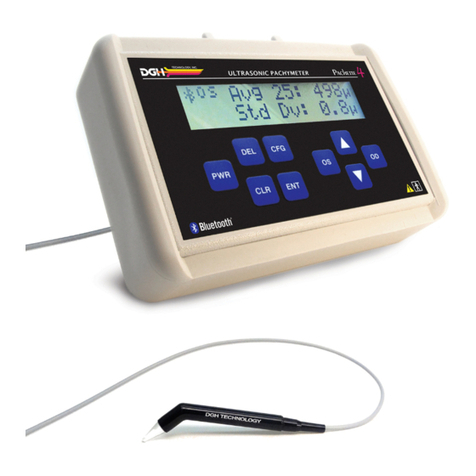
DGH 3000B User manual

DGH 3000B
ULTRASONIC A-SCAN
OPERATOR’S MANUAL
SYS.SBH REV. 12/98
DGH Technology, Inc. Sales: (800) 722-3883
110 Summit Drive; Suite B www.dghkoi.com Phone: (610) 594-9100
Exton, PA 19341 Fax: (610) 594-0390


TABLE OF CONTENTS
I. Introduction................................................................................. 1
II. Features ..................................................................................... 7
III. General Description ....................................................................... 8
IV. Power-Up And Programming Sequence ............................................. 12
V. A-Scan Measurements .................................................................. 14
VI. Setting Up The DGH 3000B........................................................... 18
VII. Explanation Of Display Messages .................................................... 21
VIII. Manual Gain Control.................................................................... 24
IX. Test Block Mode......................................................................... 26
X. Diagnostic Mode......................................................................... 28
XI. Setting Up The DGH 3000B For IOL Computations.............................. 29
XII. The Holladay Formula And The Personalized Surgeon Factor.................. 35
XIII. IOL Calculation Instructions........................................................... 42
XIV. Important Notes .......................................................................... 48
XV. Warranty .................................................................................. 50
XVI. Specifications............................................................................. 51
i


I. INTRODUCTION
Ultrasound is sound of a frequency level too high to be heard by the human ear;
however, sensitive equipment can send and receive these ultrasonic impulses as well as
analyze information about anything these impulses strike along their route of travel.
Every time a sound impulse strikes an interface, some sound is reflected (bounces off),
and some sound is refracted (passes through). The amount of reflected and refracted
sound varies with the density of the interface it strikes. Reflected sound acts much like
a rubber ball being thrown at a wall. Sound hitting an interface perpendicularly will
reflect back along the same path that it approached (Fig. A). Sound hitting an interface
at an angle will reflect at an angle away from the source (Fig. B). The refracted sound
will continue on at a lesser amplitude because of reflected energy lost at the interface.
By means of sophisticated equipment, sound impulses can be sent and their
reflections can be converted and displayed on a visual screen in the form of a linear
display with spikes related to interfaces that the impulses intersected. By looking at the
height (intensity) of the spike, one can predict the angle at which the sound is striking
it (Fig. A & B).
Figure B
Figure A
Taking into consideration the above properties and applying them to
ophthalmology, one can predict the alignment of an ultrasound beam through the eye.
This alignment is crucial to the accuracy of measurements that will be used for IOL
calculations. Fig. C illustrates an ultrasonic pattern typical when alignment along the
visual axis is met. Please note the two high spikes representing the anterior lens and
- 1 -

posterior lens interfaces, along with a strong spike representing the retinal interface.
Conversely, Fig. D illustrates a pattern representing misalignment. Improper
measurements could be obtained with this incorrect alignment. Most older A-Scans
require the operator to decide when proper alignment has been met. This is normally
done by the operator looking at a display to view the spikes relating to the anterior
lens, posterior lens, and retinal interfaces. This is very difficult to master when the
operator’s attention must be moved from the patient to the equipment. Reproducible
results are particularly difficult between two or more operators.
Figure C
Figure D
The DGH 3000B A-Scan incorporates a very sophisticated pattern recognition
program that automatically checks for proper alignment. It looks for the proper pattern
of spikes as well as going a major step further by looking at the retinal spike for
particular signal characteristics which are produced only by retinal interfaces. This
recognition is accomplished quickly (1,000 times per sec.) and without removing your
attention from the patient.
Another important property of ultrasound is that it cannot travel through air. It
must have a medium of substantial mass for transmission. Different materials or
densities of materials will conduct sound at different speeds or velocities. Liquids or
substances containing large amounts of water conduct ultrasound very well.
- 2 -

It has been proven that the following relationship exists: the denser the material,
the faster sound is conducted through it. Using this relationship, Ophthalmic A-Scans
can obtain distances in the eye by performing a two step process. First, a pulse of
sound is timed as it travels through the eye, reflects off the retina, and returns to the
transducer. Second, a length is calculated from the travel time by analyzing the time in
comparison to the speed of sound through the eye.
It has been established that the speeds of sound for ophthalmic structures are as
follows:
Most ophthalmic ultrasonic units use an average speed of sound of 1550 m/s for
phakic eyes and 1532 m/s for aphakic eyes. The DGH 3000B is programmed to
automatically use the proper speed for the eye you wish to read.
Another important area of concern in obtaining accurate measurements for IOL
power calculating is corneal indentation. Logic would dictate that if you indent the
very thing you are measuring, a false or shortened value will be obtained. Logic also
dictates that as soon as you touch something that is soft, you will immediately indent it.
This is true of the eye and corneal indentation. In recent years, other A-Scan
manufacturers claimed that they can prevent corneal indentation by making their probes
with soft water filled tips. This may have lessened indentation, but it fell short of
eliminating it. The inconvenience and mess associated with water filled probes far
outweighed their advantage.
Through a second pattern recognition program, The DGH 3000B will
automatically disregard readings with corneal indentation present. So, through a
simple and fast technique, accurate ultrasonic measurements can be obtained.
- 3 -

The only important measurement
obtained via an A-Scan for IOL
calculations is the axial length. Dimensions
of other structural entities of the eye can
prove useful; however, only a few A-Scans
on the market are able to produce these.
The DGH 3000B displays values for the
anterior chamber, lens thickness, and axial
length automatically each time a reading is
made. These readings can be entered into
the patient’s permanent record via the
optional printer or the optional computer
link.
Obtaining accurate measurements
for the axial length of the eye is only part
of the challenge of predicting a correct IOL power for a patient. Many factors play
roles in the procedure.
Axial Length
Axial length measurement is the most important factor affecting IOL power
calculations. An error of 1.0 mm affects the post-operative refraction by
approximately 2.5 diopters.
Corneal Power
Corneal power is the second most important factor affecting IOL power
calculations. A keratometer is an instrument that measures the central 3.3 mm of the
anterior curvature of the cornea in its two meridians. The readings are called K-
readings.
There are two potential sources of error in keratometry. First, failure to
calibrate the instrument can cause all readings to be in error by as much as 0.2 mm or
1.0 D. A second source of error is hidden in the dioptric scale of any keratometer.
No keratometer measures the refracting power of the cornea in diopters. Keratometers
measure the radius of curvature of the anterior corneal surface and then convert this
millimeter measurement into diopters. The dioptric scale used for this conversion is
based on an assumption, a fictitious refractive index. The true refractive index of the
- 4 -

cornea is 1.376, but to obtain an approximation of the true refracting power of the
cornea from only the radius of the anterior surface, a fictitious refractive index has to
be used. This index varies with the make of keratometer. Common values are:
1.3375 (Haag-Streit, Bausch and Lomb)
1.336 (American Optical)
1.332 (Gambs)
A radius of 7.8 mm will thus read 43.27, 43.08, or 42.56 D respectively,
depending on which keratometer is used. These differences may not be of much
importance in contact lens fitting or the determination of corneal astigmatism.
However, these differences are significant when calculating IOL power, which is a new
application for the established discipline of keratometry.
Any IOL power calculation formula which features the dioptric power of the
cornea is subject to this source of error. With the same data, one may calculate IOL
powers varying almost a diopter depending on the make of the keratometer used.
With both potential sources of error in mind, consider that an error of 1 diopter
in the measurement of the corneal power produces an error of about 1 diopter in the
postoperative refraction.
Postoperative Anterior Chamber Depth
The anterior chamber depth is the least important factor affecting IOL power
calculations. An error of 1.0 mm affects the postoperative refraction by approximately
1.0 diopter in a myopic eye, 1.5 diopter in an emmetropic eye, and up to 2.5 diopters
in a hyperopic eye.
Preoperative measurement of the anterior chamber depth is of little value, and
the actual position of the IOL after surgery cannot be accurately predicted so an
estimate has to be used.
Surgical Technique
Changes in corneal curvature are often noted postoperatively. This fact as well
as differences between actual placement and predicted placement of the IOL can
produce an error. An intraocular lens placed in the posterior segment requires a
- 5 -

stronger power, and inserting the implant with the convex side backwards necessitates
an even stronger lens.
Implant Power
The implant power is measured differently by different manufacturers. This can
result in variations between IOL companies.
Formulas Used
There are basically two classifications of IOL formulas - Theoretical and
Regression. All THEORETICAL formulas work on optical formulas based on a two
lens system, the cornea and pseudophakic lens focusing images on the retina.
REGRESSION formulas are derived empirically from retrospective computer analysis
of data on a great many patients who have undergone surgery. Although similar
results are obtained between regression and theoretical formulas for eyes that are
considered average in length (23.5 mm), results may vary for eyes on the shorter and
longer side of average.
An ideal IOL prediction formula would be one that is derived empirically from a
retrospective analysis of data on patients operated on by the same surgeon, using the
same IOL, and obtaining measurements from the same equipment. This would be a
personalized regression formula.
Summary
Predicting preoperatively the IOL power is a combination of science and art.
Accurate axial length and keratometry measurements must be obtained. These
measurements must then be applied to the prediction formula that works best for the
surgeon. With the majority of accuracy based on correct axial length readings, the
importance of a simple, fast and accurate ultrasonic A-Scan is increased.
- 6 -

II. FEATURES
The DGH 3000B A-Scan is manufactured with high quality components that are
designed and built using the latest technological concepts. The result is an advanced
and powerful A-Scan that offers practicality and reliability. The following features are
just a sample of the characteristics and capabilities of this unique unit.
• Simple to use. No complicated setup procedures to follow - very user friendly.
• Solid transducer tip, 3.0 mm in diameter, for ease of applanation and
visualization.
• Large thirty-two character alphanumeric display simultaneously displays anterior
chamber depth, lens thickness, and axial length.
• Front panel keypad permits programming.
• Front panel LED bar graph for displaying echo amplitudes.
• Storage of measurement data for review.
• Operator feedback. An audible signal indicates when the probe is properly
aligned and when a valid measurement is complete.
• Pattern recognition program yields accurate, reproducible measurements in a
fraction of a second.
• Personalized configuration allows the operator to preset pertinent information
that will automatically be used or inserted into the A-Scan function. This
information is permanently stored even when the unit is turned off.
• Built in printer documents the A-Scan measurements and IOL power calculations
generated by the unit.
- 7 -

III. GENERAL DESCRIPTION
Front Panel
Paper Door Latch
When the thermal printer paper needs replacing, this latch is used to gain
access to the twenty-eight column thermal graphics printer. The printer provides
the operator with a permanent record.
LED Bar Graph
The LED bar graph consists of three columns of multi-colored LED’s used to
indicate the amplitude of the anterior lens echo, posterior lens echo, and retinal
echo respectively. Green LED’s indicate the echo signal meets the measurement
criteria. Orange LED’s indicate the echo signal does not meet the lower limit
criteria and red LED’s indicate the echo has saturated, exceeding the upper limit
criteria.
Display
The display consists of two lines of sixteen characters and is used to present
information to the operator.
Paper Release
- 8 -

This lever releases the thermal paper from the printer platen.
“NEXT” - Next Entry
Used to advance to the next entry during the setup (configuration) of A-Scan
or IOL parameters.
“SETUP” - Setup (Configure)
Used to initiate and terminate the setup (configuration) of A-Scan or IOL
parameters.
“0” through “9” - Digits
Used to input appropriate numbers for IOL calculations and A-Scan setup.
“.” - Decimal Point
Used to provide fractional data for IOL calculations.
“+/-” - Sign Change
Used to change the sign of the number appearing on the display.
Probe Interface
Connector located on the front panel which mates to the probe connector.
“MANL GAIN” - Manual Gain Control
Used to manually adjust the gain.
“AUTO GAIN” - Automatic Gain Control
Used to switch from one eye to the other during an A-Scan exam. Also used
to return the unit to automatic gain control after being used in the manual gain
control mode.
“PRINT”
Initiates print out.
“PAPER ADV” - Paper Advance
Allows the printer paper to be advanced.
“NEXT MEAS” - Next Measurement
Used to advance to the next measurement during the A-Scan measurement or
IOL calculation review process.
“PREV MEAS” - Previous Measurement
Used to reverse to the previous measurement during the A-Scan measurement
or IOL calculation review process.
- 9 -

“IOL” - IOL Calculations
Used to enable the IOL calculations.
“PREV” - Previous Entry
Used to reverse to the previous entry during the setup (configuration) of A-
Scan or IOL parameters.
“SELECT”
Used to scroll through program options presented on the display.
“DELETE” - Delete Measurement
Used to delete an undesired measurement.
Power Switch
Rocker switch located on the lower right hand corner of the front panel.
“CLEAR”
Used to clear all measurements from memory and prepare the unit for the
next patient, or to clear unwanted entries presented on the display.
“ENTER”
Used to accept options presented on the display. Also used to override the
automatic gain control function.
Calibration Standard
Polystyrene block used to simulate aphakic axial length.
- 10 -

Back Panel
Fuse Holder
Contains the AC line fuse.
IOL Calculation Firmware Module
Firmware module where the IOL calculation formulas are stored.
Unit Model Number & Serial Number
Location of the model number and serial number for the DGH 3000B. These
numbers are used to identify the unit.
IOL Calculation Firmware Module Serial Number
Location of the serial number for the IOL calculation firmware module.
IOL Calculation Firmware Module Revision Number
Location of the revision number for the IOL calculation firmware module.
Contrast Control
Used to vary the contrast of the 32 character display located on the front
panel.
- 11 -

IV. POWER-UP AND PROGRAMMING SEQUENCE
1. Plug the AC cord into a three prong outlet.
2. Verify that the probe is connected to the front panel.
3. Turn on the unit by using the power switch located on the front panel.
4. The unit will perform an internal self-test function and display the results. The
display will also indicate whether or not an IOL Firmware Module is installed.
5. The DGH 3000B will automatically set the internal gain of the unit to comply with
the probe sensitivity. This is how the unit maintains consistent performance
throughout the life of a transducer.
6. When the initialization sequence is completed, the display will read:
7. Use the “SELECT” key to display the proper eye: “OD” or “OS” (the default is
“OD”). Press “ENTER” to confirm your selection. The display will read:
* * * CAUTION * * *
When power is applied to the unit, the DGH 3000B will automatically set
the internal gain of the unit to comply with the probe sensitivity. Therefore,
it is imperative that the probe tip be clean and dry before the unit is turned
on. Also, the temperature of the probe should be stabilized to within ±10°F
of the temperature at which the probe will actually be used. Never turn on
the unit with the probe attached after the probe has just been exposed to an
extremely cold or hot environment. Always allow time for the probe to
stabilize at room temperature.
SELECT EYE
OD
SELECT LENS TYPE
CATARACTOUS
8. Use the “SELECT” key to display the desired lens type: “Cataractous”,
- 12 -

“Normal”, “Aphakic”, or “Pseudophakic” (the default is “Cataractous”). Press
“ENTER” to confirm your selection. When the desired lens type is chosen, the
appropriate program parameters for alignment criteria and velocity of sound are
automatically installed so no further changes need to be made.
NOTE: If the pseudophakic lens type is selected, the display will prompt the
operator to select an artificial lens type: “PMMA”, “Silicone”, or “Other”.
The display will read:
1 OD(S) AUTO GAIN
NO MEASUREMENT
9. This display indicates that the unit is now in measurement mode, i.e., the unit is
ready to take measurements. Refer to Section V for a detailed description of the
proper method for obtaining measurements.
- 13 -

V. A-SCAN MEASUREMENTS
1. Perform the Power-up and Programming Sequence as described in Section IV.
2. Position the unit for easy visibility during patient examination.
3. Seat or lay the patient in a comfortable position so that the head can be positioned
in almost a horizontal plane. Use a firm, comfortable head rest to prevent
unwanted head movement.
4. Anesthetize the cornea and ask the patient to fixate with their fellow eye on a spot
on the ceiling or wall.
5. Hold the probe in such a way that you can stabilize your hand on the cheek or
forehead of the patient. This will help prevent indentation of the cornea or
excessive movement.
6. The probe can now be applanated to the cornea. This should be observed from a
vantage point that allows the operator to look across the topography of the eye.
This aids in seeing the exact moment when the probe touches the cornea so
indentation of the cornea will not occur. Applanation should be made as close to
the visual axis as possible. An aid in this can be to point the back side of the
probe at the fixation target while touching the front portion to the center of the
cornea.
NOTE: When applanating the probe, one should be particularly careful that
contact is made with the center of the probe tip.
7. At the moment of applanation, the unit will start to beep repeatedly at a rate of
approximately two beeps per second. This means that proper coupling has been
achieved and sound pulses are being transmitted through the eye. The display at
this time will indicate “TAKING MEASUREMENT”. If the beeping stops, this
indicates that the probe is no longer applanated to the eye and a slight pressure of
the probe should be applied.
8. If the probe is in proper alignment when applanation occurs, a measurement will
be obtained almost instantaneously as indicated audibly by three short, successive
beeps. The measurements will be shown on the display as follows:
- 14 -

LENS TYPE DISPLAY MESSAGE
CATARACTOUS or NORMAL 1 OD(S) AXL = XX.XX
AC = Y.YY LNS = Z.ZZ
APHAKIC 1 OD(S) AXL = XX.XX
PSEUDOPHAKIC 1 OD(S) AXL = XX.XX
AC = Y.YY
where “1” indicates the measurements have been stored in memory location 1.
9. If the probe is not in proper alignment when applanation occurs, some minor
adjustments may be needed. With the probe applanated, make some minor
sweeping motions by moving the back portion of the probe in an X-Y plane. As
the operator approaches the proper alignment along the visual axis, the repetition
rate of the beeping sound will increase until a nearly constant tone is reached when
proper alignment is obtained. During the alignment process, the LED bar graph
will indicate the amplitude of the lens and retinal echoes being received. The
criteria for proper alignment is that all echoes must be in the green section of the
bar graph. Echoes in the orange section indicate that the amplitude is too low,
while echoes in the red section indicate that the amplitude is too high.
10. As the unit reaches the maximum beep repetition rate, movement of the probe
should be made in smaller and slower steps, so as not to pass through the area of
proper alignment too quickly. As soon as proper alignment is achieved, the
measurement will be obtained as indicated audibly by three short, successive
beeps, provided there is no corneal indentation present. The display will indicate
the measurement as shown in step 8.
11. If the beep rate reaches a constant tone during the alignment procedure, cornea
indentation may be occurring. The DGH 3000B uses special circuitry that
prohibits any measurements from being obtained if the cornea is being indented.
If a constant tone is obtained, slowly withdraw the probe away from the cornea
until the constant tone changes to pulsed beeping. Again, the pulsed beeping
should be maximized as described in steps 9 & 10 until a measurement is
obtained.
12. If a measurement is not obtained after a preset time period*of probe applanation,
the unit will time out as indicated audibly by three short, successive beeps. The
display will show a message indicating why a measurement was not obtained.
Refer to Section VII for a list of the seven possible messages that will appear when
no measurement is obtained and an explanation of each. At this point the operator
should take the corrective action indicated by the display and reattempt taking a
measurement.
- 15 -

*The time duration allowed for a measurement cycle is preset at the factory for
five (5) seconds. This time can be changed to meet the operator’s needs. Refer to
Section VI for the procedure used to change this time duration.
13. After obtaining an acceptable measurement for memory location 1, the unit will
sense when the probe has been removed from the cornea and advance to memory
location 2. At this point, the probe applanation and alignment procedures
described in steps 5 through 11 should be repeated until a measurement is taken
and stored in memory location 2.
14. The measurement and storage of up to eight (8) different readings for each eye is
possible with the DGH 3000B, depending on how many measurements the
operator feels is necessary to evaluate for consistency and repeatability.
15. All measurements can be reviewed by pressing the “NEXT MEAS” or “PREV
MEAS” keys.
16. If during the data review a reading is observed which is suspect because it does
not agree with the other measurements, the measurement data in that particular
memory location may be replaced with a new measurement as follows:
a) Scroll through the measurement data using the “NEXT MEAS” or “PREV
MEAS” keys until the data which you desire to replace with a new
measurement appears on the display.
b) Press the “DELETE” key to delete the measurement from the display.
c) Repeat the measurement sequence of steps 5 through 11 above until a new
measurement is obtained.
17. After obtaining the desired measurements for the first eye (OD or OS), the
operator may obtain measurements on the same patient’s other eye, if desired, by
pressing the “AUTO GAIN” key, selecting the eye and lens type for the second
eye, and repeating the measurement sequence of steps 5 through 11.
NOTE: The measurement data for the first eye will remain stored in memory
while measurements are being obtained on the second eye.
18. After the desired measurements on one or both eyes are obtained, the operator
may obtain a permanent record by pressing the “PRINT” key. The unit will print
out the following:
a) A header, which includes:
i) Space to write the date, operator name, and patient name.
ii) The eye measured (OD or OS).
iii) The aqueous, vitreous, and lens velocities used in the ocular
measurements.
- 16 -
Table of contents
Other DGH Medical Equipment manuals
