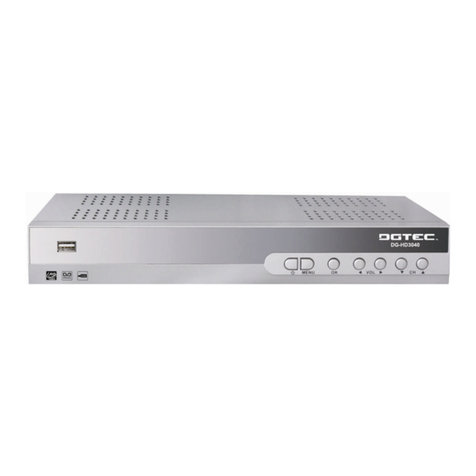
DGTEC DG-SD3401 User manual

User Manual
DG-SD3401
Technical Support: 1800 189 941


1) Read these instructions.
2) Keep these instructions.
3) Heed all warnings.
4) Follow all instructions.
5) Do notuse this apparatusnear water.
6) Clean onlywith dry cloth.
7) Do not block any ventilation openings, install in accordance with
the instructions.
8) Do notinstall near anyheat sources suchas radiation, heat
registers, stoves, orother apparatus (includingamplifiers) that
produce heat.
9) Do notdefeat the safetypurpose of thepolarized plug. Ifthe
provided plug doesnot fit intoyour outlet, consultan electrician for
replacement of the obsolete outlet.
10) Protect the power cord from being walked onor pinched
particularly at plug.
11) Onlyuse attachments/accessories specifiedby the manufacturer.
12) Unplug thisapparatus during lightningstorms or whenunused for
long periods oftime.
13) Refer allservicing to qualifiedservice personnel. Servicingis
required when theapparatus has beendamaged in anyway
such as power cord or plugis damaged, liquidhas been
spilled, objectshave fallen into the apparatus, the apparatus
has been exposedto rain ormoisture, does notoperate normally,
or has beendropped.
14) Mains plug should be turned off if apparatus is not in use for a
15) The ventilationshould not beimpeded by coveringthe ventilation
openings with items such as newspapers, table-cloth, curtains,
etc.
16) No nakedflame sources, suchas lighted candles,should be
placed on the apparatus.
17) Attention shouldbe drawn to the environmental aspects of battery
disposal.
18) Use apparatus in moderate climate.
WARNING: To reduce therisk of fireor electric shock,do not
expose this apparatus to rain or moisture.
WARNING: Thebatteries should notbe exposed to excessive heat
from sunshine or other heat sources.
Thesymbol indicatesthat there are important operatingand
maintenance instructions in the literature accompanying this unit.
Thesymbolindicatesthatdangerousvoltagesconstitutingarisk
ofelectricshockarepresentwithinthisunit.
Thesymbol indicatesthat this product incorporatesdouble
insulation between hazardous mains voltageand user accessible
parts. Whenservicinguse only identical replacement parts.
Front and Rear Panel Illustration................................................... 1
Remote Controller ........................................................................ 1
Connections................................................................................. 2
.............................................................................. 3
Troubleshooting .......................................................................... 8
Specifications.............................................................................. 8
User Interface
Quick Installation..................................................................... 3
Menu Operations......................................................................3
Normal Play............................................................................. 6
Important Safety Instructions
Tableof Contents
long period of time.

100-240V~
50/60Hz
INRFLOOP
RF
THROUGHCOMPONENTVIDEO/AUDIOOUT
CbCr
Y
RCOAXIAL
LVIDEOOUT
VIDEO
S-VIDEO
Upgrade
USB
1. Frontpanel
1STANDBYUsedto switchthe
set top box toonor standby.
2Standby Indicator: Used to visually show power state of the set top box, the green
LEDwill showif turned ontheset topbox and theredLEDwill belight if the set top box
enteredstandby mode.
3 REMOTE CONTROL SENSOR: Used to receive the signal from the remote control.
4 CHANNELUP/DOWN:Usedto changechannelswithout usingtheremotecontrol.
LEDDISPLAY:Usedto display thetimeor channel information
5
35
12345678
1
2
3 COMPONENT VIDEO OUT:
4
5
6
7
RF IN : This socket connects to your external aerial.
RF LOOP THROUGH: This socket will bypass the RF signal to either your TV or another
video system.
These sockets connect to your TV component input terminals.
COAXIAL: This socket connects to a coaxial socket on your surround sound system.
USB: This socket is used to upgrade the software.
AUDIO L/R: This socket outputs analog audio L/R signal.
S-Video output: This socket outputs separate Y/C video signal.
VIDEO: This socket outputs composite video signal.
8
1
4
OK
EXIT
PAUSE
123
456
7890
INFO
AUDIO
EPG
VOL
+
VOL
-
CH+
CH-
MENU
MUTE
RECALL
TV/RADIO
STANDBY
GAME
SUBTITLE TEXT
FAVORITE
VIDEO
Remote Controller
Front and Rear Panel Illustration

Installing the Batteries
Remove the battery coverfrom the remote controland put 2xAAAsize
batteries inside the compartment.
The diagram inside thebattery compartment shows thecorrect way to
install the batteries.
OPEN
OPEN
1.Open the cover 2.Install batteries 3.Close the cover
Using the Remote Control
Touse the remotecontrol, point ittowards the frontof the digitalset top
box.The remotecontrol has arange of upto 7 metresfrom the settop
box at an angle of up to 60degrees.
The remote control will not operateif its pathis blocked.
Sunlight or verybright light willdecrease the sensitivityof
the remotecontrol.
Connections
2
100-240V~
50/60Hz
IN
RFLOOP
RF
THROUGHCOMPONENTVIDEO/AUDIOOUT
CbCr
Y
RCOAXIAL
LVIDEOOUT
VIDEO
S-VIDEO
Upgrade
USB
RFIN
TVAerial
Cr
Cb
BASS
TREBLE
ECHO
DOWNUP
VOLUME
INPUT SELECTOR
MUTE
KARAOKE
CHANNEL
TEST
MODE
3STEREO
PROLOGIC
BYPASS
EXCITE
POWER
MIC
2
1
1
MICVOL
2
MIC
Amplifier
Coaxial

User Interface
1.1 Setting Country andLanguage
User can selectpreferred country andlanguage atSetup - Installation
page.
(1) Press <Menu> buttonto enterMain Menu.
(2) Press <Left/Right> button toselect SETUP option.
(3) Press <Up/Down> button toselect Installation option.
(4) Press <OK> buttonto enterInstallation page.
(5) Press <Up/Down> button toselect Country option.
(6) Press <Left/Right> buttonto setCountry Setting.
(7) Press <Up/Down> button toselect OSD Languageoption.
(8) Press <Left/Right> buttonto set alanguage.
If there isno channel database inthe STB, itwill start atstep(5) directly
when booting.
1.2 How toreceive the programs?
Scan the possible frequencyand bandwidth to receivethe programs.
Press <RED> or <GREEN>button to startAuto Scanor Manual Scan.
1.2.1 Auto Scan
Auto Scanwill erase the databasefirst, and scans defaultfrequency
and bandwidth byCountry Setting. Follow thesteps (1) ~ (8) at
section 1.1.
(9) Press <RED> buttonto clear thedatabase.
(10) Press <OK> button to confirm, clear action andstartAuto Scan.
It takes timeto do aAuto Scan, user canpress <Exit> buttonto exit at
anytime. See Figure1. Later ifyou want toscan again, you can follow
above the Quick Installationprocedure.
1.2.2 Manual Scan
Manual Scanadds the scanning resultsinto database, it doesn't erase
the database.The User hasto know theFrequency and Bandwidth
for scanning. Ifthe user scans the sameFrequency and Bandwidth
more than once,the previous programswill be overwritten.
( 9 ) Press <GREEN> buttonto enterManual Scan Page.
(10) Press <Up/Down> button toselect Frequency option.
(11)Press <0~9> buttonto input theFrequency value.
(12) Press <Up/Down> button toselectBandwidth option.
(13) Press <Left/Right> buttonto setBandwidth value.
(14) Press <OK/Exit> button tostart scan or exit.
See Figure 2.
Figure 1. Cleardatabase message Figure 2. ManualScan edit
1.Quick Installation
3
2.Menu Operations
Once the channel scanis finished and allthe channels are stored into
the database, youcan start towatch a digital terrestrial TV channel
or listen tothe radio broadcast.Some typical operationsare given in
this chapter.
2.1 Main Menu
Main Menufor operating a lotof functions.
(1) Press <Menu> buttonto enterMain Menu.
(2) Press <Info> button to display the versioninformation of STB.
2.2 SETUP
Set the systemsettings of STB.
2.2.1 Installation
Sets up the channels by automatically searching for networks
2.2.1.1 Antenna Setting
Set the antenna poweron or offto supply +5V powerto antenna
SETUP. Installation 01/01/2008 00:19
Country Setting
Antenna_Setting
England
OFF
Move Switch Exit
Manual Scan
Auto Scan
OSD Language English
Audio Language
Subtitle Language
LCN
OFF
ON
English
ExitYES
OK
Database will be cleared! Continue?
MANUAL SCAN 01/01/2008 02:19
Channel No.
Frequency
CH .21
474.000 Mhz
Move Move Exit
Edit
Bandwidth 8 Hz
Scan
OK
65 %
94 %
Strength
Quality

Note: The default isOFF, set this option to ON only if this STBis
connected to an activeantenna which amplifies thereceived RF signal,
otherwise please set it to OFF .
2.2.1.2 Country Setting
Set the country forAuto Scan, Manual Scanand Time Zone.
Note: Change toCountry Setting will automatically change the
default Time Zone and set the defaultFrequency and Bandwidth for
Auto Scan.
2.2.1.3 OSD Language
Set the On ScreenDisplay Language.
2.2.1.4 Audio Language
Set the audio language forwatching program.
2.2.1.5 Subtitle Language
Set the language fordisplaying subtitle.
2.2.1.6 LCN
Set the Logical Channel Numberto on or off.
Note: LCNis a number thatuniquely identifies a logicalchannel,
NOTE-Always set to ON
2.2.1.7 Daylight Saving/Region Setting/TimeZone
Allows you to enable or disable daylight saving. If you know the region of
your location,select an appropriateRegion Setting or set the Time Zone
offset manually.
2.2.1.8 Auto Scan
Press <RED> button tostart Auto Scan. See section1.2.1 for details.
2.2.1.9 Manual Scan
Press <GREEN> button tostart Manual Scan. See section1.2.2 for details.
2.2.2 TV Setup
Setup the display modefor TV.(Optional) See Figure 3.
2.2.2.1 TV Format
Set display formatfor sizing screen, such as 4:3LB, 4:3PS,
16:9PB,16:9 FIT.
4:3LB(LetterBox): Typicallyfor wide screencontent displays on
conventional 4:3 TVwith black barsabove and belowthe picture.
4:3PS(PanScan): Typicallyfor wide screencontent displays on
conventional 4:3 TVwith left andright edges cropped.
16:9PB(PillarBox)/16:9 FIT: Typicallyfor wide screen 16:9TV.
2.2.2.2 TV Mode
Set PAL,NTSC or AUTO for display. AUTOwill switch PAL or NTSC
by program content.This setting should bematched with user'sTV.
2.2.2.3 OSD Transparency
Set the On ScreenDisplay transparency.1 is the most transparent.
2.2.2.4 Banner DisplayTime
Set Banner displaystime. Banner doesn'tdisappear when setas
Always and disappears at timeout when set as othervalues.
2.2.2.5 Video Output
Set the video outputmode to TV.
2.2.2.6 Video Enhancement
Set the VideoEnhancement. See Figure4.
(1) Press <Up/Down> button toselect Video Enhancementoption.
(2) Press <Left/Right> buttonto setVideo Enhancement.
(3) Press <Up/Down> button toselect Flesh Toneor Black/White
Expansion.
(4) Press <Left/Right> buttonto setFlesh Toneand Black/White
Expansion.
2.2.3 Password
Set password formenu lock orchannel lock orcensorship lock.And the
user can changepassword here, thedefault PIN Codeis 6666.
2.2.3.1 Menu Lock
Lock the menusby password.
2.2.3.2 Channel Lock
Lock the channelwhich has beenset to lockstatus when turningon the
Channel Lock. Please seesection 2.3.1.2 for details.
2.2.3.3 Censorship Lock
Lock the programby password andcensorship threshold.
The censorship infois in programcontent. Under thecensorship rating,
user has to enterthe right password forwatching program.
2.2.3.4 Change Password
Tochange the PINcode, select thisoption, press <Left/Right>button
to trigger changingpassword and <0~9>buttons to enterold password,
new password and confirm new password.If successful,thePIN Code
Changed message will bedisplayed, otherwise thePIN Code Error
message will be displayed.
Figure 3. TVSetup
4
Figure 4. VideoEnhancement
SETUP. TV Setup 01/01/200800:19
TV Format
TV Mode
4:3LB
PAL
Move SwitchExit
OSDTransparency 6
Banner Display Time
Video Output
Video Enhancement
3S
OFF
CVBS+RGB
5761
Flesh Tone OFF
Move Switch Exit
Black/White Expansion OFF
Note:Most settings are automatically set upon scanning the unit in.

2.2.5 Set Default
Restore STB to factory default. All settings will be restored to
factory default values and the database will be erased. .
2.3 TV/RADIO
There are two types of program: TV and Radio. Theoperation of the List
and Guide of TV and Radio are almost the same.
2.3.1 List
User can operate some functions inList. See Figure 5.
2.3.1.1 Favorites
User can quickly channel up/down the favorite programs by favorite filter.
There are 8 groups of favorite for user setting: News, Sport, Movie, Music,
Shopping, Travel, Boy and Girl. Press <1~8> button toset or clear the
favorite group when Favorites option selected.
2.3.1.2 Lock
Lock will ask for password before watching program when SETUP ->
Password ->Channel Lock is turned on. Please see section2.2.3.2 for
details. Press <OK> button to set or clear lock status whenLock option
selected.
2.3.1.3 Edit
User can edit the program name, maximum length is 20 characters.
(1) Press <Left/Right> button to select Edit option and <Up/Down> button
to select the program.
Figure 5. TVList
5
2.2.4 Advance Timer
User can settimer for watching the program bydate and timemanually
or from theTV/Radio Guide(see section2.3.2). When settingdate and
start time is, STB will automatically switch to the requested
program. Press anykey except <Vol-/Vol+/Mute> button.STB asks user
to abort itor not whenwatching booked program.User can delete this
event.
(2) Press <OK> button to display program info and press it again toedit
program name.
(3) Press <Up/Down/Left/Right/0~9/RED/GREEN> button to select the
character.
(4) Press <OK> button to finish the editing and return to previous program
info page.
(5) Press <RED> button to save the editing and return toList or press
<Exit> button to return to List without saving.
Figure 6. Guide- Event
2.3.1.4 Move
Move will allow you to movethe position of the channels in the list.
Note: This option will not appear in this list whenSETUP->Installation
->LCN is set to ON.
2.3.1.5 Sort
Sort will allow youto sort the channelsbyA<->Z or Pay<->Free.
Note: This option willnot appears inthis list whenSETUP->Installation
->LCN is set toON.
2.3.1.6 Skip
Skip will skip the programwhen changing program byCH+/-. Press
<OK> button toset or clearskip status whenSkip option selected.
2.3.1.7 Delete
Delete will delete the program permanently from database. User must
rescan to recover it.
Press <OK/GREEN> buttonto set deleteone or delete all whenDelete
option selected.
2.3.1.8 Search
User can searchthe program nameby partial keyword.
(1) Press <Left/Right> button toselect Search option.
(2) Press <OK> buttonto enter searchpage.
(3) Press <Up/Down/Left/Right/OK/0~9/RED/GREEN> buttonto input
keyword.
(4) Press <OK> buttonto Search and returnList. The matched program
will be focused.
(5) Press <GREEN/YELLOW> buttonto the nextor previous matched
program.
2.3.2 Guide
Guide is also named EPG (Electronic Program Guide).
See Figure 6.
(1) Press <Up/Down> button toselect program or EPGevent.
(2) Press <Left/Right> buttonto change eventor date.
(3) Press <OK> buttonto exit allthe menus orshow the detail
information of selected event.
(4) Press <Exit> buttonto exit to previous menu.
All
No. Program Name Status
0001CT SPORT
0002AplikaceMHP
0003CT 1
0004CT 2
0005CT 24
0006NOVA
CH+/-ToolExit
Save
1-8:Favorite GroupEdit
Favorites
CH23/490166 KHz
PID:V1025 , A1041
TV List 01/01/200802:19TV Guide 17/07/200702:19
EPG+/- Date Exit
Book
Detail
0800TVE 1
0800TVE 2
080224H TVE
0803CLAN TVE
Date
Wed.
2007
10/17
Today 18 19 20 21 22 23
11:30 Por LaManana 2007
13:15 EI Negociador
14:00 InformativoMadrid 2007
14:30 Corazon DeOtono 2007
2
15:00 Telediario 1 Edic ion 2007
No.Program Name
OK

(5) Press <RED> button to enterBook page and <YELLOW> button to save
after edit. If it conflicts with itself or other event, a conflict message will be
displayed. The successful booking will be added toMain Menu-> SETUP->
Advance Timer(see section 2.2.4).
6
2.4 ACCESSORY
There are threeoptions: Gomoku,Calendar, Calculator.
Gomoku
Press <Up/Down/Left/Right> button toset play mode and difficulty.
Press <OK> buttonto start and playGomoku.
Press <Up/Down/Left/Right> buttonto select theposition.
Press <OK> buttonto place thepiece.
Calendar displays the year,month, and date.
Calculator can used for mathematical calculations.
Figure7. Normal Play- Radio
3.Normal Play
Normal Playmeans STB in TV or listening Radio mode.
See Figure 7.
3.1 Information
Press <Info> buttononce to displayinfo banner.Banner displays the
program No., favoritesetting, current time,program name, nowand
next event, lock,scramble, subtitle andteletext info.
Press <Info> buttonwhen banner existto display detailinfo of now
event. Press <Info>button when detailexist to displaycurrent
program info. SeeFigure 8.
3.2 Switch Program
User can switchprogram by CH+/-or input programnumber directly.
If the input programnumber doesn't exist, STBwill ignore the input.
Or press <Recall>button to switchto last watchingprogram from
current watching program.
3.3 Volume
Press <Vol-/Vol+> button toadjust the volume.
Press <Mute> buttonto mute.
If adjust thevolume while mute,mute will becanceled.
Figure 8. Program Info
3.4 Program List
Press <OK> buttonto displayProgram Listwith No., name andlock/
scramble/skip status.
Press <Up/Down/Left/Right> to switch the program.
Press <OK/Exit> toreturn normal playmode.
Figure 10. Teletext Setting Page
Figure 9.Audio Channel
3.5 Audio
Switch the soundchannel and switchsound mode toLR(stereo) or LL
(left) or RR(right).If setting audiolanguage atSETUP->Installation->
Audio Language, the audiochannel default languagewill be chosen
by setting. SeeFigure 9. Press<Audio> button todisplay the audio
channel page. Press <Up/Down>button to select Channel/AudioPID
or Sound Modeoption. Press <Left/Right>button to setthe value.
3.6 Pause
Pause video and audio.But it will becanceled by any input.
3.7 Favorites
User can switchthe favorite programsin the samefavorite group.
About favorites setting,see section2.3.1.1 for details.
Press <YELLOW> button toswitch the favorite groupin Program list.
Press <CH +/->button to switchthe same favoriteprogram in normal
play mode.
3.8 Teletext
Display teletext onscreen, the styleof teletext maybe different by
content provider.See Figure 10.
Press <Text> button todisplay the teletextsetting page.
Press <Up/Down> buttonto select theteletext language ifthe program
has teletext.
Press <OK/Exit> buttonto exit theteletext setting page.
Press <0~9/Up/Down/Left/Right> buttonto change teletextpage if
teletext exists.
Program Info
Program Name ITV1
Program No 0003 Video PID 0512
Channel No. 0045 Audio PID 0650
Frequency 665934 KHz
Bandwidth 0008 MHz
Constellation QAM64 Hierarchy Mode N/A
Guard Interval 1/32 HP Code Rate 7/8
FFT 8K LP Code Rate 1/2
Strength 62%
Quality 88%
Audio PID 0650
Channel eng
Audio channel
Sound Mode LR
TELETEXT
TeletextLanguage
eng
OFF

7
Figure 11.Subtitle Setting Page
3.10 TeletextSubtitle
Display subtitle byteletext, the styleof the teletextsubtitle may be
different by contentprovider.
Figure 12. Digest
3.9 Subtitle
Display the subtitleon screen, thestyle of subtitlemay be differentby
content provider.See Figure 11.
Press <Subtitle> buttonto display subtitlesetting page.
Press <Up/Down> buttonto select subtitlelanguage, if theprogram has
subtitle.
Press <OK/Exit> buttonto exit subtitlesetting page.
3.11 Guide
Press <GUIDE> button at normal play state, see section2.3.2 for details.
3.12 Auto Sleep
Press <RED> button for the auto sleep function at normal play state,12, 30,
60, 120 minutes and OFF can be selected.
3.13 List
Press <GREEN> button at normal play state, see section2.3.1 for details.
3.14 Digest
Press <YELLOW> button at normal play state, digest can display 9
programs on screen each time. But only the selected program is
playing, others will display a snapshot. See Figure 12.
Press <YELLOW> button to display digest.
Press <Up/Down/Left/Right> button to browse program.
Press <OK> button to switch program and watch it.
Press <Exit> button to return normal play mode.
Press <Text/Subtitle> button todisplay teletext orsubtitle setting page.
Press <Left/Right> buttonto select TTX Subtitle .
Press <Up/Down> buttonto select teletextsubtitle language.
Press <OK/Exit> buttonto exit thesetting page.
3.15 Message
There are some messagesto inform user thecurrent status of the STB.
3.15.1 No Signal
STB can't getsignal, for example,cable is disconnected.
3.15.2 No Service
Program doesn't haveany content toplay.
3.15.3 Service Scrambled
Program is scrambledfor payment, youneed contact withthe content
provider to know howto descramble it.
3.15.4 Antenna Overload
Power supplied to antenna is overloaded
3.15.5 HDTV NotSupport
If the program content is HDTV format, thisSTB doesn't support it.
3.15.6 Channel Locked
Program is lockedby setting lock(see section2.3.1.2) and turningon
channel lock inpassword setting (seesection 2.2.3.2). User mustinput
correct password to watchprogram.
SUBTITLE
Subtitle Language
eng
OFF

8
If you experienceproblems with thisreceiver or itsinstallation,
please read carefully the relevant sectionsof this User
Manual and thisTroubleshooting guide.
Specifications
This symbol on theproduct or in theinstructions means that yourelectrical and
electronic equipment should bedisposed at the endof life separately fromyour
household waste. Thereare separate collection systemsfor recycling in theEU.
For more information, pleasecontact the local authorityor your retailer where
you purchased the product.
Troubleshooting
Table of contents
Other DGTEC Set-top Box manuals
