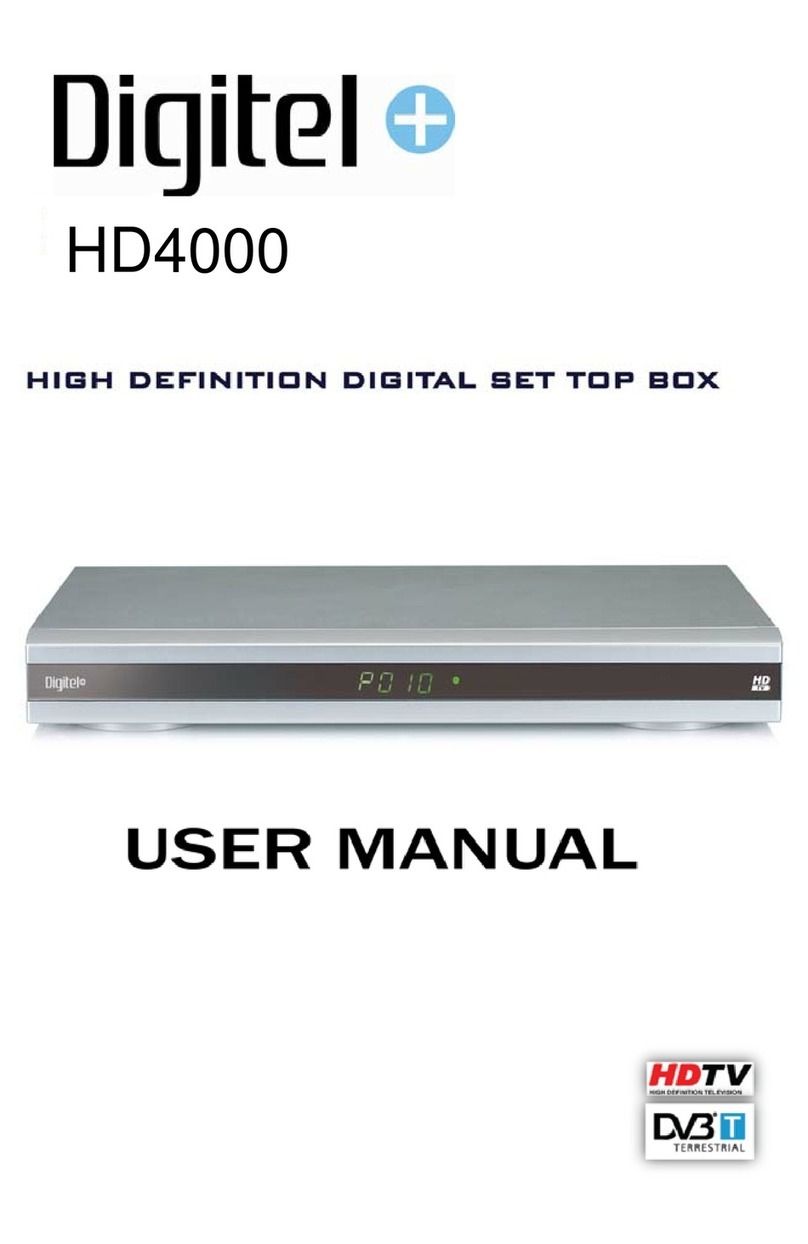
Infomir MAG-00 User manual

IPTV SD / HD Set-Top Box
MAG-200.
User Guide
© 2009 Infomir

MAG-200. User Guide (Rev 1.2 05/02/2010,17:23)
Precautions
Read and observe all warnings and instructions given in this manual.
•Do not try to service or repair this product on your own. Under no
circumstances should the case be opened because it does not contain any parts to be
serviced by the user. Opened product presents mortal danger if connected to power
supply. In all technical questions relating to the repair and servicing of the product,
please, refer to the manufacturing company or an authorized service center.
•Do not expose the product to water and moisture to avoid ignition or
electric shock. In case of moisture ingress inside the case, immediately disconnect
the product from power supply and refer to the service center for carrying out a
thorough check. You must not turn on the product on any account unless the check
had been carried out.
•Do not expose the product to very high or low temperatures.Do not place
the product beside heat generating devices such as radiators, ovens, etc.
•Do not create obstacles to air flow though air gaps and near radiators.
•Power cable should be laid in such manner as to avoid twisting, bending
and excessive mechanical loads. Do not pull at the supply cable when turning
off the product. If the supply cable is damaged refer to the service center.
•If you do not intend to use the product during a long period of time (being
on leave, etc.), better disconnect the power supply from the mains to avoid possible
problems due to voltage jumps or lightning strokes. Always disconnect the power
supply of sensitive electronic equipment from the mains during a thunderstorm.
2

MAG-200. User Guide (Rev 1.2 05/02/2010,17:23)
Copyrights and trademarks
Dolby Digital:
Manufactured under license from Dolby Laboratories.
“Dolby” and the double-D symbol are trademarks of Dolby Laboratories.
3

MAG-200. User Guide (Rev 1.2 05/02/2010,17:23)
Contents
Purpose of the device...............................................................................................................................5
MAG-200 main features ........................................................................................................................... 6
Getting acquainted ................................................................................................................................... 7
Unpacking and placing the device ...................................................................................................... 7
Front panel .......................................................................................................................................... 8
Rear panel........................................................................................................................................... 9
MAG-200 connection to TV set......................................................................................................... 10
Remote control .................................................................................................................................. 12
Operation of the device .......................................................................................................................... 13
Bootstrap menu ................................................................................................................................. 13
Basic software loading ...................................................................................................................... 15
Loading from internal flash-memory of the device (“NAND”)....................................................... 15
Loading from local network (“DHCP”) .......................................................................................... 15
Indication the stages of basic software loading ...........................................................................16
Loading the portal.............................................................................................................................. 17
Service Menu .................................................................................................................................... 19
Characters input...........................................................................................................................19
Characters input using remote control.................................................................................... 20
Characters input using standard keyboard .............................................................................21
Working with input forms.............................................................................................................. 21
Network settings........................................................................................................................... 22
API Demonstration .......................................................................................................................23
TV Channels viewing ................................................................................................................... 25
TV channels list....................................................................................................................... 25
Manual creation of the channels list .................................................................................. 26
Loading the predefined list from the server .......................................................................27
Channel launching parameter («Solution») ............................................................................ 28
Video preview window ............................................................................................................28
Control buttons........................................................................................................................ 28
Viewing media files (Media Browser)...........................................................................................31
General notes..........................................................................................................................31
Content playing ....................................................................................................................... 33
Positioning .........................................................................................................................33
Rough positioning .............................................................................................................. 33
Precise positioning............................................................................................................. 33
Video format conversion (Aspect Ratio) ................................................................................. 35
Upgrade of the device software ........................................................................................................ 38
Variants of the device basic software upgrade ............................................................................ 38
1. Upgrade using cyclic multicast groups.....................................................................................38
2. Upgrade from USB-storage .....................................................................................................38
3. Upgrade using the nfs-Image of the root file system ...............................................................38
4. Upgrade using fixed multicast groups...................................................................................... 39
Description of mcast.exe utility ....................................................................................................39
The procedure of changing firmware for MAG200 ............................................................ 42
Basic software upgrade stages on the device ...................................................................42
Requirements to operating system .................................................................................... 44
Troubleshooting...................................................................................................................................... 45
Specification ........................................................................................................................................... 47
Appendices............................................................................................................................................. 48
Supported content formats................................................................................................................ 48
Media server settings (UPnP) ........................................................................................................... 49
Format of the file with the list of TV channels ................................................................................... 50
4

MAG-200. User Guide (Rev 1.2 05/02/2010,17:23)
Purpose of the device
«MAG200» IPTV HD (high resolution) set-top box has been developed for use in hotels,
holiday centers, health resorts, hospitals and in apartment houses for viewing and listening
video and audio content.
The device conforms to the following standards:
•EMC Directive
•89/336 EEC
•ДСТУ CISPR 14-1:2004
•ДСТУ 4210:2003
•ДСТУ 4211:2003
•ДСТУ EN 50106:2003
•СОУМПП29.130.20-037:2004
Climatic version УХЛ 4.2 according to state standard ГОСТ 15150.
Continuous operation of the device is provided under the following climatic conditions:
а) limiting working temperature of the ambient air from +10 to +40°С;
б) working humidity (relative humidity and temperature) from 40 to 60 % at the
temperature +25°С;
в) limiting working atmospheric press from 84 to 106,7 кPа(630 – 800 mm of
mercury).
You can obtain further information concerning MAG-200, as well as the electronic version of
this document at the Internet address: http://iptv.infomir.com.ua/en/ip_stb.
5

MAG-200. User Guide (Rev 1.2 05/02/2010,17:23)
MAG-200 main features
•Viewing HD video content
•Viewing multicast streams (TV channels) according to the list
•Manual generation of TV channels list
•Loading previously prepared list of channels according to http protocol
•TV channel preview window
•Display format conversion
•Playback of audio and video data in various formats:
MPEG-TS, MPEG-PS, avi, mkv, mov, mp4, wmv, ac3, mp3
•Decoding video streams in the following standards:
MPEG2, MPEG4P2, h264, VC-1, WMV9
•Decoding audio streams in the following standards:
mpeg2-audio, mp3, AC-3
•Playback of media data from UPnP-servers
•Playback of media data from USB (flash memory)
•Capability of connecting USB–keyboard, USB–mouse
•Remote volume control and shutdown
•Low power consumption
6

MAG-200. User Guide (Rev 1.2 05/02/2010,17:23)
Getting acquainted
Unpacking and placing the device
Carefully unpack the device and take all accessories out of the case.
Please, keep all packing materials during the whole period of guarantee. You may
need them to transport the device to the manufacturer.
MAG-200 is designed for optimal operation on any stable and even surface, for example a
shelf.
It should be taken into account that some space should be left behind the device for free
placing of power and connecting cables. Twenty centimeters of free space is enough for
laying the cables without twists and deformations.
In the process of regular operation the device generates little heat. However, free space
should be left above and at the sides of the device for the dissipation of heat due to air
circulation. Avoid placing the device on a soft surface, which may limit the airflow (for
example, on a pile carpet).
7

MAG-200. User Guide (Rev 1.2 05/02/2010,17:23)
Front panel
8

MAG-200. User Guide (Rev 1.2 05/02/2010,17:23)
Rear panel
9

MAG-200. User Guide (Rev 1.2 05/02/2010,17:23)
MAG-200 connection to TV set
MAG-200 TV set
S/PDIF S/PDIF
1xRCA cable
HDMI HDMI
HDMI cable
Y
Pr
Pb
Y
Pr
Pb
3xRCA cable
video (component)
L
R
CVBS
video (composite) + sound
L
CVBS
R
3xRCA cable
S-Video S-Video
S-Video cable
SCART SCART
SCART cable
MAG-200 can be connected to TV set using one of the methods shown in the picture above.
It depends on the quality of video and audio signal you wish to playback on your TV and on
the availability of the corresponding cable.
Short specification of various types of connections is shown below.
Connector Cable Video Audio Remark
CVBS, L, R 3 хRCA SD only Analog Composite signal
Y-Pr-Pb 3 хRCA SD + HD No Component video-signal.
Additional cable 2xRCA is required for connecting audio
signal (L and R)
L, R 2 хRCA No Analog When connecting video through Y-Pr-Pb
S-Video S-Video SD only No Otherwise called «Separate Video»
SCART SCART SD only Analog
HDMI HDMI SD + HD Digital
S/PDIF 1 хRCA No Digital To music center
10

MAG-200. User Guide (Rev 1.2 05/02/2010,17:23)
To make sure that the STB is correctly connected to your TV, turn it on and enter the
bootstrap loader menu (see «Bootstrap menu»). The bootstrap loader menu looks like white
letters on the blue background.
11

MAG-200. User Guide (Rev 1.2 05/02/2010,17:23)
Remote control
12

MAG-200. User Guide (Rev 1.2 05/02/2010,17:23)
Operation of the device
Bootstrap menu
The bootstrap menu is used for loading and starting basic software. Basic software contains
operating and file systems and is used to provide general functioning of the device and for
further loading of the operator portal or internal portal software. The portal software provides
the main service for playing multimedia content to the user.
The bootstrap settings and specifications are presented and arranged in the form of a menu.
The menu allows specifying the source of software loading, establishing the logo and
operator key, setting graphic resolution of the TV screen, modes of the device video outputs,
etc. Each item of the menu consists of two fields – the name of the parameter and its value.
The bootstrap loader menu has a tree-type structure in which some menu items may contain
own sub-items. In this case such item has «» instead of its value.
To enter the bootstrap menu press and keep
•«Menu» button on the remote control, or
•«ON/OFF» button at the front panel of the device
while the device is turned off and then switch on the power supply.
To exit from the menu use «Exit & Save» option for saving the changes you have made or
«Exit & Discard» to quit without saving the changes.
You can navigate through the menu with remote control buttons and/or the buttons on the
front panel of the device.
The buttons «» и«» on the remote control move up and down between the menu items.
The button «» performs a double function. If the current menu item contains its value and
this value can be changed, press the «» button makes such a change. If the current menu
item contains sub-items, press the «» button enters sub-menu. The button «» is used to
exit from the sub-menu backward.
The correspondence between remote control buttons and buttons on the front panel is shown
in the table below.
Remote control Front panel Purpose
«» volume – Exit from a sub-menu
«» volume + Enter to a sub-menu item / Change a value
«» channels Move up
«» channels Move down
«OK» channels Confirm
«EXIT» channels Cancel / Exit from a sub-menu
13

MAG-200. User Guide (Rev 1.2 05/02/2010,17:23)
Short description of the bootstrap loader menu is given below.
TV System Video output mode. Possible values are:
•PAL (576i)
•576p-50
•720p-50
•1080i-50
•NTSC (480i)
•576p-60
•720p-60
•1080i-60
Graphic Res Graphic window resolution. If the preset value exceeds the video
output resolution, optimal resolution is used for the graphic window.
Possible values are:
•720x576
•1280x720
•1920x1080
•TV System Res (determined by the video outputs mode)
Component out Component video output operation mode. Possible values are:
•Y-Pr-Pb
•RGB
Boot Mode Basic software loader mode. Possible values are:
•DHCP (loading from the local network)
•NAND (loading from the internal flash-memory of the device)
Device Info «Product information» menu. This menu contains the following
information not to be changed by the user:
•Vendor (manufacturing company)
•Model
•Hardware Ver. (hardware version)
•Serial Number
•MAC Address
Loader Info The menu containing information on the bootstrap loader’s version
and the date of creation. Not to be changed by the user.
Image Info Information on the image stored in the NAND flash-memory
Upgrade Tools The menu for working with the software upgrading tools
Def. Settings Reset of all variables of the bootstrap loader to the manufacturer
settings. To reset settings confirm it with the command «OK» and exit
from the loader menu saving the data
Exit & Save Exit from the menu and save all changes made
Exit & Discard Exit from the menu without saving the changes
14

MAG-200. User Guide (Rev 1.2 05/02/2010,17:23)
Basic software loading
To be able to perform its functions the device must be loaded with its software (basic
software). The basic software can be loaded either from internal flash-memory of the device
or through the local network. The basic software loading stages are indicated on the TV
screen and on the front panel indicator.
Loading from internal flash-memory of the device (“NAND”)
The loading of the basic software from the NAND memory can be used for off-line playing of
multi-media content. Such content may be located on the external flash-memory connected
through USB port (not to be confused with internal NAND flash-memory of the device) or on a
home media UPnP server.
The basic software image stored in the NAND memory is initially recorded there by the
manufacturer. This image can be re-recorded and easily replaced by a new one in case of
issuing a new version of the software.
To load basic software from the NAND set the parameter «Boot Mode» in the bootstrap
loader to the value «NAND», and exit saving the data. For this purpose proceed as follows:
1) Make sure that the device is correctly connected to the TV and the video input on the
TV set is correctly chosen
2) Enter the bootstrap loader menu (with the device switched off press and keep for
several seconds the remote control button «menu» until blue screen with the menu
appears).
3) Using remote control button «» move to the item «boot mode»and using «»set its
value to «NAND»
4) Move to the menu item «Exit & Save»
5) Press the button «». The message «Please confirm save change. Press OK», will
appear on the screen, suggesting to press «OK» button to confirm saving the changes
6) Press «OK» button
As the result the message «Saving…» (saving the data), then «OK. Reboot…» will appear on
the screen. If the mode of loading from NAND is switched on, the indication «Load from
nand» appears at the bottom of the screen immediately after reloading.
Loading from local network (“DHCP”)
The loading of the basic software through the local network is advantageous because in case
of issuing a new version of the software it makes much easier the process of updating the
image stored in the NAND memory of each device on the network.
To load basic software through the local network set the parameter «Boot Mode» in the
bootstrap loader to the value «DHCP» and exit with saving the data. Proceed as follows:
1) Make sure that STB is correctly connected to the TV and correct video input is chosen
on the TV set
2) Make sure that Ethernet-cable is connected to the «LAN» connector on the rear panel
of the device (connector RJ-45)
15

MAG-200. User Guide (Rev 1.2 05/02/2010,17:23)
3) Enter the bootstrap loader menu: when the device is turned off press and keep for
several seconds the remote control button «menu» until the menu blue screen
appears.
4) Using «»button go to the item «Boot Mode» and with the button «»set its value
to «DHCP»
5) Move to the menu item «Exit & Save»
6) Press the button «». The message «Please confirm save change. Press OK» will
appear on the screen
7) Confirm saving the changes with the button «OK»
As the result the screen shows the message «Saving…» and then «OK. Reboot…».
The «tftp load» message appears at the bottom of the screen immediately after reloading in
DHCP loading mode.
Indication the stages of basic software loading
After the device is switched on the logo (if set) appears on the screen and the indicator on
the front panel shows «200». Then the bootstrap loader indicates stages of loading process
simultaneously on the TV screen and on the front panel indicator.
Basic software loading stages Front panel Messages on the TV set screen
The Ethernet cable is not connected «Erln» «No link detected!!!»
Sending dhcp-request «dHCP» «DHCP»
Sending repeated dhcp-request with the
number of attempt #
«dHCP» «DHCP Retry#»
Dhcp-request is unsuccessful «Er10» «DHCP Error»
Loading the core from mtd4 partition «nand» «Load from nand»
Error of core loading from mtd4 partition «Er20» «Error loading image from nand»
Content of mtd4 partition is not valid «Er20» «Active partition not valid»
Loading the core/bootstrap from multicast group «load» «Multicast load»
Loading the core/bootstrap according to tftp
protocol
«tftp» «Tftp load»
Checking digital signature «chec» «Checking image»
Wrong image format «Er30» «Wrong image»
Wring digital signature «Er30» «Wrong digital signature»
Starting the core/bootstrap «GO» «Loading ...»
16

MAG-200. User Guide (Rev 1.2 05/02/2010,17:23)
Loading the portal
After the bootstrap loader has loaded the basic software (operating system, file system, etc.),
the final stage of the device loading process begins – the loading of the portal software.
Portal software provides the user with the main service of playing multimedia content and
other possible services.
Portal software can be supplied by a company of the multimedia service operator. In addition,
you can always use the «internal» portal software stored in the NAND flash memory of the
device irrespective of the multimedia service operator. Internal portal is named «Service
menu».
To start the internal portal you need to load the device from internal flash memory (see
«Loading from internal flash-memory of the device (“NAND”)») and then press «Services»
button on your remote control. The «Service menu» provides IPTV service («TV channels»
menu item) and «Video on Demand» service («Media Browser»).
Note. The “Service menu” can be also loaded within a short span of time while the
device is trying to load remote portal software through the network. For this
purpose press the button “Services” within 3 seconds after the message “Loading
portal…” appears on the screen.
To load the operator portal proceed as follows:
1) Load the basic software from «NAND»
2) Go to the service menu
3) In the service menu select “Network Settings” item. In several seconds “Network
Settings” form will appear.
4) Further network settings are performed by the multi-media service operator or by the
user of the device according to the configuration data obtained from the operator (or
network administrator)
a) If the operator automatically assigns IP address, set “DHCP” checkbox using
remote control buttons «ОК» or «MIC(On/Off)» (use Enter key or Space bar on
the keyboard). When «DHCP» checkbox is set the fields «IP», «Mask»,
«Gateway», «DNS» and «NTP» become inaccessible (painted with grey color):
b) If the fields «IP», «Mask», «Gateway», «DNS» and «NTP» should be static, then
«DHCP» checkbox must be reset. At that, the color of these fields turns white
and they become accessible for entering appropriate data obtained from
operator or local network administrator.
Note. Refer to “Characters input” to learn how to enter characters into text fields using
remote control buttons and/or standard PC-keyboard.
5) Then fill the fields «Portal #1 URL» and/or «Portal #2 URL» with the addresses of the
operator portal according to the information obtained from the service operator.
17

MAG-200. User Guide (Rev 1.2 05/02/2010,17:23)
6) Press “Save and restart” button to complete. The device will restart and new parameters
will come into force. The further loading will proceed as follows.
If both «Portal #1» and «Portal #2» fields are filled, the menu “Choose a Portal” appears on
the screen. This menu allows choosing a concrete portal to be loaded. From here you can
also go to service menu by press «Services» button on your remote control.
If either «Portal #1» or «Portal #2» field is filled, then after the basic software is loaded, portal
software will automatically start to be downloaded from corresponding address (see fig.
below). At this stage you can also move to the service menu using the button «Services».
If both «Portal #1» and «Portal #2» fields are empty, the transition to Service Menu will be
done automatically after the basic software has been loaded.
18

MAG-200. User Guide (Rev 1.2 05/02/2010,17:23)
Service Menu
The Service Menu provides access to the main functionality of the device. It also suggests
some service for working with IPTV иVoD and forms a small but quite functional portal
supplied by the manufacturer with each device.
The Service Menu contains the following items:
•Network Settings
•API Demo
•TV Channels
•Media Browser
The green button in the service menu is used to restart the device.
Characters input
When working with the service menu the user may want to enter some text information, for
example, a website address specification. To enter a digit, a lowercase Latin letter or a
special character you may use both remote control and a standard 101-key PC keyboard
connected through the USB-port.
Note.
When any remote control buttons are mentioned in this manual they are usually
accompanied (in brackets) with the corresponding key or combination of keys on a
standard keyboard, which perform identical function.
19

MAG-200. User Guide (Rev 1.2 05/02/2010,17:23)
Characters input using remote control
Digits, lowercase Latin letters and special characters are entered in the virtual keyboard
mode of the device. Only the numeric buttons «1»…«9» are used in this mode.
To enter a digit press the corresponding button only once. If the same digit should be
repeated wait for one second and press this button again. When you press different buttons
no pause between them is necessary.
To enter a letter use the numeric button under which this letter is inscribed. In this case it may
be required to press this button repeatedly to display the letter wanted. The interval between
pressings should not exceed one second. At the first press the digit corresponding to this
button will be displayed on the screen and after that – the letters in the succession specified.
The succession is cyclic, which means that after press the last letter in the succession the
digit will be displayed again, and so forth. So, if you accidentally miss the needed letter, just
proceed press the button until the wanted letter appears on the screen.
For example, if you want to enter the letter «c» use the button «2» and press it four times
with intervals not exceeding one second. At the first press character «2» appears on the
screen, at the second press «a» appears in the same position, at the third press – «b», at the
forth press - «c».
To enter special characters press the button «1» («SYMBOL») twice. The table of special
characters will be displayed on the screen allowing you to choose the needed character.
Notice
The table does not present a complete set of special characters. It contains only
those characters, which are most probably used when working with the device.
The active position highlighted with the blue color is moved with cursor buttons. The
character selected is entered with «OK» button (Enter). If the active position moves to the
extreme line or column, the next press of the cursor button will move it to the opposite
position. The last entered character can be deleted with the «Back» button on the remote
control (Backspace).
Some forms may contain the elements of choice usually called «checkbox» or «tick-box».
Depending on the realization of the device software this element presents a box, which is
ticked off or marked with a cross sign when it is switched ON.
To change over the state of the checkbox with remote control use the «MIC On/Off» button
unless otherwise stated. This button corresponds to the SPACE bar on a standard PC-
keyboard.
20
Table of contents
Other Infomir Set-top Box manuals
Infomir
Infomir MAG424w3 User manual
Infomir
Infomir MAG256 User manual
Infomir
Infomir MAG420 User manual
Infomir
Infomir MAG349 User manual
Infomir
Infomir MAG-200 Manual
Infomir
Infomir MAG520 User manual
Infomir
Infomir MAG351 User manual
Infomir
Infomir MAG322 User manual
Infomir
Infomir MAG324 User manual

Infomir
Infomir MAG 254 User manual
