Diaglobal DP 700 User manual

1
Vet Photometer
DP 700
Operating Manual
Version 5.9
Edition 2020/2

2
Dear customer,
We are pleased that you have chosen the Vet Photometer from Diaglobal GmbH and thank
you for the confidence you have placed in us.
The Vet Photometer belongs to a new generation of small mobile instruments developed by
Diaglobal GmbH and specially designed for on-site analysis.
With the new software version from V5.3, an automatic test of the instrument function has
also been integrated.
With the Vet Photometer, 4 parameters can be determined from serum/plasma and blood:
NEFA (free fatty acids), calcium, magnesium and lactate.
The kits and accessories required for the test are also available from Diaglobal GmbH.
All the best for your work with the new Vet Photometer!
Yours
Diaglobal GmbH

3
Table of contents
Page
1. General information regarding the Photometer 4
2. Installation 5
3. Description of the instrument 5
3.1 Power supply 6
3.1.1 Mains power operation 6
3.1.2 Network-independent operation 6
3.2 Measuring system 6
4. Service 7
4.1 Adjustment and Calibration 7
4.2 Maintenance 7
4.3 Cleaning 7
4.4 Disturbances 7
4.5 Disposal 7
5. Required reagents and laboratory accessories 7
5.1 Durability of consumables 7
5.2 Reagents / parameter list 8
5.3 Control materials 8
5.4 Laboratory aids 8
6. Internal quality control 9
7. Measuring process 9
7.1 Multipoint measurement and recognition of the end point 9
7.2 End point measurement taking standard 9
8. Measurement 10
8.1 Switching the instrument on 10
8.2 Self-testing when switching on 10
8.3 Test selection 10
8.4 Switching the instrument off 10
8.5 Integrated operational device checks 11
9. Technical data 12
10. General guidelines and notes 13
11. Appendix: “Step-by-step measurement” 13ff.

4
1. General information regarding the Photometer
Device name: Vet Photometer
Model: DP 700
Features: In-vitro diagnostics, measuring instrument for the
determination of NEFA (free fatty acids), calcium
and magnesium from serum/plasma and lactate
from plasma/blood.
The Vet Photometer fulfils the basic requirements of Low Voltage Directive
2006/95/EG.
The conformity of the instrument with Directive 2006/95/EG is confirmed by
the use of the CE marking. The Vet Photometer was specially developed for
analyses in veterinary medicine, however it is universally applicable.
Manufacturer: Diaglobal GmbH
Innovationspark Wuhlheide
Köpenicker Str. 325 / Haus 41
12555 Berlin
Tel: +49 (0) 30 6576 2597
Fax: +49 (0) 30 6576 2517
E-Mail: info@diaglobal.de
http://www.diaglobal.de

5
2. Installation
For trouble-free operation of the device, the following environmental conditions must
be met:
• Ambient temperature: 0 °C ... 40 °C
• No direct exposure to sunlight or similar heat radiation sources
• Free from excessive dust
• Free from shocks
• Free from interference from electromagnetic waves
• Operation on a horizontal surface
Please observe the following instructions for use:
Insert the rechargeable battery if the instrument is to be used network-independent
or connect the photometer to the power supply unit.
Press the key <ON/ENTER> (Fig. 1) to activate the internal instrument check which
is automatically carried out by the instrument.
Following this, the instrument is immediately ready for measuring.
3. Description of the instrument
Cuvette shaft
Display
Function keys
Fig. 1
6
3.1 Power supply
The Vet Photometer can be operated as desired using a power supply, a (9V block)
battery or (model 6F22 or PP3) rechargeable battery.
3.1.1 Mains power operation
The connection plug of the power supply unit has to connect to the rear power
supply socket of the device.
The Vet Photometer is offered with a power supply (9 V DC) for operation at a mains
voltage in the range 100 V ... 240 V AC.
3.1.2 Network-independent operation
Insertion of the rechargeable battery or the normal battery:
Unscrew the knurled screws on the bottom side of the device and remove the battery
compartment cap. Connect the rechargeable battery or the normal battery using the
push-button contact and insert into the device. Place the battery compartment cap
back on top and fasten the knurled screws.
The rechargeable battery cannot be charged while it is installed. A separate battery
charger is required for this purpose.
Please note:
The Vet Photometer can be operated using a power supply and it is not necessary to
remove the rechargeable battery or the normal battery for this purpose.
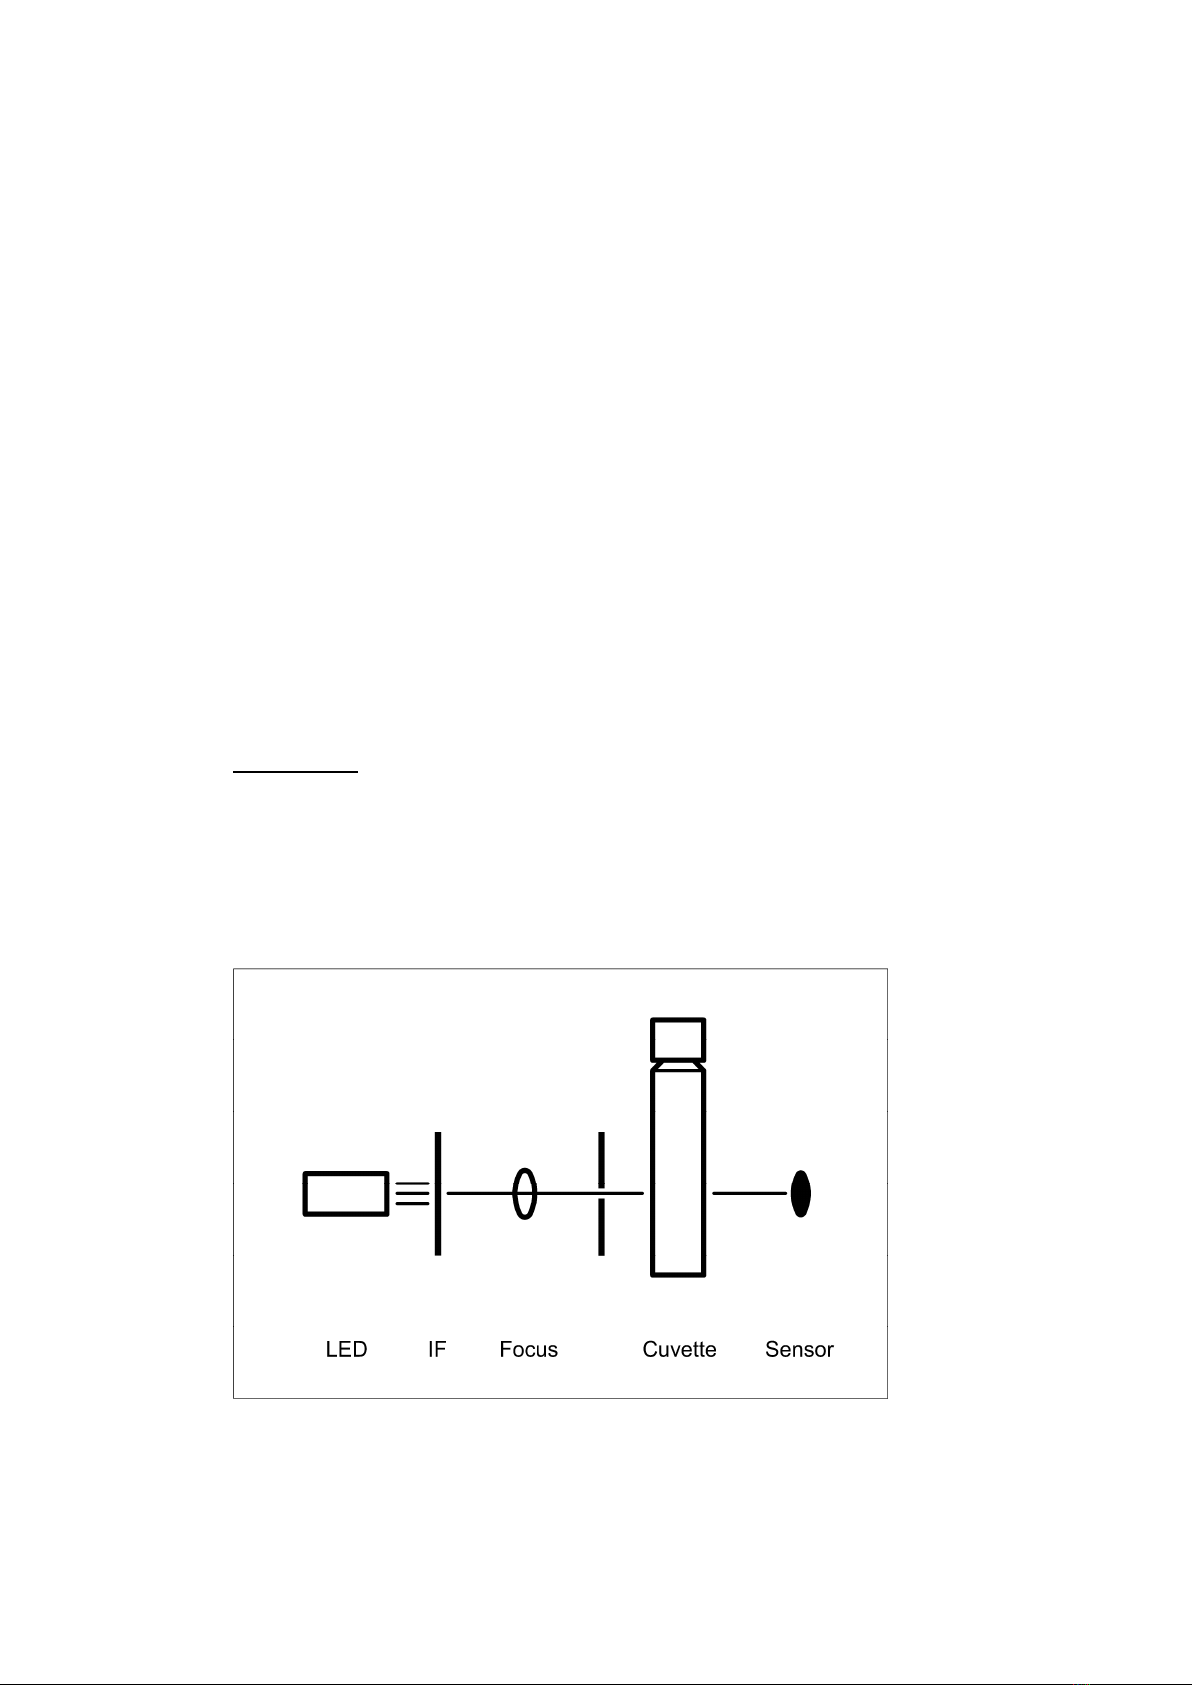
3.2 Measuring system
The optical section is shown in Fig. 2.
Fig. 2
The light emitted by an LED is first selected by an interference filter IF
(HBW ~ 5 nm) in its spectral ranges (520 nm) and then guided concentrated to the
cuvette in the shaft. After it has passed through the cuvette, a broadband photo
sensor converts the light falling onto its sensor surface to current, proportional to its
intensity.

7
4. Service
4.1 Adjustment and Calibration
The instrument is adjusted and calibrated at the factory on delivery, adjustment by
the customer is not necessary.
Adjustment is carried out via the interface socket on the rear panel. It can only be
carried out at the factory, settings by the customer are not possible.
Information about the calibration of the instrument can be found in chapter 6,
Internal Quality Control.
4.2 Maintenance
After the expiration of warranty we recommend regular yearly maintenance of the
instrument.
4.3 Cleaning
To clean the surface of the device, commercially available decontaminating solutions
commonly used in clinical chemistry laboratories such as Mikrozid
®
AF Liquid,
Bacillol
®
plus, 3% Kohrsolin
®
or similar are recommended. Before cleaning the
device with a soft cloth and the decontaminating solution, it must be switched off
and unplugged.
Make sure that no liquids get into the device. There is no protection against
penetrating liquids (Code IP X0).
The cuvette shaft must not be cleaned by the user of the device as this may damage
the device. Should it be necessary to clean it, in particular in cases of leaking liquids
or glass breakage, please contact us.
4.4 Disturbances
If any disturbances or problems occur, simply call us. We can answer most questions
on the telephone. Faulty instruments must be sent to our Berlin address. We can
lend our customers an instrument whilst theirs is being repaired.
4.5 Disposal
We take back instruments free of charge which are no longer needed or cannot be
repaired and dispose of them.
5. Required reagents and laboratory accessories
5.1 Durability of consumables
It is important to ensure that all consumables may only use within the expiration
date.

8
5.2 Reagents / parameter list
The following tests can be measured by the Vet Photometer:
Parameter
Sample material
Tests/pack
Art.-No.
Blood Serum Plasma
Free fatty acid - + + 50 NEFA 013
Lactate + - + 40 LAC 142
Calcium - - + 65 CA 015
Magnesium - + + 65 MG 013
5.3 Control materials
Art.-No.
Description
Contents
LAC QS Lactate control set
2 mmol/L ; 4 mmol/L ; 10 mmol/L
3 x 4 mL
CA QS Calcium- and Magnesium control 3 x 1.5 mL
NEFA QS Free fatty acid control 3 x 1.5 mL
CA ST Calcium- and Magnesium standard-solution 1 x 25 mL
NEFA ST Free fatty acid standard-solution 2 x 10 mL
5.4 Disposables and accessories
Art.-No.
Description
Contents
LH 004 Capillaries 10 µL, with ringmark 250
LH 006 Cuvette rack 1
LH 007 Micropipettor (pipetting aid) 1
LH 009 Cellulose swabs 500
LH 010 Cellulose swab box 1
LH 011 Alcohol pads, non-sterile 100
LH 012 Powder-free nitrile gloves size M 200
LH 050 Reaction tubes for samples 500
LH 053 Pipette tips 500 - 5000 µL clear 200
LH 054 Pipette tips 2 - 200 µL yellow 1000
LH 075 Cuvettes with screw caps 40
LH 504 Pipette variable 500 - 5000 µL 1
LH 550 Pipette fix 50 µL 1
All reagent kits, control materials and other materials are supplied by Diaglobal
GmbH and can be stored and transported together with the Vet Photometer in a
practical case.

9
6. Internal quality control
We recommend using the Diaglobal control solution LAC QS to check the accuracy of
measurement of lactate, the control solution CA QS to check the accuracy of
measurements of calcium and magnesium and the control solution NEFA QS to check
the accuracy of measurement of free fatty acids.
7. Measuring process
7.1 Multipoint measurement, taking the sample’s blank point and recognition of
the end point into account
After measurement of the sample blank value (= measurement 1), the colour
reaction is started in the cuvette. The reaction process is monitored by the
instrument (= measurement 2). The measuring procedure is stopped as soon as the
end point is reached.
The time needed to reach the end point is temperature-dependent. It is normally
2 - 6 minutes for the lactate test. If temperatures are close to freezing point,
measuring times of up to 20 minutes may result, dependent on the parameters.
Both single measurements and series measurements can be selected.
If single measurements are made, the samples are measured one after another. For
series measurements, all A1 values are measured first.
Parameter: Lactate (LAC)
Calculation: Concentration in plasma = Absorbance Difference x Factor
7.2 End point measurement taking standard
Measurement of absorbance after reaching the end point in relation to the reagent
blank value and taking standard.
Parameters: Free fatty acids (NEFA), Calcium (CA) and Magnesium (MG)
Calculation: Concentration = Factor x (A
Analysis
- A
Blank
) / (A
Standard
- A
Blank
)

10
8. Measurement
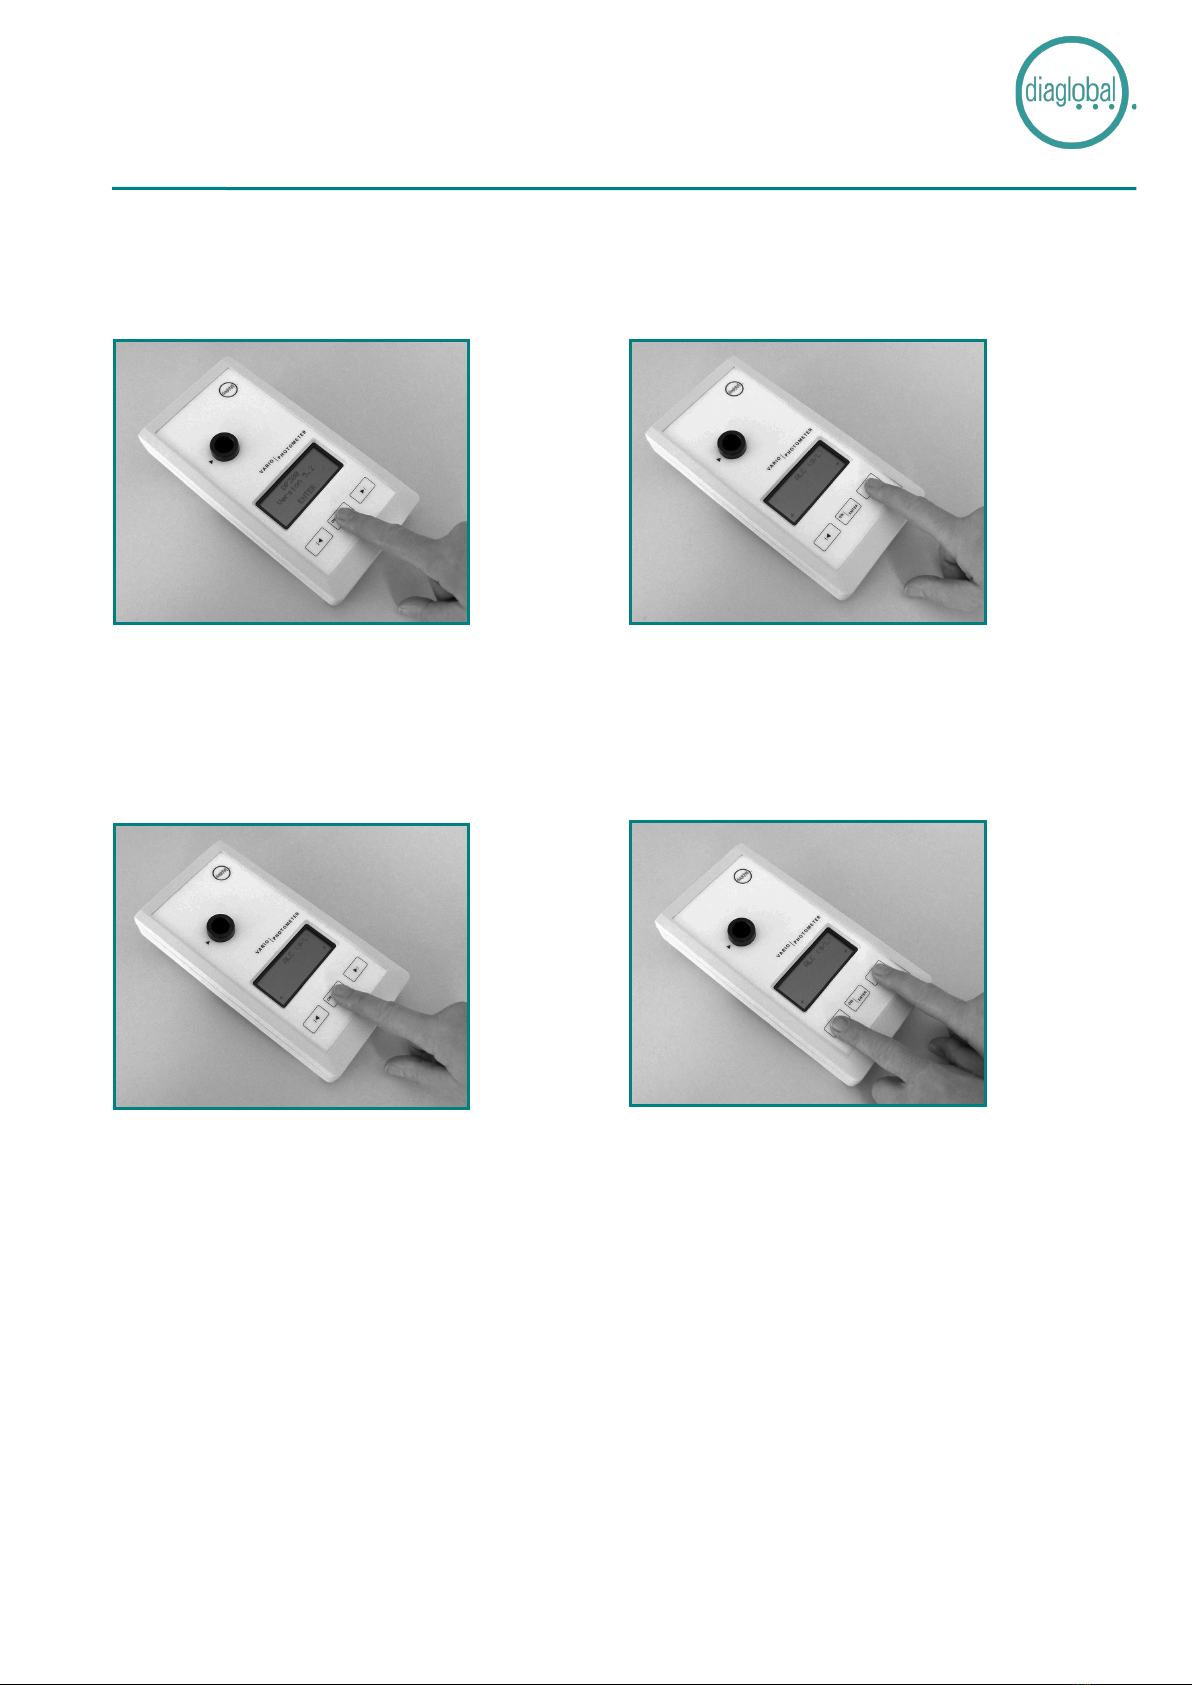
8.1 Switching the instrument on
Press the <ON/ENTER> key.
8.2 Self-testing when switching on
A self-testing of the digital and analogue circuit occurs when switching on the
instrument. The operational device check proceeds automatically after the
switching-on. It lasts ca. 5 seconds, after this the device is ready for measuring.
Note:
In case during the testing it should emerge that one of the device functions does not
satisfy the required settings, the following display appears: <SERVICE>.
In this case please switch off the instrument.
Please call the Service of Diaglobal GmbH (Tel: +49 (0) 30 6576 2597) or contact
your speciality retailer.
8.3 Test selection
Press the <ON/ENTER> key.
Select the desired method using from the menu using the right or left arrow key:
NEFA - LAC - CA - MG - ABS520
Press the right arrow key to mark the respective next test and the left arrow key to
return to the previous test. The test currently selected is shown in the upper
right-hand corner of the display.
Confirm test selection by pressing the <ON/ENTER> key.
8.4 Switching the instrument off
To switch the instrument off, press both arrow keys together.

11
8.5 Integrated operational device checks
Self-testing when switching on
The testing of the device’s digital and analogue circuit occurs automatically already
when switching on the instrument.
Please see chapter 8, point 8.2.
Differential measurements
All measurements are based on differential measurements, i.e. after having chosen
the desired test the instrument requests a reference measurement with a blank
value cuvette. Thus, a reference basis to the measured value is established so that
minor deviations may be compensated.
Measurement range controls
The measurement ranges of all measurement results indicated in the display become
verified by an integrated measurement range control. An error display appears when
exceeding the measurement range.
All measurement ranges, which are separately defined for each parameter, are
documented in the respective package inserts as well as in the operating manual,
chapter 9, Technical Data.
Plausibility controls
When performing multiple point measurements the extinction, which was measured
first, represents the reference basis. The program tests the individual measured
values for plausibility. In case particular requirements (e.g. A2 > A1 for rising
reactions) are not met, an error message is displayed.

12
9. Technical data
Storage temperature: -20 °C ... 70 °C
Operating temperature: 0 °C ... 40 °C
Dimensions: 200 x 100 x 50 mm
Weight: 450 g
Measuring principle: Absorption metering with a single-beam (Fig. 2),
choppered operation
Projection: LED
Spectroscopic apparatus: Interference filter
Measuring wavelength: 520 nm
Spectral half-width value: ~ 5 nm
Extraneous light influence: Negligible
Interface: V24 (9600, 8, n, 2)
Power supply: 6 V ... 10 V DC
Current consumption: max. 250 mA
Warm-up time: 0 min
Interference suppression: According to DIN VDE 0871 and DIN VDE 0875
Electromagnetic Compatibility: According to EN 61326-1
Inaccuracy: < 0.5 % at A = 1.000
Relative photometric
short-time standard deviation: < 0.1 %
Measuring ranges: DP 700
Free fatty acids 0.02 - 4.00 mmol/L
Lactate 0.2 - 30 mmol/L
Calcium 0.10 - 5.00 mmol/L
Magnesium 0.10 - 2.10 mmol/L
ABS 520 nm A = 2.500

13
10. General Guidelines and Notes
EC Directives
1. Low Voltage Directive 2006/95/EG
EN / ISO standards
2. EN ISO 9001:1994, Quality Management Systems, Model for quality
assurance in design, development, production, installation and servicing
3. EN 61010 -1, Safety requirements for electrical equipment for
measurement, control and laboratory use - Part 1: General requirements
4. EN 61326 -1, Electrical equipment for measurement, control and
laboratory use - EMC requirements - Part 1: General requirements
Note on electromagnetical compatibility
a) This photometer meets the requirements of the IEC 61326 series of
standards regarding electromagnetic radiation and interference immunity.
b) Do not use this unit near to sources of intense electromagnetic radiation
as these may disturb its correct functioning. During the measurement, a
distance of at least 1 m should be kept between an operative (turned on)
mobile telephone and this photometer.
Note on the unit's internal quality control
This unit checks its functionality when it is turned on. Moreover, it performs
electronically controlled individual tests during the measurement causing an
error message when defined conditions are not met.
11. Appendix: “Step-by-step measurement”
Please refer to the illustrations in the how-to manual “Step by Step”
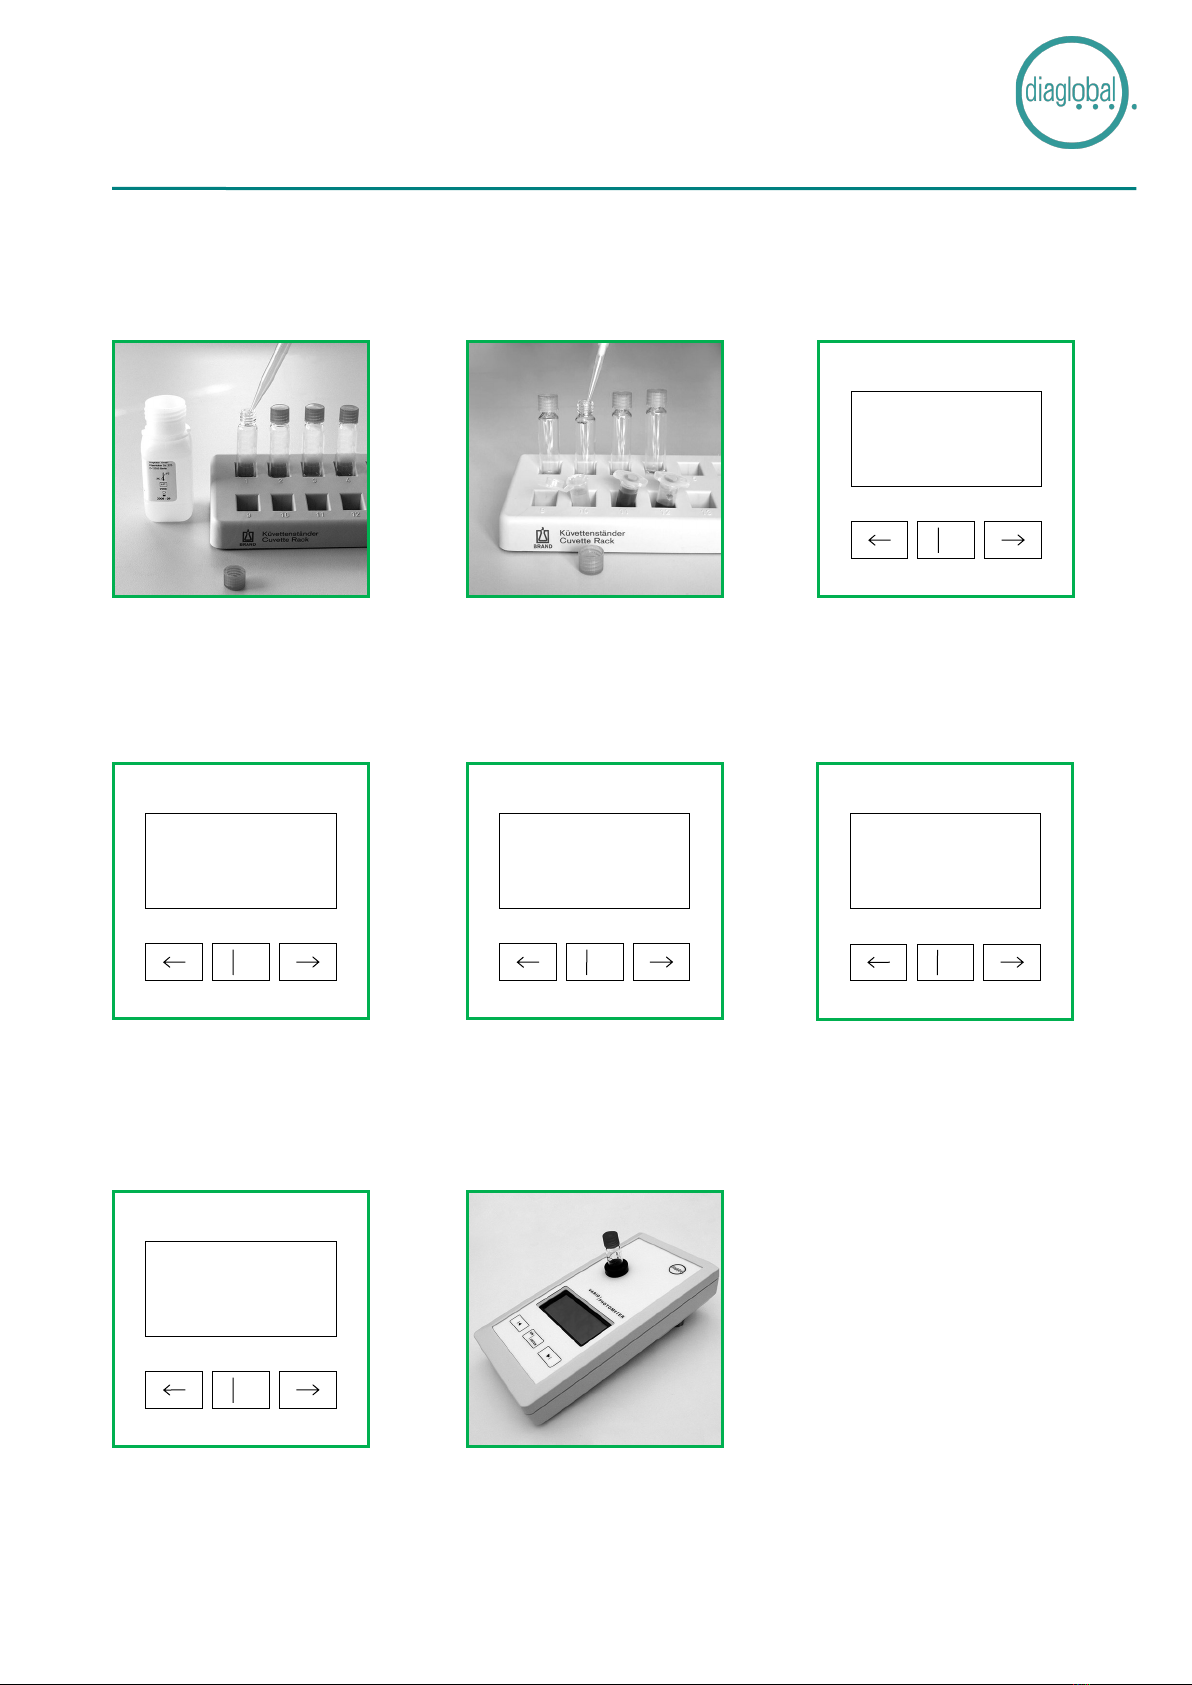
Step by step instructions
Device manual
Diaglobal GmbH · Köpenicker Straße 325 · 12555 Berlin · +49 (0)30 6576 2597 · info@diaglobal.de · www.diaglobal.de
1. Switch on:
Press ON/ENTER
Wait for device check and confirm with
ON/ENTER
2. Select test:
Press arrow key until required test
appears
3. Confirm required test:
Press ON/ENTER
4. Switch off:
Press both arrow keys at the same time
Note:
If SERVICE appears after the device
check, the device has a fault.
In this case, please contact our customer
service at +49 (0) 30 6576 2597.

Step by step instructions
NEFA (free fatty acids)
Example: 2 samples
Additionally required: Free fatty acids standard (NEFA ST), Diaglobal-round cuvettes (LH 075)
Diaglobal GmbH · Köpenicker Straße 325 · 12555 Berlin · +49 (0)30 6576 2597 · info@diaglobal.de · www.diaglobal.de
1. According to instruction
prepare the reagent mixtures
Thereafter, pipette 1000 µL of
the bottle R1a in each cuvette
2. Pipette samples:
cuvette 1: nothing (= blank)
cuvette 2: 50 µL standard
cuvette 3: 50 µL sample 1
cuvette 4: 50 µL sample 2
Close cuvettes, mix and leave for
10 minutes
5. Blank adjustment:
Insert cuvette 1 (= blank) into
photometer, blank is stored in
memory
Remove after signal tone
4. Switch on the photometer
with ON/ENTER
Wait for device check, confirm
with ON/ENTER
Select NEFA, confirm with
ON/ENTER
ON
ENTER
ON
ENTER
NEFA
Insert
blank
6. Insert cuvette 2 with standard
into photometer
Photometer shows Absorption of
cuvette with standard
Hint: If necessary, note this value for
documentation purposes.
7. Remove cuvette 2 with
standard
ON
ENTER
NEFA
Sample 01
insert
NEFA
Insert
standard
ON
ENTER
NEFA
Standard Abs.
0.471
3. After 10 minutes of waiting time
pipette 500 µL R2a in each cuvette
Close and mix again and leave
again at room temperature for 10
minutes
In regard to serial measurement:
After blank setting any number of
additional samples can be measured.
Hint: To verify the measured values, we
recommend carrying a control: NEFA-
control (Art. No.: NEFA QS).
8. Insert cuvette 3 (sample 1)
and thereafter cuvette 4
(sample 2) into photometer
Read results successively
ON
ENTER
NEFA
Sample 01
0.50 mmol/L
Step by step instructions
CA 015 / MG 013
Example: 2 samples
Additionally Required: Calcium-Magnesium-Standard (CA ST), Diaglobal-round cuvettes (LH 075)
Diaglobal GmbH · Köpenicker Straße 325 · 12555 Berlin · +49 (0)30 6576 2597 · info@diaglobal.de · www.diaglobal.de
1. According to the instructions,
pipette the prescribed amounts
buffer and color solution into
cuvettes
Thereafter, pipette the standard
and the two samples (fig. 2)
2. Pipette into cuvettes, mix well:
cuvette 1: nothing (= blank)
cuvette 2: standard
cuvette 3: sample 1
cuvette 4: sample 2
CA 015: 50 µL / without waiting time
MG 013: 10 µL / wait 5 minutes
5. Insert cuvette 2 with standard
into photometer
Photometer shows Absorption of
cuvette with standard
Hint: If necessary, note this value for
documentation purposes.
4. Blank adjustment:
Insert cuvette 1 (= blank) into
photometer, blank is stored in
memory
Remove after signal tone
ON
ENTER
ON
ENTER
CA
Insert
standard
6. Remove cuvette 2 with
standard
7. Insert cuvette 3 (sample 1) and
thereafter cuvette 4 (sample 2)
into photometer
Read results successively
ON
ENTER
CA
Sample 01
2.85 mmol/L
CA
Standard Abs.
0.142
ON
ENTER
CA
Sample 01
insert
3. Switch on the photometer
with ON/ENTER
Wait for device check, confirm
with ON/ENTER
Select the required test,
confirm with ON/ENTER
ON
ENTER
CA
Insert
blank
In regard to serial
measurement:
After blank setting any number of
additional samples can be
measured
In regard to quality control:
To verify the measured values,
we recommend carrying a
control: Calcium Magnesium
Control (Art. No.: CA QS).

Step by step instructions
LAC 142 / LAC 342 / GLU 142 / CHO 142 / TRI 142
Single measurement
Diaglobal GmbH · Köpenicker Straße 325 · 12555 Berlin · +49 (0)30 6576 2597 · info@diaglobal.de · www.diaglobal.de
1. Insert capillary with
sample into cuvette
2. Wash out sample with
micropipetter
3. Screw on cap
Turn cuvette upside down
several times
5. Blank adjustment:
Insert cuvette with sample (fig. 3)
into photometer, blank is stored in
memory
Remove after signal tone
4. Switch on photometer with
ON/ENTER
Wait for device check, confirm
with ON/ENTER
Select the required test,
confirm with ON/ENTER
6. Replace screw cap against
starter cap
ON
ENTER
ON
ENTER
M1 LAC
Sample 01
insert
9. Timing appears, wait for
result
7. Turn cuvette upside down
several times
8. First press ON/ENTER
Thereafter insert cuvette in
photometer
ON
ENTER
M2 LAC
Sample 01 00:30
Measuring
M1 LAC
Sample 02
insert or
ENTER

Step by step instructions
LAC 142 / CHO 142 / TRI 142
Serial measurement
Diaglobal GmbH · Köpenicker Straße 325 · 12555 Berlin · +49 (0)30 6576 2597 · info@diaglobal.de · www.diaglobal.de
1. Wash out samples from
capillaries into cuvettes with
micropipetter
4. Blank adjustment:
Insert cuvette with samples (fig. 2)
into photometer, blank is stored in
memory
Ensure correct order of samples!
3. Switch on photometer with
ON/ENTER
Wait for device check, confirm
with ON/ENTER
Select the required test,
confirm with ON/ENTER
5. After blank adjustment of
the last cuvette replace all
screw caps against starter
caps
ON
ENTER
ON
ENTER
M1 LAC
Sample 01
insert
8. Read the measured value of
cuvette 1, remove cuvette
Insert cuvette 2, read the
measuring value, remove
cuvette, etc.
6. Turn cuvettes upside down
several times at the same
time
7. First press ON/ENTER
Thereafter insert cuvette 1 in
photometer
Timing appears, wait for result
ON
ENTER
M2 LAC
Sample 01 00:30
Measuring
M1 LAC
Sample 19
insert or
ENTER
2. Screw on cap
Turn cuvette upside down
several times
9. Repeat the process until the
measured value of the last cuvette
is displayed
Pay attention to correct assign-
ment and sequence of samples!
ON
ENTER
M2 LAC
Sample 19
5.28 mmol/L
Table of contents
Other Diaglobal Measuring Instrument manuals


