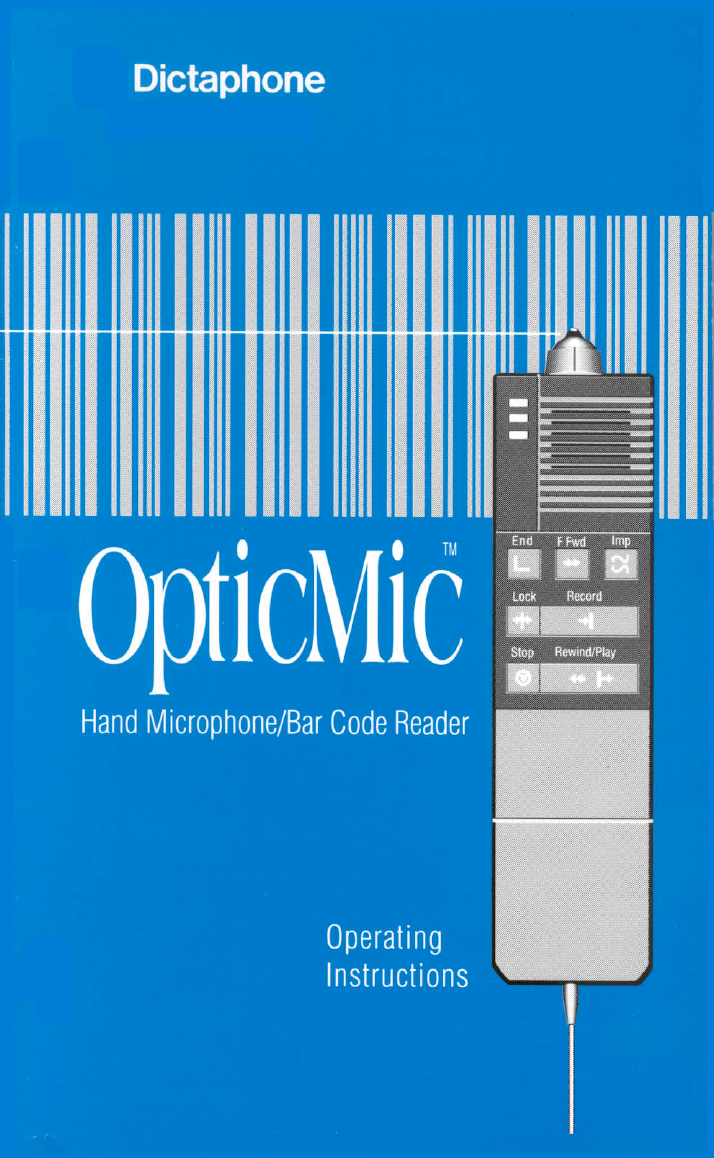
Dictaphone OpticMic User manual

Introduction
.............................................................
ii
Some
Fundamentals
...........................................
ii
How
this
manual
is
organized
.............................
111
For More Information
........................................
111
...
...
Dictating Using the OpticMic'rMHand MicrophonelBar
Code Reader
Dictation-System Recorder
.....................................
1
Displaying Bar Codes
.........................................
1
Single Recorder Access
........................................
2
Record Lock
.......................................................
2
To Stop Record
...................................................
2
ReviewingDictation
...........................................
3
Insert
..................................................................
3
Scanning Bar Codes
............................................
4
Recording an Impression
....................................
5
Assigning Priority
...............................................
5
Ending a Report
.................................................
6
Log
off
................................................................
6
Telephone Dictation
...........................................
6
Answering Telephone Calls
During Dictation
................................................
7
Telephone Dictation
(Multi-line sets only)
....................................
7
Intercom
.............................................................
7
Phone-In Dictation Keypad Commands
..................
8
Appendix
..................................................................
9
Index
.....................................................................
11

Synergy
is
a
lot
like putting butter and salt on your
potatoes. Even though
the
individual items are
OK,
they
taste a lot better when they are combined. Some ideas are
are like that to. Imagine a businesswithout a telephone,
a
tape recorder without cassette (reel-to-reel?), or a
TV
without a VCR.. Unthinkable! Sometimes the simplest
combinations create the most powerful effects.
The
OpticMicTMhand microphone/bar code reader
represents the marriage of
two
good ideas.
It
brings
together a bar code reader for scanning bar code numbers
and a hand microphone for dictation. Sound logical! It
sure
is
if your doing modern dictation. Thekinds of
dictation were you have to enter long strings of numbers
to
identify patients, departments and work types. When you
enter numbers, you have four options: ignore them
entirely,have someone else do it, use a keypad, or use a bar
code reader. The
first
generally leads to the second, the
third
is
tedious, and the fourth-well-it’s the easiest, but
it
means you have another instrument to handle. The
OpticMicTMhand microphone/bar code reader places
dictation and scanning in one place-the palm
of
your
hand. Oneinstrument for both jobs.
SOME FUNDAMENTALS
TheOpticMicTMbar code reader can read and decode
3-of-9 bar codes-more commonly called “Code39.”
It
can read bar codes from either a left-to-right
or
right-to-left scan.
It
also produces a confirmation beep
after a successful scan. (If desired,
it
can produce an error
tone for unsuccessful scans. Consult a Dictaphone
representative for information about enabling or disabling
these tones.)
ii
If you use a system recorder for dictation (Digital
ExpressTMsystem),you can use the bar code reader for
entering report information
(ID
numbers).
You
can
still
use
the
telephone keypad for reports that do not have bar
code labels.
Also,
the bar code reader does not prevent you
from using the handset for diction.
TheOpticMicTM hand microphone has all of the dictation
controls and indicators that you are familiar with using on
the ConnexionsB telephone and handset: microphone,
MICIndicator, record, record lock, Stop, Rewind/Play,
Fast forward, End
Cue
and Impression Cue.
HOW
THIS MANUAL
IS
ORGANIZED
This document has
two
basic sections. The
first
explains
dictation to a system recorder (e.g., Digital ExpressTM
system). Within
this
section you will find instructions for
using the hand microphone features and the bar code
reader features:“Displaying Bar Codes” and “Scanning Bar
Codes.
”
Thesecond section
is
the Appendix. For reference, the
Appendix
lists
all of the feature codes that you can
program into your ConnexionsB telephone. For a detailed
explanation of each code, refer to the ConnexionsB system
telephone operating instructions,
L-940
or
L-
10
15
(UK).
FOR
MORE INFORMATION
For more specificinformation about the operation
of
your
system or ConnexionsB telephone refer to appropriate
devises operator’smanual.
...
Ill

DICTATING
USING
THE
OPTICMIW HAND MICROPHONE/
BAR CODE READER
DICTATION-SYSTEM RECORDER
You can use your Connexions@ system to dictate into
a
singlesystems recorder, or with a Multiple Dictate Module
connected, you can access as many as eight recorders.
If
you will be scanning bar codes, make sure you read
through the procedures for displaying and scanning bar
codes before you begin dictating,
DISPLAYING
BAR
CODES
Your ConnexionsB telephone can display the bar code
digits
that you scan. However, to do
this
you must
program the proper feature code into the telephone.
To
display bar code digits:
Program your telephone with the Bar Code Reader
feature code
#*
1807.
To
program a feature code:
Press
KEYS
Press the Select button.
Press
PROGM
and enter your
security code,
if
needed.
Select a program key-press
it.
Enter the feature code:
#*
1807
Label the button, and you're done.
I
1

Section 4-"Quick Access Program Keys"-of the
ConnexionsB telephone operating instructions
lists
and explains all of the feature codes for the
ConnexionsB telephone.
SINGLE RECORDER ACCESS
1.
Program a quick access key with Feature Code
#
*
01.
(See
Feature Codes in Section
4
of
the ConnexionsGO
telephone operating instructions.)
If required, press the appropriate quick access key to
access the recorder-if in
use,
the
LED
will be
illuminated.
Press the quick access key programmed with your
Author ID,
or
enter your Author ID using the
telephone keypad. Your Author IDwill display on the
telephone screen
for
verification.
If
you make an
error, press the BACK key to make corrections. When
the ID
is
correct, press DIAL to send
it
to the system
recorder.
Lift the OpticMicTM Hand Microphone. When
RECORDEWHANDMICappears on the display,
press the RECORD control on the OpticMicTM
Hand Microphone to begin dictating.
2.
3.
4.
RECORD LOCK
For continuous, hands-free recording, while in
record, press LOCK. (Microphone remains out of the
cradle.)
TO
STOP
RECORDING
Release the
RECORD
control.
(If
you are using the
LOCK feature, press
STOP.)
2
R
EVI
E
W
I
N
G
DICTATION
You
can listen to dictation through the speaker in the
OpticMicTMHand Microphone.
To
rewind, press and hold the REWIND/PLAY
button on the OpticMicTM Hand Microphone.
Release button to listen to dictation.
(If
you rewind
to beginning, press
PLAY
to listen to dictation.)
Press the
F
FWD
button to return rapidly to the last
word dictated.
To
insert additional dictation in previously dictated material:
1.
2.
3.
Rewind or fast forwardto desired location and stoptape.
Press
[#]
on the keypad.
Press the Record button and record your
insert.Release RECORD to stop. (Impressionscannot
be recordedwhile in Insert mode-Imp button.)
To
Pause during insert:
0
Release the Record button.
To
review an insert while
still
in Insert mode:
Press
REWIND
control on OpticMicTMHand
Microphone until Insert tone
is
reached; release to
listen to dictation.
To
complete the Insert
1.
Press
[3]
on the keypad. The last few words
of
the
insert will play back.
3

2.
To
continue dictating, press
[4]
[4]
to fast forward to
the last word recorded. Then press the Record button
on the handset.
To
review previously recorded insert:
Press
[4]
[#I
or
[7]
[#I
to move directly to the insert;
Plabyback
is
automatic.
SCANNING
BAR
CODES
To scan a bar code:
1.
2.
Press the “QuickAccess Key” programmed with the
Bar Code reader feature code.
Place the OpticMicTM tip either to the left or right
of the bar code-you can startyour scan fromeither side.
Make sure you place the tip in contact with a white
space to one side
of
the code.
Pass
the OpticMicTM
tip
across the bar code.
As
you
move
it,
make sure
it
remains in contact with the bar
code. You can cause
a
bad scan
by
either lifting the
tip
during the scan or
by
scanning off the code
diagonally-not reading the entire code.
3.
SUCCESSFUL
SCAN-You will hear a singlebeep
after
a
successfulscan.
If
you programmed the bar
code reader feature code into the ConnexionsB
telephone, then the bar code numbers will appear on
the display.
UNSUCCESSFUL
SCAN-If
you do not hear a
single beep after a scan, you will have to scan the code
again.
If
you
still
cannot read the code after several
tries, then enter the digits through the telephone
keypad.
4

NOTE:
Your
OpticMicTMreader can be
set
to
play an
error
tone-a short warble tone-aBer an unsuccessjklscan.
Ifyou
hear this
ype
of
tone, then
you
should rescan the bar code.
Theconfguration ofyour ConnexionsC3telephonedetermines
whether the
error
tone willplay
or
not.
Consultyour
local
Dictaphone representativeifyou wish
to
have the tone turned
either
on
or
off
RECORDING AN IMPRESSION
(Imp
cue)
After you finish dictating,
you
can record your impressions
or comments about the report. You can mark the location
of
your comments with the “Impcue button. Thesystem
saves your impressions alongwith the dictation. The
transcriptionist can review your comments before
transcribing the report by locating your “Imp’cue.
To record an impression:
When you finish dictating, press and release the
“Imp”button, and record your impression.
Note:
Editing dictation may delete
your
impressions.
ASSIGNING PRIORITY
Assigning priority means that the report you are dictating
should be transcribed before other work.
To
assign priority:
Press
[6]
on the keypad at any time before you
complete the report. (If you are using record lock,
press Stop before you press
[6]
.)
5

ENDING
A
REPORT
To end a report:
Press and release the “End’button on the
OpticMicTMhand microphone to end your report.
You will hear a system prompt that tells you the status
of
your report. You can begin your next report or log
off-
hang-up.
LOG
OFF
To
log
off
of
the Digital Express system:
Press
[5],
and then hang up the hand microphone.
TELEPHONE DICTATION
You may dictate into a remote Dictaphone recorder
equipped with the appropriate telephone interface.
1.
2.
Press the SPEAKEWMUTEkey and dial the
telephone number.
Lift the OpticMicTMHand Microphone and press
the
RECORD
control to record your dictation. TEL
HANDMIC DICTappears on the telephone display.
When dictation
is
complete, press STOPto
disconnect the line then replace microphone in the
cradle.
3.
Other operations such as marking end of document,
designating priority, fast forward, etc., are performed using
the appropriate controls on the OpticMicTMHand
Microphone or the telephone keypad.
6
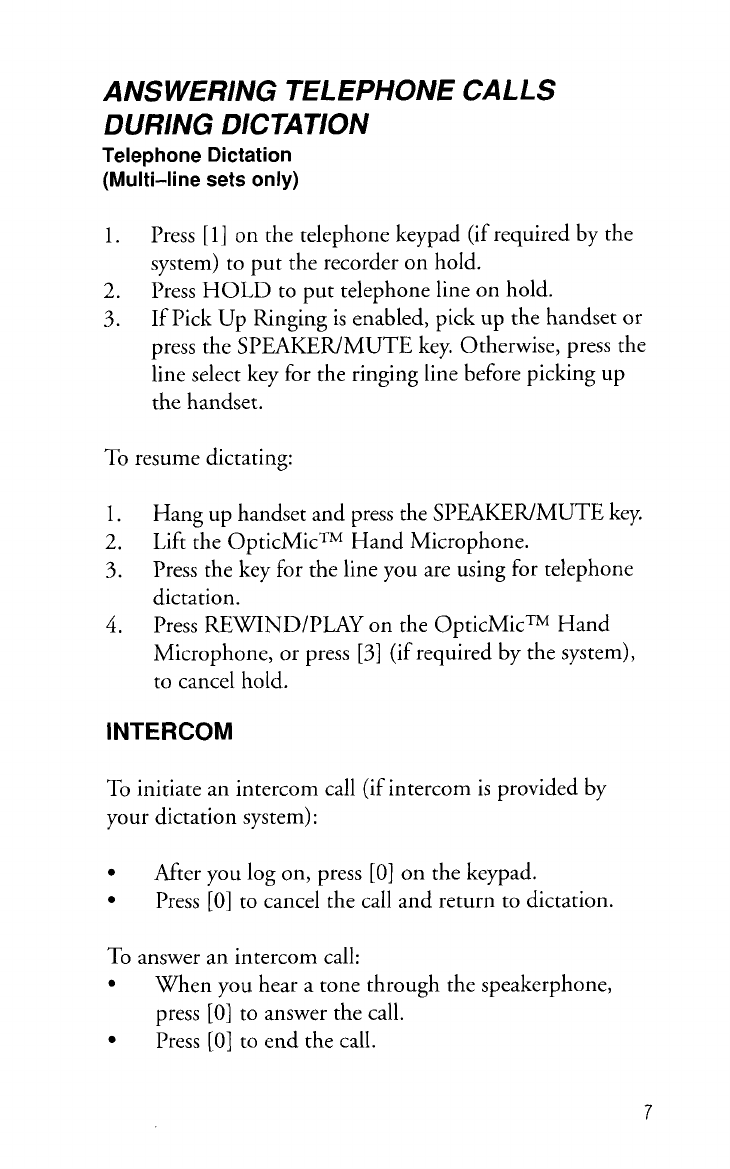
ANSWERING TELEPHONE CALLS
DURING DICTATION
Telephone Dictation
(Multi-line sets only)
1.
2.
3.
Press
[I]
on the telephone keypad
(if
required by the
system) to put the recorder on hold.
Press
HOLD
to put telephone line on hold.
If
Pick
Up
Ringing
is
enabled, pick up the handset
or
press the SPEAKENMUTE key. Otherwise, press the
line select key for the ringing line before picking up
the handset.
To
resume dictating:
1.
2.
3.
4.
Hang up handset and press the
SPEAKEWMUTE
key.
Lift the OpticMicTMHand Microphone.
Press the key for the line you are using for telephone
dictation.
Press
REWINDFLAY
on the OpticMicTMHand
Microphone,
or
press
[3]
(if required by the system),
to cancel hold.
INTERCOM
To
initiate an intercom call (if intercom
is
provided
by
your dictation system):
After you
log
on, press
[0]
on the keypad.
Press
[0]
to cancel the call and return to dictation.
To answer an intercom call:
When you hear a tone through the speakerphone,
press
[0]
to answer the call.
Press
[O]
to end the call.
7
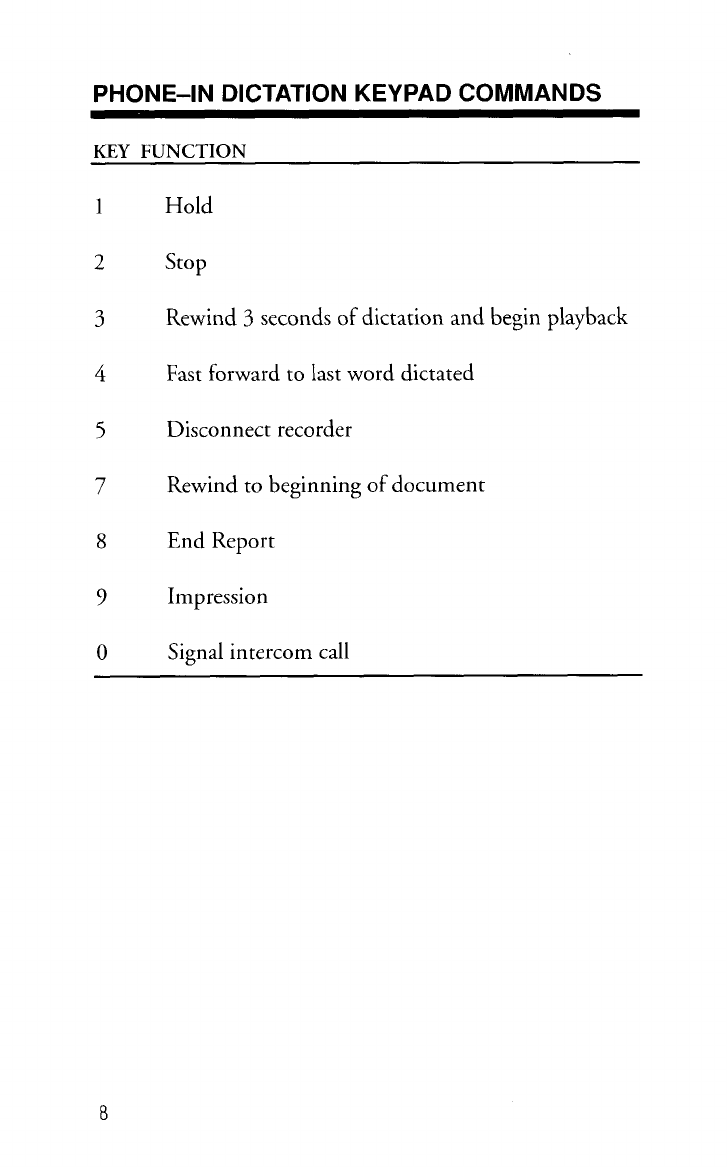
PHONE-IN DICTATION KEYPAD COMMANDS
KEY
FUNCTION
1
Hold
2
stop
3
Rewind
3
seconds
of
dictation and begin playback
4
Fast forward to last word dictated
5
Disconnect recorder
7
Rewind to beginning
of
document
8
End Report
9
Impression
0
Signal intercom call
8
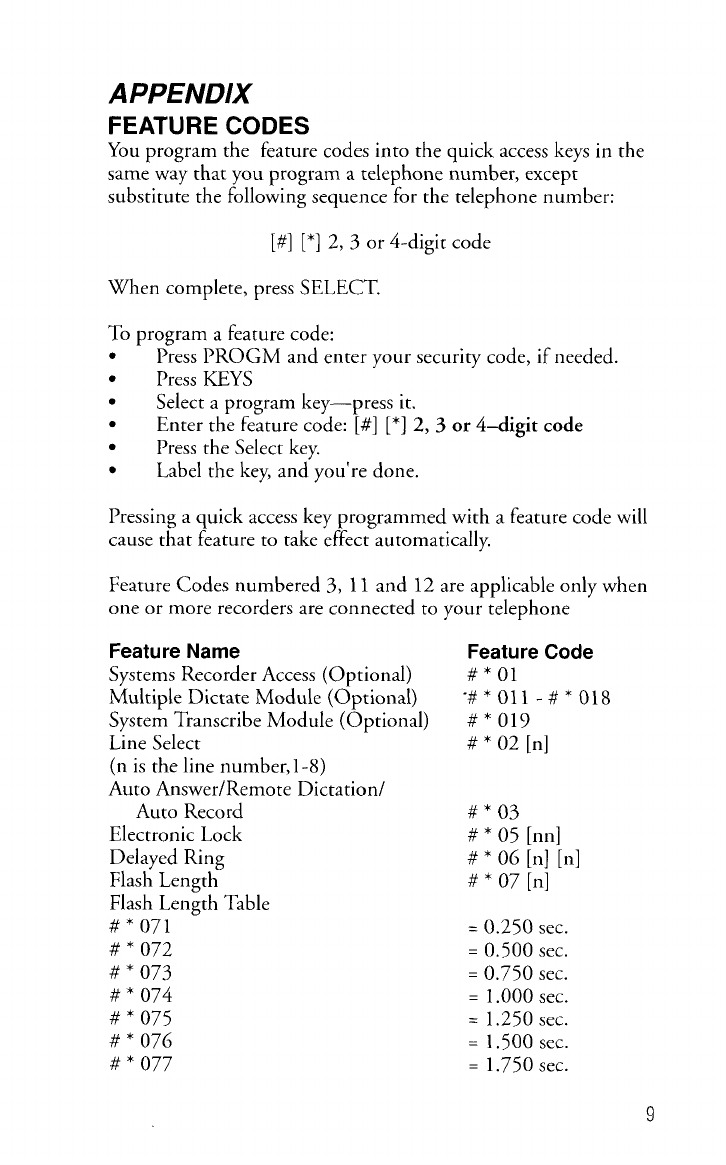
APPENDIX
FEATURE
CODES
You program
the
feature codes into the quick access keys in the
same way
that
you program a telephone number, except
substitute the following sequence for the telephone number:
[#I
[*]
2,
3
or 4-digit code
When complete, press
SELECT.
To
program a feature code:
Press
KEYS
Press the Select key.
Press PROGM and enter your security code,
if
needed.
Select a program key-press it.
Enter the feature code:
[#]
[*I
2,
3
or
4-digit
code
Label
the
key, and you're done.
Pressing a quick access key programmed with a feature code will
cause that feature
to
take effect automatically.
Feature Codes numbered
3,
11
and
12
are applicable only when
one or more recorders are connected to your telephone
FeatureName
Systems Recorder Access (Optional)
Multiple Dictate Module (Optional)
System Transcribe Module (Optional)
Line Select
(n
is
the line number,1-8)
Auto Answer/Remote Dictation/
Auto Record
Electronic Lock
Delayed Ring
Flash Length
Flash Length Table
#
*
071
#
*
072
#
*
073
#
*
074
#
*
075
#
*
076
#
*
077
FeatureCode
#*01
'#*011-#*018
#
*
019
#
*
02 [n]
#
*
03
#
*
05 [nn]
#*
06
[n] [n]
#
*
07
[n]
=
0.250 sec.
=
0.500
sec.
=
0.750 sec.
=
1.000
sec.
=
1.250 sec.
=
1.500
sec.
=
1.750
sec.
9

#
*
078
#
*
079
Headset Answer
#*
11
Auto Answer Monitor
#*
12
Automatic Directory Entry
#*
14
Timer
#*
16
Hands Free Dictate (Optional)
#*
19
=
2.000
sec.
=
2.250
sec.
NetworkManagerTMsoftware FeatureCodes
The following Feature Codes apply only when your telephone is
connected to the Network ManagerTM.(Seethe Operating
Instructions for the ConnexionB Computer and Network
ManagerTMSoftware.)
Billing
Message Retrieval
Start Network Manager
Deliver Message
View Directory Entry
Access Create New Message Screen
View Master Directory
Intra-Telephone Message Delivery
Sending Priority Messages-
Send Message to
PC
Send Appointment Calendar
enter a
P
after entering
#*
13
#*
15
#
*
21
#
*
22
#
*
23
#
*
24
#
*
25
#
*
30
thru #
*
53
#
*
30
-#*
53
#*
54
#*55
Digital ExpressTMSystem Feature Codes
Use
these Feature Codes with the Digital ExpressTMsystem. For
more information, refer to the Digital ExpressTMSystem
Operating Instructions. Press the QuickAccess key after you
connect with the system and before you enter your user
ID.
Transcribe
Bar Code Reader
#*
18
#*
1807
(Refer to the ConnexionsB System 'Telephone
manual for a detailed explanation of each Feature
Code.)
10

INDEX
Bar Code
Feature Code,
1
Scanning,
4
Displaying,
1
Unsuccessful Scan,
4
SuccessfulScan,
4
Code
39,
ii
Code
3-of-9
,
ii
Dictation
Answering Call during,
7
System Recorder,
1,
6
Telephone,
6
Disconnect,
8
End Cue,
6,
8
Ending a Rreport,
6
Fast Forward, Reviewing Dictation,
3
Feature Codes
list
of,
9
To
Program,
1,9
Hold,
8
Impression cue,
5,
8
Insert,
3
Intercom,
7,
8
Keypad Commands,
8
Log
Off,
6
Priority,Assigning,
5
Record Singlerecorder access,
2
Record Lock,
2
ReviewingDictation,
3
RewindlPlay, ReviewingDictation,
3
RewindlAutoplayback,
8
Stop recording,
2,
8
System, Single Recorder Access,
2
System recorders,
iii
11
CUSTOMER SATISFACTIONGUARANTEE
The Dictaphone Corporation is committed to providing you with the worlds finest
products backed by our guarantee of your complete satisfaction The Dictaphone
guarantee is provided
to
all of our customers onall of our products, for a period of
90
days following installation Thereafter, you have the option to
annually extend this guarantee for up to five years by purchasin
annual maintenance agreements The guarantee ensures that
you will be satisfied with the utilization of the productwithin
your establishment If the product does not perform to
specifications for any reason, Dictaphone will repair the
product at no additional cost to you Should we be unable to
promptly effect a repair, we will replace the product at no
additional cost to you If the replacement product also does not
meet Dictaphone specifications we will removethe product and
give you a full refund
Our commitment to your satisfaction also extends beyond product performance Any
other problems or concerns that you might have will be resolved promptly Your billing
statements will be accurate and easily understood Any telephone calls
or
written
communicationsthat you may generate will be answered in a prompt and courteous
manner
Dictaphone is committed to makingyou a permanent customer of our company If, in
your opinion, we have lapsed inany way regarding this guarantee and policy of product
quality and customer satisfaction, please call the office of the President at (800)-343-
5838 We won't be satisfied until you re satisfied
LIMITEDWARRANTY
For
equipment other than portables, Dictaphonewill (a) for a period of ninety
(90)
days
from the date of delivery make at its expense all necessary adjustments, repairs and
parts replacements not occasioned by accident, misuse or casualty, and (b) for a period
of nine
(9)
months after said ninety
(90)
day period, Dictaphone will replace without
charge any parts (except platens, ribbons, print wheels and non-rechargeable batteries)
which become broken or defective except by reason of accident,misuse
or
casualty
Any labor, transportation
or
adJUStmentrequired during such nine
(9)
month period for
the installation of said parts shall beperformed by Purchaser or at Purchasersexpense
Dictaphone's obligations during such nine
(9)
month period shall be limited to repair
or
replacement of broken or defective parts
Dictaphone's obligationshereunder are limited
as
set forth hereinabove The foregoing
are Purchasers exclusive remedies Dictaphoneassumes no liabilityfor special
or
consequential damages This LimitedWarranty applies only (a) to new equipment and
(b) when recommended recording media are used and when all work is performed by
authorized Dictaphone personnel Purchaser may obtain service coverage beyond the
service
to
be performed hereunder through Dictaphone'sAssured Performance Plan
12

Other Dictaphone Microphone manuals


