DIG R750 User manual

1210 Activity Drive
Vista, CA 92081, USA
Website: http://www.digcorp.com
e-mail: [email protected]
0105 DIG CORP 26-006
Printed in the USA
1-800-322-9146 FAX: 760-727-0282
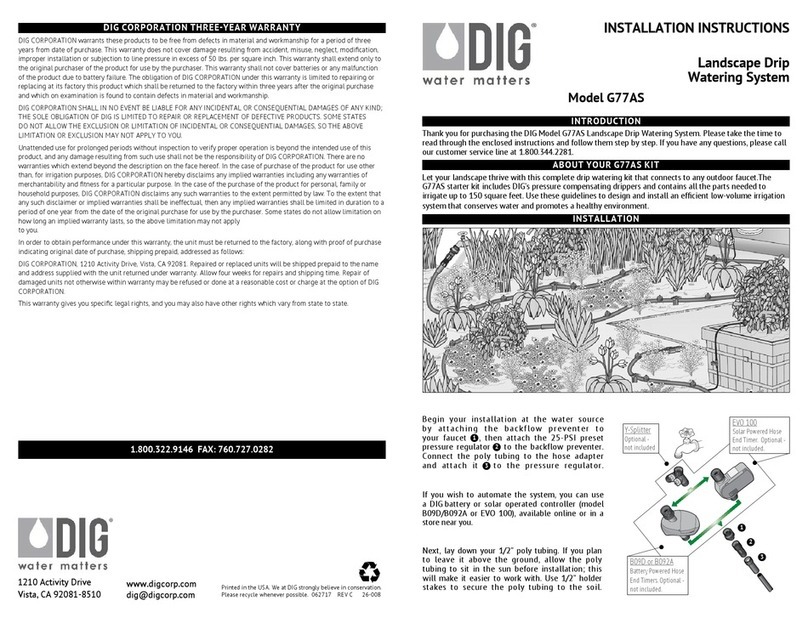
DIG CORPORATION 3 YEAR WARRANTY
INTRODUCTION / INTRODUCCIÓN
THANK YOU for purchasing the DIG model R750 Flowerbed Watering Kit.
Please take the time to read through the enclosed instructions and follow them
step-by-step. If you have any questions, please call our customer service line at
1-800-344-2281. Use R750 Flowerbed Watering Kit to maximize your efficient
use of water and have abundant growth in your gardens. If you decide to
expand your system, all the necessary parts are available individually.
GRACIAS por comprar el modelo R750 Flowerbed Watering Kit de DIG. Por
Favor tome el tiempo de leer las instrucciones incluidas y de seguirlas paso
a paso. Si usted tiene algunas preguntas, por favor llame a nuestra línea de
servicio al cliente al 1-800-344-2281. Utilice el R750 Flowerbed Watering Kit
para maximizar el uso del agua y para tener crecimiento abundante en sus
jardines. Si usted Decide extender su sistema, todas las partes necesarias están
disponibles individualmente.
STEP-BY-STEP INSTALLATION / INSTALACIÓN PASO A PASO
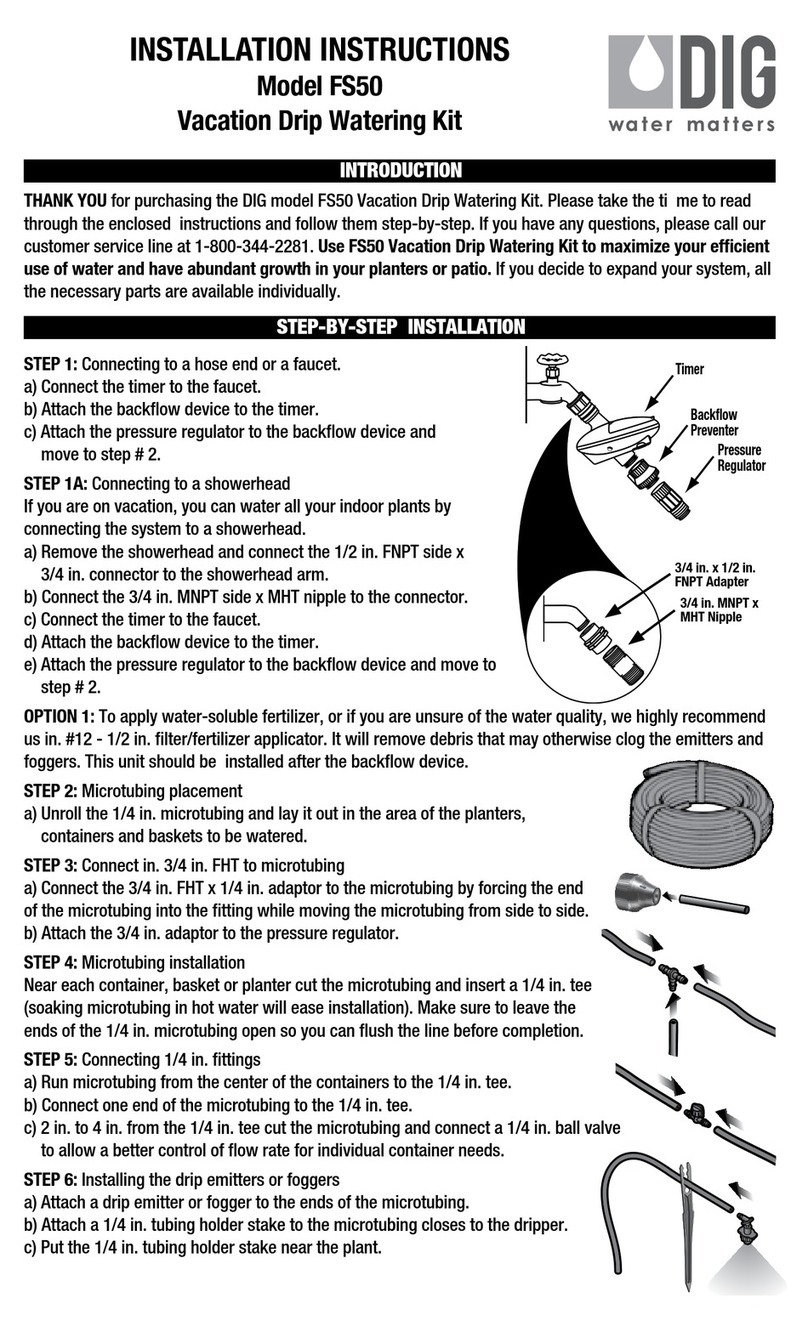
STEP 1: Connect the 3/4” FHT x MNPT backflow device to the faucet.
PASO 1: Conecte el dispositivo de prevención de reflujo al grifo.
STEP 2: Attach the pressure regulator with FNPT to
the backflow device.
PASO 2: Acople el regulador de presión con la rosca
para tubo al dispositivo de prevención de reflujo.
OPTION 1: To automate, first install our battery-operated
controller model 9001D or 7001, and then connect the
backflow device.
OPCIONAL 1: Para que funcione en forma automática, instale
primero nuestro controlador a pilas modelo 9001D o 7001.
Después añada el dispositivo de prevención de reflujo.
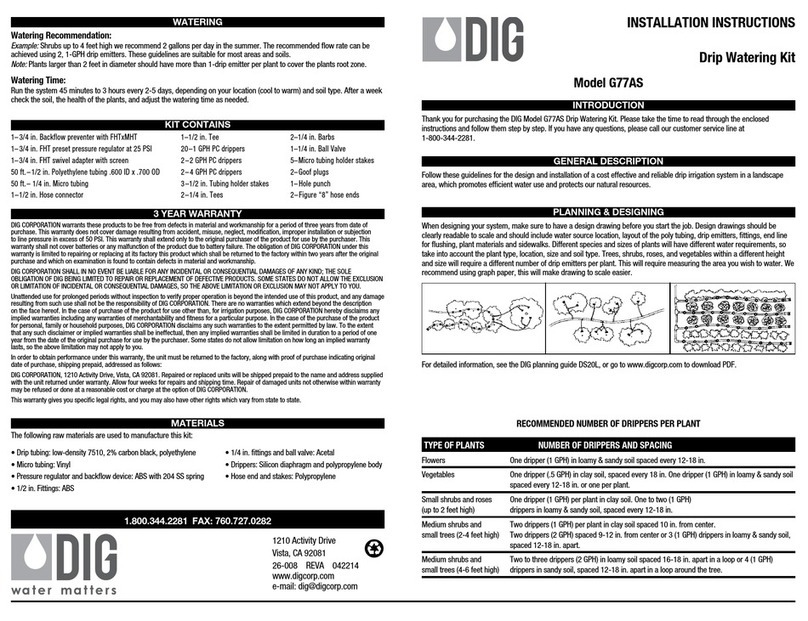
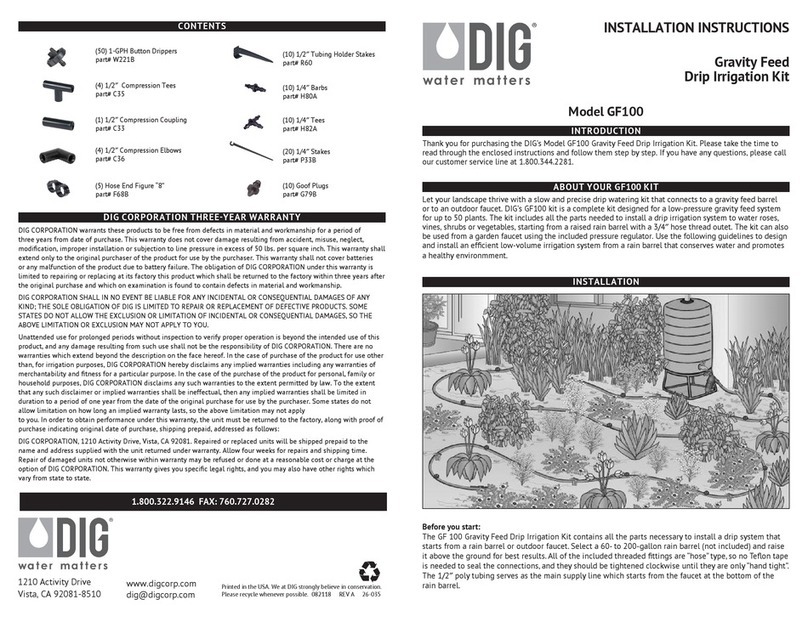
KIT CONTAINS: 2-90 degree and 4-180 degree microsprayers on adjustable
flow stakes, 2-360 degree adjustable flow sprayers, 50’ of ½” polytubing, 8- 2’
microtubing with ¼” barb, 1 backflow device, 1 pressure regulator, 1 swivel
adaptor, 1-½” tee, 1 punch, 3-1/2” tubing holders, 2 hose ends, 2 plugs, and
instruction manual.
EL KIT CONTIENE: Dos microaspersores de 90° y quatro de 180° en estacas
con regulador de flujo, dos aspersores de flujo regulable de 360°, 50 pies de
tubo de polietileno de 1/2”, ocho trozos de microtubo de 2 pies con elemento
de sujeción de 1/4”, un dispositivo de prevención de reflujo, un regulador de
presión, un adaptador giratorio, un conector en T de 1/2”, dos conectes en T de
1/4”, un punzón, tres sujetadores para tubo de 1/2”, dos extremos de manguera,
dos tapones, manual de instrucciones.
DIG CORPORATION warrants these products to be free from defects in material and workmanship for a period of three
years from date of purchase. This warranty does not cover damage resulting from accident, misuse, neglect, modification,
improper installation or subjection to line pressure in excess of 100 PSI. This warranty shall extend only to the original
purchaser of the product for use by the purchaser. This warranty shall not cover batteries or any malfunction of the product
due to battery failure. The obligation of DIG CORPORATION under this warranty is limited to repairing or replacing at its
factory this product which shall be returned to the factory within three years after the original purchase and which on
examination is found to contain defects in material and workmanship.
DIG CORPORATION SHALL IN NO EVENT BE LIABLE FOR ANY INCIDENTAL OR CONSEQUENTIAL DAMAGES OF ANY KIND;
THE SOLE OBLIGATION OF DIG BEING LIMITED TO REPAIR OR REPLACEMENT OF DEFECTIVE PRODUCTS. SOME STATES DO
NOT ALLOW THE EXCLUSION OR LIMITATION OF INCIDENTAL OR CONSEQUENTIAL DAMAGES, SO THE ABOVE LIMITATION OR
EXCLUSION MAY NOT APPLY TO YOU.
Unattended use for prolonged periods without inspection to verify proper operation is beyond the intended use of this
product, and any damage resulting from such use shall not be the responsibility of DIG CORPORATION. There are no
warranties which extend beyond the description on the face hereof. In the case of purchase of the product for use other
than, for irrigation purposes, DIG CORPORATION hereby disclaims any implied warranties including any warranties of
merchantability and fitness for a particular purpose. In the case of the purchase of the product for personal, family or
household purposes, DIG CORPORATION disclaims any such warranties to the extent permitted by law. To the extent that
any such disclaimer or implied warranties shall be ineffectual, then any implied warranties shall be limited in duration to
a period of three years from the date of the original purchase for use by the purchaser. Some states do not allow limitation
on how long an implied warranty lasts, so the above limitation may not apply to you. In order to obtain performance under
this warranty, the unit must be returned to the factory, along with proof of purchase indicating original date of purchase,
shipping prepaid, addressed as follows: DIG CORPORATION, 1210 Activity Drive, Vista, CA 92081. Repaired or replaced units
will be shipped prepaid to the name and address supplied with the unit returned under warranty. Allow four weeks for
repairs and shipping time. Repair of damaged units not otherwise within warranty may be refused or done at a reasonable
cost or charge at the option of DIG CORPORATION. This warranty gives you specific legal rights, and you may also have
other rights which vary from state to state.
INSTRUCTION MANUAL
MANUAL DE INSTRUCCIÓN
Model R750
Modelo R750
Flowerbed Watering Kit
ADJUSTABLE FLOW MICROSPRAYER
for watering borders, under canopies, and flowerbeds
KIT DE RIEGO DE ARRIATES MICROASPERSORES DE FLUJO REGULABLE
Para regar canteros, arriates y debajo de la vegetación.

OPTION 2: To apply water-soluble fertilizer, or if you are unsure of the water
quality, we highly recommend using #12 - ¾” filter/fertilizer applicator. It will
remove debris that may otherwise clog the emitters and foggers. This unit
should be installed after the backflow device.
OPCIONAL 2: Para aplicar el fertilizante soluble en agua, o si usted esta
inseguro de la calidad del agua se recomienda altamente en usar el filtro #12-
3/4” con aplicador de fertilizante. Quitara la basura que puede estorbar de otra
manera al vaporizador o a los goteros. Esta unidad se debe instalar después del
dispositivo de la expulsión.
STEP 3: Connect the #72 ¾” FNPT swivel adaptor to the
pressure regulator, and then connect the polytubing by
forcing the polytubing into the swivel adaptor while moving
the polytubing from side to side.
PASO 3: Conecte el adaptador giratorio de 3/4” al
regulador de presión despues conecte el tubo de polietileno a presión en el
adaptador giratorio con un movimiento lateral.
STEP 4: Unroll the ½” polytubing and lay it out in the area to
be watered. Use # 60 stakes to secure the polytubing to the
ground.
PASO 4: Desenrolle el tubo de polietileno de 1/2”y dispóngalo
en el área que desea regar. Utilice las estacas #60 para fijar el
tubo de polietileno al suelo.
STEP 5: Every 4’, or any other spacing desired, punch
holes in the polytubing by holding the polytubing in one
hand and the punch with the other. Apply just enough
pressure on the punch, while rotating it back and forth
to create a hole in one side of the polytubing.
PASO 5: Si lo desea, tome el tubo con una mano y
el punzón con la otra, y perfore el tubo de polietileno
cada 4 pies o cualquier distancia deseada. Haga la
presión suficiente con el punzón mientras lo gira de
lado a lado para perforar un orificio en un lado del tubo de polietileno.
STEP 6: Insert the barb end on the microtubing into the
½” polytubing.
PASO 6: Inserte el extremo de los microtubos en el tubo
de polietileno con un espacio de 4 a 6 pies.
STEP 7: Cut the microtubing to the right length, then
connect the adjustable stakes with the sprayer to the ¼”
microtubing. Note: Some assembly may be required.
PASO 7: Corte el microtubo a la longitud adecuada
despues conecte las estacas ajustables con los aspersores
al microtubo de 1/4”.
STEP 8: Cut the microtubing to the right length, then connect
the adjustable full circle sprayer to the ¼” microtubing.
PASO 8: Corte el microtubo a la longitud adecuada despues
conecte los aspersores regulables de círculo completo al
microtubo de 1/4”.
STEP 9: Use the ½” tee to set up a three way
layout of the ½” polytubing.
PASO 9: Use el conector en T de 1/2” para
configurar el tubo de polietileno de 1/2” para un
flujo de tres vías.
STEP 10: Flush the line, and close the end of the polytubing using the hose end.
Turn the water on again and adjust the flow, and
spray diameter on each sprayer by the knob on the
top of the stake.
PASO 10: Purgue la línea y obture el extremo del tubo de polietileno que se
conecta a la manguera. Vuelva a abrir el agua y ajuste el diametero y el flujo de
cada aspersor, girando la perilla en la cima dela estaca.
GOOF PLUGS # 57
Use to plug holes in the ½” polytubing or to close the
end of the ¼” microtubing.
TAPONES # 57
Usar para tapar los hoyos en el tubo de polietileno de
1/2” o el extremo del microtubo de 1/4”.
½” STAKE HOLDER # 60
Use to hold the ½” polytubing to the ground.
SUJETADORES DE ESTACA DE ½” # 60
Para detener el tubo de polietileno de 1/2” al suelo.
Other DIG Lawn And Garden Equipment manuals
Popular Lawn And Garden Equipment manuals by other brands

Sunforce
Sunforce SOLAR user manual

GARDEN OF EDEN
GARDEN OF EDEN 55627 user manual

Goizper Group
Goizper Group MATABI POLMINOR instruction manual

Rain Bird
Rain Bird 11000 Series Operation & maintenance manual

Cub Cadet
Cub Cadet BB 230 brochure

EXTOL PREMIUM
EXTOL PREMIUM 8891590 Translation of the original user manual

Vertex
Vertex 1/3 HP Maintenance instructions

GHE
GHE AeroFlo 80 manual

Land Pride
Land Pride Post Hole Diggers HD25 Operator's manual

Yazoo/Kees
Yazoo/Kees Z9 Commercial Collection System Z9A Operator's & parts manual

Premier designs
Premier designs WindGarden 26829 Assembly instructions

Snapper
Snapper 1691351 installation instructions


