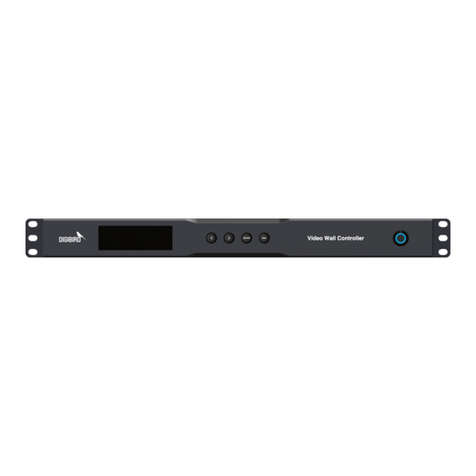
DigiBird DB-RC4 v2 User manual


All rights reserved by DigiBird®1

Research & Development, Manufacturing and Sales
Video & Image Processing
All rights reserved by DigiBird®
2
NOTICES…………………………………………………………………………………………………………………4
I. Introduction……………………………………………………………………………………………………………6
1.1 About This Guide………………………………………………………………………………………………………………6
1.2 About the DB-RC4 v2 Video Wall Controller…………………………………………………………………………………6
1.3 Key Features of the DB-RC4 v2 Video Wall Controller……………………………………………………………………6
1.4 Video Wall Layout Examples…………………………………………………………………………………………………7
II. The DB-RC4 v2 Hardware……………………………………………………………………………………………8
2.1 Unpacking and inspection……………………………………………………………………………………………………8
2.2 Hardware Overview……………………………………………………………………………………………………………8
2.2.1 Technical Specification……………………………………………………………………………………………………9
2.2.2 Front Panel…………………………………………………………………………………………………………………9
2.2.3 Rear Panel…………………………………………………………………………………………………………………9
2.2.4 Side View………………………………………………………………………………………………………………10
2.2.5 Optional Hardware (sold separately)……………………………………………………………………………………10
2.3 DB-RC4 v2 Hardware Installation………………………………………………………………………………………………11
2.3.1 Factory Default Settings…………………………………………………………………………………………………11
2.3.2 Installation Steps…………………………………………………………………………………………………………11
2.4 Connection Diagram…………………………………………………………………………………………………………12
III. About the DB-RC4 v2 Control and Design Software…………………………………………………………12
3.1 Computer System Requirements……………………………………………………………………………………………13
3.2 Software and Driver: Installing and Uninstalling…………………………………………………………………………13
3.2.1 Installing the Driver………………………………………………………………………………………………………13
3.2.2 Installing the Software……………………………………………………………………………………………………14
3.2.3 Uninstalling the Software………………………………………………………………………………………………16
IV. Running the Software……………………………………………………………………………………………18
V. Software Operation………………………………………………………………………………………………18
5.1 Software Overview……………………………………………………………………………………………………………19
5.2 Mounting Wall Size Setting…………………………………………………………………………………………………20
5.3 Input Resolution Settings……………………………………………………………………………………………………22
5.4 Monitor Settings………………………………………………………………………………………………………………24
5.4.1 Monitor Selection………………………………………………………………………………………………………24
5.4.2 Adding New Monitors…………………………………………………………………………………………………26
5.4.3 Delete a Custom Monitor………………………………………………………………………………………………27
5.5 Physical Layout Design and Settings………………………………………………………………………………………28
5.5.1 Toolbar for Physical Layout Settings…………………………………………………………………………………30
5.5.2 Centered Icon……………………………………………………………………………………………………………30
5.5.3 Rotate Icon………………………………………………………………………………………………………………30
5.5.4 Sync to Capture Regions Icon…………………………………………………………………………………………31
5.6 Capture Regions Settings……………………………………………………………………………………………………33
5.6.1 Moving and Resizing the Capture Regions……………………………………………………………………………33
5.6.2 Zooming in or out the Capture Regions Window……………………………………………………………………33

All rights reserved by DigiBird®3
5.6.3 Context Menu of the Capture Regions………………………………………………………………………………34
5.6.4 Layering the Capture Regions…………………………………………………………………………………………35
5.6.5 Flip Horizontally or Vertically……………………………………………………………………………………………36
5.6.6 Capture Regions Properties……………………………………………………………………………………………37
5.6.7 How to Calculate the Pixel Size and Position of a Capture Region………………………………………………37
5.7 Adding a Device (DB-RC4 v2)…………………………………………………………………………………………………39
5.8 Apply……………………………………………………………………………………………………………………………41
5.9 Refresh…………………………………………………………………………………………………………………………41
5.10 Conguration Template Management……………………………………………………………………………………42
5.11 EDID Management…………………………………………………………………………………………………………42
5.11.1 Read EDID……………………………………………………………………………………………………………42
5.11.2 Write EDID to Input……………………………………………………………………………………………………43
5.11.3 Open EDID File…………………………………………………………………………………………………………43
5.12 Test……………………………………………………………………………………………………………………………44
5.13 Language……………………………………………………………………………………………………………………44
5.14 About…………………………………………………………………………………………………………………………44

Research & Development, Manufacturing and Sales
Video & Image Processing
All rights reserved by DigiBird®
4
NOTICES
Important Notices
Thank you for purchasing this DigiBird ®product. To prevent damage to your DigiBird product or injury to personnel
when operating this equipment, please read the following safety precautions and user guide prior to operation.
This manual includes detailed instructions for software operation. Please refer to this manual or contact DigiBird if
you have any questions. DigiBird reserves the right to make changes in the hardware, software, packaging, and any
accompanying documentation without prior written notice.
Copyright ©DigiBird®. All rights reserved.
The copyrights of the software indicated in this manual are reserved by DigiBird. They are protected by patent and
copyright laws.
Without written notice or authorization, any entity or person shall not copy, quote, duplicate, print or translate
this manual and shall not share or publish it through any unauthorized manner. Without DigiBird or its licensor’s
authorization, any entity or person shall not copy, distribute, modify, extract, decompile, disassemble, decode, reverse
engineer, rent, transfer or re-license to another entity or person, except for the conditions stipulated by Law or
government requests.
Trademarks
All trademarks noted in this guide are the properties of their respective owners.
The DigiBird logo, name and other DigiBird trademark rights are reserved.
Limitations
This manual is based on “the current condition”, except for the stipulation of law. DigiBird does not provide any
ostensive or implicit guarantee, including but not limited to the guarantees of merchantability or specific purpose.
Under the scope of law, DigiBird assumes no responsibility for any inaccuracies that may be contained in this manual.
In no event will DigiBird be liable for direct, indirect, special, incidental, or consequential damages resulting from any
defect or omission in this manual, even if advised of the possibility of such damages. Nor shall DigiBird be liable for any
compensation for any income, information, business reputation or any anticipated saving cost for the users.
Third-party Software
Regarding any third-party software or applications referred to in this manual that DigiBird does not own or hold the
licensed copyright to, DigiBird cannot provide any guarantee for the operation of third-party software or applications
and does not provide any technical support for them. In no event will DigiBird be liable or take responsibility for the
handling or usage of these third-party software or applications.
The service of third-party software or applications may fail or crash. In no event will DigiBird be liable for the usability
of those software or applications. In no case will DigiBird be liable for the validity, quality or other services of software
or applications modied by the user.

All rights reserved by DigiBird®5
Safety Precautions
To prevent damage to your DigiBird product or injury to personnel operating the equipment, please read the safety
precautions prior to operation.
1) Make sure your PC conguration meets the minimum requirements indicated in this manual.
2) Make sure the operating system is compatible with the requirements indicated in this manual.
3) Make sure your operating system is safe, stable and free of viruses.
4) Close other running applications when installing this software.
Notications
The following notications are used in this guide:
I. Introduction
ATTENTION: Attention indicates a situation that may damage or destroy the product or associated equipment.
NOTE: A note draws attention to important information.

Research & Development, Manufacturing and Sales
Video & Image Processing
All rights reserved by DigiBird®
6
I. Introduction
Thank you for choosing the DigiBird DB-RC4 v2. Before you begin conguring your DB-RC4 v2 for the rst time, please
read completely through the document to become familiar with its features. This section gives an overview of the user
guide and features of the DB-RC4 v2 Video Wall Controller and Control & Design Software. Topics include:
About this Guide
About the DB-RC4 v2
Key Features of the DB-RC4 v2
Video Wall Layout Examples
1.1 About This Guide
This guide provides detailed information about the DB-RC4 v2 Hardware and DB-RC4 v2 Control and Design Software,
including software installation and conguration. This guide also describes how the software controls the DB-RC4 v2
Video Wall Controller. The features and functionality described in this guide are based on version 2.0 of the DB-RC4 v2
Control and Design Software with DB-RC4 v2 rmware version 2.0.0.0 and later. For the latest details on rmware and
software, and for additional updates, visit our website at www.digibirdtech.com.
1.2 About the DB-RC4 v2 Video Wall Controller
The DigiBird DB-RC4 v2 Video Wall Controller is the simplest and most cost-effective solution to build an eye-catching
and creative video wall. It is an ideal video wall solution for retail stores, shopping malls, restaurants, sport bars, hotel
lobbies, trade shows and entertainment venues.
The DB-RC4 v2 breaks the limitations of the traditional video wall alignment. Unlike traditional video walls, the DB-RC4
v2’s displays and each of its outputs can be independently ipped or rotated 45°, 90°, 135°, 180°, 225°, 270°or 315°. It
also supports the alignment of varying resolutions and display sizes to build a distinctive, asymmetrical video wall. The
DB-RC4 v2 is a compact video wall controller/processor that features one single or dual-link DVI input that provides
stunning 4K × 4K input capability and can exibly route the input to four output displays.
1.3 Key Features of the DB-RC4 v2 Video Wall Controller
• Controls up to four displays in a wall conguration.
• Cascades multiple units to create walls with more than four displays.
• Bezel compensation for input image across screens.
• Supports image rotation and mirroring. Each output can be independently rotated 45°, 90°, 135°, 180°, 225°,
270°or 315° and ipped horizontally or vertically.
• The displays aligned in the video wall can be of different sizes and of native resolution.
• Supports automatic frame lock. When the timings of the four monitors are the same, genlock will be activated.
The genlock feature guarantees uid motion video and minimizes latency to a single frame.
• Accepts Single-Link or Dual-Link DVI and HDMI input signal formats. (A DVI-to-HDMI adapter is required.)
• Ultra high input resolutions up to 4K x 4K (4088 pixels x 4088 lines).
• Supports connections to four DVI-I (VGA, DVI) displays, and all VESA resolutions (up to 1920×1200@60Hz) are
supported. The four different output resolutions can be supported.
• The input source can be cropped at the user’s discretion and copied to an output monitor. The smallest
cropping area is one pixel.
• Supports exible EDID management.
• Automatic input and output signal detection.
• Congure using windows-based software installed on a PC connected via a USB link.
• Durable, stainless steel chassis.
• Windows®XP, Windows®7 (32, 64-bit), Windows®8 (32, 64-bit), Windows®10 (32, 64-bit) compatible.

All rights reserved by DigiBird®7
1.4 Video Wall Layout Examples
Figure 1.4 Video Wall Layout Examples

Research & Development, Manufacturing and Sales
Video & Image Processing
All rights reserved by DigiBird®
8
II. The DB-RC4 v2 Hardware
2.1 Unpacking and inspection
Your packing box should contain the following items:
Items Quantity
DigiBird DB-RC4 v2 enclosure 1x
DB-RC4 v2 AC/DC Switching Power Adapter 1x
Standard Computer Power Cord, 10A, 18AWG (NEMA 5-15P to IEC-320-C13), 6-ft. (American
Standard) or 1× CEE7/7 Male Plug to 2 Way IEC 60320 C13 Connector 6 Feet 10a/250v power cord
(European Standard)
1x
USB 2.0 Cable Type A Male to Type B Male 5 feet, Black 1x
DigiBird CD containing Software Installation File and User Guide (PDF version) 1x
Warranty Card 1x
User guide and Software are also available on www.digibirdtech.com.
Before connecting any inputs or outputs, it is advised to power on the unit. Should you encounter any
problems powering on the unit, immediately contact your local distributor or dealer.
The DB-RC4 v2 enclosure will arrive boxed with internal foam for protection during shipping.
You are encouraged to retain the box and all packing material so the unit can be returned in the
unlikely event that repairs should ever become necessary.
2.2 Hardware Overview
2.2.1 Technical Specication
Connectors
(1) Single-Link or Dual-Link DVI-I female for input
(4) DVI-I female for output
(1) power connector female
(1) USB-B female
Indicators (1) Power LED, (1) Input LED, (1) Status LED
Outputs 4 x Single-Link DVI or analog RGB outputs, up to 1920×1200@60Hz
Input Resolution Up to 4K×4K
Input Clock Rate 330MHz
Input Bandwidth 9.9Gbps
Arbitrary Upscaling Unlimited upscaling for original cropped area
Operating Humidity 90% non-condensing
Operating Temperature 32º to 104ºF (0º to 40ºC)
Power
Input: 100-240 VAC, 1.4 Amps
Output: 12 VDC, 5 Amps
Consumption: 40 Watts

All rights reserved by DigiBird®9
Width 8.86"(225mm)
1
2
3
1 2 3 2 4
252
1
Height 1.75"(44.5mm)
1
2
3
Dimensions 1.75”H x 8.86”W x 8.66”D (44.5mm x 225mm x 220mm) without rack mount ears
1.75”H x 10.24”W x 8.66”D (44.5mm x 260mm x 220mm) with rack mount ears
Package Dimensions 3.74”H x 17.72”W x 12.20”D (95mm x 450mm x 310mm)
Net Weight 1.26 Kg or 2.78 lbs
Gross Weight 2.87 Kg or 6.33 lbs
2.2.2 Front Panel
Figure 2.2.2 Front Panel
DVI IN indicator LED: When the DVI IN LED lights orange, it indicates a valid input source is connected to the input
interface of the DB-RC4 v2.
Status indicator LED: Solid-state lighting indicates the DB-RC4 v2 is running properly. When the LED is blinking, it
means the detected input resolution doesn’t match the default or congured input resolution. The user should follow
the instructions and modify the conguration using the software.
Power indicator LED: This LED lights orange when the DB-RC4 v2 is powered on.
2.2.3 Rear Panel
Figure 2.2.3 Rear Panel
USB Type B Port: This USB Type B port is compatible with USB 1.0 and 2.0. The USB port is used to connect the
DB-RC4 v2 to your control PC. A USB Type A to Type B cable is supplied with the DB-RC4 v2. The DB-RC4 v2 can be
controlled via the USB port while using the windows-based software.

Research & Development, Manufacturing and Sales
Video & Image Processing
All rights reserved by DigiBird®
10
DVI-I Output Port # 1 to # 4: The four black DVI-I Output ports are used to connect the DB-RC4 v2 to the output
monitors or displays. The DVI-I outputs support both DVI and analog RGB (VGA) signals.
DVI IN Port: The DVI IN port (white) is applied to connect the input source. The DB-RC4 v2 supports Single-Link
DVI-D, Dual –Link DVI-D and HDMI (not HDCP compliant) signals. When connecting an HDMI source, like a PC or
laptop with an HDMI graphics card, an HDMI to DVI adapter is needed. Use a DVI-I connector as it is compatible with
most DVI cables.
Power Socket: The power socket is used to connect the DB-RC4 v2 power adapter. The parameters of the AC-DC
switching power adapter is shown below:
Input: 100-240 VAC, 50/60hz, 1.4A Output: 12V DC, 5.0A, 60W Max.
Ventilation Hole: System fan and ventilation hole. Do not obstruct the ventilation hole as it may cause the DB-RC4
v2 to overheat.
2.2.4 Side View
The following gures show both sides of the DB-RC4 v2 ventilation grilles. Do not obstruct the ventilation grilles under
any circumstances.
Figure 2.2.4 Side View
2.2.5 Optional Hardware (sold separately)
Depending on your needs, you may also require the following hardware:
A. HDMI to DVI adapter for DB-RC4 v2 input B. DVI to VGA adapter for DB-RC4 v2 outputs
Figure 2.2.5 A: HDMI Male to DVI-I Dual Link Female Adapter Figure 2.2.5 B: DVI-I Female to VGA Male Adapter
Ventilation Grilles
Depth 8.66"(220mm)
2
3
4
5

All rights reserved by DigiBird®11
DVI-I Output Port # 1 to # 4: The four black DVI-I Output ports are used to connect the DB-RC4 v2 to the output
monitors or displays. The DVI-I outputs support both DVI and analog RGB (VGA) signals.
DVI IN Port: The DVI IN port (white) is applied to connect the input source. The DB-RC4 v2 supports Single-Link
DVI-D, Dual –Link DVI-D and HDMI (not HDCP compliant) signals. When connecting an HDMI source, like a PC or
laptop with an HDMI graphics card, an HDMI to DVI adapter is needed. Use a DVI-I connector as it is compatible with
most DVI cables.
Power Socket: The power socket is used to connect the DB-RC4 v2 power adapter. The parameters of the AC-DC
switching power adapter is shown below:
Input: 100-240 VAC, 50/60hz, 1.4A Output: 12V DC, 5.0A, 60W Max.
Ventilation Hole: System fan and ventilation hole. Do not obstruct the ventilation hole as it may cause the DB-RC4
v2 to overheat.
2.2.4 Side View
The following gures show both sides of the DB-RC4 v2 ventilation grilles. Do not obstruct the ventilation grilles under
any circumstances.
Figure 2.2.4 Side View
2.2.5 Optional Hardware (sold separately)
Depending on your needs, you may also require the following hardware:
A. HDMI to DVI adapter for DB-RC4 v2 input B. DVI to VGA adapter for DB-RC4 v2 outputs
Figure 2.2.5 A: HDMI Male to DVI-I Dual Link Female Adapter Figure 2.2.5 B: DVI-I Female to VGA Male Adapter
C. High Quality DVI cables (male-to-male) D. Rack Ears
Figure 2.2.5 C: DVI-I Dual-Link Digital/Analog Cable Figure 2.2.5 D: Rack Ears
2.3 DB-RC4 v2 Hardware Installation
2.3.1 Factory Default Settings
The factory default settings are shown here:
Input EDID Preferred Mode 1920 x 1080 x 60Hz (SMPTE timings)
Output monitor resolution 1920 x 1080 x 60Hz (SMPTE)
Layout Mode Duplicate Mode and No Rotation
The default settings can be modied with the DB-RC4 v2 Video Wall Control and Design Software (RCS). Refer to the
software section in the DB-RC4 v2 user guide that came with your product.
2.3.2 Installation Steps
1) Disconnect all equipment from power sources.
2) (Optional) Mount the DB-RC4 v2 to a rack or other desired place using the optional rack mount ears.
3) Monitors/Displays Installation: Install the monitors or displays at the desired place. A video wall mounting
system could be needed for your specic installation needs. The monitors may be rotated from their traditional
landscape-style placement according to the user’s requirement. It is strongly recommended to employ a
clockwise rotation.
4) Input Connection: Connect the DVI IN port (white, single-link or dual-link DVI) of the rear panel to an input
source, like a graphic workstation, PC or laptop. The DVI input is not compatible with HDCP which means you
cannot use a Blu-ray DVD as an input source.
5) Output Connection: Connect the DVI-I Dual-Link Digital/Analog Cables to the DVI outputs of the rear panel
starting from number 1 to number 4.
6) Control Connection: Connect the USB to the port of the rear panel and to the controlling PC’s port using the
USB Type A to Type B cable.
7) Power Connections:
Connect the DC output connector of the DB-RC4 v2 AC/DC power adapter to the power socket at the rear
panel of the DB-RC4 v2. See Figure 2.3.2 DB-RC4 v2 Power adaptor.
Connect the power cord to the 3-pole AC inlet of the adapter.
Connect the power cord to a reliable source with a voltage between 100 and 240VAC.
8) Power on all connected devices.
9) Install and set up the DB-RC4 v2 control and design software.
10) Use the software to congure the sources and displays for your creative video wall system.

Research & Development, Manufacturing and Sales
Video & Image Processing
All rights reserved by DigiBird®
12
Figure 2.3.2 DB-RC4 v2 Power adaptor
2.4 Connection Diagram
Figure 2.4 Connection Diagram
III. About the DB-RC4 v2 Control and Design Software
The DB-RC4 v2 Control and Design Software is a Microsoft®Windows®-based application used to control the DB-RC4
v2 Video Wall Controller from your computer via a USB cable (compatible with version 1.0 and 2.0).
Some features of the DB-RC4 v2 Control and Design Software include:
• User interface is organized into a series of tasks so that you can easily navigate them and set up the video wall.
• Supports quick setup. Once the dimensions and positions of the monitors are set up, the software is able to
automatically calculate the display area.
• The monitors in the physical layout and the white frames in the capture regions can be moved by using the up
↑, down ↓, left ←and right →arrows on the keyboard.
• The DB-RC4 v2 Control and Design Software provides a monitor database, and most well-known
manufacturers are already included at launch. It also allows users to add their own monitors manually.

All rights reserved by DigiBird®13
• Monitor information such as screen dimensions (in pixels and millimeters), bezel sizes and refresh rates are all
included.
• Supports arbitrary cropping of input sources and previewing of cropped regions.
• A virtual canvas provides a screen layout (physical layout) for the video wall where monitors can be positioned
and rotated.
• Custom video wall congurations can be saved as templates for future recall.
3.1 Computer System Requirements
For the DB-RC4 v2 Control and Design Software to function correctly and reliably, it must be installed on a computer
that meets or exceeds the following criteria:
Minimum Recommended
Operating System Windows®XP 32-bit and 64-bit versions Windows®7 32/64-bit, Windows®8
32/64-bit, Windows®10 32/64-bit
CPU Intel®Pentium®/Celeron®/AMD
Athlon™ Intel®Core™i3 or above
Memory (RAM) 256MB RAM 2GB RAM or above
Hard Disk Free Space 150MB 5G or above
Graphics 1024 x 768, 65K colors
(16-bit)
1024 x 768, 16.7M colors
(32-bit)
CD-ROM DVD-ROM DVD-ROM
Input Microsoft compatible keyboard and
mouse Microsoft compatible keyboard and mouse
3.2 Software and Driver: Installing and Uninstalling
This section contains the following topics:
Installing the Driver Installing the Software Uninstalling the Software Running the Software
3.2.1 Installing the Driver
Before installing the DB-RC4 v2 Control and Design Software, the user must install the USB driver.
The USB driver installation steps are shown below:
1. Copy to your computer the le named “RCSCtrl_2.0” from the CD that came with the DB-RC4 v2.
2. Click the “INSTALL” button to install the driver (Figure 3.2.1 A).
Figure 3.2.1 A: Installation of driver Figure 3.2.1 B: Driver installed
3. When the driver is installed successfully, it will appear in the device manager (Figure 3.2.1 B: Driver installed).

Research & Development, Manufacturing and Sales
Video & Image Processing
All rights reserved by DigiBird®
14
3.2.2 Installing the Software
The Control and Design Software installation file is provided on a CD with your DB-RC4 v2 (it is also available for
download from the DigiBird website at www.digibirdtech.com). Install the program on your computer in the following
way:
1. Copy the le “RCSCtrl_2.0” from the CD to your PC and double-click the icon in Figure 3.2.2 A.
Figure 3.2.2 A: RC4 software icon Figure 3.2.2 B: Select language
2. Select the desired Language and then click “OK”, as shown above in Figure 3.2.2 B.
3. Follow the instructions on the Setup Wizard to complete the software installation, as demonstrated below:
Figure 3.2.2 C:RC4 software setup wizard

All rights reserved by DigiBird®15
Figure 3.2.2 D: Choose install location
Figure 3.2.2 E: Finish

Research & Development, Manufacturing and Sales
Video & Image Processing
All rights reserved by DigiBird®
16
4. After the program is installed successfully, it will generate a shortcut on the desktop:
Figure 3.2.2 F: RC4 Control and Design software shortcut
3.2.3 Uninstalling the Software
The software uninstall steps are explained below:
1. Open the Start Menu by clicking the Start button and then click “All Programs” →“ RC4 Control and Design
Software” →“Uninstall”, as shown:
Figure 3.2.3 A: Uninstall
2. Follow the instructions on the Uninstall Wizard to complete the uninstall as shown in the steps below:

All rights reserved by DigiBird®17
Figure 3.2.3 B: Uninstall
Figure 3.2.3 C: Uninstallation completed

Research & Development, Manufacturing and Sales
Video & Image Processing
All rights reserved by DigiBird®
18
IV. Running the Software
Once the DB-RC4 v2 Control and Design Software has been installed, the user can run the application with any of the
following methods:
• Double-click the DB-RC4 v2 icon (shortcut) on the desktop.
• From the desktop, click Start > All Programs > RC4 Control and Design Software > RC4 Control and Software.
The opening screen below will appear:
Figure 4.0 RC4 Software Interface
You can exit the DB-RC4 v2 Control and Design Software using any of the following methods:
• From the Main Menu, select Exit.
• Or click the “Exit” button at the top left corner of the main application window.
V. Software Operation
This section contains the following topics:
Mounting Wall Size Setting Input Resolution Setting Monitors Setting
Physical Layout Design and Setting Capture Regions Settings EDID Management
Other Software Operations

All rights reserved by DigiBird®19
5.1 Software Overview
Prior to setup of the positions of monitors and capture regions, the user needs to be conversant with the software. The
DigiBird DB-RC4 v2 Control and Design Software application window contains the following elements:
Figure 5.1 A: Software Overview
Menu Bar: includes Start Menu and Customized Toolbars.
Toolbars: includes Conguration Templates, Physical Layout Settings, Capture Regions Settings, Test, Help and
Others.
Monitor Listing Window: the monitors list will be shown here after completing the Monitors Settings. The
trade names and models of the selected monitors will be displayed in the list. See below gure 5.1 B.
The Monitor Listing window can be docked or undocked. Look for the small pushpin in the title bar of the
Monitor Listing window and click it so that the pin is pointing to the left, as shown in the gure below. The
window will now automatically hide itself when it is not being used. See below gure 5.1 C.
Figure 5.1B: Monitor list Figure 5.1 C: Undocked bar
Physical Layout Window: The background of the Physical Layout Window serves as the virtual area for which
video wall monitors will be mounted or placed. The monitors in the Physical Layout window can be dragged
and rotated in the custom designing of the video wall.
Capture Regions Window: The input signal (image or video) will appear here. The input signal can be cropped
and ipped in the Capture Regions window.
System Log Window: The system events will be displayed in the System Log window.
Status Bar: Includes Device ID, prompt message and Input Resolution, etc.
1
2
3
4
5
6
7
Table of contents
Other DigiBird Controllers manuals
Popular Controllers manuals by other brands

DUNIWAY Stockroom
DUNIWAY Stockroom Terranova 906A instruction manual

KUSSMAUL
KUSSMAUL 091-86-1901 manual
AAON
AAON Orion VCCX2 Technical guide
YOKOGAWA
YOKOGAWA STARDOM FCN technical information

GRASS VALLEY
GRASS VALLEY CM 4000 Installation and operating manual
ROBWAY
ROBWAY RCI-4100 Operation and installation
