manuals.online logo
Brands
  1. Home
  2. •
  3. Brands
  4. •
  5. Nice
  6. •
  7. Controllers
  8. •
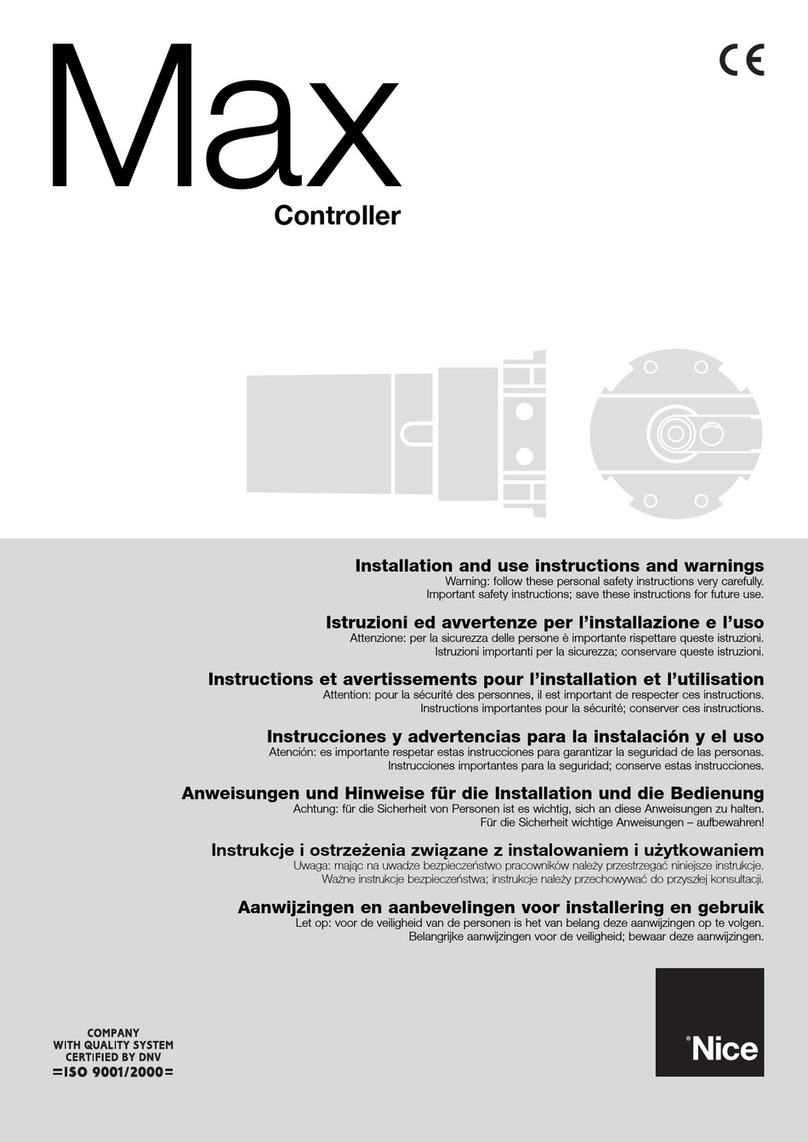
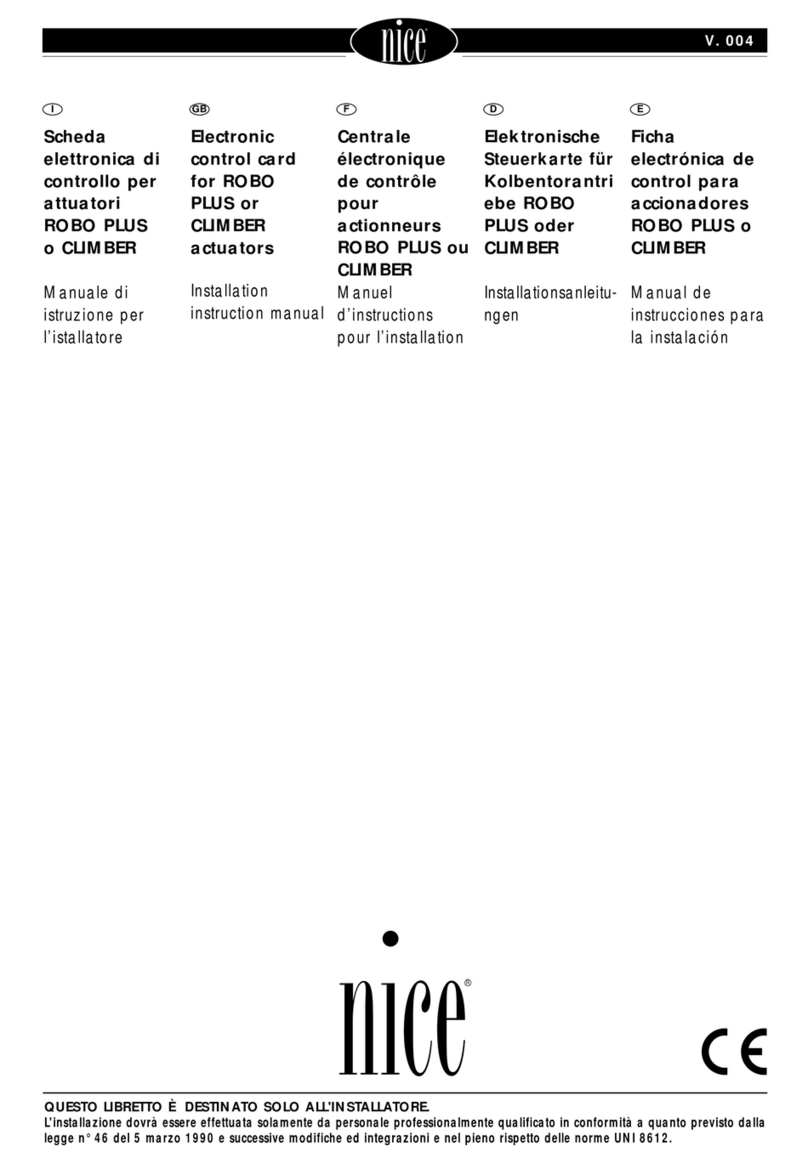
  9. Nice METRO ME 3000 User manual

Nice METRO ME 3000 User manual

O
MANUATE
rsTRuzroNr
E CATATOGO
RICAMBI
Attuotore
elettromecconico
per
concellio
bottenteod uno
o dueonte.
(Montoggio
interroto)
@
,NSTRUCT'ONs
MANUAL
AND SPARE
PARTS
CATALOGUE
Electromechonicol
actuotorfor
hingedgates
withoneor lwo
wings.
(IJ
nderground ínstollotion)
@
TIVRET
D'INSTRUCTIONS
ET
CATATOGUE
DE5
RECHANGES
Actionneur
électroméconique
pourgrillesò
bottontsò une
oudeuxportes.
(Montoge
enterré)
@
ANLE'ruNGSHEFÍ
UND
ERSAÍZ-ÍE'l1.
KATALOG
Elektromechonischer
Triebfíirein-und
zweiflúgelige
Tore.
(Llnterfluymontoge)
@
MANUAL DE
INSTRUCCIONES
Y CATATOGO
DERECA'YîBIOS
Actuodor
electromecónico
poroconcelosde
botientedeuno
o doshoios.
(Montoie
enellerreno)
lî100 C€
GIUESTOTIBRETTOÈ OTSNNATOSOLOALL'INSTALIATORE.
L'instrollozione
dowòessereeffettuolosolomenbdopersonoleprofessionolmenfequolificoloinconformito
oquonto
previstodollo
leggen"4ódel5 morzo1990
esuccessive
modifiche
edintegrozioni
enelpienorispetio
delle
norme
UNI8ó12.
MoDELLI
EcARATTERISTIcHE
. MODELS
AND
CHARACTERISTICS.
MODÈLES
ETCARACTÉRISTIOUES
MODELLE
UND
MENKMAIE.MODELOS
YCARACTERíSNCNS
. ME3000
. ME3010*
. ME3024
. ME3000L
Motoriduttore (D
elettromeccanico
irreversibile,
costruito
in
alluminio
pressofuso,
a
tenula
stagna.
Disponibile
a230
V
c.a.
oppure
inbassa
tensione.
Ebene
per
un
più
duraturo
esilenziesp
funzionamento
del/
motoriduttore,
aggiungere
ogni6mesi
del
grasso
nellastaffa
di
comando
tramite
I'apposito
ingrassatore
(fig.
pag.
4).
Aperturastandard
110"
(360"
conapposito
accessorio
opzionale).
Possibililàdisblocco
interno/esterno.
Electromechanical,
@)
irreversible.sealed
geared
motor
made
in die-cast
aluminium.
Available
with
230Va.c.
ortowvoftage.
Every6months
add
grease
tothelubricator
onthecontrol
rodof the
gearreducer
toensure
low-noise
andtrouble-
treeoperation
(fig.
page4).
110"standard
opening
(360'with
aspecial
optional
accessory)
PossibiliU
otinside/
outside
unlocking.
Motoréducteur (D
électromécanique
inéversible,
construit
en
aluminium
moulésous
pression,
étanche.
Disoonibleà230Vc.a.
ouà basse
tension.
Pourassurer
un
fonctionament
plus
durable
etsilencieux
du
motoréducteur,
ilestbon
d'ajouter
tousles6 mois
delagraisse
dans
la
bride
decommande
à
travers
legraisseur
prévu
àcet
effet
(fig.
paEe
4),Ouverture
standard
110"
(360"
avecaccessoire
spécial
enoption).
Possibilitéde
déblocage
de
l'intérieur
etde
l'extérieur.
lrreversibler, @
elektrcmechanischer
Getriebemotot
aus
Aludruckguss,
vollkomme
n dicht.Steht
nit 230VWechselstrom
odermit
Niederspannung
zur
Vertùgung.
Fureinen
dauerhafteren
und
leiseren
Betrieb
des
Getriebemotors
sollte
derSteuerbugel
alle6
Monate
durchdie
vorgeseh
eneF
ettblichse
eingefettet
werden
(fig.
Ab.4).
Standardóffnung
110"
(mitspeziellem
Sonderzubebór
360")
Móglichkeit
furinteme
/ertemeEntriegelung.
Motorreductor (D
eteclromecanrc0
ineversible,
fabricadoen
aluminio,
fundidoa
presión,
concierre
hermético.
Disponible
en
230V
c.a.
ytambién
en
baia
tensión.
Paraun
funcionamiento
màsduradero
ysilencioso
del
motoneductor,
se
aconseja
anadir
cada6
meses
grasa
enelestribo
deaccionamento
akavés
del
respectivoengrasador
(fig.
pag.4).
Apertura
estàndar
110"
(360"
con
accesorios
opcionales).
Posibilidadde
desbloqueo
desde
el
interior/exterior.
A BAGNO
D'OLIO " IN OIL BATH - ENBAIN
D'HUILE - IN ÓLBAD - ENBANO
DE
ACEITE
DATI
TEcN
tct
- TEcHNtcAL
DATA
-DoNNEEs
TEcHNIQU
Es- TEcHNIscHE
DATEN
-DATOS
TÉcNlcos _r/
Unitàdi
misura
Unitofmeasure
Unité
de
mesure
MaBeinheit
Unidad
de
medida
ME3000 ME3010ME
3OOOL
ME3024
Alimentazione
- Powersupply-Alimentation
Speisung
- Alimentación
Vac50 Hz 230
Vdc 24
Corrente
- Current-
Courant
Strom
-Intensidad A1.2 1.3 5
Potenza
assorbita
-Absorbed
power
Puissanceabsorbée
AufgenommeneLeistung
-Potencia
absorbida W250 300 120
Condensatore
incorporato
-Condenser
built-in
Condensateur
incorporé
-Kondensator
eingebaut
Condensator
incorporado pF 10
Velocità
- Speed-Vitesse
G
eschwi
ndigketT
-Velocidad Rpm 1.14 0.8 1.4
Spinta
max.
- Maximum
thrust
Pousèe
maximum
-Max.
Schub
-Empuje
max. Nm 300 250
Temperatura
diesecizio
- Workingtemperature
Température
deservice
- Betriebstemperatur
Temperatura
deservicio "C(Min.
/ Max.) -QQ + +7O
Termoprotezione
-
Thermal
protection
Protection
Thermique
- Wàrmeschutz
Termoproteccion oc 140"
Ciclodi lavoro
- Workingcycle
Cyclede travail
- Arbeitszyklus
Ciclo
detrabajo %30 40 30 80
Pesomotore- Motorweight
- Poids
moteur
Motorgewicht
- Peso
del motor kg 1'l 11.5 11
2
TIMITI
DI IftIPIEGO. L',MIîS
OF USE . LIMITESD'UTILISATION
. E'NSArZGRENZEN
. LI}IITESDEE}IPIEO
Peso
massimo
anta
Maximum wing weight
Poids
Max Flúgelgewicht
Peso
màximodelahoja
O vERtFlcHE E
PRELIMINARI
A) Leggereattentamente
le
istruzioni.
B) Prima di passare
all'installazione,accertarsi
chelastrutturadelcancello
siasolidaedappropriata.
C)
Accertarsicheilcancello,
durante tutto il suo
movimento,non subisca
punti
diattrito.
D)Ogni
anta
deveavere
una sola cerniera.
eventualmenteeliminare
la superflua all'atto
dell'automazione.
E) Prevedere
unabattutadi
arresto in chiusura e
possibilmente
anche in
apenura.
@ cHEcKtNG
ANDPBELIMINARY
PROCEDURES
A) Read the instructions
caretally.
B) Before starting
installatíon, ensure that the
structure of the gate is
sturdyand appropriate.
C) Ensure thet there is no
point of friction during the
entire
movementofthe
gate.
D)Each
gatemusthave
just
the one hinge;removeany
other hinges upon
automation.
E) Install a stop for closing
and, if possible, one for
openingtoo.
A) Lire attentivementles
instructions.
B) Avant de passer à
I'installation.s'assureroue
la structurede la grille
soit
solideetappropriée.
C) S'assurer
que la grille
n'ait pas de points de
frottementdurant tout le
mouvemenî.
D) Chaque battant doit
avoirune seulecharnière;
élimineréventuellement
la
charnière en oius au
momentdeI'automatisation.
E) Prévoirune butée en
fermeture
et si possible
aussienouverture.
A) LesenSiedieAnleitungen
aufmerksamdurch.
B) Vor der lnstallation
sicherstellen,daB
dieStruktur
Ihres Torssolide und fùr die
Montage
geeignet
ist.
C) Sicherstellen, daB das
Tor
wàhrend
dergesamten
Bewegug auf keine
Reibpunkte trifft.
D)Jeder
Flúgeldarlnureinen
Stùtzzapfen haben, den
úberflússigen Stútzzapfen
gegebenenfalls bei der
Automatis
ier
u
n
g bese
iti
g
e
n.
É)EinenEndanschlagfùrdas
SchlieBen
und,wennmóglich,
auch
fùr
dasOffnen
vorsehen.
A) Leer atentamente
las
instrucciones.
B) Antes de efectuar la
instalación,comprobar
que
la estructurade la cancela
sea
robusta
y adecuada.
C) Comprobar que la
cancela,durantetodo su
movimienlo,no presente
ountosderoce.
D)Cada
puerta
debetener
sólo un gozne,
en caso
eontrario, eliminar el
sobranteenel momenlode
laautomaîización.
E) Tener previstoun tope
para el cierre y, si fuera
posible, también para la
aoenura.
Kg 600
500
:'
Lunghezzamassimaanta
Maximum wing lenht
Longuermaximum
Max. Flúgellànge
Longitudmàximadelahoja
3,5 m
@, coNTROLES @ PRIJFUNGEN
@ CoNTROLES
Y
PRELIMINA]RES UND VORBEREITENDEPRELIMINARES
ARBEITEN
O
1) Colonnina
per
fotocellula.
2) Coppiadiarresti
in
apertura.
3) Linea230V.
4) Quadro
dicomando
(centralina
elettronica)
5) Antenna.
6) Lampeggiatore.
7) Fotocellula.
8) Attuatore
METRO.
9) Elettroserraturaverticale.
10)Selettorea chiaveo
tastiera
digitale
. da
installare
qualora
ilcan-
cello
superi
i ml.2,5di lun-
ghezza
per
ognisingolaanta.
'- Mod.3024
cavo5x1,5
@
1) Columnforphotocell.
2) Pair
ofopeningstops.
3) 230 Vline.
4) Control panel (or
electroniccontrolunit).
5) Aerial.
6) Flashing light.
7) Photocell.
B) METRO actuator.
9) Vertical
electriclock..
10)Keyselector
or
digital keyboard.
- to install if each gate
exceeds 2,5 m in length.
-- Mod.3024cable 5x1
,5
Petitecolonne
pour
cel-
lule
photo-électrique
Couplede butéesen
ouverture
Ligne
à 230V
Pupitrede
commande
Antenne
Clignoteur
Cellule
photo-élecfique
ActionneurMETRO
Serrureélectrique
verticale*
10)Sélecteurà cléou
claviernumérioue
. à installersi le oortail
dèpasse
les2,5 m de lon-
gueur
pour
chaquebattant.
- Mod.
3024cable5x1
,5
@
1) Sàule fúr Photozelle
2) PaarÓffnungssperren
3) Linie 230 V
4) Schalttafel
(oder
elek-
tron
isch
es Steue
rg
e
ràt)
5) Antenne
6) Blinklicht
7) Photozelle
B) METRO-Trieb
9) VertikalesElektroschloB-
10) Schlússelschalteroder
Digital-Tastatur
. in Tore mit einer
Flùgellànge von mehr als
2,5 m einzubauen.
* Mod.3024Kabel5x1,5.
@
1) Columna
para
foto-célula.
2) Par
de
topes
enapertura
3) Línea230V
4) Cuadrode mando (o
centralitaelectrónica)
5) Antena
6) Intermitente
7) Fotocélula
8) ActuatorMETRO
9) Electrocerradura
vertical
*
10)
Selectordellave
o
tecladodigital
. Instalar
sólocuandocada
hojadelaspuerta
delaverja
supere
los
2,5m.delargo.
-. Mod.3024
Cable5x1,5
@
1)
2)
3)
4)
5)
6)
7)
8)
e)
QUADRO
D' INSIE}IE
. OVER,ALL
PTCIIIRE.
CADRECÉruÉRAI
. íJÙSNilCUTZHCHNUNG.
ESQUEMADE
CONJUNTO
DhTENSIONI
D' INGOMBRO
. DII}IEN5'ON5
- DIMENSIONS
D'ENCOMBREIYIENT
'RAIIMBEDARF'DIMENSIONES
300
50
140
O POSA
DETLA
CASSA
DI
FONDAZIONE
O
1)Cerniera
2) Perno
3) Calcestruzzo
4) Leva
di sblocco
5) lngrassatore
6)Levadi
collegamento
7) Sfera
8) Leva
del riduttore
@
1)Hinge
2) Pin
3) Concrete
4) Unlock lever
5) Greaser
6) Connection
lever
7) Batt
8) Geared
motorlever
@ |,,YTNGfHE
FOUND,ÍION BOX @ POSE
DE
tA
CAISSE
DE
FONDATION
@ VERLEGEN
DES
FUNDA/I,|ENI|(ASÍENs
@ INSTALACION
DE
tA CAJADE
CIftTENTACION
@
g) Finecorsa
meccanico
in chiusura
- 9) Mechanicalstop
forclosing
manoeuvre
Si fin Oe
coursemécanique
enfermeture
- 9) Mechanischer
Endanschlag
in SchlieBung
9) Findecarrera
mecénico
encierre
1)Charnière
2) Pivot
3) Ciment
4) Levier
dedéblocage
5)Graisseur
6) Levierde raccordement
7) Sphère
8) Levier
duréducteur
@
1) Stútzzapfen
2) Zapfen
3) Stahlbeton
4) Entriegelungshebel
5) Fettbúchse
6) Verbindungshebel
7) Kugel
8) Getriebemotorhebel
@
1)Gozne
2) Perno
3)Hormigón
4) Palanca
dedesbloqueo
5) Engrasador
6) Palanca
deconexión
7) Bola
8) Palanca
del
motorreductor
VERSION
24
Vdc:USO
OBLIGATORIO
VERSION
230
Vac:USO
ACONSEJADO
No
sustituye
elbatiente
mecénico
dela
hoja
VERSIONE
24Ydc:
UTILIZZO
OBBLIGATORIO
VERSIONE
230Vac:UTILITJ,O
CONSIGLIATO
Non
sostituisce
labattuta
meccanica
dell'anta.
24Vdc
VERSION:
MUST
BEUSED
230
Vac
VERSION:
RECOMMENDED
USE
Itdoes
not
replace
theleaf's
mechanical
strike.
24
VdcVERSION:
PFLICHT
230
Vac
VERSION:
EMPFOHLEN
Mechanischer
Endanschlag
inSchlieBung
VERSION
24
Vdc:
EMPLOI
OBLIGATOIRE
VERSION
230
Vac:EMPLOI
CONSEILLE
Neremplace
pas
labutée
mécanique
dubattant.
AITENZIONE ATIENT'ON AITENTION
Togliere
i dadi
e lerondelle
prima
difissare
ilmotoriduttore'
Remove
nutsandwashers
before
fixing
thegearmotor.
Enlever
lesécrous
et lesrondelle
avant
defixer
lemotoréducteur'
Bevor
derGetriebemotor
befestigt
wird,
dieMutternund
die
Unterlegscheiben
entfernen.
Quite
las
tuercas
y arandelas
antes
defijarel motoneductor.
ACHÍUNG ATENCION
O
@
@
@
@
4
\-
O
1) Eseguirein basealledimensioni
d'ingombro,unoscavodi îondazione,avendocuradi prevedere
unbuon
drenaggio,in modo
da evitareil
ristagnodell'acqua.
2) Collocare
lacassa
all'internodelloscavo,
conilperno
allineato
allacernieradelcancello.
3) Prevedereuncondotto
peri cavielettrici
edunoperildrenaggio.
4) Annegarenelcalcestruzzo
lacassa
difondazione,curandone
lamessa
inbollaed illivello.
5) lnseriresulperno
dellacassa,
la levadi sblocco,
avendocuradi interporrelasferadi dotazione.
6) Appoggiare
l'antadelcancellosulla
levadisblocco,e fissareconsaldatura
robusta.
7) Ingrassaremedianteappositougello
ingrassatore.
@
1) Keeping overall dimensions in mind, dig a hole for the foundation, making sure it is properly drained to avoid the stagnation of water.
2) Place the box inside the hole, aligning the pin with the gate's hinge.
3) Lay one duct for the electric cables and one for draìnage.
4) Bury the foundation box in concrete, making surc it is level.
5) Mount the unlock lever on the box's pin, remembering to place the ball provided in between.
6) Restthe gate against the untocklever and weld it firmly into ptace.
7) Use the greaset nozzle to lubricate.
@
1) Effectuer,suivant
lesmesures
d'encombrement,
untroude fondationen ayant
soinde prévoir
un drainageefficace
de manièreà éviter
la
stagnation
d'eau.
2) Placerlacaisse
à I'intérieurdutrou,avec
lepivot
dans
I'axe
delacharnièreduportail.
3) Prevoirunconduit
pour
les
càbles
électriquesetunpour
ledrainage"
4) Couler
lecimentsurlacaissedefondationenveillantà lamettredeniveau.
5) Insérer
surlepivot
de lacaisse
lelevierdedéblocageenfaisantattentionà interposerlasphère
fournie.
6) Poserlaporte
duportail
surlelevierde déblocageetfixeravecunesoudure
robuste.
7) Graisseravecunbècgraisseur.
@
1) Je nachRaumbedafÍeinenGraben
fiir denFundamentkastenausheben,dabeieineguteDrainagevorsehen,so dasssichkeinWasserstaut.
2) DenFundamentkasten
im Graben
anordnen;derZapfen mussmit dem Stutzzapfen
des Torsausgerichtetsein.
3) EineLeitungfur die Elektrokabetund eine fúr die Drainage
vorsehen.
4) Den Fundamentkasten einbetonieren, dabei auf díe richtige Nivellierung und Hóhe achten.
5) Den Entriegelungshebel auf den Zapfen am Kasten einsetzen und die mitgelieferte Kugel dazwischeniegen.
6) DenTortlúgelauf den Entriegelungshebelstútzenundgut anschweissen.
7) Mit der dazu bestimmten Fettbúchse schmieren.
@
1) Efectuar,deacuerdoconlasdimensionestotales,unagujerodecimentación
procurandoprever
undrenaje
correcto
para
evitar
que
elagua
seestanque.
2) Colocar
lacalaenel interiordelagujeroexcavado,
conelperno
alineadoalgozne
delaverja.
3) Efectuaruncanal
parapasar
los
cableseléctricos
y otro
para
eldrenaje.
4) Sumergir
enel hormigónlacajadecimentación,
procurandoquequede
bien
nivelada.
5) Introducirlapalanca
dedesbloqueoenelperno
delacaja,
procurando
intercalarlabolaentregada
conelequipo.
6) Apoyar
lahojade lapuerta
delaverjaen lapalanca
dedesbloqueo
y fijarlaconunasoldadura
resistente.
7) Engrasarutilizando
para
el lo laboquillaengrasadora.
\.
5
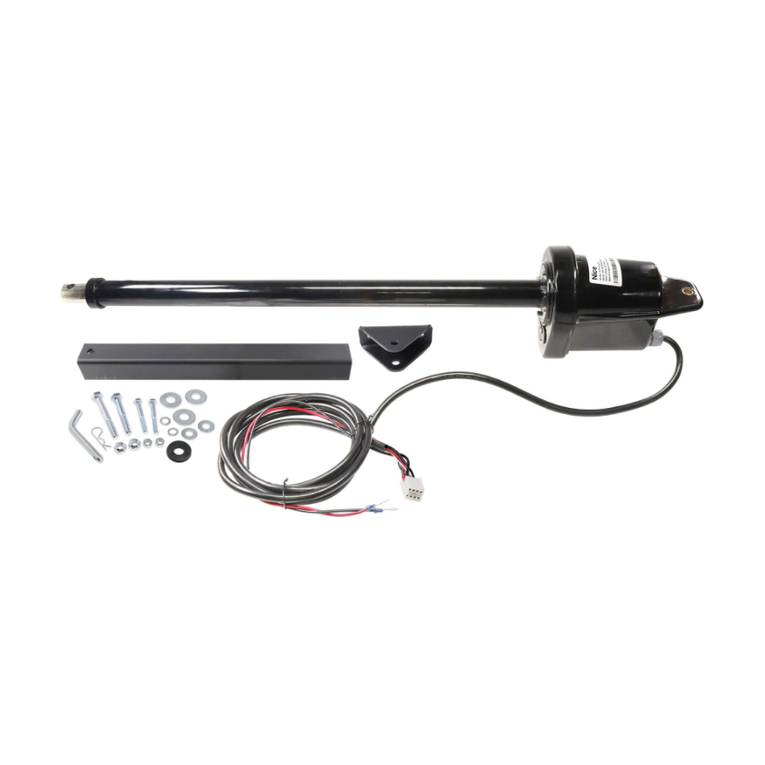
@ FISSAGGIO
TVIOTORIDUTTORE @ F,X,NG THE
GEARED
MOTOR @ FrxATtoN
MOTOREDUCTEUR @ BEFESÍ|GUNG
DES
GEÍRIEBEMOîORS
@ SUJECION
DEt
MOTORREDUCTOR
J
O
1) Collocare
il motoridutto-
reall'
interno
dellacassae
bloccarlo
con
vitie rondelle
indotazione.
2) Collegare la leva del
motoriduttorealla leva di
trascinamento mediante
l'apposita
leva di collega-
menIo.
@
1) Position the geared
motot inside the box and fix
it with the screws and
washersprovided.
2) Connectthegeared
motor's lever to the drive
lever by means of the
connecting lever
@
1) Placer
le motoréducteur
à l'intérieur
de la caisse
et
le bloquer
avec les vis et
lesrondelles
fournies.
2) Raccorder
le levierdu
motoréducteur
au levier
d'entraînement
à I'aidedu
levier
deraccordemenl.
@
1) Den Getriebemotorim
Kasten anordnen und mit
denmitgelieferten
Schrauben
und Unterlegscheiben
blockieren-
2) Mittels des dazu
bestimmten Hebels die
Verbindung des
Getriebemotorhebels mit
dem Mitnehmerhebel
herstellen.
@
1)Colocar
elmotorreductor
en el interior
de la caja y
bloouearlo
con lostornillos
y las arandelas que se
entregan
conelequipo.
2) Conectar
la palanca
del
motorreductor con la
oalanca de arrastre
mediante
lacorrespondiente
palanca
deconexión.
o colreoAllENTl
ETETTRICI
Mod. ME3OOO
Mod. ME
3OlO
@ srscrnlc
CONNECT'ONS
Mod. ME 3O(N
Mod.ME 3OlO
@ eRAhlcHr-
MENTS
ÉUCrnlOUtS
Mod.ME3OO0
Mod.
ME3OlO
@ EtEKrRo-
ANSCHLúJSSE
Mod. ME 3OOO
Mod.ME 3OlO
@ colrxoNEs
ErÉcrRrcAs
Mod. ME3OOO
Mod.ME3OlO
@
Negro
= Fasede
apertura.
Marrón
= Fasede
cierre.
Azul
=Común.
AmarilloA/erde=
O
Nero
= Fase
"apre"
Marrone
= Fase
"chiude"
Blu
=Comune
@
Black
="open"
phase
Brown
="close"
phase
Blue
= common
Yellow/Green
=
@
Noir
= Phase
"ouvre"
Marrón
= Phase
"ferme"
Bleu
=Commun
Jaune-Vert
= (-
\-/
@
Schwarz
= Phase
"auf"
Braun
= Phase
"zu"
Blau
= Gemeinsame
Getb/Grún=€l
\,:_/
óciallo^/erde
= e
O COIIEGA}TENTI
ELETTRICI
Mod. ME3024
@ ELECTR'C
CONNECTIONS
Mod. ME3O24
@ gRAncHr-
MENTSÉUCrnrOUrS
Mod. ME
3O24
@ ELEKîRO.
ANSCHLiJSSE
Mod. ME 3024
@ coNExroNEs
ErÉcrRrcAs
Mod. ME3O24
O
Blu
= motore+
Marrone
= motore
-
Nero
=encoder+
Nero
=encoder
-
Giallotuerde
= l+=ì
\-/
@
Bleu
= engine+
Brown
= engine
-
Black
= encoder
+
Btack
= encoder
-
@
Bleu
=moteur+
Marron
= moteur
-
Noir
=codeur+
Noir
=codeur
-
@
@
Blau
= motor
+ Azul
= motor+
Braun
= motor
- Marrón
= motor
-
Schwarz
= encoder+ Negro
= encoder+
Schwarz
= encoder
- Negro
= encoder
-
Yettow/Green=e Jaunefy'ert
=
eGetb/Grún--
gRmarirroA/erde=€
s
O }TANOVRA
MANUATE
O
A) Abòassareilcoperchio
copriserratura
(1)
come
indicato.
B) Inserire
lachiavee
ruotarlainsensoorariodi
90".
C)Agiremanualmente
sull'anta.
ATTENZIONE:
ll funzionamento
automaticoawerrà alla
prima manovra
elettrica.
@ rulruunr
MANOEUVRE @ }TANCEUVRE
MANUEttE @ AIANUEIIE
BETÀI|/GUNC
@
A) Den Schlossdeckel (1)
wiegezeigt senken.
B) Den Schlússel
einsteckenund um 90' in
den Uhrzeigersinn drehen.
C) Den Toflúgel von Hand
betàtigen.
ACHTUNG:
Bei der ersten
e
lektri
schen Schaltun
g
erTolgt der Betrieb auf
automatische Weise,
@ ftTAN|oBRA
ftIANUAL
@
A) Bajarlatapa
que
cubre
lacerradura
(1),
talcomo
se lndica.
B) Introducir
lallave
y
girarla
90' haciala
derecha.
C)Movermanualmente
la
puerta.
ATENCION:
Elfuncíonamiento
automético se activaró
con la primeramaniobra
eléctrica.
@
A) Lowerthelockcover
(1)
asshown.
B) Put the key in and turn
it 90" fromleft to,right.
C) Move the gate
manually.
ATTENTION:
It will work automatically
with the îirst electrical
manoeuvre.
@
A) Abaisserlecouverclede
protection
dela
senure
(1)
commel'indiquelafigure.
B) Introduirelacléetla
tourner
de90'dans
le
séns
desaiguillesd'unemontre.
C)Agirmanuellement
sur
lebattantdu portail.
ATTENTION:
Lefonctionnement
automatiqueauralieuà
la première
manoeuvre
électrique. 7
O MoNTAGGTo
ETETTROSERRATURA
1)Elettrosenatura.
2) Piastra
difissaggio
elettroserratura.*
3)Aggancio
chiavistello.-
4)Battuta
per
aggancio.
5)Chiavistello.
6)Barilotto
passante.
7)Cancello.
. Specificareseorizzontaleo verticale.
@ FTTnTNGÍHE ELEcTR,c
LOCK
1)Electric lock.
2) Plate for fixing the electric lock.*
3) Latchconnection."
4) Connection rabbet.
5) Latch.
6) Through cylinder.
7)Gate.
. Specify whether horizontal or vertical.
@ MoNTAcEDErA
SERRURE
ÉUCTNIOUT
1) Serrureélectrique
2) Plaquedefixagede laserrureélec-
trique*
3) Attachedu verrou
4) Feuillure
pour
l'attache
5) Verrou
6) Baricaut
passant
7) Grille
* Précisersielleesthorizontaleou
verticale.
@ MoNTAGEDEs
ELEKTROSCHIOSSES
1)ElektroschloB
2) Anschlagplatte ElektroschloB -
3) Riegelanschlag -
4) Anschlag
5) Riegel
6) durchgehender Zylinder
7) Tor
-Angeben,ob horizontaloder
vertikal
@ roNTAJE DELA
ETECTROCERRADURA
1)Eleclrocenadura
2)Placa
de
fijación
dela
electrocerradura*
3) Enganche
delpestillo-
4)Tope
para
enganche
5) Pestillo
6)Cilindro
pasante
7)Cancela
- Indicar
sihorizontal
o vertical
@ - fissaggio
verticale
(per
dueante)
@' - Verticalfastening (for two wings)
@ - Fixagevertical
(pour
deux
portes)
@ - Verti*ate Befestigung (fúr zwei Fliigel)
@ - rilaciónvertical
(para
doshojas)
@ - Fissaggio
orizzontale
(per
unasolaanta)
@ - Horizontal fastening (for only one wing)
@ - Fixagehorizontal
(pour
uneseule
porte)
@ - Horizontale Befestigung (fùr nur einen Flúgel)
@ - Fijaciónhorizontal
(para
unasola
hoja)
4
I
-r-
J
8
O ACCESSORI
A
RICHIESTA @ ACCESSOR,IES
ON REGIUEST @ AccEssorREs
SUR
DEftTANDE @ auT ANFRAGE
ERHÀLTLICHES
ZUBEHóR,
@ ACCESORTOS
A
PEDIDO
O
@
@
@
@
O
@
@
@
@
}IEA2
- Finecorsameccanicoinchiusura.
- Mechanical stop for closing manoeuvre.
- Findecoursemécaniqueenfermeture.
- Mechanischer Endanschlag in SchlieBung.
- Fin
decarreramecénicoencierre.
}IEAI
- Dispositivo
per
apertura360'.
- Device for opening 360'.
- Dispositif
pour
ouvertureà 360'.
- Einrichtung fúr 360' Óffnung.
- Dispositivo
para
laaperturaa 360'.
PLAto
\- O - Elettroserratura12Vcaverticale.
@\ - Vertical 12 Vacelectric lock.
@ - Senure
électrique12V C A verticale
(î\ - vertikales ElektroschloB 12 V C A
@ - Electrocerradura
12
V CA vertical.
PLAII
((((((((((((((((iì
- Elettroserralun 12Vca orizzontale.
@t - Horizontal12Vac electric
lock.
(Fì - Serrureélectrique
12V CA horizontale
(E\ - Horizontales ElektroschloB 12 V C A
(Ò.- Electrocerradura12V C A horizontal.
9
O @ cD (e, (E'
CATATOGO
RICAMBI
. SPARE
PARISCAIATOGUE
. CATALOGUE
DES
RECHANGES.
ERSATZIEITKATALOG'CATATOGO
DE
RECA'VTBIOS
34
/t'/
--/l
/-/ |
-.' I
J
J
ro
Pos. Code Descrizione
ODescription
@Description
@ @ Beschreibung Descripción
@
1
2
a
4
I
I
10
'I1
tz
IJ
14
to
17
18
19
20
21
22
23
24
25
26
27
28
29
JU
31
32
33
34
JO
37
42
43
44
45
46
47
48
49
50
ql
52
53
38
39
40
4'l
PMD00264610
PMD00274610
V4.2x135101
BMGIM4567
GOR35501
V6.3x225101
PMCU44630
PECR50B4670
PMCU34630
PMDAU4610
PMD00394610
PMDIP4610
GOR-F5501
PMCUg4630
PMDAPI4610
PMCSs4630
BMGSM4567
GOR15501
V3x16
5101
GOR-G5501
D10A
51
10
R105120
V6x8B
5102
BMGS4567
PMDST4610
l6x1
5124
PMDLC4610
PMDLU
4610
PMCSI 4630
PMDLF4610
MO-G
2640
PMDLA4610
PMDLP
4610
PMDFC4610
cM-D 1630
V2.9x13
5101
MP0032601
PMCS124630
G6x14
5123
MMCT2620
EME4870
V4x8
5105
V10x355102
VOx30
5102
MO-H2640
MO-C2640
MEAOl
RO4E5120
Cassadifondazione
Coperchio
cassa
Vite
4.2x13
inox
Guscio
inferiore
"Metro"
O-Ring4950
Vite6.3x22
Cuscinetto6203ZZ
Roforeconalbero
Statore-
Cuscinetto6005ZZ
Albero
uscita
Spinacilindrica
Ingranaggio
primario
O-Ring
Cuscinetto6009
Albero
primario
Ingranaggio"
Cuscinettoassialeasfere-
Spina5x30
Gusciosuperiore
"Metro"
Cablaggioalimentazione*
O-Ring
Vlte
3x16
Guarnizione
paraolio
DadoM10
UNI
7473
RondellaD10
Vite6x8
Sblocco
Staffacomando
lngrassatore
Leva
dicollegamento
Levadi uscita
riduttore
Sfera
Levafissaggio
Molladi ritorno
Levaanteriore
sblobco
Levaposteriore
di
sblocco
Fermocomandosblocco
Serraturadoppia
Vite2.9x13TC+
UNI6954
Senacavo
PG9
Spinaelastica
Grano6x14
Occhiello
isolato
Etichettamotoriduttore
Bronzina
*
Vite4x8
Vite10x35
Vite6x30
Molla
di recupero
Molla
di sblocco
Motore24 Vdc
Rondellao4
Foundation box
Box lid
4.2x13stainlesssteel
screw
"Metro"bottom casing
4950 O-Ring
6.3x22screw
6203 ZZ bearing
Rotorwithshaft
Stator.
6005 ZZ bearing
Outputshaft
Parallelpin
Main gear
O-Ring
6009 bearing
Mainshaft
Gear*
Axialballbearing.
5x30 pin
"Metro"top casing
Powercabling.
O-Ring
3x16screw
Splash
guardseal
Ml0 andUNI7473nut
D 10washer
6x8screw
Release
Controlrod
Greaser
Connecting lever
Geared
motoroutput
Ever
Bail
Fixing lever
Return spring
Front unlock lever
Back unlock lever
Unlock stop
Double Iock
2.9x13screw,TC+
UNI 6954
Cable camp PG9
Spring pin
6x14dowel
Insulated
slot
Gearmotor
label
Bush-
4x8 screw
10x35
screw
6x30 screw
Shockabsorber
spring
Release spring
24 Vdcmotor
s4 Washer
Caissedefondation
Couverclecaisse
Vis4.2x13inox
Coque
inférieure
"Metro"
Jointtorique
4950
Vis6.3x22
Roulement6203
ZZ
Rotoravecarbre
Stator*
Roulement6005ZZ
Arbresortie
Chevillecylindrique
Engrenage
primarie
Joint
Torique
Roulement
6009
Arbre
primarie
Engrenage.
Roulementaxialàbilles.
Cheville5x30
Coquesupérieure
"Metro"
Càblage
alimentacion*
Joint
torique
Vis3x16
Garniture
pare-huile
EcrouM10UtttlZ+ZS
Rondelle
D10
Vis
6x8
Déblocage
Bridecommande
Graisseur
Levierdereccordement
Levierde sortie
réducteur
Sphère
Levierdefixation
Ressortderappel
Levieravantde
déblocage
Levierarrièrede
déblocage
Butéededéblocage
Double
serrure
Vis2.9x13TC+
UNI6954
Serre-càble
PG9
Chevilleélastique
Goujon6x14
Oeilletisolé
Etiquettemotoreducteur
Douille
enbronze*
Vis4x8
Vis
10x35
Vis
6x30
Ressortde
compensation
Ressortdedéblocage
Moteur24Vdc
Rondelle
s4
Fundamentkasten
Kastendeckel
Schraube4.2x13
rostrt. Shhl
UnteresGehàuse
"Metro'
O-Ring 4950
Schraube6.3x22
Lager 6203 ZZ
Rotor mit Welle
Stator"
Lager 6005 ZZ
Abtriebswelle
Zylinderstift
Primàrrad
O-Ring
Lager 6009
Primàrwelle
Zahnrad.
Làngskugellager.
Spannstift 6x30
OberesGehàuse
"Metro"
Versorgungskabel.
O-Ring
Schraube3x16
ótabdichtung
MutterMl0 UNI 7473
Unterlegscheibe
D10
Schraube 6xB
Entblockung
Steuerbúgel
Fettbuchse
Verbindungshebel
Abtriebshebel d.
Getriebemotol
Kugel
Befestigungshebel
Rúckfeder
Vorderer
Entriegelungshebel
Hinterer
Entriegelungshebel
Entriegelungsspenung
Doppelschloss
Schraube2.9x13TC
+ UNI 6954
Kabelschelle PG9
Spannstift
Stift6x14
Schlitz
Getriebemotorctikeft
Bronzelager"
Schraube 4x8
Schraube10x35
Schraube 6x30
Schwingungsdàmpfen
de Feder
Entriegelungsfeder
24vdc motor
Unterlegscheibe a4
Cajadecimentacion
Cubiertacaja
Tornillo
4.2x13Inox
Carcasainferior
"Metro"
O-Ring
Tornillo
6.3x22
Cojinete
6203ZZ
Rotorconàrbol
Estator-
Cojinete6005ZZ
Orbolsalida
Clavijacilindrica
Engrenaje
primario
O-Ring
Cojinete6009
Orbol
primario
Engrenaje.
Cojineteaxialdebolas'
Clavija
elastica5x30
Carcasasuperior
"Metro"
Cables
de
alimentacion*
O-Ring
Tornillo3x16
Guarnicionsellode
aceiete
TuercaM10
UNI
7473
ArandelaD10
Tornillo6xB
Desbloqueo
Mordazamando
Engrasador
Palancadeconexion
Palancadesalida
reductor
Bola
Palancasujecion
Muellederetorno
Palancadelantera
desbloqueo
Palancatrasera
desbloqueo
Retendesbloqueo
Cenaduradoble
Tornillo2.9x13TC+
UNI6954
Mordaza
determinal
decable
PG9
Pasador
elastico
Tornillosincabeza6x14
Argollaaislada
Etiquetamotorreductor
Buje-
Tornillo4x8
Tornillo10x35
Tornillo
6x30
Muelledetope
Muellededesbloqueo
Motor24vdc
Arandelas4
Specificare
sempreilmodello Always specify the
model Précisertoujours
le
modéle lmmerdas modell
vonangeben Seespecificar
siempreel modelo
It

This manual suits for next models

3

Other Nice Controllers manuals

Nice M-BOARD Quick start guide

Nice

Nice M-BOARD Quick start guide

Nice PLUTO PL 4000 Installer manual

Nice

Nice PLUTO PL 4000 Installer manual

Nice Patio Series Technical specifications

Nice

Nice Patio Series Technical specifications

Nice MG3000 User manual

Nice

Nice MG3000 User manual

Nice TITAN12L User manual

Nice

Nice TITAN12L User manual

Nice To-Max Product manual

Nice

Nice To-Max Product manual

Nice Titan 912L Installation and operating manual

Nice

Nice Titan 912L Installation and operating manual

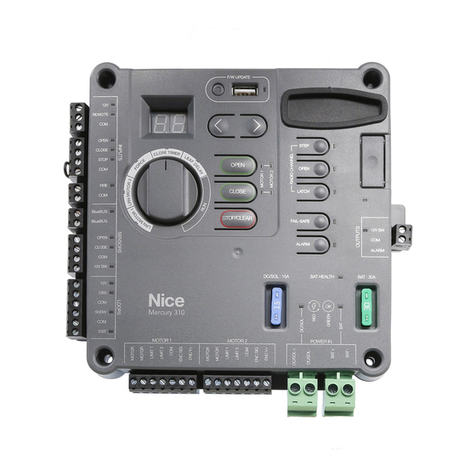
Nice Mercury 310 Instruction Manual

Nice

Nice Mercury 310 Instruction Manual

Nice ROX600 Technical specifications

Nice

Nice ROX600 Technical specifications

Nice 1551 User manual

Nice

Nice 1551 User manual

Nice Apollo 816 LA Installation and operating manual

Nice

Nice Apollo 816 LA Installation and operating manual

Nice HySecurity 1500 Series Installation and operating manual

Nice

Nice HySecurity 1500 Series Installation and operating manual

Nice GEFEN GF-AVIP-MC User manual

Nice

Nice GEFEN GF-AVIP-MC User manual

Nice Elero ExitSafe 28 388.0001 User manual

Nice

Nice Elero ExitSafe 28 388.0001 User manual

Nice ROBO PLUS Service manual

Nice

Nice ROBO PLUS Service manual

Nice One-Max Product manual

Nice

Nice One-Max Product manual

Nice Mercury 310 User manual

Nice

Nice Mercury 310 User manual

Nice Max Product manual

Nice

Nice Max Product manual

Nice Robus 600 Parts list manual

Nice

Nice Robus 600 Parts list manual

Nice SPA30 Service manual

Nice

Nice SPA30 Service manual

Nice UST1K-1.1kW Quick start guide

Nice

Nice UST1K-1.1kW Quick start guide

Popular Controllers manuals by other brands

Danfoss AK-CC 250A instructions

Danfoss

Danfoss AK-CC 250A instructions

Xvent ELEMENTAIR E - MARK I Quick manual

Xvent

Xvent ELEMENTAIR E - MARK I Quick manual

DEEP SEA ELECTRONICS DSE4520 MKII Operator's manual

DEEP SEA ELECTRONICS

DEEP SEA ELECTRONICS DSE4520 MKII Operator's manual

NCE Power Pro System reference manual

NCE

NCE Power Pro System reference manual

Brooks 5850i Installation and operation manual

Brooks

Brooks 5850i Installation and operation manual

Prozeda BDC 102 Installation and operating instructions

Prozeda

Prozeda BDC 102 Installation and operating instructions

Honeywell Aquastat L4006 installation guide

Honeywell

Honeywell Aquastat L4006 installation guide

Siteco Connect 31 Commissioning Instruction

Siteco

Siteco Connect 31 Commissioning Instruction

CD Automation REVO C 1PH 690V user manual

CD Automation

CD Automation REVO C 1PH 690V user manual

GameSir G7 SE user manual

GameSir

GameSir G7 SE user manual

Embed RAD-002 installation guide

Embed

Embed RAD-002 installation guide

Dungs MPA22 Operating and mounting instructions

Dungs

Dungs MPA22 Operating and mounting instructions

TRENDnet TK-RP08 Quick installation guide

TRENDnet

TRENDnet TK-RP08 Quick installation guide

Danfoss VLT AutomationDrive FC 302 operating guide

Danfoss

Danfoss VLT AutomationDrive FC 302 operating guide

Walchem W600 Series instruction manual

Walchem

Walchem W600 Series instruction manual

STI SC Instruction, installation and maintenance manual

STI

STI SC Instruction, installation and maintenance manual

Texas Instruments MSP430x5 series user guide

Texas Instruments

Texas Instruments MSP430x5 series user guide

PulseWorx KPLD7 Installation guide and owner's manual

PulseWorx

PulseWorx KPLD7 Installation guide and owner's manual

manuals.online logo
manuals.online logoBrands
  • About & Mission
  • Contact us
  • Privacy Policy
  • Terms and Conditions

Copyright 2025 Manuals.Online. All Rights Reserved.