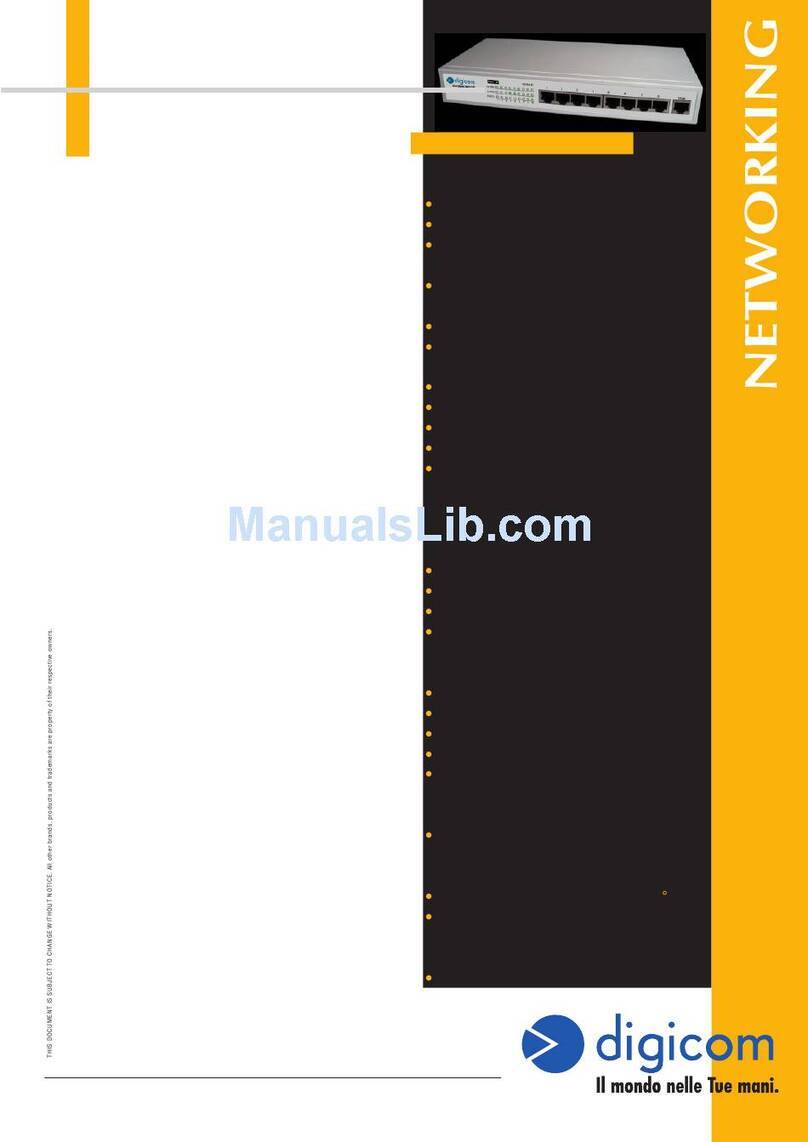
Digicom 8 PORT 10 User manual

http://www.digicom.it
SWITCH o HUB 8 PORTE
8 PORT SWITCH or HUB
8 porte RJ45 10/100 Mbit/s
Funzione MDI/MDI-X automatica su tutte le porte
10/100 Auto-Sensing e Auto-Negotiation su tutte le porte
8 RJ45 10/100 Mbit/s ports
Automatic MDI/MDI-X function on all ports
10/100 Auto-Sensing and Auto-Negotiation on all ports
Manuale Operativo
User's Guide
rev. 3.0 01/2003
8 PORT 10/100


8port 10/100 Indice - Index
I
INDICE - INDEX
PRECAUZIONI III
PREFACE III
DICHIARAZIONE CE DI CONFORMITA' IV
DECLARATION CE OF CONFORMITY IV
1. DESCRIZIONE 1
1.1. CONTENUTO DELLA CONFEZIONE 2
1.2. CARATTERISTICHE TECNICHE 2
2. INSTALLAZIONE 3
2.1. INSTALLAZIONE DA TAVOLO 3
2.2. CAVI E CONNESSIONI 3
2.3. ALIMENTAZIONE 4
2.4. INTESTAZIONE DEI CAVI 4
2.5. DESCRIZIONE LED 5
1. DESCRIPTION 7
1.1. PACKAGE CONTENTS 8
1.2. TECHNICAL SPECIFICATIONS 8
2. INSTALLATION 9
2.1. DESKTOP INSTALLATION 9
2.2. CABLES AND CONNECTIONS 9
2.3. POWERING THE DEVICE 10
2.5. CABLE WIRINGS 10
2.4. LED DESCRIPTION 11


8port 10/100 Precauzioni - Preface
III
PRECAUZIONI
Al fine di salvaguardare la sicurezza,
l’incolumità dell’operatore ed il
funzionamentodell’apparato,devonoessere
rispettate le seguenti norme installative:
Temperatura ambiente da 0 a +50°C
Umidità relativa dal 5 al 95% n.c.
Si dovrà evitare ogni cambiamento rapido di
temperatura e umidità (0,03°C/min).
Il sistema, compresi i cavi, deve venire
installato in un luogo privo o distante da:
Polvere, umidità, calore elevato ed
esposizione diretta alla luce del sole.
Oggetti che irradiano calore. Questi
potrebbero causare danni al contenitore
o altri problemi.
Oggetti che producono un forte campo
elettromagnetico (altoparlanti HI-FI, ecc).
Liquidi o sostanze chimiche corrosive.
AVVERTENZE GENERALI per tutti gli
apparati alimentati direttamente da rete
Alimentazione 90-253 Volt monofase 50/60Hz
Fusibili solo quelli indicati sull’etichetta
dell’apparato
Classe di isolamento solo quelli indicati
sull’etichetta dell’apparato
Correnti nominali soloquelliindicatisull’etichetta
dell’apparato
Per evitare scosse elettriche, non aprite
l’apparecchio. Rivolgetevi solo a personale
qualificato.
Dovendo verificare o sostituire il fusibile,
togliere preventivamente il cavo di
alimentazione dalla presa di rete.
Scollegate il cavo di alimentazione dalla
presadi correntequandonon intendeteusare
l’apparecchioperun lungoperiodo ditempo.
Perscollegare ilcavo tirateloafferrandoloper
la spina. Non tirate mai il cavo stesso.
PREFACE
The following installation rules should be
respected in order to have the best working
order of the equipment and for the user’s
safety.
Enviromental temperature from0 to+ 50°C
Relative humidity from 5 to 95% n.c.
from 32 to 122°F
Rapid changes of temperature or humidity
should be avoided (0,03°C/min).
This equipment, including cables, should be
installed in an area free from:
Dust, humidity, heat from direct sun light.
Objects which irradiate heat. These could
cause damage to the container or other
problems.
Objects which produce a strong
electtromagneticfield (loudspeakers,etc.)
Liquidsor chemicalcorrosivesubstances.
GENERAL WARNINGS For all equipment
powered directly from mains power
Power supply 90-253Volt singlephase 50/60Hz
Isolation classifications onlythoseindicated on
the equipment label
Nominal currents only those indicated on the
equipment label
To avoidelectric shock,theequipmentshould
never be opened. Ask qualified personnel
help.
Disconnect the power cable from the wall
outlet when the equipment is not to be used
fora longperiod. Todisconnectthe cablepull
it by the plug, never pull it by the cable itself.
If there should be liquid or object penetration
in the equipment, disconnect the power
cable and call a qualified personl for testing.
IV
8port 10/100 Precauzioni - Preface
In caso di penetrazione di oggetti o liquidi
all’internodell’apparecchio, scollegateil cavo
di alimentazione e fate controllare da
personale qualificato prima di utilizzarlo
nuovamente.
PULIZIA DELL’APPARATO
Usareun pannosoffice asciuttoper lapulizia
delcontenitore. Inumidireil pannocon acqua
odetergente naturaleperrimuovere eventuali
macchie.
Non usare mai insetticidi o prodotti chimici
quali benzina o solventi per la pulizia del
contenitore.
VIBRAZIONI O URTI
Attenzione a non causare vibrazioni o urti.
DICHIARAZIONE DI
CONFORMITA'
Noi, Digicom S.p.A. via Volta 39 - 21010
Cardano al Campo (Varese - Italy)
dichiariamo sotto la nostra esclusiva
responsabilità, che il prodotto, Nome: 8 port
10/100 al quale questa dichiarazione si
riferisce, soddisfa i requisiti essenziali della
sotto indicata Direttiva:
1999/5/CE del 9 marzo 1999, R&TTE,
(riguardante le apparecchiature radio e le
apparecchiature terminali di
telecomunicazione e il reciproco
riconoscimento della loro conformità).
Come designato in conformità alle
richieste dei seguenti Standard di
Riferimentoo adaltri documentinormativi:
- EN 55022
- EN 61000-3-2
- EN 61000-3-3
- EN 55024
- EN 60950
CLEANING THE TERMINAL
Useaclean andsoft cloth.Wetthe cloth with
water or natural detergent if it is necessary
to remove any stains.
Never use chemical products such as petrol
or solvents.
VIBRATIONS OR DROPPING
Caution against vibrations and dropping.
DECLARATION OF
CONFORMITY
We, Digicom S.p.A. registered office at: via
Volta 39 - 21010 Cardano al Campo (Varese
- Italy) declare under our sole responsability
that the product:
Name: 8 port 10/100 satisfies the basic
requirementof thebelowindicated Directive:
1999/5/CE of March 9 1999, R&TTE
ashaving beendesignedin conformitywith
the requirements of following Reference
Standards:
- EN 55022
- EN 61000-3-2
- EN 61000-3-3
- EN 55024
- EN 60950

8port 10/100 Descrizione
1
1. DESCRIZIONE
Gentile cliente,
la ringraziamo per la fiducia accordataci nell’acquistare un prodotto Digicom.
8 port 10/100 Digicom le
permetterà di ottenere il massimo
delle prestazioni dalla sua rete
locale.
L’introduzione di un 8 port 10/100
Digicom porta molteplici vantaggi
immediati che contribuiscono ad
elevare sia le prestazioni assolute
che la sicurezza dei dati.
Dual Speed Aldispositivo potràcollegare siastazioni,server osegmenti
di LAN operanti indifferentemente a 10 o 100Mbit/s, che
avranno la possibilità di comunicare tra di loro grazie al
modulo switch integrato che interconnette le due sezioni a
differenti velocità. Inoltre, al momento dell‚inserimento del
cavo di rete la velocità verrà automaticamente rilevata e
impostata senza richiedere configurazione alcuna.
Porte MDI o MDI-X in modo automatico
Tutte le porte del dispositivo sono in grado di predisporsi
in modo automatico come porta "diritta" o "incrociata" al
momento della connessione del cavo, permettendo di
utilizzare unicamente cavi di rete diritti.
Autosensing Aldispositivo potràcollegare siastazioni,server osegmenti
di LAN operanti indifferentemente a 10 o 100Mbit/s. Al
momento dell‚inserimento del cavo di rete la velocità e la
modalitàdifunzionamento verràautomaticamente rilevata
e impostata senza richiedere configurazione alcuna.
Ottimizzazione (mod. Switch)Lo switch provvederà ad ottimizzare il traffico in rete,
inoltrando i pacchetti di dati solamente alle porte alle quali
sono connessi i destinatari dei pacchetti in oggetto,
eliminando automaticamente il traffico "inutile" dalle porte
non interessate.
Sicurezza (mod. Switch) L’utilizzo della tecnologia di switching Store and Forward
garantisce la massima sicurezza e affidabilità dei dati
ricevuti da ogni singola stazione. L’integrità e correttezza
di ogni singolo pacchetto viene verificato prima di essere
inoltrato al destinatario
Compatibilità e trasparenza Il dispositivo è in grado di veicolare in modo trasparente
qualsiasi tipo di protocollo di rete, trasmettendo i pacchetti
di dati da una porta alle altre con tempi di trasferimento
(latenza) prossimi allo zero.

2
8port 10/100 Descrizione
1.1. CONTENUTO DELLA CONFEZIONE
Switch o MiniHub 8 porte
Manuale d’uso
Alimentatore VDC
1.2. CARATTERISTICHE TECNICHE
8 porte RJ-45 10BaseT / 100BaseTX (MDI-X)
Funzione MDI-X/MDI (porta diritta/incrociata) automatica su tutte le porte
Funzionalità Half Duplex/Full Duplex per ogni porta*
Metodo d’accesso CSMA/CD
Tecnologia Store and Forward*
Full speed Filtering and Forwarding rate*
Memoria per tabella di 1024 indirizzi*
Memoria Buffer 1Mbyte
Conforme alle specifiche IEEE 802.3, IEEE802.3u e IEEE802.3.x*
Indicatori luminosi Power, Link/Activity, 10/100 Mbps
Chassis metallico
Versione da tavolo
Alimentazione esterna 12 VDC, 5 Watts
Dimensioni 170 x 105 x 30 mm, Peso 0,8 Kg
Temperatura di esercizio da 0 to 50 C
Umidità tra 5% e 95% non condensante
Marcatura CE
* solo per modello Switch.

8port 10/100 Installazione
3
2. INSTALLAZIONE
L’apparato può essere installato su piani d’appoggio o scrivanie.
Prima di iniziare, verificate che il luogo di destinazione risponda a tutti i requisiti di spazio,
temperatura, umidità e ventilazione, e che disponga di tutto il necessario per permettere
un’agevole e stabile installazione (presa di alimentazione, vicinanza dei cavi di rete, ecc.).
Lasciate circa 10 cm di spazio libero intorno al dispositivo per permettere la corretta
ventilazione.
2.1. INSTALLAZIONE DA TAVOLO
Appoggiate l’apparato su una superficie piana e stabile.
Sestateinstallando piùapparati unosopra l’altro,fateattenzione anon generaresituazioni
che possano comprometterne la stabilità.
2.2. CAVI E CONNESSIONI
Il dispositivo dispone di più porte RJ45 per la connessione di switch, hub o stazioni di rete
operanti a 10 o 100Mbit/s.
La velocità di trasmissione è
automaticamente riconosciuta
ed attivata tra lo Switch o Hub
e il dispositivo corrispondente
purchè questo implementi le
funzioni dia autonegoziazione,
senza richiedere alcun tipo di
configurazione manuale.
Utilizzate cavi RJ45-RJ45 UTP (Unshielded Twisted Pair) o STP (Shielded Twisted Pair) a
100 Ohm per la connessione di schede di rete o Hub o Switch.
Per connessioni a 10Mbit/s potete utilizzare cablaggi in Categoria 3, 4, o 5, mentre per
collegamenti a 100Mbit/s è indispensabile utilizzare cablaggi in Categoria 5, gli unici in
grado di funzionare a questa velocità.
Uplink
Essendoil dispositivodotatodella funzioneAutoMDI/MDI-X èpossibileutilizzare unicamente
cavi "diritti" sia per le connessioni dirette che per "uplink" verso altri switch o hub di rete.
Inserite i connettori RJ45 nelle porte dello Switch senza forzare eccessivamente. Il cavo è
correttamente inserito quando sentite il "click" della linguetta di ancoraggio del connettore.
Per estrarre un cavo da un porta dello Switch non tirate mai il cavo stesso, ma abbassate
la linguetta e estraete il connettore RJ45.

4
8port 10/100 Installazione
Note: Se collegate degli Hub operanti a 10Mbit/s in cascata, non superate il limite di 4 dispositivi
(normative IEEE 802.3), pena il malfunzionamento dell‚intera rete. Questo limite è dato dai tempi di
propagazione dei pacchetti attraverso i vari repeater e dalla tecnologia di accesso CSMA/CD utilizzata
dagli Hub. Se si supera il limite di 4 repeater si possono generare un numero elevatissimo di collisioni
con conseguente blocco della rete.
Se collegate degli Hub operanti a 100Mbit/s in cascata, non superate il limite di 2 dispositivi (normative
IEEE 802.3u), pena il malfunzionamento dell‚intera rete. Inoltre verificate che la lunghezza complessiva
del cablaggio, dalla prima stazione alla seconda, non superi i 205 metri. Se ad esempio la stazione
connessa al primo hub e la stazione connessa al secondo hub utilizzano un cavo lungo 100 metri, il
cavo che collega in cascata i due hub non deve superare i 5 metri.
I suddetti limiti non si applicano agli SWITCH in quanto ogni porta di uno switch rappresenta un segmento
di LAN indipendente e a se stante ed immune dai tempi di propagazione della restante rete.
2.3. ALIMENTAZIONE
Collegate il cavetto dell’alimentatore al dispositivo e poi l’alimentatore alla presa di
alimentazione.
Verificate che led Power risulti acceso. Dopo qualche secondo il dispositivo è pronto per
operare.
Nota: Non utilizzate alimentatori diversi da quallo fornito nella confezione, pena il possibile
danneggiamento del dispositivo e conseguente invalidazione della garanzia.
2.4. INTESTAZIONE DEI CAVI
Cavo RJ45-RJ45 diritto
Pin Porta HUB/Switch Stazione di rete
o porta di uplink di
un hub o switch
1 Input Receive Data + Output Transmit Data +
2Input Receive Data - Output Transmit Data -
3 Output Transmit Data + Input Receive Data +
4NC NC
5NC NC
6Output Transmit Data - Input Receive Data -
7NC NC
8NC NC

8port 10/100 Installazione
5
2.5. DESCRIZIONE LED
Power
Acceso
indica che l’apparato è operativo e connesso
alla rete di alimentazione.
Link/Act
Acceso
indica che la porta relativa è correttamente
connessa e operativa
Lampeggiante
indica traffico dati sulla relativa porta.
100M
Acceso
indica che la relativa porta stà operando a
100Mbit/s.
Spento
(se il corrispondente led Link/Act è acceso),
indica che la relativa porta stà operando a
10Mbit/s.
Full Duplex (Switch)
Spento
la relativaporta stàoperandoinmodalitàHalf
Duplex.
Acceso
la relativa porta stà operando in modalità Full
Duplex. La modalità full duplex è possibile
solamentese ildispositivo connessoallaporta
supporta la funzione di auto-negoziazione
secondo lo standard IEEE 802.3u.
Buffer (Hub)
Spento
Il buffer interno non è attivo.
Acceso
Il buffer interno è attivo (dipendente dalla
modalità negoziata)
POWER
Full Duplex/Buffer
Link/Act
100M


8port 10/100 Description
7
1. DESCRIPTION
Dear customer,
thank you for purchasing a Digicom product.
Your Digicom 8 port 10/
100 will allow you to
achieve the maximum
performances on your
network.
Adding the 8 port 10/100
will bring several
advantagesand raisedata
throughput and reliability.
Dual Speed With the device you can set up mixed speed LANs (10
Mbit/s and 100 Mbit/s) allowing communication between
all stations, regardless of their operating speeds. No
configuration needed. Each port is able to automatically
detect and set the operating speed as soon as the cable is
plugged in.
Automatic MDI or MDI-X port setting
The device is able to automatically detect and determine
which kind of equipment is on the other end of the cable,
setting its port accordingly to MDI or MDI-X, thus allowing
the use of straight cables only. All ports can act as uplink
ports.
Speed Autosensing The device is able to automatically detect and determine
the operating speed of the equipment on the other end of
the cable, setting its port accordingly to 10 or 100Mbps as
well as half or full duplex. No user intervention or
configuration is needed.
Optimization The different sections operating at different speeds are
handledby theinternalhighspeedswitching modulewhich
optimizes the data traffic by confining it into its respective
collision domains.
Compatibility and transparency
The device is completely transparent to any data packet,
providing absolute compatibility to any application running
through the network.

8
8port 10/100 Description
1.1. PACKAGE CONTENTS
Hub or Switch 8 ports
User Guide
Power adaptor
1.2. TECHNICAL SPECIFICATIONS
8 RJ-45 10BaseT / 100BaseTX ports (MDI-X)
Automatic MDI-X/MDI (straight/cross port) function on all ports
Half Duplex/Full Duplex operation on each port*
CSMA/CD access method
Store and Forward switching technology*
Full speed Filtering and Forwarding rate*
1024 address table space*
1Mbyte work buffer
IEEE 802.3, IEEE802.3u and IEEE802.3x standards compliant
Power, Link/Activity, 10/100 Mbps, Half/Full Duplex/Buffer indicators
Metal case
Desktop mount
Power 12 VDC, consumption 5 Watts
Dimensions 170 x 105 x 30 mm (6,7 x 4,1 x 1,1 in), Weight 0,8 Kg (1,7 lb)
Operating temperature from 0 to 50 C (32 to 122 F)
Humidity 5% to 95% non condensing
CE Mark
* only for Switch model

8 port 10/100 Installation
9
2. INSTALLATION
The device can be placed on flat surfaces or desktops.
Once you have decided the installation place, please verify that there is enough space and
ventilation, and that the operating temperature and humidity ranges are respected.
Also be sure that all the necessary cables are near enough to permit a safe and clean
connection to the device ports.
2.1. DESKTOP INSTALLATION
Place the device on a firm flat space on your desktop.
Ifyou arestacking moredevices,be carefuland avoidsituationswhich couldcause instability
or damages to persons or to the devices themself.
2.2. CABLES AND CONNECTIONS
The device has several RJ-45 ports that support connection to switch, hub or stations
running at 10 or
100Mbps. The
transmission speed is
automatically set by the
device to match the
speed supported by the
other device using auto-
negotiation (if supported
by the attached device).
Use 100 Ohm RJ45-
RJ45 UTP (Unshielded
Twisted Pair) or STP (Shielded Twisted Pair) cables.
Use 100 Ohm RJ45-RJ45 UTP (Unshielded Twisted Pair) or STP (Shielded Twisted Pair)
straight cables to connect to network cards. Use crossed cables to connect to another
switch or hub. See section "Cable wirings" for more details.
UseCategory 3,4, or5 cablesfor 10Mbit/sconnections. UseCategory 5cables for100Mbit/
s connections. The maximum length for the cables is 100meters (328 feet).
Uplink
The device supports Auto MDI/MDI-X function, It will auto-detect the cable type when it
plug into Switch, and it means all ports can be use as Uplink port, and no need to use a
cross-over cable for uplink to other hubs or switches.
When inserting an RJ-45 plug, be sure the tab on the plug clicks into position to ensure that
it is properly seated.

10
8 port 10/100 Installation
When extracting a cable never pull the cable itself but first press the tab and then pull the
connector.
Note:
When cascading hubs operating at 10Mbit/s, do not cascade more than 4 devices (IEEE 802.3
restrictions). When cascading hubs operating at 100Mbit/s, do not cascade more than 2 devices
(IEEE 802.3u restrictions). Also be sure that the total cabling length between two end stations does
not exeed 205 meters (672 feet). If two stations are connected to two different cascaded hubs using
each a 100 meter cable, then the cascading cable between the hubs must non exeed 5 meters (16
feet).
This limitation does not apply to switches, because they break up the path into separated collision
domains.
2.3. POWERING THE DEVICE
Plug the power cord coming from the power adaptor to the hub and then plug the power
adaptor into the power outlet.
Check that the power led on the front panel is on.After few seconds the device is ready to
work.
Note: In order to avoid damages to the device and consequent warranty void do not use other power
adaptors than the supplied one.
2.5. CABLE WIRINGS
Straight RJ45-RJ45 cables
Pin HUB/Switch port Network station
or hub/switch uplink port
1 Input Receive Data + Output Transmit Data +
2Input Receive Data - Output Transmit Data -
3 Output Transmit Data + Input Receive Data +
4NC NC
5NC NC
6Output Transmit Data - Input Receive Data -
7NC NC
8NC NC

8 port 10/100 Installation
11
2.4. LED DESCRIPTION
Power
Lights
when the device is operating and connected
to the mains outlet.
Link/Act
Flashing
when data traffic is present on the
corresponding 10 or 100 Mbit/s section.
100M
On green
when the port is operating at 100Mbit/s.
Off
(ifcorresponding Link/Actledlights) whenthe
port is operating at 10Mbit/s.
Full Duplex (Switch)
Off
when the port is operating at Half Duplex
mode.
On
when the port is operating at Full Duplex
mode. Full duplex operation is only possible
if also the connected device supports auto-
negotiation (IEEE 802.3u standard).
Buffer (Hub)
Off
Internal buffer is not active
On
Internal buffer is active (negotiation depend)
POWER
Full Duplex/Buffer
100M
Link/Act


ITALY
21010 Cardano al Campo VA
via A. Volta 39
This manual suits for next models
1
Table of contents
Languages:
Other Digicom Switch manuals

Digicom
Digicom 8D5505 User manual

Digicom
Digicom Hub USB User manual

Digicom
Digicom Hub 8-10 Owner's manual

Digicom
Digicom 8E4090 User manual

Digicom
Digicom DUAL SPEED SWITCH 24 User manual

Digicom
Digicom Dual Speed Hub 16 Owner's manual

Digicom
Digicom 8E4095 Owner's manual

Digicom
Digicom 8E4126 Owner's manual