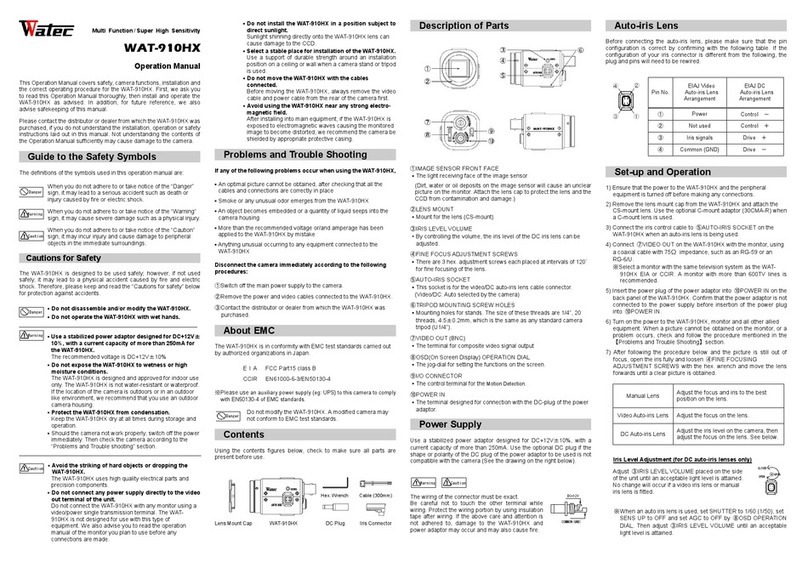
Digimax 300K Pixels User manual

DigiMax Camera Installation Guide v1.0
Page 1
300K Pixels
DigiMax Digital Camera
OWNER'S MANUAL
Warning
1. Do not connect the camera to the computer before the software is
installed.
2. Download the Images from camera before the battery discharges,
otherwise, the Images will be deleted from the memory.
3. Use good quality alkaline batteries only.

DigiMax Camera Installation Guide v1.0
Page 2
DigiMax Camera Installation Guide v1.0
Page 3
Mini Digital Camera
Profile Overview
Thank you for purchasing this digital camera. The camera is able to take both
still images and short videos. The camera is equipped with a 64Mbit (8MB)
built-in SDRAM Memory. If you want to download the photos from the camera
to the PC you only need to have installed the Drivers and connect the
camera via the USB cable provided. You can also use the camera with Video
Conferencing software so you can see others via the Internet.
Electronic Coupling Element: CMOS Sensor 300K Pixels
Image Resolution: 1280 x 960 Pixels (SXGA) 640 x 460 Pixels (VGA)
Memory Device: Built-in 4*16Mbits (8MB) (SDRAM)
Memory Capacity: 26 pictures (SXGA) 99 pictures (VGA)
System Requirements
· Microsoft Windows 98FE/98SE/2000/ME/XPHome/XP Pro operating
systems
· 125MB or above free hard disk space, 32MB or more RAM
· Usable USB Interface and CD-ROM
· colour Monitor (Suggest at least 800*600 24bit or above)
Provided Components
· Camera
· USB Cable
· Stand
· Strap
· Mini Digital Camera Owners Manual
Getting Started
This camera is equipped with standard accessories and this section will tell
you how to use them on the camera.
Replacing Batteries
The battery compartment is located at the lower part of the back of camera,
and you must use one AAA battery. If you want to replace the battery:
1. Open the battery compartment;
2. Load the battery correctly: when you load the battery, please place the
battery according to the polarity requirements for battery on the battery
compartment;
3. Replace the battery compartment cover.

DigiMax Camera Installation Guide v1.0
Page 2
DigiMax Camera Installation Guide v1.0
Page 3
Precautions
When you use the USB cable to connect the camera to a computer, it is not
necessary to use the battery because the camera will use the power provided
by the computer through the USB interface. Before you use the PC Camera
function you are required to download all photos in the camera onto your
computer, which will avoid losing the currently stored photos.
Warning
Don't open the battery compartment and remove the batteries, this will cease
power to the camera and will result in the loss of your photos.
1. If you don't use the camera for a long time, please take out the battery as
this may lead to discharge or corrosion;
2. Please do not put the battery near fire or high temperatures as this may
cause the battery to explode.
3. We suggest using AAA size alkaline batteries for best results.
4. Please note that if you leave the battery in the camera it will use the power
to retain the memory. This will result in a battery life of 7 to 10 days.
Continuous use will result in a reduction of battery life.
Automatic Energy Saving Mode
In order to improve the battery life, if the camera is not used in 30 seconds,
the camera will automatically enter the energy saving mode.
Installing the DigiMax
a. Windows 98FE
i.) On Windows 98 FE, before you install the Driver components you will need
to run the file D:\win\DirectX 8.1b Redist Package.EXE (where D is the drive
letter of the CD-ROM drive you are using) from the Installation CD supplied.
ii.) Once the DirectX 8.1b Redist Package.exe file is installed it would be
advisable to download and install the latest version of DirectX 9 from the
Microsoft website. Please visit www.microsoft.com/directx to obtain this
download.
iii.) Once complete you may follow the installation procedure as described for
installation on Windows 98SE, ME and 2000 in section 2.b.
b. Windows 98SE, ME and 2000
i.) Please insert the Installation CD supplied. If it
does not auto run please click on your Windows
Start button and then on the Run option. In the
Open dialog box please type in D:\autorun.exe
(where D is the drive letter of the CD-ROM drive
you are using.) then click on OK. You should then
be shown the menu pictured right.

DigiMax Camera Installation Guide v1.0
Page 4
ii.) To install the driver component and the MyDSC download manager click
on the option called “Install DC Driver”. You will be given a second screen
where you will again need to click on the option called “Install DC Driver”.
This will prompt the InstallShield to begin the installation process. On the next
installation screen given, click on Next and the installation will continue
immediately installing the application as required.
iii.) Once this has finished you will be asked to
Restart your PC as shown in the picture on the
right. Choose “Yes, I want to restart my PC now”
ensuring all programs that may be running are
closed and any information saved. (Please Note:
During the installation of any software it is
advisable that you do not have any applications
running in the background as this may interfere
with the installation process.)
iv.) Once the PC has restarted you should be able to plug your camera in and
Windows will detect the new Hardware. We advise that you first connect the
camera to a rear USB port and not through a Hub or front USB port. Once
connected the camera should turn on automatically and make a small beep
to indicate this. Windows will detect new hardware. Allowing Windows to
search for the appropriate drivers will install the device as required.
v.) Once the camera is detected and you run the MyDSC application from
Start>Programs>MyDSC>MyDSC you will be able to access the images on
the camera by clicking on the Pink Camera Icon at the bottom of the MyDSC
download manager.
c. Windows XP
i.) Please insert the Installation CD supplied. If it
does not auto run please click on your Windows
Start button and then on the Run option. In the
Open dialog box please type in D:\autorun.exe
(where D is the drive letter of the CD-ROM drive
you are using.) then click on OK. You should then
be shown the menu pictured right.
ii.) To install the driver component and the MyDSC download manager click
on the option called “Install DC Driver”. You will be given a second screen
where you will again need to click on the option called “Install DC Driver”.
This will prompt the InstallShield to begin the installation process. On the next
installation screen given click on Next and the installation will continue
immediately installing the application as required.

DigiMax Camera Installation Guide v1.0
Page 5
iii.) Once this has finished you will be asked to
Restart your PC as shown in the picture on the
right. Choose “Yes, I want to restart my PC now”
ensuring all programs that may be running are
closed and any information saved. (Please Note:
During the installation of any software it is
advisable that you do not have any applications
running in the background as this may interfere
with the installation process.)
iv.) Once the PC has restarted you should be able to plug your camera in and
Windows will detect the new Hardware. We advise that you first connect the
camera to a rear USB port and not through a Hub or front USB port. Once
connected the camera should turn on automatically and make a small beep
to indicate this. Windows will detect new hardware. Allowing Windows to
search for the appropriate drivers will install the device as required.
v.) Once the camera is detected and you run the MyDSC application from
Start>Programs>MyDSC>MyDSC you will be able to access the images on
the camera by clicking on the Pink Camera Icon at the bottom of the MyDSC
download manager.
Camera Operation
In order to use the DigiMax Digital Camera it must have a battery inserted
and be turned on so that it is in it’s normal working state. If it is in the energy
saving mode press the “Function” button once to turn on the camera and the
LCD should then display the current Resolution Mode before showing you
the number of images you have remaining.
When you use the function button on the back of the DigiMax Digital Camera
you will cycle through the following Modes. When you find the mode you
require you will then need to click the shutter button to select this mode.
oF - Off Turns off the DigiMax Camera
St - Stop Timer 10 Second Delay Stop Timer
d8 - Continuous mode Continuous shoot mode to create a short
movie
CA- Clear All Removes All stored pictures taken
CL - Clear Last Removes Last picture taken
Lo/HI - Resolution Low/High Resolution mode toggle
Hd/Ld - Compression High/Low Compression mode toggle
60/50 - Frequency 60/50 Frequency mode toggle

DigiMax Camera Installation Guide v1.0
Page 6
Turn off the camera
1. Press the “Function” button once, LCD will display "oF"
2. Press the “Shutter” button within 5 seconds to turn off the camera swiftly.
Note:This will not take effect when connected to USB
Auto-Shoot Mode
1. Press the “Function” button twice and the LCD will display "St";
2. Press the “Shutter” button within 5 seconds to enter the 10-second time to
set auto-shoot state, and the camera will give out a sound every second.
After 10 seconds, the camera will give out a longer sound to indicate the
photo has been taken.
Continuous Shoot Mode:
1. Press the “function” button three times and the LCD will display “d8";
2. Press and hold the “Shutter” button within 5 seconds to start the
continuous shoot.
3. Release shutter button to stop the continuous shoot.
Note:During the continuous shooting period, an alternative exposure will
appear to allow for a longer continuous video to be made.
Delete All Photos
1. Press the “Function” button four times and the LCD will display "CA”;
2. Press the “Shutter” button in 5 seconds to delete all photos in the camera.
Delete the last photo
1. Press the "Function" button five times and the LCD will display “CL".
2. Press the "Shutter" button within 5 seconds to delete the last photo.
Image Quality Mode Toggle
1. Press the "Function" button six times and the LCD will display "HI/Lo";
2. Press the “Shutter” button in 5 seconds and the image quality mode will
change between either Hi and Low Resolution.
Image Compression/Normal Shift
1. Press the “Function" button seven times and the LCD will display “Hd/Ld”;
2. Press the “Shutter" button within 5 seconds and the change between
image compression/normal can be achieved.
NOTE:LCD can only display up to 99 on the LCD display, but it will actually
hold over 99 pictures in it’s memory given the Resolution and Compression
Settings you set up.
Light System Toggle
1. Press the "Function" button seven times and the LCD will display "60/50";
2. Press the "Shutter" button within 5 seconds and the shift of 50/60Hz light
system can be achieved.

DigiMax Camera Installation Guide v1.0
Page 7
Note:
If you don't press the shutter button in 5 seconds, the operation will not
be executed and the digital camera will return to its normal working state.
Take Photos
Please be sure that the power in the battery is enough before you use this
camera to take photos. If you want to take photos, please follow the steps
below;
1. Press function button to turn on the camera and the LCD display will turn
on;
2. Use the viewfinder to determine what you would like to take a photo of;
3. Hold the camera steadily, and press the shutter button to take photos;
4. When you hear the buzzer beep once, this indicates you have taken a
photo, and you can proceed to take further photos. A double beep means
there has been a problem and you may need to take the photo again.
Please ensure you are using it in sufficient light for the sensor to work.
5. When the camera is fully loaded with photos, the LCD will display "00" if
you press shutter button again, the buzzer will give out the continuous
beep to warn you that you can take no more pictures.
Download Photos
When you have taken as many photos as the memory will allow, you can
delete the photos to take more photos if you wish. If you wish to save these
photos before deleting them, you can upload them into your computer for
storage first.
1. MyDSC Download Manager
i.) Use USB cable to connect the camera with your computer and the buzzer
will give out a beep indicating the connection is correct and the device is
powered. To access the MyDSC Download Manager click on your Windows
Start button and then on Programs (this will be called “All Programs” in
Windows XP) you will be able to locate an option called MyDSC. Click on
MyDSC then on the MyDSC application shortcut.
ii.) To download your pictures click on the Pink
Camera Icon which will download your images directly
to the manager preview windows.
iii.) You can Preview your images by Right Clicking on
the image which will open up a preview window. Right
clicking on the preview will zoom in, left clicking will
zoom out. To close the Window click the cross in the
top right hand corner of the screen.
iv.) To adjust the Brightness and Contrast click on the Edit Image button.

DigiMax Camera Installation Guide v1.0
Page 8
Adjust the Brightness and Contrast as required then redownload your images
given the new filter settings.
v.) To save the images, click each picture you wish to keep once, with the left
mouse button. The border should turn Red to indicate the selections. Click on
the Disk Icon to save. Please give the selection of photos a suitable filename.
The application will add a sequential number suffix to the name you gave and
save it in the folder of your choice.
2. PCCam - Live View
i.) With the DigiMax Camera connected via USB you will need to run the
PCCam Application. To access the PCCam Application click on your
Windows Start button and then on Programs (this will
be called “All Programs” in Windows XP). You will be
able to locate an option called MyDSC. Click on
MyDSC then on the PCCam application shortcut.
ii.) You can access a Preview of the Live Video mode
through the PCCam application. Click on Options and
ensure that Preview is ticked. You should then
receive a Preview in the PCCam Window.
iii.) The File menu allows you to choose where you can save your file, and
sets how big the file can become before the capture automatically stops.
The Devices menu allows you to select the Audio and Video devices you
wish to use to acquire a capture and create an AVI.
The Options menu allows you to view a preview, and also allows you to set
Audio and Video formats and filters to use in the capture.
The Capture menu allows you to set the capture properties including frame
rates, capture time limits, whether audio is included and when to start and
stop the capture
Additional Software
On the DigiMax Installation CD you will find two free programs from Arcsoft.
a.) Arcsoft PhotoImpression 4.0
b.) Arcsoft VideoImpression 1.6
These products are developed and supported by Arcsoft. Arcsoft can be
contacted on the following e-mail addresses.

DigiMax Camera Installation Guide v1.0
Page 9
Manuals can be downloaded for free from the Arcsoft website once you have
registered with them. Please visit http://www.arcsoft.com/en/club/signup.asp
to register with Club Arcsoft.
Once joined you can visit the following pages to download the free manual
downloads;
PhotoImpression - http://www.arcsoft.com/en/support/downloads/
manual.asp?title=12
VideoImpression - http://www.arcsoft.com/en/support/downloads/
manual.asp?title=17
Photo Editing Software
You can use "Arcsoft PhotoImpression 4.0" software to edit the photo. Please
click the button "Camera/Scanner" and then select the camera from the
select source options. The DigiMax Camera will be listed as Dual-Mode
DSC(2770), then click the Acquire button (this will have a picture of a scanner
and a camera on the button). This will load your MyDSC application and will
allow you to download your photos and select the appropriate photos you
wish to use. Instead of Saving these you can choose the option to Transfer
Files which will pass these to the PhotoImpression Software for you to work
with.

DigiMax Camera Installation Guide v1.0
Page 10
Video Conferences
The camera can be used as a PC camera to conduct image transmission or
hold online video conferences, you are only required to:
1. Use the USB cable to connect the camera and the USB Interface of PC;
2. Run the video conference software Microsoft NetMeeting (C:\Program
files\NetMeeting) on your computer. Click [TOOLS] and press [OPTIONS];
3. Select an appropriate video device to start a video conference. Click on
the Video tab and choose from the available list.
NOTE:Windows NetMeeting is given as an example that should be available
to most Windows Users and can be downloaded from Microsoft if required.
VideoImpression 1 .6
VideoImpression is an easy to use video editing application. It can edit new
video files onto the current video project, and the content of it will be display
on the working area for the application. The VideoImpresion will assist you in
mastering the editing of your digital video files.
Title Screen
Allows you to select whether to start a New
project or open a currently saved document.

DigiMax Camera Installation Guide v1.0
Page 11
Document Addition
Allows you to add additional files to your
timeline. To go back to the Title Screen to Save
or Send the file click on Play Movie
Video Capture
Through Capture, the digital camera can take
the digital video and add it to your timeline.
5. Troubleshooting
If your camera is not performing as dictated in this document or the
installation has not completed for any reason, the following section should
help.
a. The autorun does not allow me to install the applications.
i.) To install the MyDSC application please click on your Windows Start
button and select the Run option. In the Open dialog type in
D:\DRIVER\Setup.exe
ii.) To install the PhotoImpression application click on your Windows Start
button and select the Run option. In the Open dialog type in
D:\PhotoImpression\setup.exe
iii.) To install the VideoImpression application click on your Windows Start
button and select the Run option. In the Open dialog type in
D:\VideoImpression\setup.exe
b. I get a “Has Not Passed Windows Logo Testing” error message.
When Windows XP was under development Microsoft tested all pieces of
hardware and software that were available at the time and made a small
database in the operating system to tell you if the item passed Logo Testing

DigiMax Camera Installation Guide v1.0
Page 12
or not. Items developed since the release of Windows XP in October of 2001
may not have been pre-tested and will give up this error message. This
device has been thoroughly tested by both Aiptek and ourselves and we can
confirm compatibility with Windows XP.
c. I get a “Camera Connection Error” message when I try to download
photos.
i.) With the camera connected ensure that the camera turns on when you
plug it into the USB port. Once connected Right click on My Computer (You
may need to click on Start then right click on My Computer in XP) and choose
Properties.
In order to access the device manager there are two methods depending on
the version of Windows you are using.
In Windows XP/2000 click on the Hardware Tab, then click on the button to
view your Device Manager.
In Windows 98SE/ME click on The Device Manager Tab
In here you will be able to see the item listed. If it is installed correctly you will
find the camera listed in the Imaging Devices section. It will be called Dual
Mode DSC(2770)
If the item has not installed successfully then it may be listed under Other
Devices as USB Digital Still Camera. If it is, you will need to double click this
option and choose to Reinstall Driver. The button should be automatically
visible on the General Properties Screen.
Run through the Wizard and allow Windows to search for the most
appropriate drivers (this is the recommended option). Once complete the
USB Digital Still Camera should now be listed as Dual-Mode DSC(2770) as
required.
You should now be able to use your DigiMax Camera as required.
ii.) If the advice in 3.c.1. does not resolve the issue but you find that the “Dual
Mode DSC(2770)” has an exclamation mark against it, it would be advisable
to check that the device is plugged into your PC directly and that you are not
using a USB Hub or a front USB port. These can prevent the camera from
working properly if they do not supply enough power to run the device.
iii.) On earlier versions of Windows including Windows 98 First Edition/
Second Edition it is advisable to ensure that you have DirectX 9 installed on
your system. This can be downloaded from www.microsoft.com/directx.

DigiMax Camera Installation Guide v1.0
Page 13
d. I’m unable to print my photos.
The photos are only downloaded using this application. In order to Print these
images you will need to save the pictures (Please refer to section 3.b.
regarding this process.) and then open them with the image editing
application of your choice.

DigiMax Camera Installation Guide v1.0
Page 14

DigiMax Camera Installation Guide v1.0
Page 15

DigiMax Camera Installation Guide v1.0
Page 16
Table of contents
