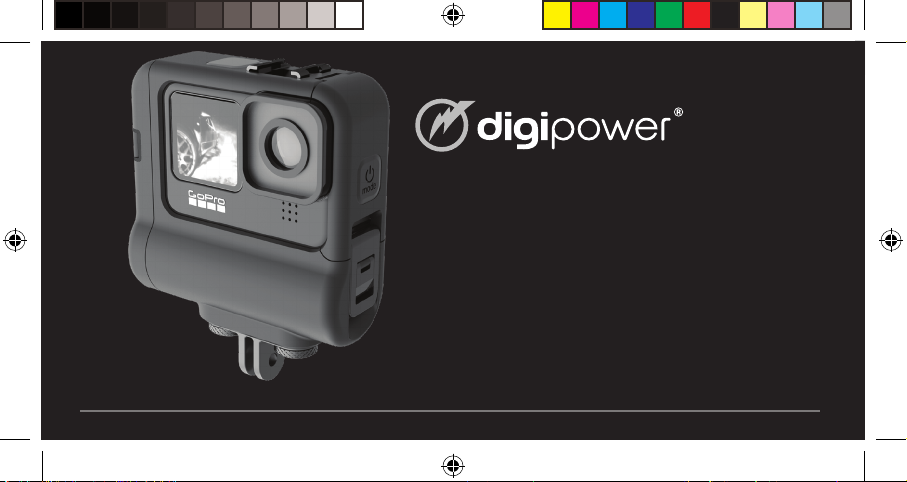
DigiPower ActionPack RF-REFUEL-10 User manual
ACTIONPACK
RECHARGEABLE
BATTERY
High capacity power for
GoPro® HERO10 Black, HERO9 Black
USER GUIDE
Item No. RF-REFUEL-10

1
ENGLISH
1
23
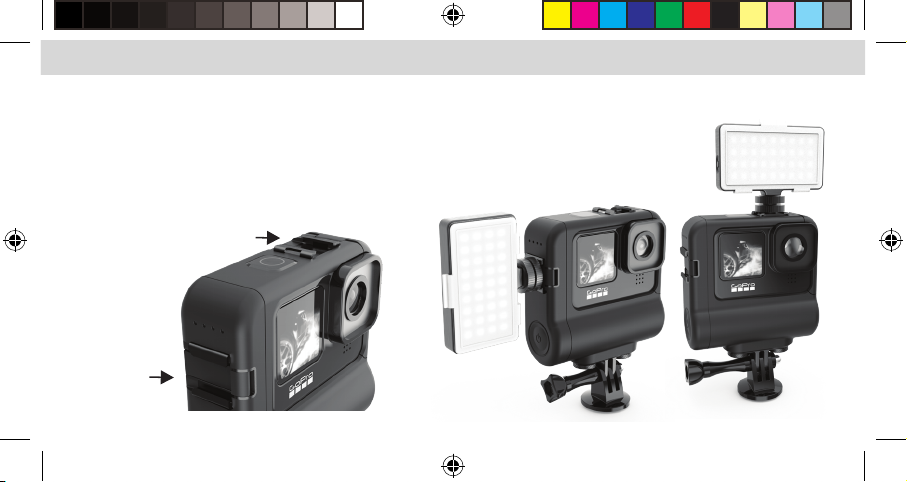
PREPARING THE CAMERA FOR USE WITH THE ACTIONPACK
It is necessary to remove the USB door so the camera can connect to the ActionPack.
The USB door is designed to be safely removed and reinstalled on the camera as needed.
1. Open the USB door on the left side of the camera.
2. With the door open at a 90 degree angle to the camera body gently pull downward at a 45 degree angle
to remove the door.
3. Keep the door in a safe place,
you will need this when not
using the ActionPack on
the camera.

2
ENGLISH ENGLISH
USING THE ACTIONPACK IN 4 EASY STEPS
1. Open the ActionPack housing by pressing up on the security clip (the security clip is found on the right side of
the ActionPack).
2. Lift the pivoting frame up and to the left so you can install the GoPro camera.
3. Slide the GoPro camera to the left so that it FIRMLY connects to the USB-C plug on the ActionPack, close the
housing.
4. Press in on the side door while latching the case.
5. Secure the case latch. IT IS VERY IMPORTANT TO PROPERLY LATCH THE CASING OR THE PRODUCT WILL NOT BE WATERPROOF.
2 4
31

3
ENGLISH ENGLISH
CHARGING THE ACTIONPACK
1. The USB-C charging port is in the middle of the shoe mount on the left side of the ActionPack.
2. Open the USB port cover by pulling upward to unlatch it. Using a coin will make it easier to open.
3. Insert the included USB-C charging cable.
4. With the cable inserted, plug the other end into a USB power source (not included).
Unlocked
1 2 34

4
ENGLISH ENGLISH
5. For fastest charging use a 2 Amp (10 Watt) power supply (not included).
6. If the camera is installed in the ActionPack the camera’s internal battery will also charge.
7. Press and hold the power button for 2 seconds to turn the ActionPack on. Press and hold for 2 seconds to turn it o.
NOTE: IT IS VERY IMPORTANT TO PROPERLY LOCK THE USB-C DOOR DOOR AFTER CHARGING OR THE PRODUCT WILL NOT BE WATERPROOF.
5 6 7

5
ENGLISH ENGLISH
CHARGING STATUS INDICATOR
STATUS DISPLAY STATE CHARGE STATUS
One LED is blinking Below 25%
One LED is on, next LED is blinking 25% - 50%
Two LEDs are on, next LED is blinking 50% - 75%
Three LEDS are on, last LED is blinking 75% - 100%
All four LEDs are on Charging complete
When the ActionPack is fully charged, all 4 LEDs will
remain lit.
When the camera is installed in the ActionPack, both the
ActionPack and the internal camera battery will charge at the
same time.
Charge level LEDs
The percent of charge by LED is an approximation, it is best to
wait until all four LEDs are lit, the unit will be fully charged then.

6
ENGLISH ENGLISH
BATTERY LEVEL INDICATOR
STATUS DISPLAY STATE BATTERY LEVEL
One LED is blinking Very low, recharge soon
One LED is on Below 25%
Two LEDs are on 25% - 50%
Three LEDs are on 50% - 75%
All four LEDs are on 75% - 100%
CHECKING THE BATTERY CHARGE LEVEL
To check the charge level tap the power button.
TIME TO CHARGE (ASSUMING THE CAMERA BATTERY
AND ACTIONPACK ARE COMPLETELY DRAINED)
Power supply
( not included) Camera installed Camera not installed
1 Amp (5 Watt) Camera charges then
ActionPack, total charge
time approximately 8
hours 30 minutes
ActionPack charge
time 6 hours
2 Amp (10 Watt) Camera charges then
ActionPack, total charge
time approximately 4
hours 30 minutes
ActionPack charge
time 3 hours
7
ENGLISH ENGLISH
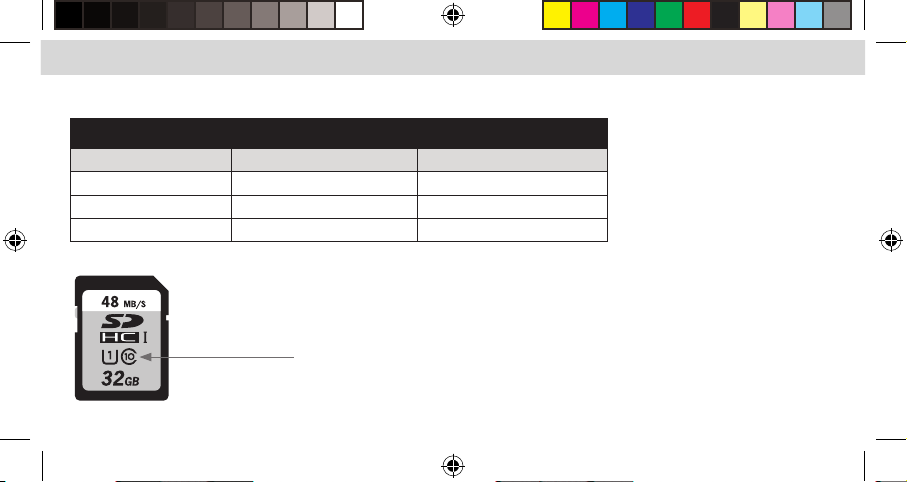
APPROXIMATE USE TIME FOR ACTIONPACK RFREFUEL10
RFREFUEL10
RESOLUTION WiFi STATUS TOTAL TIME
1080P/24fps OFF 9 HOURS
4K/30fps OFF 5 HOURS
5K/30fps OFF 4 HOURS
A Class 10/UHS1 memory card is required for best performance.
Class 10/UHS 1
memory card

8
ENGLISH ENGLISH
Standard GoPro Mount
USING THE GOPRO MOUNT
• Attach the mounting plate to the bottom of the
ActionPack by turning the two knurled knobs
clockwise. Do not overtighten.
• Connect your favorite GoPro accessories as you
normally would.
9
ENGLISH ENGLISH
• There are two cold shoes on the Actionpack frame
• You can attach a light, microphone or other camera
accessory that uses a cold shoe mount
• Slide the accessory onto the cold shoe, turn the lock-
ing wheel on the base of the accessory clockwise to
secure it.
NOTE: These are cold shoe
mounts, there is no electrical
connection to the camera.
ATTACHING ACCESSORIES TO THE COLD SHOE MOUNTS
10
ENGLISH ENGLISH
• The LEDs on the ActionPack remain on when the
ActionPack is powered on. It will tell you the level of
charge remaining in the ActionPack by the number
of LEDs lit.
• The ActionPack provides power to the camera
battery which then powers the camera. The camera’s
battery level will not begin to go down until the
ActionPack battery has been fully depleted.
• With the ActionPack powered on and the camera in
standby or playback modes the battery display on
the camera will show charging.
• With the ActionPack powered on and the camera in
record mode the battery display on the camera will
not show charging.
• When you are done using the ActionPack power it o
by pressing the power button for 2 seconds. If you do
not press the power button it will continue to provide
power to the internal battery the same way a USB
charger would provide power to your Smartphone.
• Turning on the ActionPack does not turn on the
camera, use the camera’s power button to turn it on.
• Turning o the ActionPack does not turn o the
camera, use the camera’s power button to turn it o.
• For proper functioning, it is necessary to have the
internal camera battery installed while using the
ActionPack.
• The ActionPack has been tested and approved to IEC
standard IP68 for water and dust ingress. Lab testing
done in a pressurized water tank for 2 hours’
submersion, simulated 33ft/10m depth
IMPORTANT NOTES ABOUT THE ACTIONPACK RFREFUEL10

11
ENGLISH ENGLISH
PASS THRU POWER
Pass thru power allows you to record indenitely and
keep your battery charged up at the same time.
1. Open the USB-C port door as noted on page 3 .
2. Connect the USB-C cable to a power source such as a
USB car charger, wall charger, or power bank
3. You do not need to press the power button on the
ActionPack, it starts working automatically.
4. Operate the camera as you normally would
REMOVING YOUR CAMERA FROM THE
ACTIONPACK CASE AFTER IT HAS BEEN
IN WATER
1. Visually inspect the camera, dry o any residual
water found before opening the case.
2. Unlatch the casing and pivot the frame away from
the camera.
3. Remove the camera by sliding it out of the Action-
Pack frame.
4. Visually look for any water around the USB-C port on
the camera; dry it o immediately.

12
ENGLISH ENGLISH
CARE OF THE ACTIONPACK EXTENDED
BATTERY
• 1. Before using, especially if you plan to use it in water,
visually inspect the ActionPack for signs of dust, dirt,
or anything that may aect its ability to maintain a
waterproof seal.
• 2. If the ActionPack is used in salt water clean the
areas around the USB-C port with a damp clean (lint
free) cloth then dry thoroughly.
• DO NOT IMMERSE THE ACTIONPACK IN WATER
WITHOUT THE CAMERA IN PLACE AND THE LATCH
SECURED OR IT CAN BE PERMANENTLY DAMAGED.
ACTIONPACK RFREFUEL10
SPECIFICATIONS:
• 5000mAh (18Wh) Lithium Ion battery
• USB-C Input: 5V DC, 2A(10W)
• USB-C Output: 5V DC,2A (10W) Max
• Battery Output: 3.6V DC
• Weight and dims: 6.2oz | 4.3” x 3.5” x 1.4”
177g | 110mm x 89mm x 35mm
Please
recycle
YEAR WARRANTY
ANS GARANTIE LIMITÉE

13
ENGLISH ENGLISH
We want you to have the best possible experience
when using our products, and we’re ready to help you
with any questions or problems. Technical support can
be reached at techsupport@mizco.com. Please allow
up to one business day for email replies.
WARRANTY INFORMATION FOR DIGIPOWER
PRODUCTS, A DIVISION OF MIZCO
INTERNATIONAL, INC.
Mizco’s responsibility with regard to this warranty
shall be limited solely to the repair or replacement,
at its option, of any product that fails during normal
consumeruse for a period of two years from the date
of purchase. This warranty does not extend to damage
or failure resulting from misuse, neglect, accident,
alteration, abuse, or improper installation or
maintenance. This warranty does not extend to
equipment used with the product. If at any time
during the two years period following your purchase
the product fails due to defects in materials or work-
manship, please contact us at 800-838-3200 between
the hours of 9AM and 6PM M-F Eastern time, to obtain
an RMA number and return shipping instructions.
For fastest service, have a copy of your product receipt
available with the model number, date, and location of
purchase. This warranty gives you specic legal rights,
and you may have other rights that may vary in certain
states or provinces.

14
ENGLISH ENGLISH
FCC STATEMENT: This equipment has been tested and
found to comply with the limits for a Class B digital
device, pursuant to Part 15 of the FCC Rules. These
limits are designed to provide reasonable protection
against harmful interference in a residential installa-
tion. This equipment generates uses and can radiate
radio frequency energy and, if not installed and used
in accordance with the instructions, may cause harmful
interference to radio communications. However, there
is no guarantee that interference will not occur in a
particular installation. If this equipment does cause
harmful interference to radio or television reception,
which can be determined by turning the equipment
o and on, the user is encouraged to try to correct the
interference by one or more of the following measures:
• Reorient or relocate the receiving antenna.
• Increase the separation between the equipment and
receiver.
•Connect the equipment into an outlet on a circuit dif-
ferent from that to which the receiver is connected.
•Consult the dealer or an experienced radio/ TV techni-
cian for help.
Operation is subject to the following two conditions:
1. this device may not cause harmful interference, and
2. this device must accept any interference received,
including interference that may cause undesired
operation.
CAUTION: Changes or modications not expressly ap-
proved by the party responsible for compliance could
void the user’s authority to operate the equipment
IC CAN IECS-003/NMB-003

ENGLISH ENGLISH
Visit: www.digipowersolutions.com
Mizco International, Inc. Cranford, New Jersey 07016.
All rights reserved.
email: digipowersolutions@mizco.com
DigiPower is a registered trademark of
Mizco International, Inc.
DEUTSCH
ACTIONPACK -
WIEDERAUFLAD-
BARER AKKU
Hohe Energiekapazität für
GoPro® HERO10 Black, HERO9 Black
BEDIENUNGSANLEITUNG
Artikel
Nr. RF-REFUEL-10

DEUTSCH
1
VORBEREITUNG DER KAMERA FÜR DIE VERWENDUNG MIT DEM ACTIONPACK
Die USB-Abdeckung muss entfernt werden, damit die Kamera an das ActionPack angeschlossen werden kann.
Die USB-Abdeckung kann aufgrund ihrer Bauweise sicher abgenommen und bei Bedarf wieder an der Kamera
angebracht werden.
1. USB-Abdeckung auf der linken Seite der Kamera önen.
2. Die Abdeckung muss im 90° Grad-Winkel zum Kameragehäuse geönet sein. Die Abdeckung dann vorsichtig in
einem 45°-Winkel nach unten ziehen und abnehmen.
3. Die Abdeckung bitte sicher
aufbewahren. Sie benötigen
sie, wenn das ActionPack
nicht an die Kamera
angeschlossen ist.
1
23
BEDIENUNGSANLEITUNG

DEUTSCH DEUTSCH
2
ACTIONPACK VERWENDEN IN 4 EINFACHEN SCHRITTEN
1. ActionPack-Gehäuse önen. Hierzu den den Sicherheitsbügel nach oben drücken.
(Den Sicherheitsbügel nden Sie auf der rechten Seite des ActionPack).
2. Den Schwenkrahmen gegen den Uhrzeigersinn nach oben drücken, damit die GoPro-Kamera angebracht werden kann.
3. Die GoPro-Kamera nach links in die Schiene schieben, so dass sie FEST mit dem USB-C-Stecker am ActionPack verbunden ist. Dann
das Gehäuse wieder schließen.
4. Pressen Sie auf die Tür während Sie den Riegel schließen.
5. Den Sicherheitsbügel schließen. DAS GEHÄUSE MUSS UNBEDINGT SICHER VERSCHLOSSEN WERDEN; SONST IST DAS PRODUKT
NICHT WASSERDICHT.
2 4
31

DEUTSCH DEUTSCH
3
ACTIONPACK LADEN
1. Der USB-C-Ladeanschluss bendet sich in der Mitte der Zubehörschuh-Halterung auf der linken Seite des
ActionPack.
2. Die Abdeckung des USB-Anschlusses nach oben ziehen, um sie zu önen. Dadurch wird die Abdeckung en
triegelt. Die Benutzung einer Münze erleichtert dieses.
3. Das mitgelieferte USB-C-Ladekabel anschließen.
4. Den anderen Kabelstecker an eine USB-Stromquelle anschließen (nicht im Lieferumfang enthalten).
Entsperrt
1 2 34
Table of contents
Languages:
Other DigiPower Camera Accessories manuals


