Digitus DA-20301 User manual

USB CONDENSER MICROPHONE,
PROFESSIONAL KIT
Quick Installation Guide
DA-20301

2
Table of Contents
1. Introduction ................................................................................3
2. Feature........................................................................................3
3. Package Content .........................................................................4
4. Specifications ..............................................................................4
5. Product Components..................................................................5
6. Microphone setup.......................................................................5
7. Power requirements...................................................................6
8. Set your input level.....................................................................6
9. Settings .......................................................................................7

3
1. Introduction
The DIGITUS USB PC Condenser Microphone is ideal for audio
recording, video conferences, phone conferences, gaming or live
streaming. The recording microphone is delivered with a 1.5 m long
USB cable and a stand. The microphone supports directional
recording with cardioid characteristics, which reduces disruptive
environmental noise. Ideal for professional use in offices or private
settings to communicate with family or friends on video calls, as well
as for gamers and audio/video streamers.
2. Feature
The 3.5 mm stereo headphone output of the table microphone
offers direct, latency-free monitoring! This enables you to
monitor the microphone input in real time
The microphone features a mute button, microphone volume
and headset volume control
Plug & Play USB Recording Microphone with 1.5 m USB cable,
microphone arm and additional accessories
Supports directional recording with cardioid characteristics
With professional sound chipset, the USB microphone offers a
high-resolution sampling rate of 192kHz /24Bit
Microphone arm made of metal with 3/8-inch thread. The
adjustable scissor arm is robust, easy to adjust and features a
stable table clamp. The double-braced arms offer additional
strength

4
3. Package Content
1x USB microphone
1x Scissor arm
1x Pop guard
1x Wind guard
1x USB cable USB-A to USB-B
1x Thread adapter: 5/8" to 3/8"
1x Quick installation guide
4. Specifications
1. Sound head: Capacitive
2. Frequency response: 30Hz-20 kHz
3. Directivity: Heart-Sapped (0°-180°@1KHz>5db)
4. The loudest level: 120dB S.P.L
5. Signal to noise ratio: -50dB
6. Sensitivity: 25mV/Pa (-32dB ± 2dB)
7. Words put function: ±25dB gain is adjustable
8. Audio output line: φ3. 5mm gold-plated plug
Polar Response

5
5. Product Components
1
Metal mesh head
2
Control computer silence and recording
3
Reverberation adjusting knob
4
The volume knob
5
Headphones
6
PC-USB
6. Microphone setup
1. Plug one end of the USB cable into the USB port of the
microphone and connect the other end to the computer. After
connecting the USB cable, you can start working directly
2. If you need to change the volume, turn the knob

6
7. Power requirements
1. The microphone is powered by USB, meaning that in most
instances you can just plug the microphone in a USB Port and
get started right away. The microphone is a " Plug & Play "
device and doesn’t need drivers
2. The microphone is compatible with both windows and Mac
computers. Placement of the Microphone and relative to the
vocalist may by varied on several factors including room
acoustics, the vocal performance, and whether the vocalist has
a high or deep voice
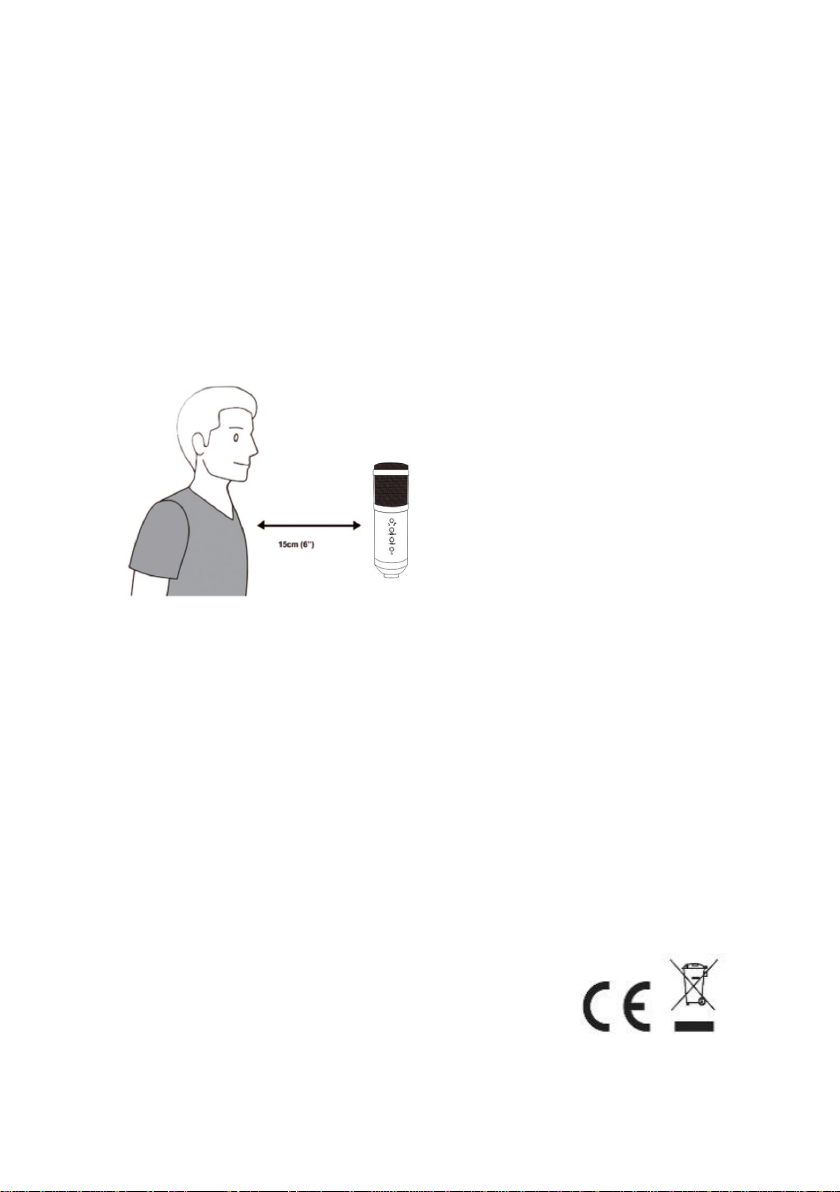
3. An ideal starting point for the reference is to place MIC directly
in front of the lead singer. 15 cm (6") distance. Moving the
vocalist a little closer will make the vocal sound more intimate
and full, while moving the vocalist back will give the vocal a
little more “air” or room sound, and will reduce the proximity
etc. (increased bass or low frequency response when the sound
source is very close)
4. Experimentation should be made with the angle from which
the microphone is addressed, as different results can be
achieved from different angles
8. Set your input level
The microphone has been set to an ideal internal gain setting. If you
need to set your preferred sensitivity to the microphone and listen
to the earphones sound size, please follow the following steps:
1. Check the hardware devices on the computer to see if there are
any USB AUDIO devices
2. Open the computer AUDIO equipment and input the AUDIO
input terminal (i.e., microphone input). Select: “USB AUDIO
microphone input device”. Select "USBAUDIO headset device"
at the output (that is, headphone listening), in this way, the
desktop microphone can be input to the computer in the early
morning, computer voice output to the headset

7
3. The sensitivity of the microphone can be adjusted in real time
through the sound card attribute microphone. It can be
adjusted well according to personal preference
4. Can monitor the size through the total volume of the computer
5. If the desktop microphone is used alone, the original sound
card device can be disabled on the computer device to prevent
conflicts
6. If the computer cannot recognize the desktop microphone,
choose to disable the original sound card. The device must be
“USB AUDIO”or other names can be displayed to uninstall the
device driver
7. If the sound is low, please check whether the sound volume of
each sound card software property is adjusted
8. The volume of microphone can be adjusted by the knob in front
of the desktop microphone
9. Settings
To manually adjust your input level via your computers system
preferences, use the following instructions relevant to your device
platform/operating system.
To ensure the microphone is configured correctly on the macOS,
follow the steps below:
1. Open System Preferences and select Sound.
2. On the Output tab, select USB Microphone
3. On the Input tab, select USB Microphone
Control the microphone
1. Open the Finder app and go to Applications > Utilities > Audio
MIDI Setup
2. Click on USB Microphone and click on the checkbox under the
Thru column to toggle

8
Adjusting the input level on a Windows computer:
Step 1: Right click the computer right voice Icon, enter the sound
control panel, and click record

9
Step 2: Select the microphone, Click on the properties below
Step 3: Click Advanced, select 48000Hz, Finally, click OK

10
Control the microphone
1. From the Sound control panel, on the Playback tab, right-click on
Speakers Default Device and select Properties.
2. On the Levels tab, adjust the Microphone volume slider to
adjust the level of microphone monitoring.
NOTE
1. Do not cover the microphone grille with your hand
2. Regular maintenance is recommended to avoid electricity
erratic and acoustic problems.
Hereby Assmann Electronic GmbH, declares that the Declaration of
Conformity is part of the shipping content. If the Declaration of
Conformity is missing, you can request it by post under the below
mentioned manufacturer address.
www.assmann.com
Assmann Electronic GmbH
Auf dem Schüffel 3
58513 Lüdenscheid
Germany
Table of contents
Other Digitus Microphone manuals