Digium Asterisk Appliance 50 Use and care manual

Asterisk Appliance™ 50
(AA50)
Administrator Manual
601-00005 Rev. C

Digium, Inc. Page 2
© Digium, Inc. 2009
All rights reserved.
No part of this publication may be copied, distributed, transmitted, transcribed, stored in a
retrieval system, or translated into any human or computer language without the prior written
permission of Digium, Inc.
Digium, Inc. has made every effort to ensure that the instructions contained in this document
are adequate and error free. The manufacturer will, if necessary, explain issues which may
not be covered by this documentation. The manufacturer’s liability for any errors in the
document is limited to the correction of errors and the aforementioned advisory services.
This document has been prepared for use by professional and properly trained personnel,
and the customer assumes full responsibility when using it.
Adobe and Acrobat are registered trademarks, and Acrobat Reader is a trademark of Adobe
Systems Incorporated.
Asterisk and Digium are registered trademarksand Asterisk Business Edition, AsteriskNOW,
AsteriskGUI, and Asterisk Appliance 50 are trademarks of Digium, Inc.
Any other trademarks mentioned in the document are the property of their respective owners.
Digium, Inc.
445 Jan Davis Drive
Huntsville, AL 35806
United States
Main Number: 1.256.428.6000
Tech Support: 1.256.428.6161
U.S. Toll Free: 1.877.344.4861
Sales: 1.256.428.6262
www.digium.com
www.asterisk.org
www.asterisknow.org

Digium, Inc. Page 3
Safety Certification and Agency Approvals
Safety:
US/CSA 60950
IEC 60950
EN 60950
AS/NZ 60950
Other:
CE Mark (European Union)
2002/95/EC Restrictions on Hazardous Substances (RoHS), 2005/747/EC
lead free exemption (Annex C)
Telecom:
FCC Part 68, TIA-968
TBR-21 1998
Industry Canada IC-CS-03
AS-ACIF S002-2005
AS-ACIF S003-2005
EMC:
FCC Part 15 Class A
EN55022/CISPR22 Class A
EN55025
IEC 61000
CNS13438
VCCI V-32005.04

Digium, Inc. Page 4
Federal Communications Commission Part 68 (USA)
This equipment complies with Part 68 of the FCC rules and the
requirements adopted by the ACTA. On the back of the Asterisk
Appliance 50 enclosure is a label that contains, among other information,
a product identifier in the format US:AAAEQ##TXXXX. If requested,
this number must be provided to the telephone company.
A plug and jack used to connect this equipment to the premises wiring
and telephone network must comply with the applicable FCC Part 68
rules and requirements adopted by the ACTA.
If the Asterisk Appliance 50 causes harm to the telephone network, the
telephone company may notify you in advance that temporary
discontinuance of service may be required. But if advance notice is not
practical, the telephone company will notify you as soon as possible.
Also, you will be advised of your right to file a complaint with the FCC if
you believe it is necessary.
The telephone company may make changes in its facilities, equipment,
operations or procedures that could affect the operation of the equipment.
If this happens, the telephone company will provide advance notice in
order for you to make necessary modifications to maintain uninterrupted
service.
If you experience problems with the Asterisk Appliance 50,contact
Digium, Inc. (+1.256.428.6161) for repair and/or warranty information. If
the equipment is causing harm to the telephone network, the telephone
company may request that you disconnect the equipment until the
problem is resolved.
Digium, Inc. Page 5
FCC Part 15
This device complies with part 15 of FCC rules. Operation is subject to
the following two conditions: (1) This device may not cause harmful
interference, and (2) This device must accept any interference received,
including interference that may cause undesired operation.

Digium, Inc. Page 6
Introduction to Asterisk Appliance 50 Documentation
This manual contains product information for the Asterisk Appliance 50.
Be sure to refer to any supplementary documents or release notes that
were shipped with your equipment. The manual is organized in the
following manner:
Chapter/
Appendix Title Description
1Overview Identifies the features of your unit.
2Unit Installation Provides instructions for installing the unit.
3Asterisk
Configuration Provides instructions on how to configure the
Embedded Asterisk Business Edition through the use
of the AsteriskGUI.
4Troubleshooting Explains resolutions to common problems and
frequently asked questions pertaining to the unit.
APin Assignments Lists the connectors and pin assignments.
BSpecifications Details unit specifications.
CLicense Agreement Digium End-User Purchase and License Agreement
DGlossary and
Acronyms Defines terms related to this product.

Digium, Inc. Page 7
Symbol Definitions
Caution statements indicate a condition where damage to the unit or
its configuration could occur if operational procedures are not
followed. To reduce the risk of damage or injury, follow all steps or
procedures as instructed.
The ESD symbol indicates electrostatic sensitive devices. Observe
precautions for handling devices. Wear a properly grounded
electrostatic discharge (ESD) wrist strap while handling the device.
The Electrical Hazard Symbol indicates a possibility of electrical
shock when operating this unit in certain situations. To reduce the
risk of damage or injury, follow all steps or procedures as
instructed.

Digium, Inc. Page 8
Important Safety Instructions
Save these instructions for future reference.
Servicing.
Do not attempt to service this unit unless specifically instructed to do
so. Do not attempt to remove the unit from your equipment while
power is present. Refer servicing to qualified service personnel.
Water and Moisture.
Do not spill liquids on this unit. Do not operate this equipment in a
wet environment.
Heat.
Do not operate or store this product near heat sources such as
radiators, air ducts, areas subject to direct, intense sunlight, or other
products that produce heat.
Warning.
Do not place anything (including paper) on top of the Asterisk
Appliance 50. To allow proper cooling, these units must not be
stacked.
Caution.
To reduce the risk of fire, use only No. 26 AWG or larger
telecommunication wiring for network connections.
Static Electricity.
To reduce the risk of damaging the unit or your equipment, do not
attempt to open the enclosure or gain access to areas where you are
not instructed to do so. Refer servicing to qualified service personnel.
Emergency 911
The Asterisk Appliance 50 is capable of forwarding arbitrary caller
id strings to VoIP service providers, which in multi-office setups
could simply be other Asterisk Appliance 50s. Customers of Internet
Telephony Service providers to which 911 or Emergency calls are
placed should ensure their provider properly forwards the customer's
accessible PSTN phone number to the emergency call handling
center.

Digium, Inc. Page 9
TABLE OFCONTENTS
Introduction to Asterisk Appliance 50 Documentation . . . . . . . . . . .6
Chapter 1
Overview . . . . . . . . . . . . . . . . . . . . . . . . . . . . . . . . . . . . . . . . . . . . . . .15
Features: . . . . . . . . . . . . . . . . . . . . . . . . . . . . . . . . . . . . . . . . . . . . .16
Chapter 2
Unit Installation . . . . . . . . . . . . . . . . . . . . . . . . . . . . . . . . . . . . . . . . . .17
Unpacking the Unit . . . . . . . . . . . . . . . . . . . . . . . . . . . . . . . . . . . . .18
Inspecting Your Shipment . . . . . . . . . . . . . . . . . . . . . . . . . . . . . . . .18
Identifying Communication Ports . . . . . . . . . . . . . . . . . . . . . . . . . .19
Understanding the LEDs . . . . . . . . . . . . . . . . . . . . . . . . . . . . . . . . .19
Using the Configuration Reset Switch . . . . . . . . . . . . . . . . . . . . . .23
Installing the Asterisk Appliance 50 . . . . . . . . . . . . . . . . . . . . . . . .24
Mounting the Asterisk Appliance 50 . . . . . . . . . . . . . . . . . . . . . . . .27
Chapter 3
Telephone System Configuration . . . . . . . . . . . . . . . . . . . . . . . . . . .29
Log On to the Asterisk Appliance 50 . . . . . . . . . . . . . . . . . . . . . . . .31
The Asterisk Appliance 50 Interface . . . . . . . . . . . . . . . . . . . . . . . .32
Analog Hardware Configuration . . . . . . . . . . . . . . . . . . . . . . . . . . .35
Trunk Configuration . . . . . . . . . . . . . . . . . . . . . . . . . . . . . . . . . . . .40
Analog Trunks . . . . . . . . . . . . . . . . . . . . . . . . . . . . . . . . . . . . . . . . .41
Outgoing Calling Rules . . . . . . . . . . . . . . . . . . . . . . . . . . . . . . . . . .55
Dial Plans . . . . . . . . . . . . . . . . . . . . . . . . . . . . . . . . . . . . . . . . . . . .59

Digium, Inc. Page 10
Table Of Contents
User Extensions . . . . . . . . . . . . . . . . . . . . . . . . . . . . . . . . . . . . . . .61
Ring Groups . . . . . . . . . . . . . . . . . . . . . . . . . . . . . . . . . . . . . . . . . .68
Music on Hold . . . . . . . . . . . . . . . . . . . . . . . . . . . . . . . . . . . . . . . . .70
Call Queues . . . . . . . . . . . . . . . . . . . . . . . . . . . . . . . . . . . . . . . . . .72
Agent Login Settings . . . . . . . . . . . . . . . . . . . . . . . . . . . . . . . . . . . .77
Voice Menus . . . . . . . . . . . . . . . . . . . . . . . . . . . . . . . . . . . . . . . . . .78
Record a Voice Menu . . . . . . . . . . . . . . . . . . . . . . . . . . . . . . . . . . .85
Time Intervals . . . . . . . . . . . . . . . . . . . . . . . . . . . . . . . . . . . . . . . . .87
Incoming Calling Rules . . . . . . . . . . . . . . . . . . . . . . . . . . . . . . . . . .89
Voicemail . . . . . . . . . . . . . . . . . . . . . . . . . . . . . . . . . . . . . . . . . . . .93
Paging/Intercom . . . . . . . . . . . . . . . . . . . . . . . . . . . . . . . . . . . . . . .97
Conferencing . . . . . . . . . . . . . . . . . . . . . . . . . . . . . . . . . . . . . . . .101
Follow Me . . . . . . . . . . . . . . . . . . . . . . . . . . . . . . . . . . . . . . . . . . .104
Directory . . . . . . . . . . . . . . . . . . . . . . . . . . . . . . . . . . . . . . . . . . . .110
Call Features . . . . . . . . . . . . . . . . . . . . . . . . . . . . . . . . . . . . . . . .112
Voicemail Groups . . . . . . . . . . . . . . . . . . . . . . . . . . . . . . . . . . . . .122
System Info . . . . . . . . . . . . . . . . . . . . . . . . . . . . . . . . . . . . . . . . . .123
Networking . . . . . . . . . . . . . . . . . . . . . . . . . . . . . . . . . . . . . . . . . .124
G.729 Codec . . . . . . . . . . . . . . . . . . . . . . . . . . . . . . . . . . . . . . . . .127
Backup . . . . . . . . . . . . . . . . . . . . . . . . . . . . . . . . . . . . . . . . . . . . .130
Update . . . . . . . . . . . . . . . . . . . . . . . . . . . . . . . . . . . . . . . . . . . . .131
Options . . . . . . . . . . . . . . . . . . . . . . . . . . . . . . . . . . . . . . . . . . . . .134
Chapter 4
Troubleshooting . . . . . . . . . . . . . . . . . . . . . . . . . . . . . . . . . . . . . . . .140
Appendix A

Digium, Inc. Page 11
Table Of Contents
Pin Assignments . . . . . . . . . . . . . . . . . . . . . . . . . . . . . . . . . . . . . . . .141
Appendix B
Specifications . . . . . . . . . . . . . . . . . . . . . . . . . . . . . . . . . . . . . . . . . .145
Appendix C
Asterisk Appliance 50 (AA50) License Agreement . . . . . . . . . . . .147
Appendix D
Glossary and Acronyms . . . . . . . . . . . . . . . . . . . . . . . . . . . . . . . . . .208

Digium, Inc. Page 12
List of Figures
Figure 1: The Asterisk Appliance 50 (AA50) . . . . . . . . . . . . . .17
Figure 2: Example Asterisk Appliance 50 Port Identification . .22
Figure 3: Asterisk Appliance 50 Back View . . . . . . . . . . . . . . .24
Figure 4: Mounting Instructions . . . . . . . . . . . . . . . . . . . . . . . .27
Figure 5: GUI Login . . . . . . . . . . . . . . . . . . . . . . . . . . . . . . . . .31
Figure 6: System Status Page . . . . . . . . . . . . . . . . . . . . . . . . .32
Figure 7: Configure Hardware . . . . . . . . . . . . . . . . . . . . . . . . .35
Figure 8: Trunk Configuration Page . . . . . . . . . . . . . . . . . . . . .40
Figure 9: New Analog Trunk Definition . . . . . . . . . . . . . . . . . .41
Figure 10: Edit Analog Trunk Definition . . . . . . . . . . . . . . . . . . .45
Figure 11: Add New Service Provider . . . . . . . . . . . . . . . . . . . .47
Figure 12: Edit VoIP Service Provider . . . . . . . . . . . . . . . . . . . .48
Figure 13: Create New SIP/IAX Trunk Definition . . . . . . . . . . . .50
Figure 14: Edit VoIP Trunk . . . . . . . . . . . . . . . . . . . . . . . . . . . . .52
Figure 15: Outbound Calling Rules . . . . . . . . . . . . . . . . . . . . . .55
Figure 16: New Calling Rule . . . . . . . . . . . . . . . . . . . . . . . . . . .56
Figure 17: Create New Dial Plan . . . . . . . . . . . . . . . . . . . . . . . .59
Figure 18: User Extensions . . . . . . . . . . . . . . . . . . . . . . . . . . . .61
Figure 19: Create New User . . . . . . . . . . . . . . . . . . . . . . . . . . .62
Figure 20: New Ring Group . . . . . . . . . . . . . . . . . . . . . . . . . . . .68
Figure 21: Music on Hold . . . . . . . . . . . . . . . . . . . . . . . . . . . . . .70
Figure 22: New Call Queue . . . . . . . . . . . . . . . . . . . . . . . . . . . .72
Figure 23: Default Voice Menu . . . . . . . . . . . . . . . . . . . . . . . . .78
Figure 24: Custom Voice Menu Prompts Page . . . . . . . . . . . . .85
Figure 25: Record Menu Prompts . . . . . . . . . . . . . . . . . . . . . . .85
Figure 26: Upload Menu Prompts . . . . . . . . . . . . . . . . . . . . . . .86
Figure 27: New Time Interval . . . . . . . . . . . . . . . . . . . . . . . . . . .87
Figure 28: Incoming Calling Rules . . . . . . . . . . . . . . . . . . . . . . .89

Digium, Inc. Page 13
List of Figures
Figure 29: Incoming Calling Rules . . . . . . . . . . . . . . . . . . . . . . .90
Figure 30: Voicemail . . . . . . . . . . . . . . . . . . . . . . . . . . . . . . . . .93
Figure 31: Paging/Intercom . . . . . . . . . . . . . . . . . . . . . . . . . . . .97
Figure 32: New Page/Intercom Group . . . . . . . . . . . . . . . . . . . .98
Figure 33: Settings for Paging Individual Extensions . . . . . . . . .99
Figure 34: Paging & Intercom Settings . . . . . . . . . . . . . . . . . .100
Figure 35: New Conference Bridge . . . . . . . . . . . . . . . . . . . . .101
Figure 36: Follow Me . . . . . . . . . . . . . . . . . . . . . . . . . . . . . . . .104
Figure 37: New Follow Me Definition . . . . . . . . . . . . . . . . . . . .106
Figure 38: Follow Me Options . . . . . . . . . . . . . . . . . . . . . . . . .108
Figure 39: Directory Settings . . . . . . . . . . . . . . . . . . . . . . . . . .110
Figure 40: Feature Codes . . . . . . . . . . . . . . . . . . . . . . . . . . . .112
Figure 41: Call Parking Preferences . . . . . . . . . . . . . . . . . . . .116
Figure 42: Application Map . . . . . . . . . . . . . . . . . . . . . . . . . . .118
Figure 43: Dial Options . . . . . . . . . . . . . . . . . . . . . . . . . . . . . .120
Figure 44: New Voicemail Group . . . . . . . . . . . . . . . . . . . . . . .122
Figure 45: System Information . . . . . . . . . . . . . . . . . . . . . . . . .123
Figure 46: Networking . . . . . . . . . . . . . . . . . . . . . . . . . . . . . . .124
Figure 47: G.729 Codec Registration . . . . . . . . . . . . . . . . . . .127
Figure 48: G.729 Codec License Information . . . . . . . . . . . . .128
Figure 49: Backup Page . . . . . . . . . . . . . . . . . . . . . . . . . . . . .130
Figure 50: Asterisk Appliance 50 Update . . . . . . . . . . . . . . . . .131
Figure 51: Polycom Update . . . . . . . . . . . . . . . . . . . . . . . . . . .132
Figure 52: Asterisk Appliance 50 Options . . . . . . . . . . . . . . . .134
Figure A-1: Back Panel Ports . . . . . . . . . . . . . . . . . . . . . . . . . .141

Digium, Inc. Page 14
List of Tables
Table A-1: CRAFT Port Pinout . . . . . . . . . . . . . . . . . . . . . . . . .142
Table A-2: RJ11 Analog Port Connector. . . . . . . . . . . . . . . . . .143
Table A-3: LAN & WAN Ethernet Port Pinouts . . . . . . . . . . . . .144
Table B-4: Maximum 12V Power Consumption . . . . . . . . . . . .146

Digium, Inc. Page 15
Chapter 1
Overview
The Digium®Asterisk Appliance 50 (AA50) is a stand alone PBX which
runs Embedded Asterisk Business Edition™. It is suitable for the desktop,
or mounting in a typical network closet or restricted access location. The
Asterisk Appliance 50 is ideal for small office environments or as an
extension to a central Asterisk PBX.
The Asterisk Appliance 50 can function not only as a PBX, but also as a
voice mail server, IVR server, conferencing server, VoIP ATA, or VoIP
gateway. It has up to eight analog ports which are configured as FXO or
FXS ports depending upon the product model. Additionally, the built in
four port switch and WAN port allow it to also serve as a basic router.
The AsteriskGUI™ is the interface for the Asterisk Appliance 50. It gives
you the ability to configure the basic hardware and dial plan elements you
need when initially setting up your system, as well as every element
needed to customize your setup. You must create trunks, system users,
conferencing, voice mail, etc. The AsteriskGUI supports the following
browsers:
Firefox 1.5 through 3.0
IE 7
Safari 3.x
Opera 9.x

Digium, Inc. Page 16
Chapter 1: Overview
Features:
Embedded Asterisk Business Edition™
AsteriskGUI™
Four port 10/100BaseT Ethernet switch with Auto-MDI/MDI-X capa-
bility for the four 10/100BaseT LAN ports and one
10/100baseT WAN port (both 802.3/802.3u)
Up to eight analog ports supporting either FXS or FXO lines depend-
ing on product version (available product versions: S800i with VoIP
only, S808i with Eight FXO, and S844i with Four FXS and Four FXO)
SIP and IAX2 VoIP protocols
CompactFlash interface (Type 1) suitable for standard CompactFlash
cards
Configuration reset switch
High performance Analog Devices Incorporated (ADI) BlackFin
BF537 processor
uClinux Operating System
Transcoding provided on the Blackfin processor
32ms (Hardware Revision B) or 128ms (Hardware Revision C) of ana-
log port echo cancellation
8MB on board serial Flash memory
64MB 16 bit parallel SDRAM
Front panel LEDs

Digium, Inc. Page 17
Chapter 2
Unit Installation
This chapter provides the following information:
Unpacking the Unit on page 18
Inspecting Your Shipment on page 18
Identifying Communication Ports on page 19
Understanding the LEDs on page 19
Using the Configuration Reset Switch on page 23
Installing the Asterisk Appliance 50 on page 24
Mounting the Asterisk Appliance 50 on page 27
Figure 1: The Asterisk Appliance 50 (AA50)

Digium, Inc. Page 18
Chapter 2: Unit Installation
Unpacking the Unit
When you unpack your unit, carefully inspect it for any damage that may
have occurred during shipment. If damage is suspected, file a claim with
the carrier and contact your reseller from which the unit was purchased or
Digium Technical Support (+1.256.428.6161). Keep the original shipping
container to use for future shipment or proof of damage during shipment.
Note: Only qualified service personnel should install the unit. Users
should not attempt to perform this function themselves.
Inspecting Your Shipment
The following items are included in shipment of the Asterisk Appliance
50:
Asterisk Appliance 50 (AA50)
Compact Flash Card
Power Supply
Power Cable
Analog Cables (optional depending on model)
CD-ROM containing manual and installation files
Product Registration Card
Support and Warranty Information

Digium, Inc. Page 19
Chapter 2: Unit Installation
Identifying Communication Ports
The Asterisk Appliance 50 unit consists of up to eight RJ11 analog ports
which are configured as FXO or FXS ports depending on the Asterisk
Appliance 50 model. These ports provide 32ms (Hardware Revisions B)
or 128ms (Hardware Revisions C) of analog port echo cancellation. The
unit is rated for a total of 8 REN across all FXS ports. Each individual
port is rated for up to 3 REN @ 1500ft (450m).
Four 10/100BaseT LAN ports and one 10/100BaseT WAN port provide
the functionality to connect to the local network as well as allowing the
Asterisk Appliance 50 to act as a router. All the Ethernet ports support
auto-MDI-X.
See Figure 2 on page 22 to locate the ports and their corresponding LEDs.
Understanding the LEDs
There are 15 LEDs on the front panel of the Asterisk Appliance 50. The
eight LEDs corresponding to the analog ports on the rear panel indicate
the type of interface installed. The definition of each LED and its color
representation is explained in Table 1.

Digium, Inc. Page 20
Chapter 2: Unit Installation
Table 1: LED Definitions
LED Color Description
Power Blue
(pulsing) On when the unit boots up, after the
bootload process has completed. The LED
pulses at a rate which is proportional to the
processor load.
Compact
Flash Blue
(flashing) Flashes each time there is read or write
activity to or from the CompactFlash card.
WAN Off No line is connected or the interface is
inactive.
Green
(flashing) Link is up at 100Mbps. LED flashes at 1/
10 second intervals as traffic is detected.
Orange
(flashing) Link is up at 10Mbps. LED flashes at 1/10
second intervals as traffic is detected.
LAN
(4 ports) Off No line is connected or the interface is
inactive.
Green
(flashing) Link is up at 100Mbps. LED flashes at 1/
10 second intervals as traffic is detected.
Orange
(flashing) Link is up at 10Mbps. LED flashes at 1/10
second intervals as traffic is detected.
Table of contents
Other Digium PBX manuals
Popular PBX manuals by other brands

Panasonic
Panasonic HYBRID IP-PBX KX-TDA100 user guide

Nortel
Nortel Meridian 1 PC Console Interface Unit Feature description and administration

Epygi
Epygi Quadro Quadro 4xa Specifications

ZyXEL Communications
ZyXEL Communications IP PBX X6004 user guide

Panasonic
Panasonic KX-TD816 installation manual

Panasonic
Panasonic KX-T7625 - Digital Proprietary Speakerphone 24... Quick reference guide

Northern Telecom
Northern Telecom QCA146 Installation and testing instructions

MCK
MCK EXTender PBXgateway II Quick installation guide

ATCOM
ATCOM IPPBX IP04 user manual

ATCOM
ATCOM IPPBX IP04 user manual

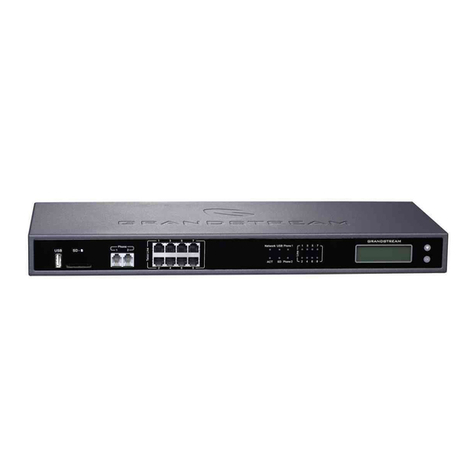
Grandstream Networks
Grandstream Networks UCM6100 Series user manual

Samsung
Samsung OfficeServ 7070 System description