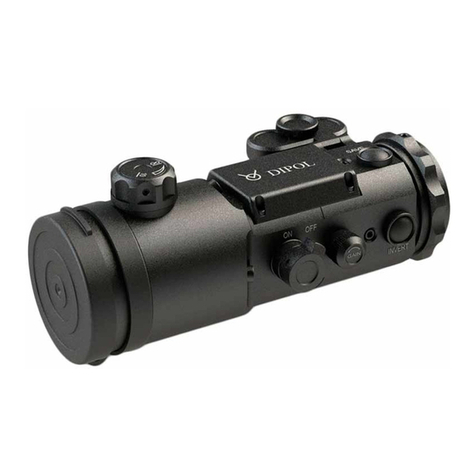
Dipol DTM1000R User manual

THERMAL IMAGING MONOCULAR
WITH RANGE FINDER
RU
www.dipol.biz
thermal imaging night vision accessories
MANUAL
DTM1000R

www.dipol.biz
CONTENTS:
1. Package 3
2. Precautions 3
3. Purpose 3
4. Technical characteristics 4
5. Design and device 5
6. Setting-up procedures and performance inspection 6
7. Quick adjustments of the device 7
8. Main menu 9
9. Use of additional accessories 14
10. Possible defects and methods of their removal 14
11. Storage and transportation 15
12. Acceptance certificate 16
13. Warranty 17
14. Company-producer 18
Attention! Before operating read attentively
the present manual!
2

www.dipol.biz
3
1. Package
Thermal imaging monocular 1 pcs.
Case 1 pcs.
Napkin to clean the lens 1 pcs.
Manual 1 pcs.
2. Precautions
IT IS IMPORTANT!
It is strongly forbidden to direct thermal monocular to the sun and
other sources of intensive thermal radiation temperature of which
exceeds 500 С0!
• Protect the device from direct shock.
• Don’t wipe objective and eyepiece lenses with hard abrasive
materials.
• Don’t store the device with power sources.
• Use power elements of well-known producers.
• Reset of the device should be fulfilled after 20-30 sec after is has
been off.
3. Purpose
The monocular is intended to observe movable and immovable objects,
aiming shooting from hunting arm in conditions of various illumination
and limited visibility (fog, dust, etc.)

www.dipol.biz
4
4. Technical characteristics
Model D1000R
Sensor, pixel/ detector pitch 384x288 / 17
MIcrodisplay: type / resolution, pixels OLED / 1024х768
Focal length/aperture ratio F40/1.0
Multiplicity, X 2,3
Angle of view, degr 9.3° х 7.0°
Digital zoom х2, х4
Detection range (object 0.5x1.8m), m Up to 1000
Range finder: measure distance, m Up to 700
Spectral range, micrometer 8 - 14
Frequency, Hz 50
Color palette/inversion 10 types/ possible
Diopter adjustment, diopters ±4
Eye relief, mm 25
Voltage/Battery type 6 / 2 x CR123A
Operating time (+20°C), hours 2,5
Operation temperature range, °С -20 … +50
Degree of protection according to IEC 60529 IPX5
External power supply possible, microUSB
Pre-installed Profiles /users 3+3
Various colors of aiming reticle possible
Video recording possible
WiFi possible

www.dipol.biz
5
5. Design and device
Рiс.1
1. ON/OFF
2. Objective
3. Objective focusing handle
4. «MENU» handle
5. Eyepiece with diopter adjustment
6. On-indicator
7. Digital zoom button
8. Polarity change button
9. Video record
10. Hand belt
11. micro USB slot cap
12. Battery compartment cap
13. Range finder
14. Range finder control
15. Proximity sensor
16. Outer power source slot
3
15
13
11
10
12
9
8
6
7
3
2
4
14
14
15
10
16
5
87
11

www.dipol.biz
6
6. Setting-up procedures and performance inspection
Unscrew the battery cap (12) and insert power elements according to
the polarity, indicated on the body or unscrew USB slot cap (11) or outer
power source slot cap (16) and switch outer power supply to the slot.
Put off the cap from the objective (2). Please pay attention when using
accumulator batteries as power supply charge indicator will display blue
with letter «А».
Press ON/OFF (1) button wait till image appears in the eyepiece. Time
of device switch doesn’t exceed 5-7 seconds. On the download screen
you will see the logo of company-producer, language and software after
that the device will proceed to operating mode. Whole image on the
screen in operating mode can be observed at pic. 2
Рiс.2
With the help of diopter adjustment ring (5) reach maximal sharpness
of an image. Follow the inscriptions and icons on the display.
After that direct the device to the chosen object and reach sharp image
of the observed object by rotating focusing handle (3) of the objective.
If on-indicator (6) doesn’t light or is blinking after switching, and
there is no image of charge indicator/switched outer power supply in the
eyepiece or it is blinking, may be, power elements or outer power supply
are uncharged. You need to change power elements or external power
supply.
zoom
image polarity
gain, brightness,
sensitivity, IDE
profile
power indicator

www.dipol.biz
7
7. Quick adjustments of the device
Display on/off.
For short-time display switching off at the operating device to save the
charge shortly press ON/OFF (1) button. To switch on the device, press
the button once again (1).
You can also adjust automatic display switching off when the device is
away from the user’s eyes. To activate the given function, you should turn
to the corresponding part of the main menu.
Digital image increase.
Press step by step ZOOM (7) button and choose optimal increase of
the observed image.
Image polarity.
Choose optimal polarity by INVERT (8) button: for instance, for black
and white displaying of hot objects may be of black or of white color.
For colored palette color inversion is also possible.
Built-in range finder.
To measure the distance shortly press the button (14), after that
viewfinder appears in the center of display. Correlate viewfinder with the
chosen object and press the button once again (14). Hold the object in
the viewfinder during 1-2 sec after that the result of distance measure up
to the object appears on display valued in meters.
Please pay attention, in digital zoom х4 mode range finder doesn’t
work.
Video recording on/off and image presentation via WiFi.
To switch on video recording /presentation press shortly REC (9)
button. In status line inscription «REC» appears, then digital record timer
switches on. To stop it press the button once again. In details the process
of video recording is described in main menu.
Pay attention, if power supply charge is too low video recording
doesn’t work. If during recording power supply charge becomes too low
the record stops automatically.

www.dipol.biz
Sensor gain, sensor sensitivity and microdisplay adjustment.
MENU (4) handle allows to adjust quickly brightness level of display
(BRGT), sensor sensitivity (SENS), level of digital zoom (IDE), sensor gain
(GAIN). Corresponding short name of parameter is displayed in the status
line. Switching of modes is fulfilled by short pressing of the handle.
To adjust microdisplay brightness be sure that the given mode is active
in the status line (BRGT) or shortly press MENU (4) handle to enter
brightness control mode (BRGT. ХХ). Choose optimal level of brightness
control by rotating the handle (4), adjustment is from 1 up to 30.
To adjust sensor sensitivity choose sensor sensitivity mode (SENS ХХ),
the level changes from 40 up to 80. By rotating the handle (4) choose
optimal level of sensor sensitivity. Use of this parameter allows to enhance
image of objects with bright temperature contrast with the environment.
To adjust the image detail enhancement choose the corresponding
mode (IDE Х), the value of which reaches 0 up to 7. By rotating the handle
(4) choose optimal zoom. The given parameter influences sharpness of
images, decreasing blurring level and smoothing of displayed objects.
To adjust sensor sensitivity, choose the corresponding mode (GAIN XX,
may vary from -10 up to +10), after that by rotating the handle (4) fulfill
the adjustment. Adjustment of this parameter makes image better in case
of small temperature contrasts of the observed object or phenomena
with the environment.
8

www.dipol.biz
8. Main menu
To enter Main menu.
To enter main menu press and hold MENU (4) handle till the menu
appears in the field of view. Exit from main menu is fulfilled automatically
after 15 sec of inactivity.
The look of main menu can be seen at pic.3
Рiс.3
To follow the menu you should rotate MENU(4) handle, to choose
menu part - press MENU handle, to exit the part – press and hold MENU .
User profile
The given part allows to adjust quick change such parameters as color
palette, thermal matrix gain, microdisplay brightness, thermal matrix
sensitivity, digital zoom level, polarity.
The device has 3 pre-installed profiles: Fix 1 Woods, Fix 2 Mountains, Fix
3 City. By choosing them adjustment of the abovementioned parameters
in the main menu is not available to the user. A user may adjust three
profiles as he wishes: User 1, User 2, User 3. Adjustment is fulfilled at
the same manner as type and color of aiming reticle (press and rotate
MENU handle in the corresponding parts of the main menu), saving of
the chosen adjustments is done automatically in the Profile.
Pay your attention, unlike operation adjustments done with the help of
MENU handle while the device is working, after switching off the device
the adjustments done through the menu are saved for user profiles.
9

www.dipol.biz
Color palette
This part allows to choose from 1 up to 10 color palettes available,
it will display during first download. Pay attention, adjustments of the
chosen palette are saved after the device is off.
Thermal image gain
This part allows to adjust the level of thermal sensor gain. The process
is described in details in the corresponding part Quick adjustments of the
device.
Display brightness
This part allows to adjust brightness of microdisplay. The process is
described in details in the corresponding part Quick adjustments of the
device.
Thermal sensitivity
This part allows to adjust level of thermal sensor sensitivity. The process
is described in details in the corresponding part Quick adjustments of the
device.
Image Detail Enhancement (IDE)
This part allows to adjust level of image zoom. The process is described
in details in the corresponding part Quick adjustments of the device.
Image polarity inversion
Allows to choose polarity : White Hot or Black Hot (similary pressing
INVERT button. For colored palette color inversion is also possible.
USB transfer mode
The given part allows to copy and delete video files from the built-in
memory card. When choosing the given mode, the following inscription
appears on the screen «Establishing connection...» after that the device
is seen as flash drive.
When entering this mode to save energy power from thermal matrix
is off, video record modules (if they were working) switch off and WiFi
(additional time may be needed to connect).
To exit the given mode switch off the device.
WiFi
While activating the given part of the menu during video recording
simultaneous broadcasting of video is possible in real time via a computer
or smartphone with WiFi.
The device creates POP with serial number of the device and password:
12345678.
10

www.dipol.biz
11
For to watch video online, you may use any player with RTSP video
available (for example, VLC player). You should install playback from the
following address rtsp://192.168.0.110 Playback starts after pressing
REC button (in the status line record timer and WiFi icon appear).
Video recording mode
In this part you may choose modes of video record/ broadcast of
video: Normal start or Quick start.
In Normal start mode video record/ broadcast of video starts a bit after
pressing REС button, it is needed to switch on corresponding module and
software download (up to 10 sec).
In Quick start modules are activated during the device is switched on
and record/broadcast of video starts more quickly after pressing REC (up
to 5 sec) button, but keeping the modules in active status considerably
increases power consumption.
Signs in status bar during video recording process:
REC (blinking) - recording module turns on
REC 00:00:00 - recording module ready for record
REC 00:01:20 - recording process
REC Saving - data saving on internal SD-card
Pressing and holding for several seconds REC button allows to switch
off video module and to lower power consumption, but after that it takes
some time for the device to start video record /broadcast – as it happens
with Normal start mode.
Date and time stamp position
It allows to indicate date position and video recording time into the
built-in memory card (it is not displayed).
Super contrast display mode
Allows to install higher level of contrast of microdisplay.
Proximity sensor
Activates function of microdisplay switching off when it is away from
the user’s eye to save power or to avoid demask.
Proximity sensor range, mm
Allows to install the distance when function of microdisplay auto
switching is activated.

www.dipol.biz
12
Auto bad pixel correction
Start of the mode for defected pixels autocorrection.
Pay your attention that device objective must be closed by the cap
during the process. After the process press and hold MENU (4) handle to
save changes or shortly press MENU handle to cancel changes.
Bad pixel correction
This mode allows to remove isolated defected pixels or group of them
manually. Please pay attention that correction of the group of defected
pixels should be fulfilled from the edges to the center by narrowing the
radius step by step.
Rotation of MENU handle allows to change cursor position (during
constant rotation the pitch of cursor shift increases), short pressing of
the handle allows to change coordinate axis. After the cursor stands
together with the defected pixel shortly press ZOOM button after that
defected pixel changes its color.
If necessary, repeat the procedure with other defected pixels. To save
the changes press and hold for a long time MENU handle.
LRF reading position
In this part you may choose position of object distance displayed by
range finder.
Status bar position
Allows to choose position of status line on the screen of the device.
Status bar delay time,s
In this part you may choose time (in seconds) of control inactivity
when status line disappears from the display.
Menu position
Allows to choose position of menu on the screen.
OSD transparency
In this part you may choose level of interface transparency to lower
“burning” of microdisplay with static image.
Auto power off, minutes
Allows automatically turns off the device after selected time of
inactivity.
Language
Allows to choose interface language. Russian, English, Deutch, Spanish
are available.

www.dipol.biz
13
Date set
In this part you may install the date displayed during video recording
or video broadcast. Values are installed by pressing and rotating of MENU
handle.
Please note, date and time settings don’t go wrong after switching off
and putting out of power elements from the device. But if the device
hasn’t been on for a long period of time (more than 4 months), date and
time settings may be wrong.
Time set
It allows to set the date displayed during video recording or video
broadcast. Values are installed by pressing and rotating of MENU handle.
Distance unit
This part installs measure values (meters, yards) for built-in range finder.
Hardware version
Shows the version of device hardware.
Software version
Shows the present version of device software.
Settings reset.
It means coming back to factory settings (doesn’t touch calibrating
values of range finder and parameters of users’ profiles).
Please note, during video recording reset is impossible!

www.dipol.biz
14
9. Use of additional accessories
There is a possibility to connect outer power source with voltage of
10…14,6 V (car embedded network) or portable outer power supply with
voltage of 8-14,5 V and slot JACK 2.1 slot through the slot (17).
There is also a possibility to connect outer power supply through
micro USB (11).
10. Possible defects and methods of their removal
Your monocular is a complicated optomechanical device. Its repair
and technical service may be fulfilled only in conditions of the company
– producer or any authorized service center.
If after switching on the on-indicator (6) doesn’t light or is blinking
and the image is absent or is blinking in the eyepiece, may be, power
elements are discharged or contacts in the battery compartment are
broken. Change power elements and examine contact at battery cap (12)
and contact inside the battery compartment. There should be no traces
of corrosion or any dirt.
If changing of power elements and cleaning of contacts doesn’t help
as well as in case of any other defects and malfunctions of the monocular
don’t try to disassemble and to repair it by yourself. Turn to the Vendor
or company-producer, the address is indicated at the end of the given
Manual.
Please, pay your attention that maximal operating time of the device is
reached when using power elements of the recommended producers at
t +20°C. When using power elements of the unknown producers, as well
as when operating in winter operating time of the device may decrease
and it doesn’t mean technical fault.

www.dipol.biz
15
11. Storage and transportation
The device should be stored in the case, in dry warm and aired room
with the relative humidity up to 80% at temperature 5°С - 30°С. There
shouldn’t be any acidity, alkali and other aggressive fumes in the air. Even
while short-time storage put out power elements from the device.
When preparing for long-term storage you should do the following
things:
- put the lubricant SOI-54p (GOST 3276-74) to the nonpainted metal
parts,
- lubricate the thread of the battery compartment cap, inner contact
of the battery compartment by lubricant SOI-54p (GOST 3276-74),
- dry the device.
The device can be transported by any means of transport, preferably
in closed vehicles according to transportation rules stated for the given
vehicle. Conditions of device transportation are determined according
to climatic factor influence due to group 5 (OZ4) in accordance with
GOST 15150-69 (at the temperature of - 50 up to +50 °С, with the relative
humidity of not more than 98 % at 25 °С).

www.dipol.biz
12. Acceptance certificate
Thermal imaging monocular
Serial № ……………….........................................................................……
Sensor № ...............……...................................................................……
Release date ……………….............................................................………….
Representative of quality control department............................……….
16

www.dipol.biz
17
13. Warranty
Company-producer guarantees that quality of thermal monocular
corresponds to technical demands if storage, transportation and
operation rules and conditions described in the present manual are
adhered to.
Warranty period constitutes 12 months.
Company-producer repairs the device or changes it in case of producer-
caused failure during warranty period.

www.dipol.biz
14. Company-producer
Scientific-productive firm «Dipol»
210033, Vitebsk, Lazo str., 115А, Republic of Belarus
Tel. +375 212 530 063
Fax. +375 212 530 068
WEB: http:// dipol.biz:
Email: cont[email protected]
18

www.dipol.biz
19
Notes

thermal imaging night vision accessories
Scientific-productive firm «Dipol»
210033, Vitebsk, Lazo str., 115А,
Republic of Belarus
Tel. +375 212 530 063
Fax. +375 212 530 068
WEB: http:// dipol.biz
Email: cont[email protected]
This manual suits for next models
1
Table of contents
Other Dipol Monocular manuals
