dito PRO IO-ST6 User manual
INSTALLATION GUIDE
RECOMMENDED MAXIMUM CABLE LENGTH CHART (Based on 1dB maximum loss)
Wire Size 8-ohm 70V with 100W Load 70V with 200W Load 100V with 200W Load
#20AWG Up to 50ft (15m) Up to 300ft (91m) Up to 150ft (45m) Up to 300ft (91m)
#18AWG Up to 80ft (24m) Up to 425ft (130m) Up to 212ft (65m) Up to 425ft (130m)
#16AWG Up to 120ft (37m) Up to 750ft (240m) Up to 375ft (120m) Up to 750ft (240m)
#14AWG Up to 200ft (61m) Up to 1200ft (370m) Up to 600ft (180m) Up to 1200ft (370m)
#12AWG Up to 300ft (91m) Up to 1900ft (580m) Up to 950ft (290m) Up to 1900ft (580m)
IO-ST6
Indoor/Outdoor
Outdoor Landscape Speaker
Install Guide Page 1 of 2
www.ditopro.com
Congratulations on the purchase of the IO-ST6 speaker. The
IO-ST6 has been specially tuned for outdoor use and sounds
best in the outdoor environment. Since the IO-ST6 has a
built-in transformer it is ideally suited for use in commercial
70V/100V distributed audio systems in addition to consumer
applications with ampliers that are designed to drive 8-ohm
loads. With its 360 degree high delity dispersion, the IO-ST6
creates a rich enveloping listening environment when used in
multiples.
CONTENTS
(1) ST-6 High Performance Landscape Speaker
(2) Security Brackets
(2) 8mm X 10mm Socket Head Screws
(Requires 6mm Hex wrench)
ADDITIONAL TOOLS & ACCESSORIES THAT
MAY BE REQUIRED
Wire cutter / stripper
6mm Hex Wrench (Allen Wrench)
(2) Waterproof wire connectors / Silicone lled wire nuts
2-Conductor direct-burial stranded speaker cable
SHIPPING DAMAGE
Each speaker is thoroughly tested before it leaves the
factory. However, in shipment, accidents may occur. Please
inspect your speakers carefully when you receive them to
make sure there is no damage. If there is, please notify your
dealer or supplier immediately for assistance. If you received
your speakers by public transportation, report the damage at
once to the shipping company.
ATTACHING SECURITY BRACKETS
Should you wish to restrict
movement and/or theft
of the IO-ST6 , two security
brackets are supplied with
each speaker to anchor the
speaker into the ground.
1.Place the speaker
upside down on
surface that will
not damage the top
surface.
2. Install the brackets as shown in the image using the
supplied hardware.
3. Repeat for the 2nd bracket.
CONNECTION & SETUP
Connection from the speaker to the amplier should be made
with appropriate size cable. Use the chart below to help
determine the best wire size. The cable should be rated for direct
burial applications. Landscape lighting wire often meets these
requirements.
Use waterproof wire connectors for all exterior connections.
These connectors usually contain a silicone gel to prevent
moisture ingression. This type of connector is commonly used for
landscape lighting.
Connect the short cable that is protruding from the bottom of the
speaker to the direct-burial trunk line. Prepare the connections
by stripping a short length of insulation from the ends of each
wire, exposing approximately 5/8” (15mm) of each conductor, or
perform the connections as directed by the manufacturer of the
wire connectors. Ensure that the proper polarity is maintained for
all connections. This will ensure maximum system performance.
Refer to the diagram on the next page.
Set the transformer tap position to the desired level. When using
multiple speakers on a single line in distributed 70V/100V audio
systems, the sum of the power taps selected on all the speakers
should approximately equal, but not exceed, the amplier’s power
output. E.g. 24 speakers each set to 8 watts, 24 x 8W=192W,
therefore the amplier should have an approximate power rating
of 200W or be limited to approximately 200W output.
Note: Not all speakers need to be set to the same position.
Overdriving the transformer will cause saturation, distortion, and
eventual failure. Setting a high-pass lter at approximately 60Hz will
help reduce saturation of the transformer.

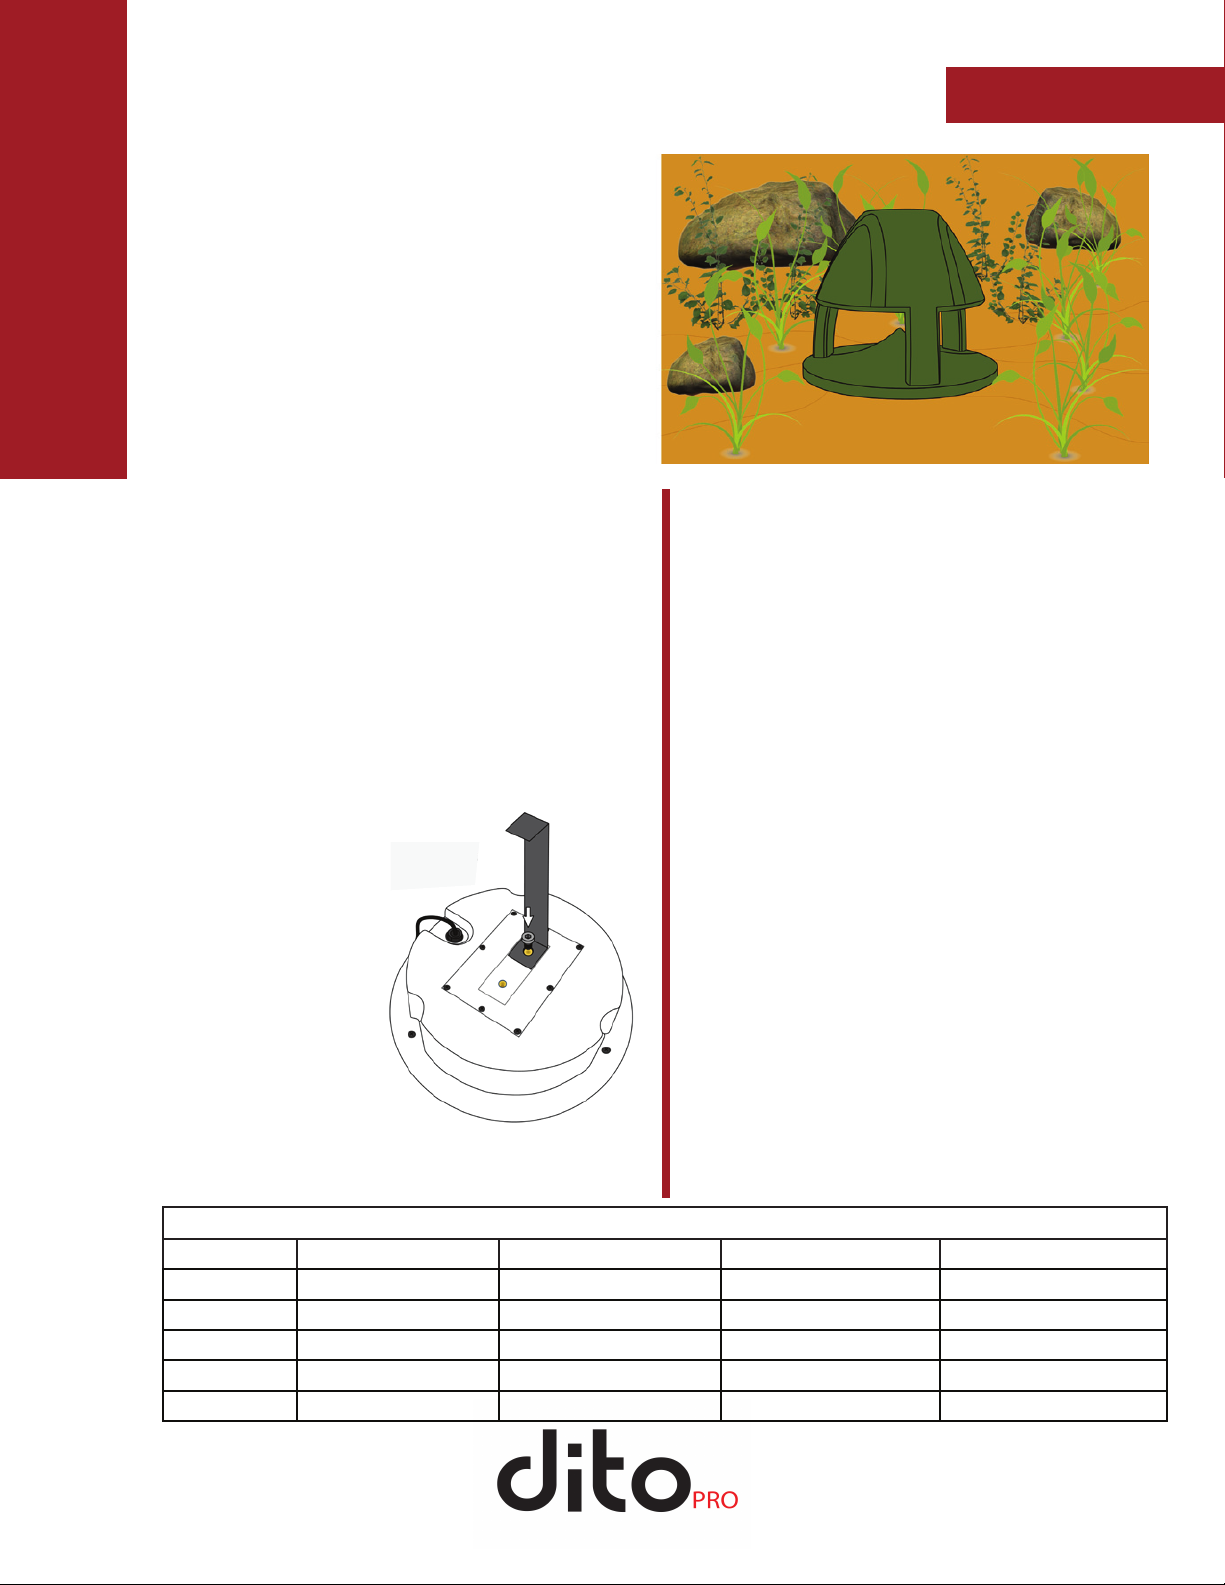
IO-ST6
Excavate an extra
space at the side
of the hole to allow
for backlling. Run
direct burial cable
to each speaker
location and make
connections as
recommended in the“Connection & Setup”
section. Select the desired tap position. Bury
the speaker to the level shown in the image.
WARNINGS
• Do not place the speakers where the grille will receive direct
high-pressure water spray.
TIPS
To increase their longevity, the speakers can be covered during
winter months in regions that receive large amounts of snow.
When selecting the tap position,
there are two bands of numbers. The
inside band is the 100V scale and the
outside band is the 70V scale. The
values shown are in watts. The most
counter-clockwise position is for use
in 8-ohm systems. The position with
the on the 100V scale is NOT to be
used on 100V systems.
INSTALLATION
Plan your installation. Ensure that
you have access to all speaker
locations and to the sound source.
If desired, install the security
brackets to the bottom of the
speaker as described earlier. Dig
a 13" (33cm) deep hole with an
opening that is 12" (30cm) in
diameter (Installations without
security bracket only require a 3"
(8cm) deep hole.)
Install Guide Page 1 of 2
www.ditopro.com
SPECIFICATIONS
Model Number: IO-ST6
Woofer: 6.5" Poly w/ butyl rubber surround
Frequency Response: 70Hz - 20kHz
Power Handling: 50W RMS, 100W Max (8-ohm)
Sensitivity: 87dB 2.83V / 1 meter (1W)
(84dB Eective)
Crossover: Dual-Band Multi-Order Topology
Tweeter: 1" Titanium dome
Impedance: 8 ohms nominal
Available Colors: Garden Green
Selectable Tap
Positions:
70V: 1, 2, 4, 8, 16, 32W
100V: 2, 4, 8, 16, 32W
Dimensions: 13-7/8" (346mm) Diameter
14-1/2" (368mm) Tall (w/o bracket)
11-1/2" (292mm) Tall (when buried)
Mounting Depth: 12-3/4" (33cm) with bracket,
3" (7.6cm) w/o bracket
Shipping Weight: 14.5 lbs (6.6kgs)
Net Weight: 10.5 lbs (4.8kgs)
Other dito PRO Speakers manuals


Popular Speakers manuals by other brands


Phase Technologies
Phase Technologies CI-6.0 VIII QM Install instructions

MB QUART
MB QUART NAUTIC NHT2-116 Quick start installation guide

dB Technologies
dB Technologies LVX 8 user manual

Power bass
Power bass OE692-TY Application guide

Tannoy
Tannoy Precision owner's manual

Bose
Bose MediaMate Computer Speakers owner's guide


