2
Registration and Recall Information
This child restraint is certified for aircraft use only when
used with the internal harness. Do not use as a belt-
positioning seat because aircraft seats do not have shoulder
belts. Use on forward-facing aircraft seats only and in a
position where the lap belt can be tightened securely. This
child restraint is installed in an aircraft seat the same way it
is installed in a vehicle.
Use the child restraint only with F.A.A. certified equipment.
Contact the airline prior to taking a child restraint on
board in order to comply with their specific regulations.
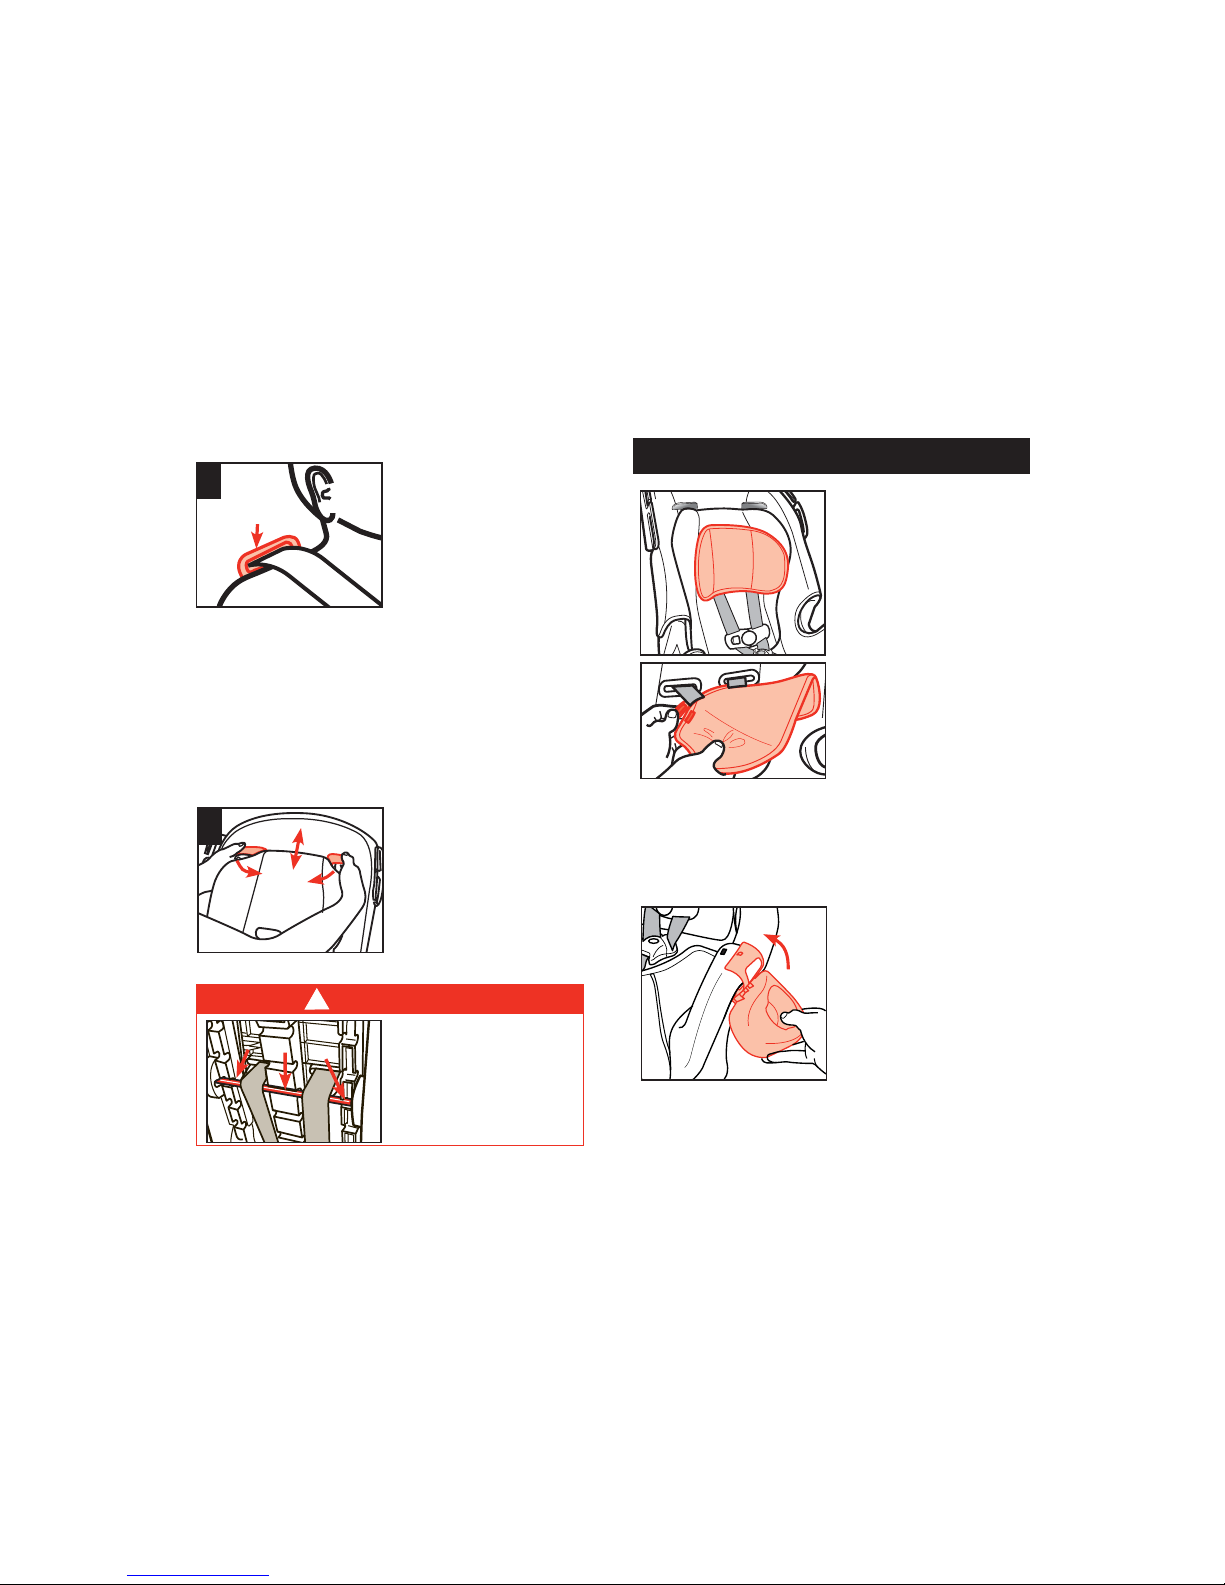
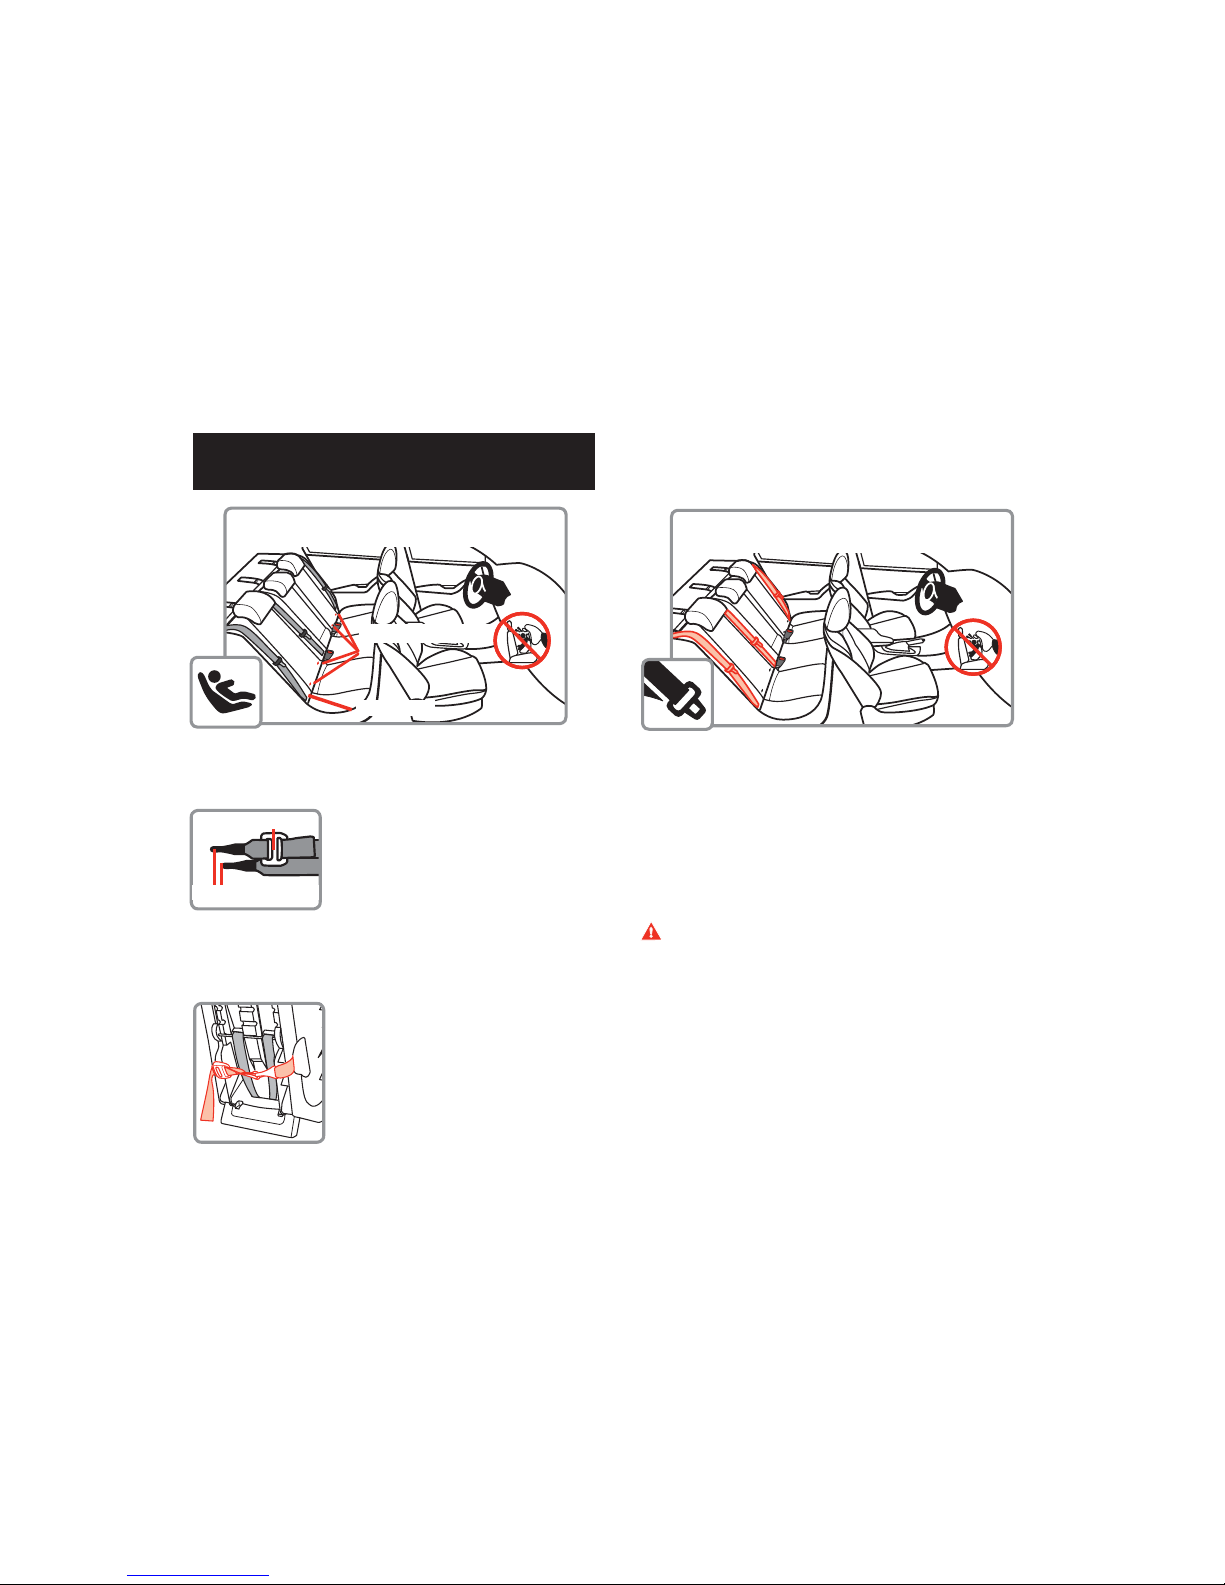
Aircraft Installation
General and Warm Weather Use
To help protect your vehicle seat’s upholstery from
damage, use a towel underneath and behind child restraint.
To avoid your child being seriously burned, take
the following precautions:
1. Park in the shade or where sun does not directly hit the
child restraint.
2. Cover the child restraint with a sheet or blanket when
not in use.
3. Check for hot seat and buckles before placing child in
child restraint.
3
Child restraints could be recalled for safety reasons.
You must register this restraint to be reached in a
recall. Send your name, address and the restraint’s
model number and manufacturing date to:
Dorel Juvenile Group, Inc.
PO Box 2609, Columbus, IN 47202-2609
Attn: Consumer Care
or register online at www.djgusa.com/registration/
carseat/us or call 1-800-544-1108
For recall information, call the U.S. Government’s
Vehicle Safety Hotline at 1-888-327-4236 (TTY: 1-800-
424-9153), or go to http://www.NHTSA.gov.
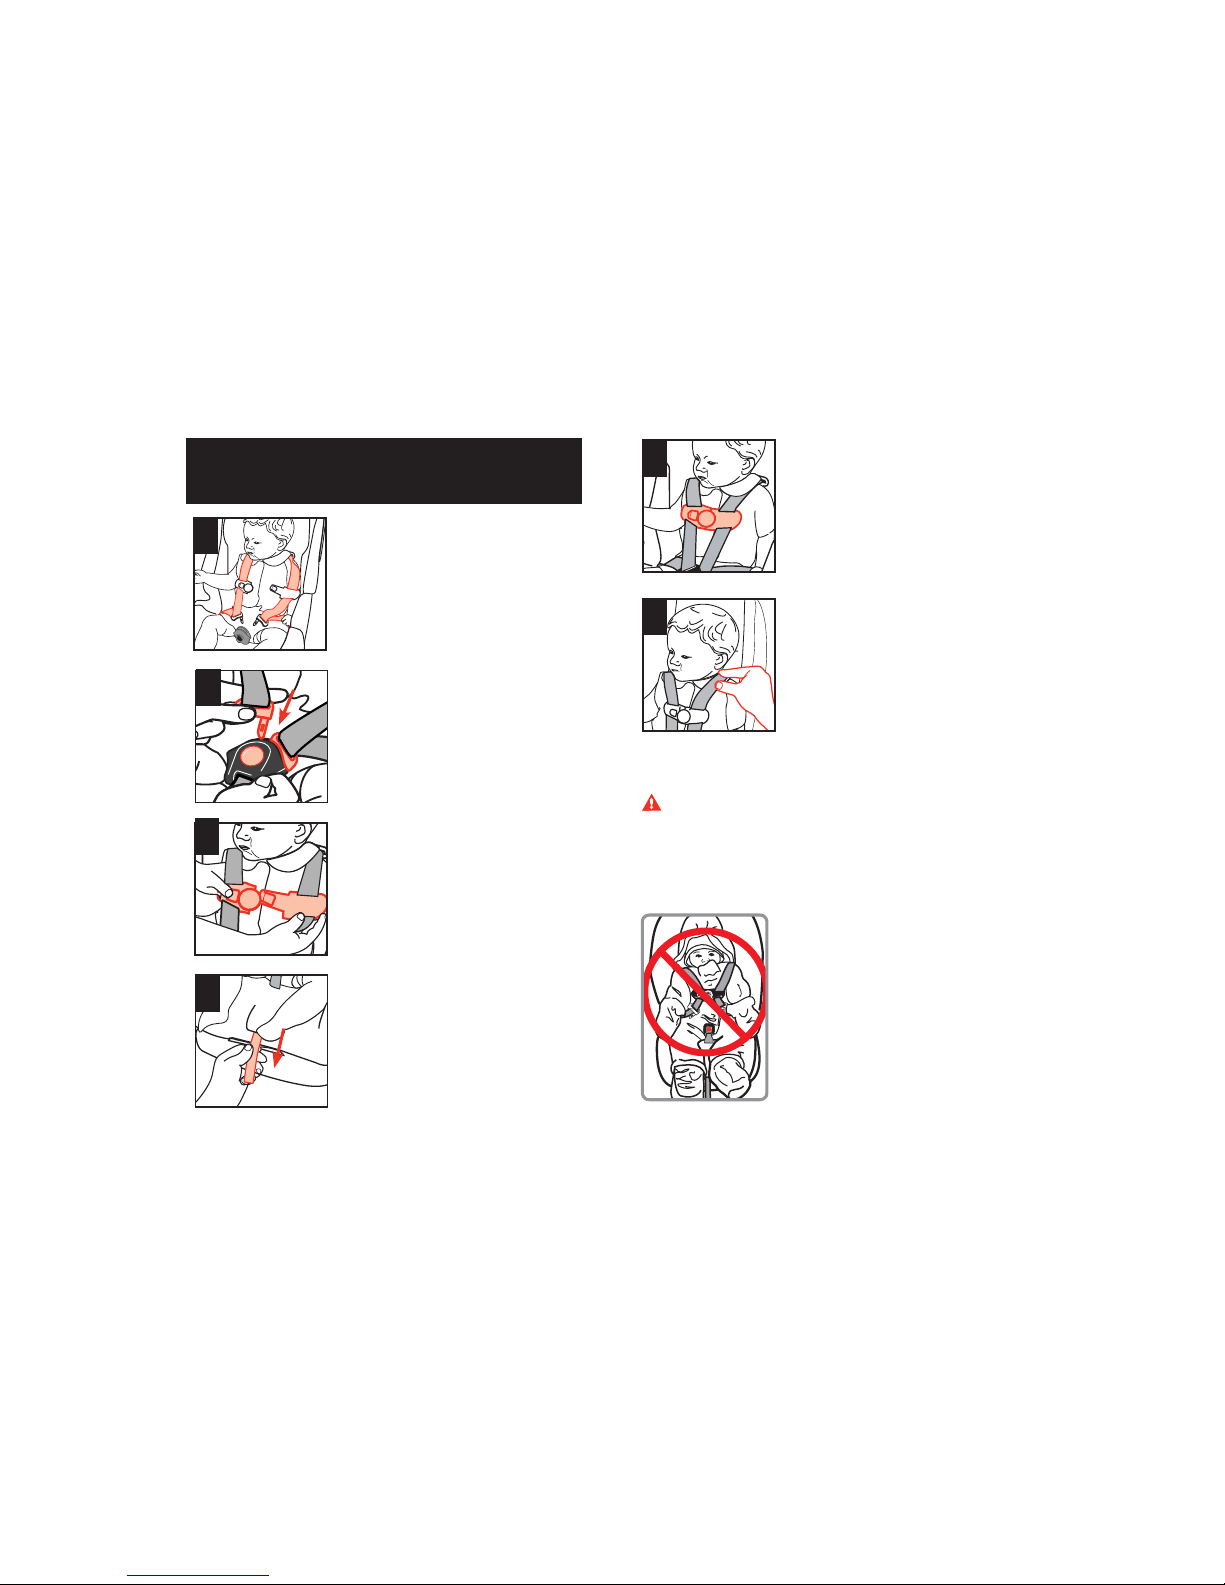
WARNING
!
Never take your child out of the child
restraint while the vehicle is moving. Never
leave child unattended.
Placing your child in a hot child restraint may
result in burns.
Do not use a child restraint with damaged or
missing parts.
Do not use cut, frayed or damaged
harnesses.
Do not lubricate buckles and fasteners.
Do not substitute parts or try to modify the
child restraint in any way.
Do not use any car seat accessory except
those approved by Dorel Juvenile Group.
Never allow any child to play with this child
restraint; it is not a toy.
Do not remove or cover up any of the
warning labels or other labels on the child
restraint.
Read all instructions for additional warnings.
On the side of the child restraint there is a
date of manufacture label. Do not use this
child restraint more than 10 years after the
date of manufacture.