DOGIPOT 1703-L User manual
DOGIPOT®
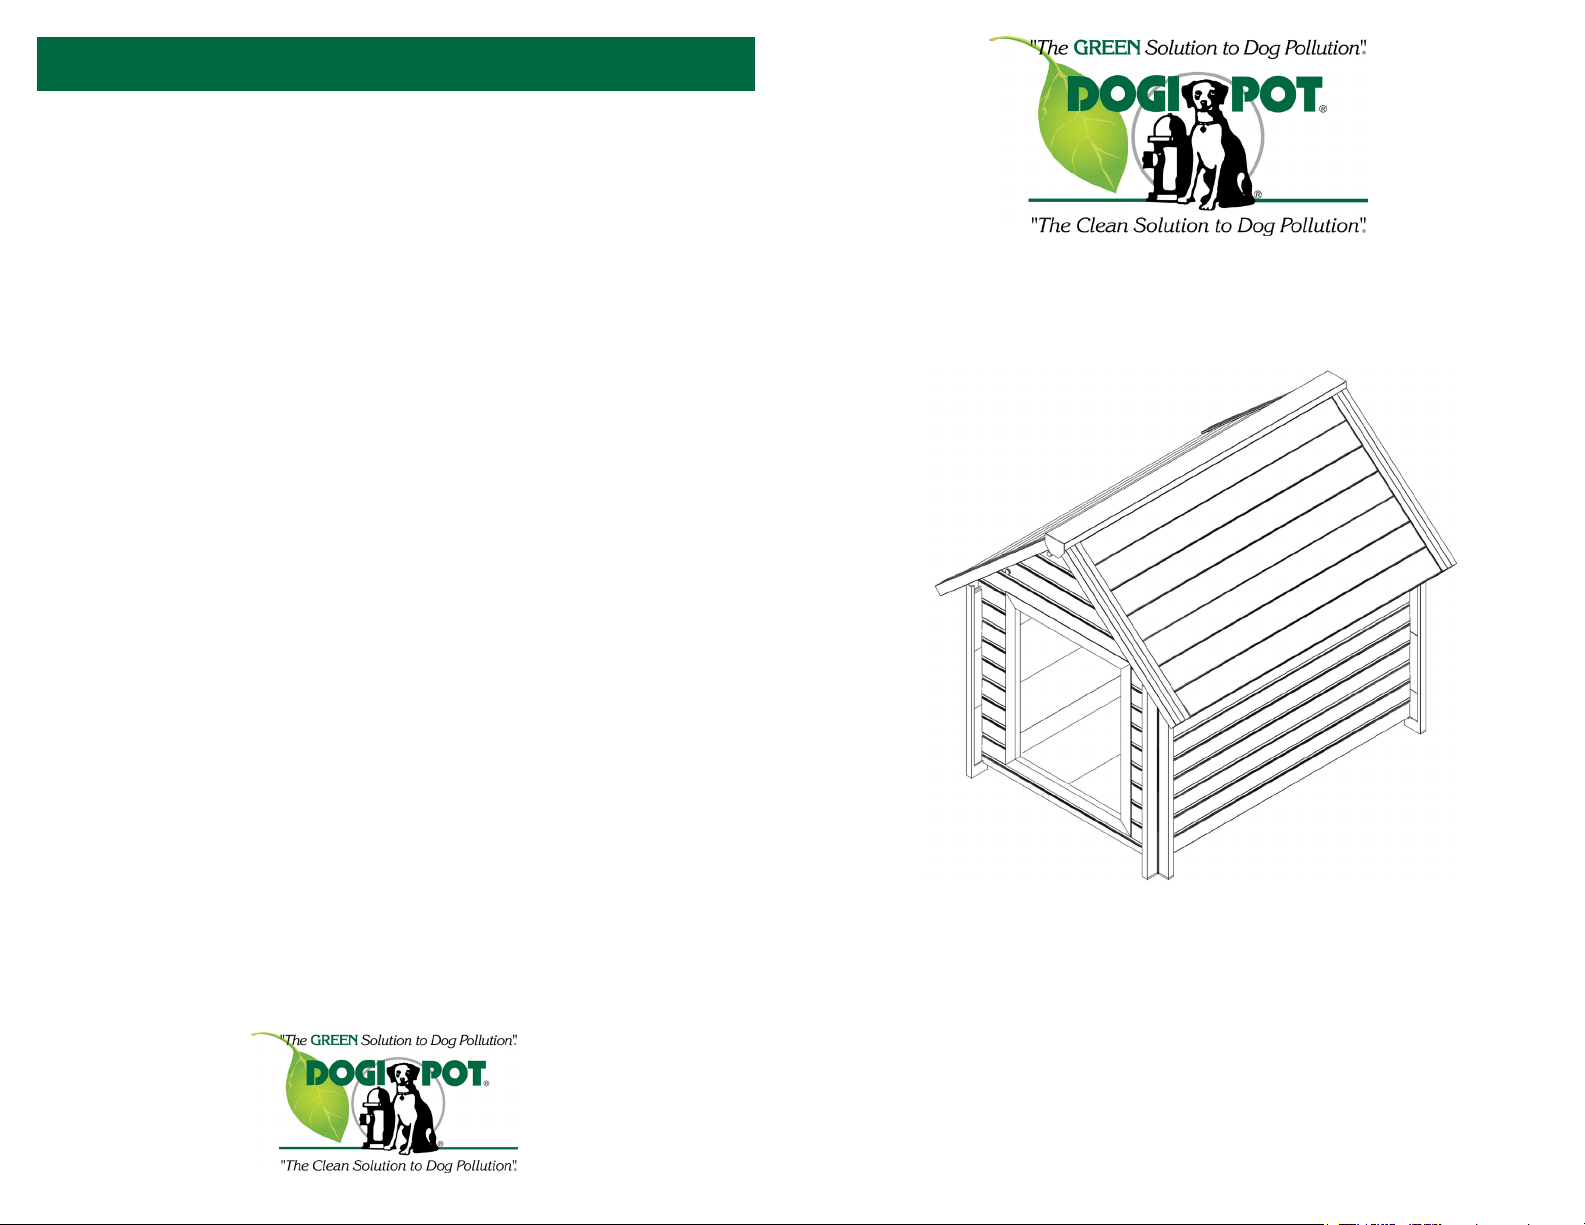
BUNKHOUSE ASSEMBLY
Congratulations on your purchase!
The assembly is EASY, SAFE and FUN!The illustrated instructions are easy to
follow and all parts are labeled in the same sequence as they should be put
together. NOTOOLS NEEDED.
Before you start assembly - check for damaged or missing parts.
Contact your DOGIPOT
®
distributor to order replacement parts.
ITEM #:
1703-L
1703-XL
LIMITED PRODUCT WARRANTY
DOGIPOT®warrants the original purchaser (“Purchaser”) of this product that, for a period of five years from the date of
original purchase under normal use and conditions, the products covered by this warranty as delivered within the package
containing the product shall be free of defects in material and/or workmanship and will not splinter, rot or suffer from any
encountered atmospheric conditions or infestation by boring insects, fungi or mildew or a condition commonly referred
to as dry rot. If defect occurs within the warranty period, Purchaser will notify DOGIPOT®of such defect as soon as defect
is observed by Purchaser. Upon confirmation of warranty application and validity, DOGIPOT®, at its sole discretion and
at is sole option, will provide replacement parts or a replacement product at no cost to the Purchaser. DOGIPOT®sole
responsibility will be for replacement of damage or defective parts or product and under no terms will DOGIPOT®be
responsible for refund or any part or the total purchase price paid by Purchaser.
This warranty is offered to the original Purchaser only and is not transferable. There is no warranty coverage for rented
products or any products purchased “used”, “as is”, at a distress or going–out-of business sales, or directly or indirectly
from a close-out agent or liquidator.
The warranty only covers initial defects in materials and workmanship and the covered conditions described above. It
does not cover damage from abuse either by the owner or the animal that the product is designed to house if applicable.
This warranty specifically excludes damage to the Product caused by the act of chewing or gnawing on any of the parts of
the Product by the animal that it is intended to house or any other animal.
DOGIPOT®does not warrant, under any circumstances, damage incurred due to improper assembly/installation or use of
the Product under the following circumstances but not limited to: 1) use beyond the intended purpose. 2) damage caused
by selection and use of the improper size, 3) rejection – refusal to use - by the animal for which the Product is intended
for any reason, 4) acts of God including but not limited to earthquake, hurricane, tornadoes, wind shear, gale force winds,
lightning and environmental conditions, 5) staining by any materials that come in contact with the Product, 6) improper
handling by Purchaser or selling retailer, 7) damage incurred as a result of impact of any kind regardless of whether the
impact is accidental or on purpose. 8) ordinary wear and tear, 9) damage by animals other than the intended resident of
the structure, 10) vandalism, negligence, storage and handling.
If the Product is intended for outdoor use, the material used in the Product will fade to a minor degree over time dependent
on varying atmospheric conditions beyond the control of DOGIPOT®. Therefore, this warranty does not cover fading of any
kind.The warranty also excludes failure of any galvanized wire products that may or may not be part of the Product.
This warranty is null and void if the Product has been modified or alterations made in any way by the Purchaser, agent of
the Purchaser, the selling retailer or anyone else other than DOGIPOT®.
No person or entity is authorized by DOGIPOT®to make, extend, modify or in any other way alter this warranty or offer any
verbal warranties beyond the terms contained in this warranty and DOGIPOT®will not be bound under any terms other than
those contained in the warranty.
UNDER NO CIRCUMSTANCES WILL DOGIPOT®BE LIABLE FOR SPECIAL, CIRCUMSTANTIAL OR CONSEQUENTIAL
DAMAGES, WHETHER SUCH DAMAGES ARE SOUGHT IN CONTRACT, IN TORT OR OTHERWISE. DOGIPOT®LIABILITY
WITH RESPECTTO DEFECTIVE / DAMAGED PRODUCTS SHALL BE LIMITEDTOTHE COST OFTHE REPLACEMENT PART(S)
ORTHE REPLACEMENT COST OFTHE PRODUCT. Some jurisdictions do not allow the exclusion or limitation of incidental
or consequential damages, so the above limitation or exclusion may not apply to you.
To make a claim under this limited warranty, the Purchaser shall notify DOGIPOT®and, upon request, shall supply DOGIPOT®
with confirming evidence of the assumed defect/damage along with proof of purchase. Notification can be made using
the following means:
•Email:[email protected]
•www.DOGIPOT.com
•Phone:407-888-4627or1-800-364-7681; Fax: 407-888-8526
•USPostalMail/Fedex/UPSto:DOGIPOT®.,2100PrincipalRow,Suite#405,Orlando,FL32837
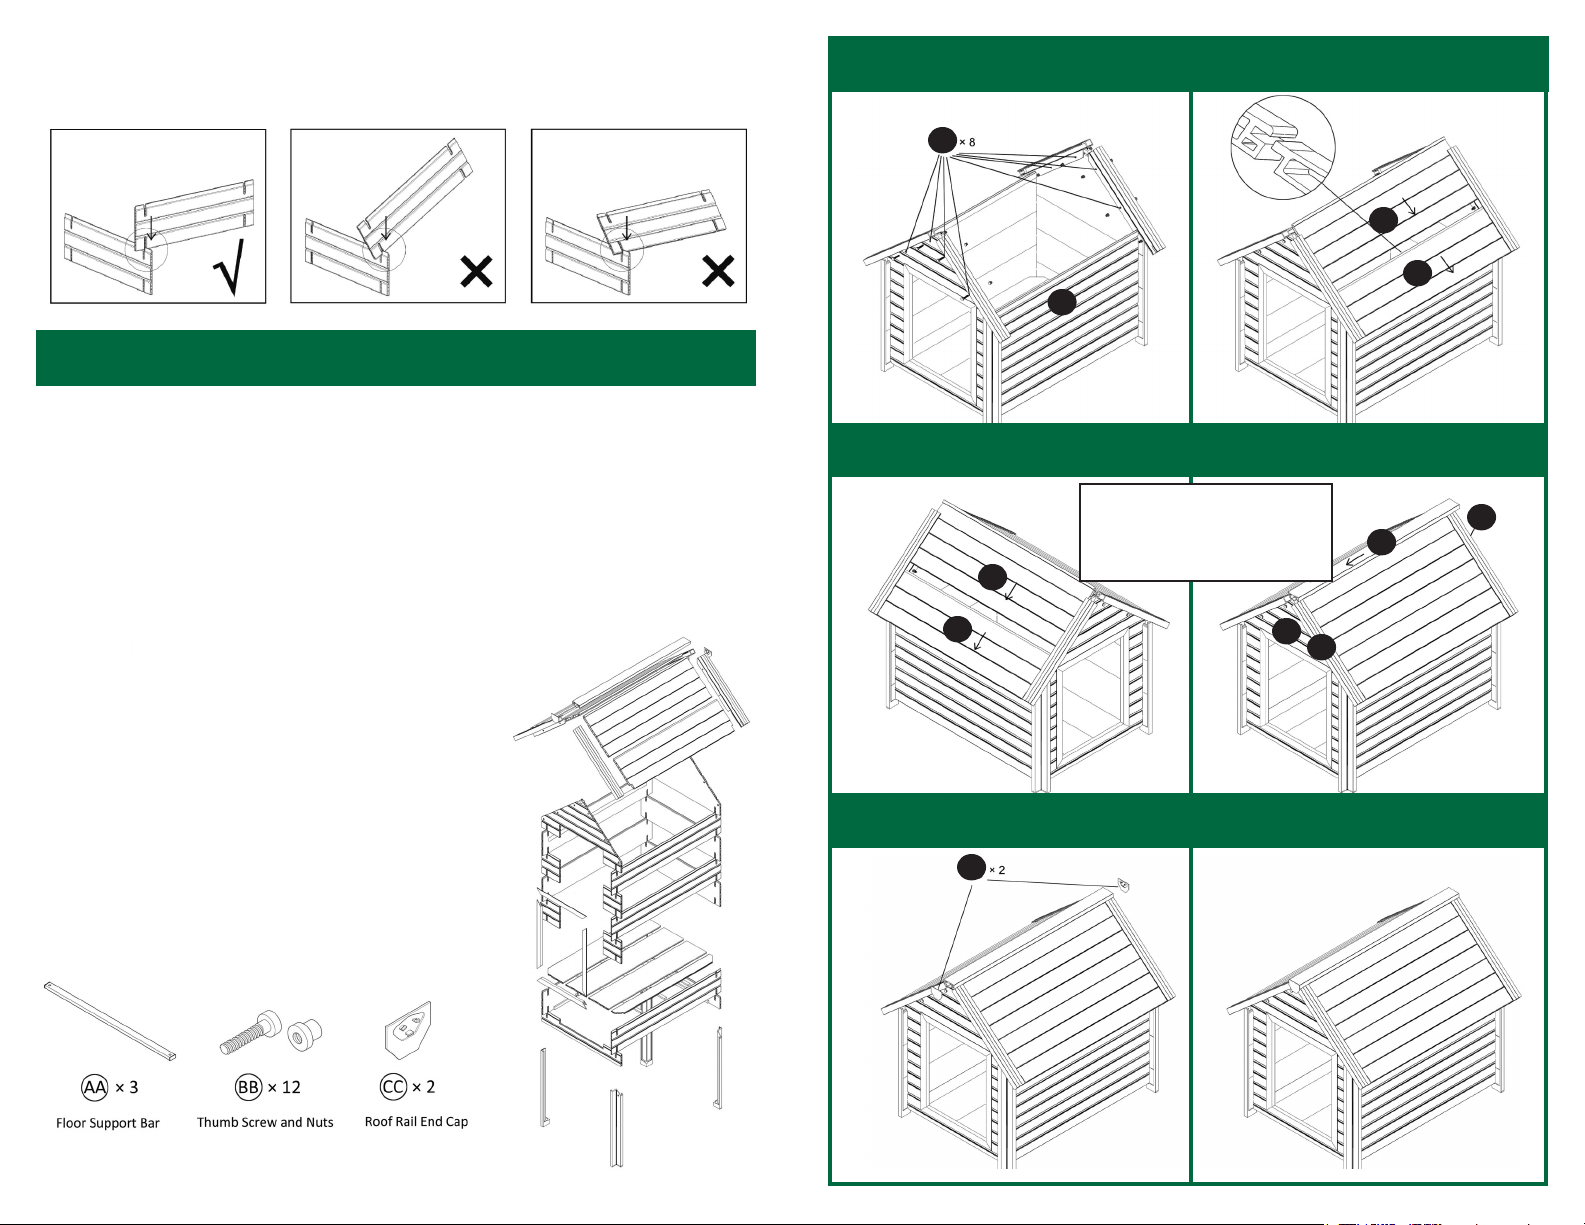
Parts List:
Wall Panels - 18
Wall Columns - 4
Floor Panels - 4
Roof Panels - 4
Roof Side Rails - 4
RoofTop Rail - 1
When installing wall panels, make sure the connecting panels are at a 90
degree angle vertical to the ground and a 90 degree angle perpendicular to
each other. Tilting in any way may cause damage to the groove.
KEEP DOGIPOT® BUNKHOUSE CLEAN FOR A HEALTHY PET
It is very important to keep the DOGIPOT® Bunkhouse clean for the health of your pet. The non-
absorbent material and the easy-to-assemble design will be appreciated when it is time to clean
the DOGIPOT® Bunkhouse.
Remove one side of the roof panels by reversing the last 3 steps of the assembly instructions,
which will allow you complete access to the entire inside of the DOGIPOT® Bunkhouse.
We recommend using a detergent with strong grease cutting capabilities that is safe to use
around you, your children and your pets. Upon completion of washing, rinse and then wipe
down the panels. Don’t forget to clean the inside of the roof panels. All the interior to air dry
thoroughly before reassembling.
Once the DOGIPOT® Bunkhouse is clean and dry, reassemble the roof panels.
STEP 25 STEP 26
STEP 29 COMPLETE
STEP 27 STEP 28
36
35
BB
16
38
37
CC
27
31
39
28
Align the keyhole openings on the
roof rail (39) to the metal connectors
at the peak of the parts (27) and (28).
Press down and push forward until
the end of the roof rail is flush to the
edge of part 31
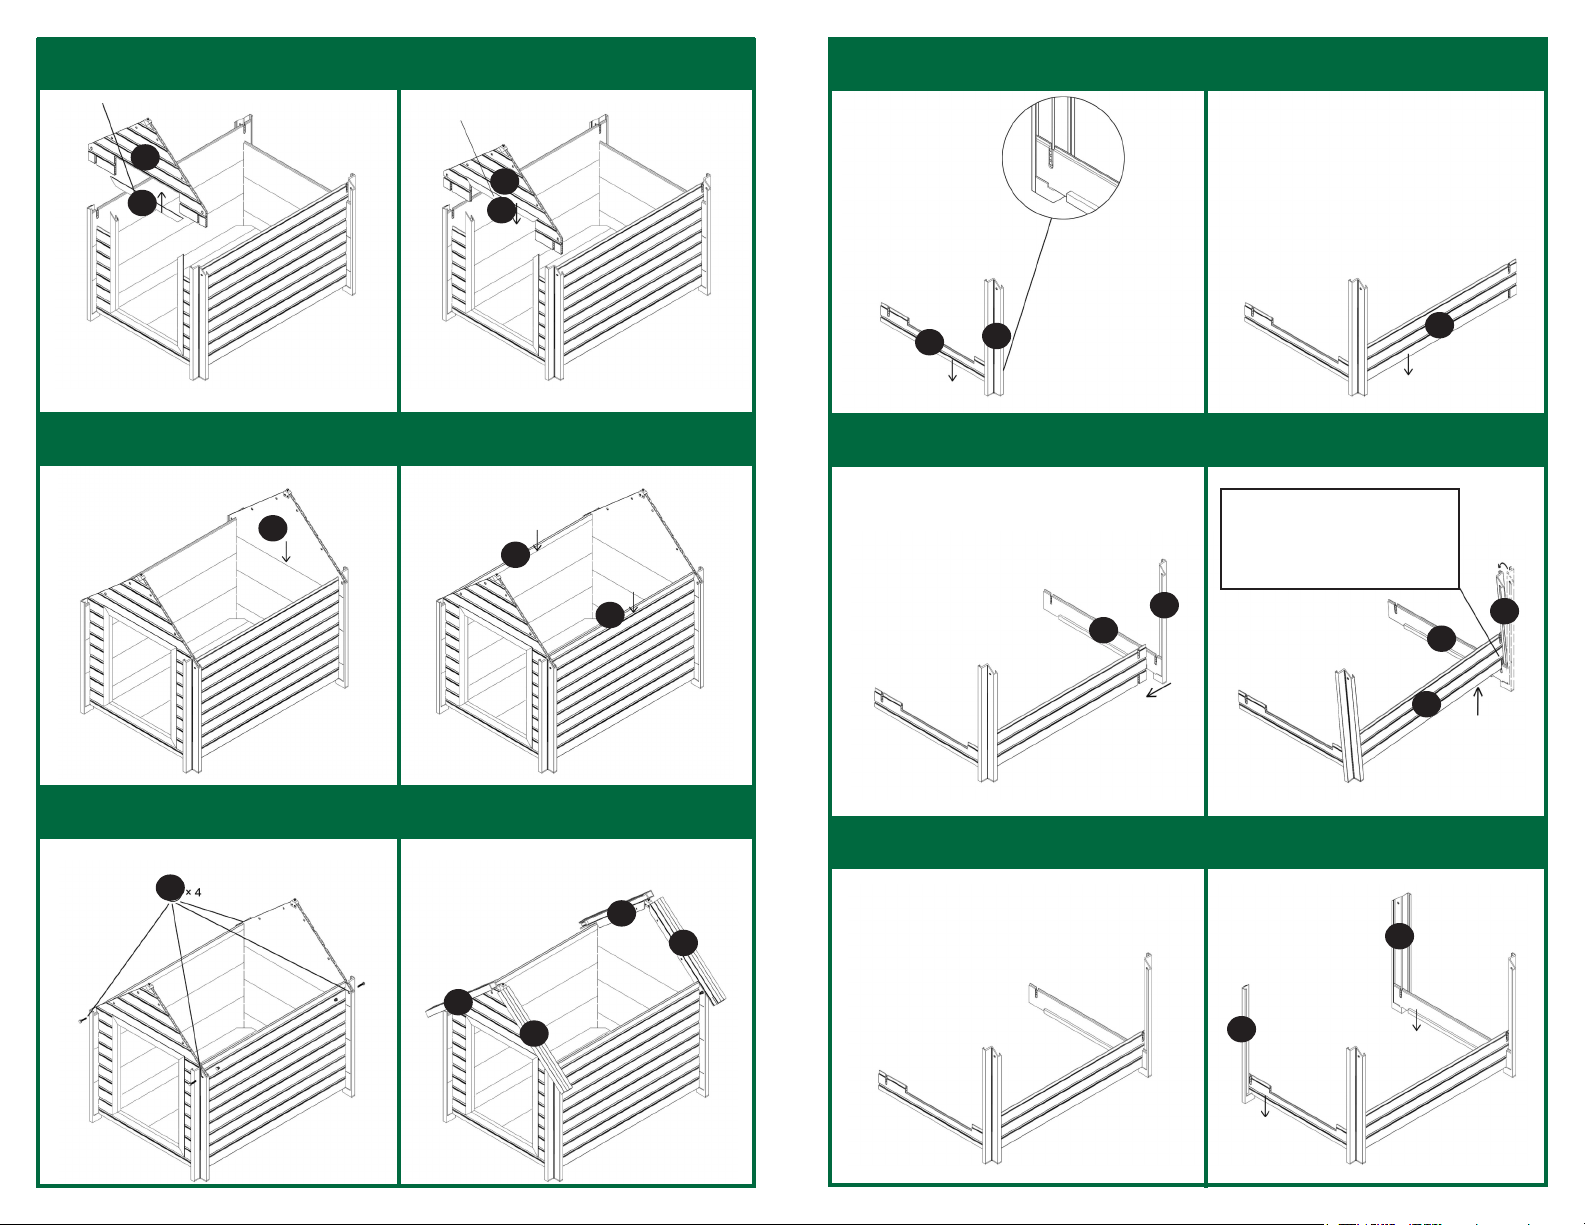
STEP 19 STEP 20
STEP 23 STEP 24
STEP 21 STEP 22
27
26
27
26
28
30
29
34
32
33
31
BB
STEP 1 STEP 2
STEP 5 STEP 6
STEP 3 STEP 4
1
2
3
4
5
3
6
7
4
5
Move assembled parts 4 & 5
and 3 near to each other. Lift
3 upward as shown then tilt 4
& 5 so 3 is perpendicular to 5.
Insert 3 into 5.
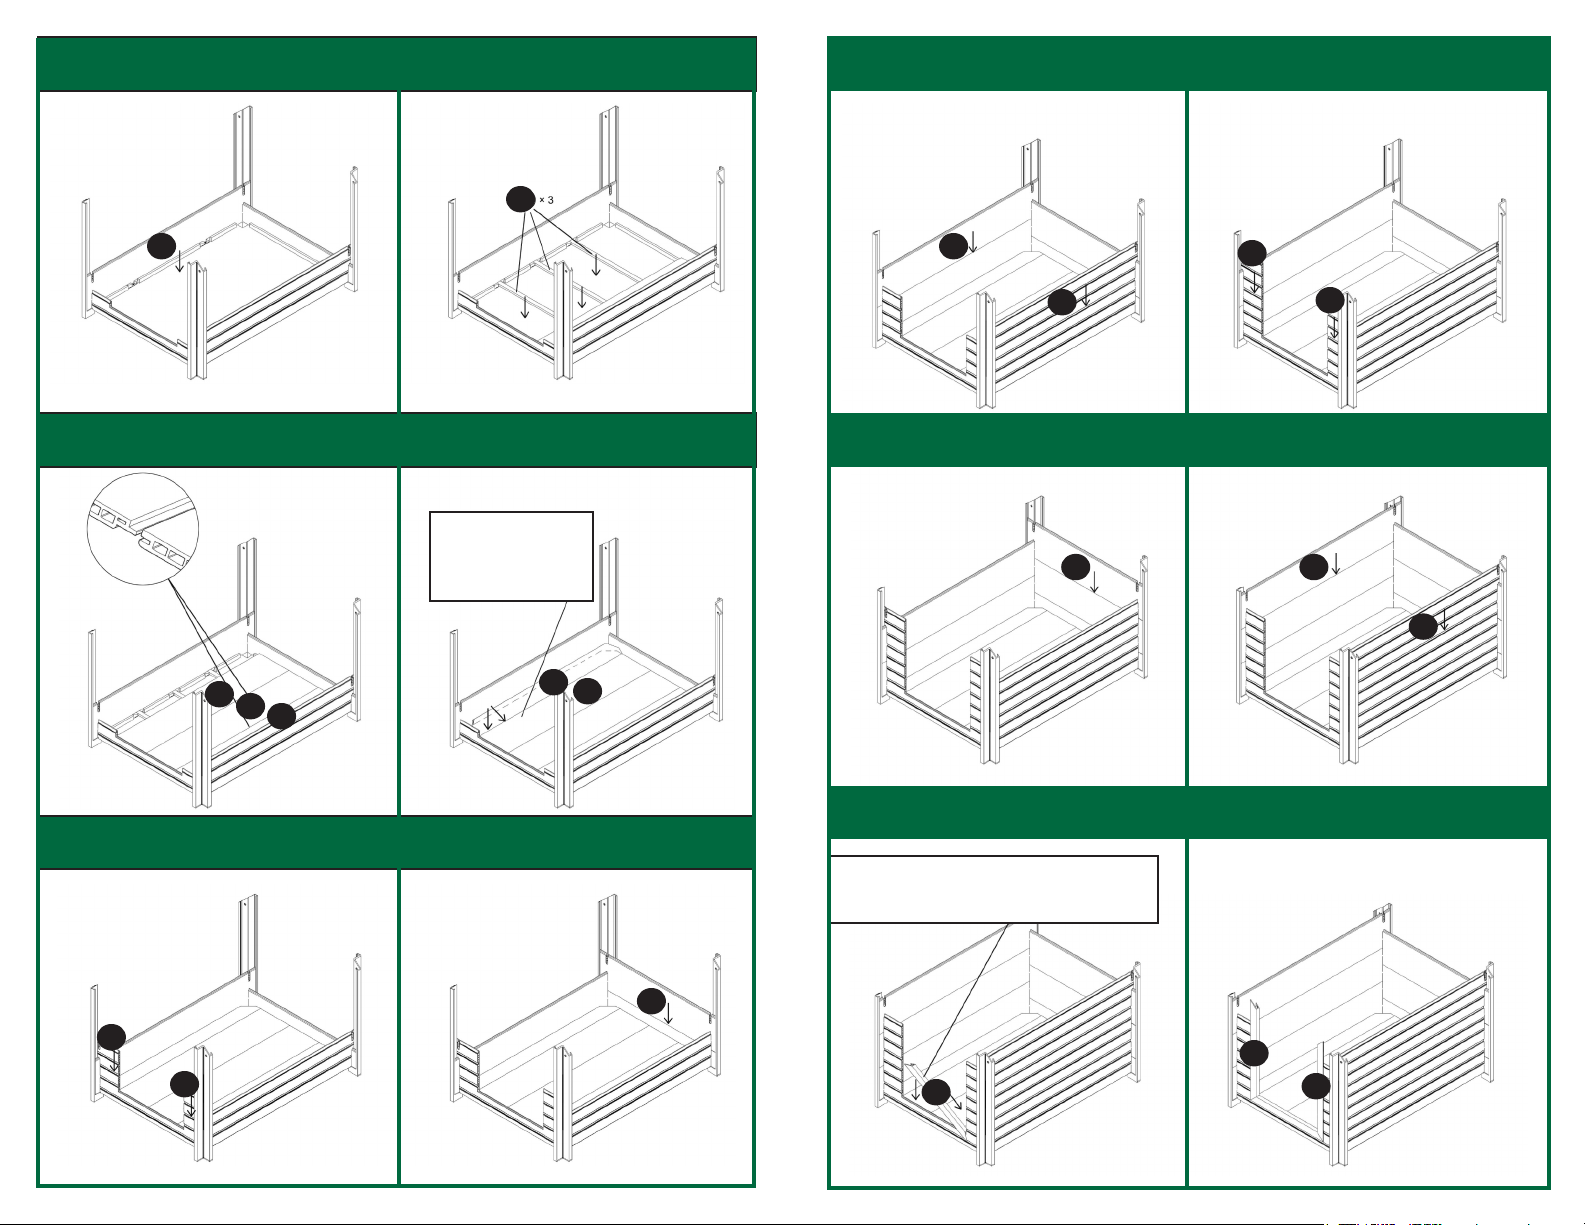
STEP 7 STEP 8
STEP 11 STEP 12
STEP 9 STEP 10
AA
8
11 12 11
15
13
14
9
10
Slightly angle 12
into 11, then push
down the other
edge gently.
STEP 13 STEP 14
STEP 17 STEP 18
STEP 15 STEP 16
19
18
17
16
20 22
21
24
23
25
Place door frame (23) into one of the
lower corners of the door opening, then
push the other end down gently.
This manual suits for next models
1
Other DOGIPOT Pet Care Product manuals


