Table of Contents
INTRODUCTION.................................................... 3
PGD1 and PLDPRO
NA
VIGA
T
I
ON
............ 2
TOUCHSCREEN NA
VIGA
T
I
ON
.................. 3
MAIN
P
AGE
.......................................................... 3
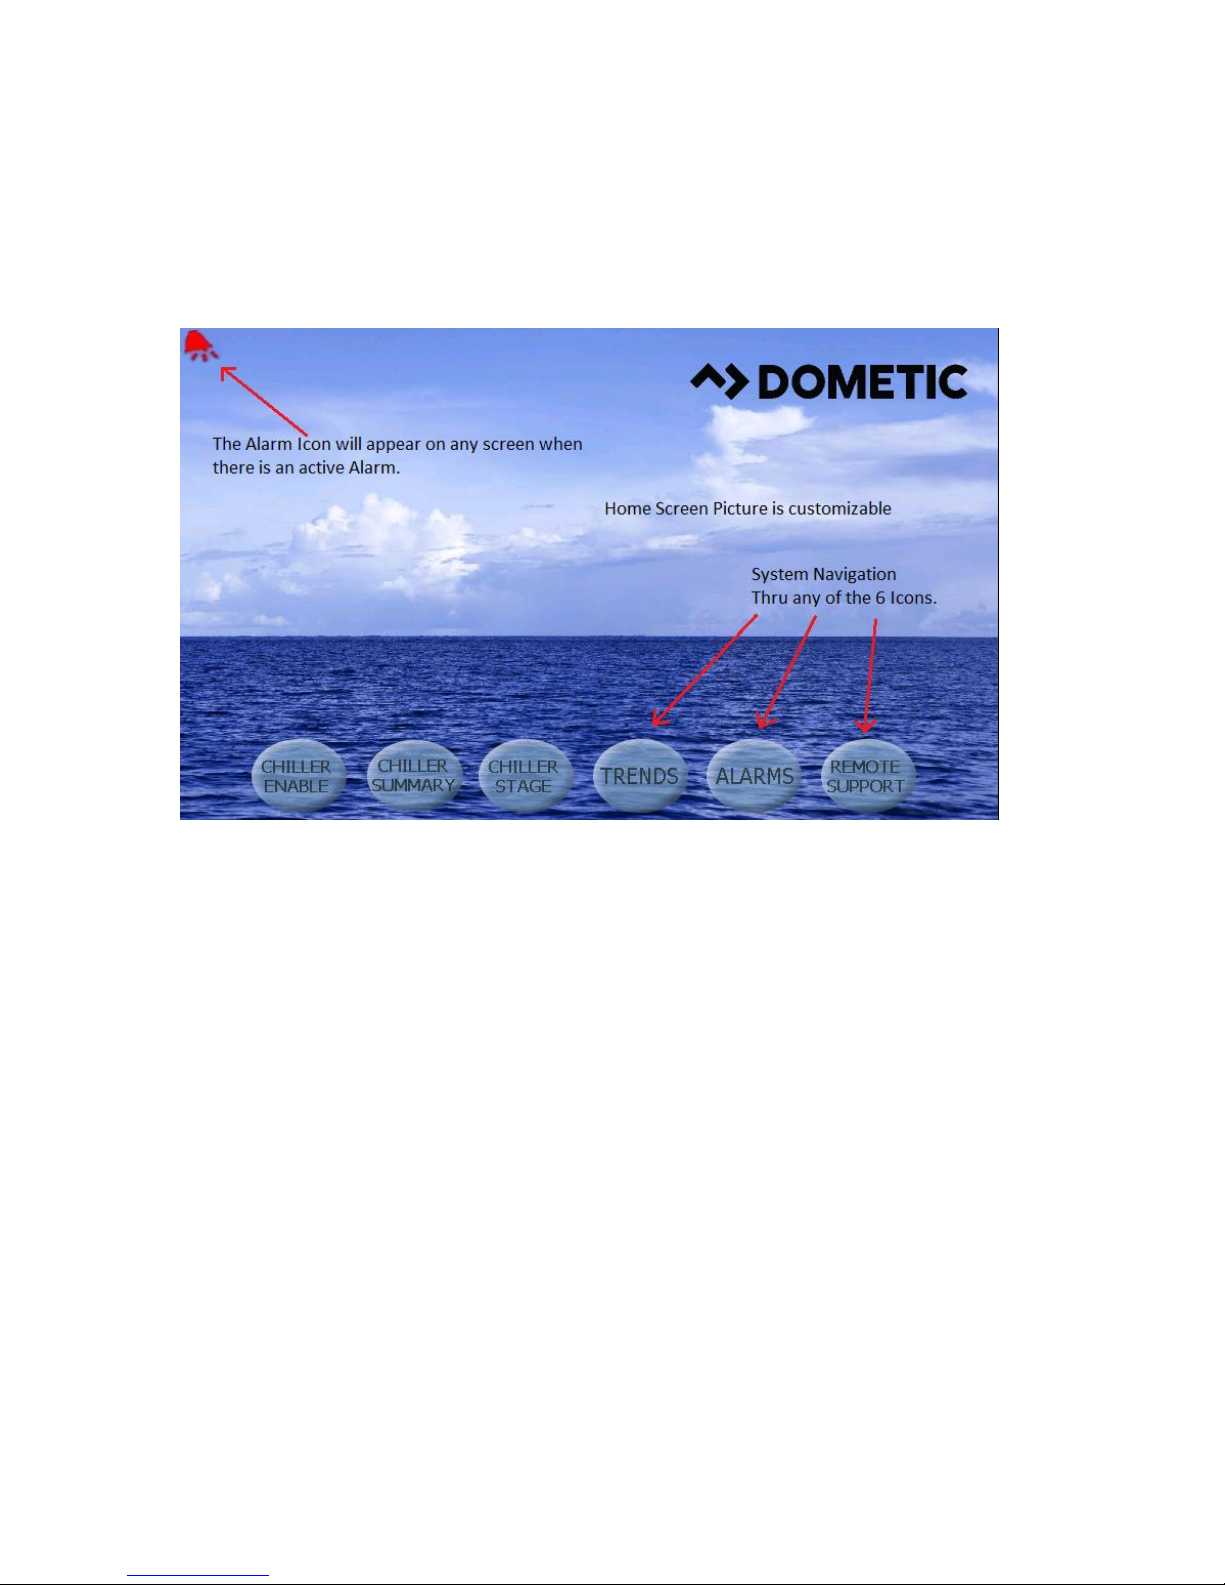
Chiller Enable
................................................ 3
Chiller Summary
........................................... 3
Chiller Stage
................................................... 3
T
rends
.............................................................. 3
A
larms
.............................................................. 3
Remote Support
............................................ 3
Logo
.................................................................. 4
Off Icon
............................................................. 4
Cool Icon
......................................................... 4
Heat Icon
......................................................... 4
Electric Heat Icon
......................................... 4
Setpoint Thermometers
............................. 4
GE
NE
RAL
........................................................... 5
DIGITAL
IN
PUTS
............................................. 5
Safety Inputs
........................................................... 5
Chilled Water Flow Switch
................................ 5
Refrigerant
High Side Pressure
L
imit
.......... 5
ANALOG INPUTS
............................................ 5
High Limit Temperature Setpoint................................ 5
Freeze Temperature Setpoint..................................... 6
Condenser Freeze Protection..................................... 6
PRESSURE TRANSDUCERS.................................... 6
Suction Pressure................................................ 6
Discharge Pressure............................................ 6
RELAYOUTPUTS
............................................ 6
COMP –Compressor ................................................. 6
CWP –Chilled Water Pump ....................................... 6
SWP –Sea Water Pump............................................ 6
RV –Reversing Valve................................................. 6
EH –Electric Heat ...................................................... 6
Fault............................................................................ 7
SYSTEM
OVERVIE
W
......................................7
System Power-up
................................................7
Software Revision
.........................................7
MODBUS............................................................7
Startup
......................................................................7
Operational
Checks
..............................................7
Compressor Startup
.............................................7
SET
POI
N
T
S
...........................................................8
Cooling................................................................8
Heating ...............................................................8
Compressor Staging
T
ime
........................8
Run Mode
–
Cooling
...........................................8
Run Mode
–
Reverse Cycle
H
eating
............8
Run Mode
–
Electric
H
eating
(optional
heater barrel)
..........................................................8
OPERATIONAL
M
ODES
...............................8
PUMP
O
PE
RA
TI
O
N
...........................................8
Chilled Water
Pump
....................................9
Sea Water
Pump
............................................9
Cooling Mode
.........................................................9
Heating
M
ode
........................................................9
Status Screen Navigation...................................10
Electrical Specifications.....................................17
Appendix I: Touchscreen Navigation
..18
Appendix II: PGD1 & PRO DISPLAY
NAVIGATION TREE
......................................27
Appendix III Multistage setup
.................38
Appendix IV Configuration & Setup..................44
Setting Time and Date ..............................................44
Enabling Electric Heat...............................................45
Select Unit of Temperature.......................................46
HMI Setup.................................................................47
Uploading program ...........................................47
Deleting old program:........................................48
Setting Screen Address, Time & Backlight: ......50
7” touch screen connection...............................56
Activating Maintenance Mode ...........................57
Enabling via PGD1 Display.......................................57
Enabling via Touchscreen.........................................59
Appendix V Alarm Table
............................61
Appendix VI Default Parameters
...........64
Appendix VII I/O Table & Wiring
Diagram
.............................................................66
VARC Standard Wiring Diagram
....................67
L-3499
E
N
GLIS
H