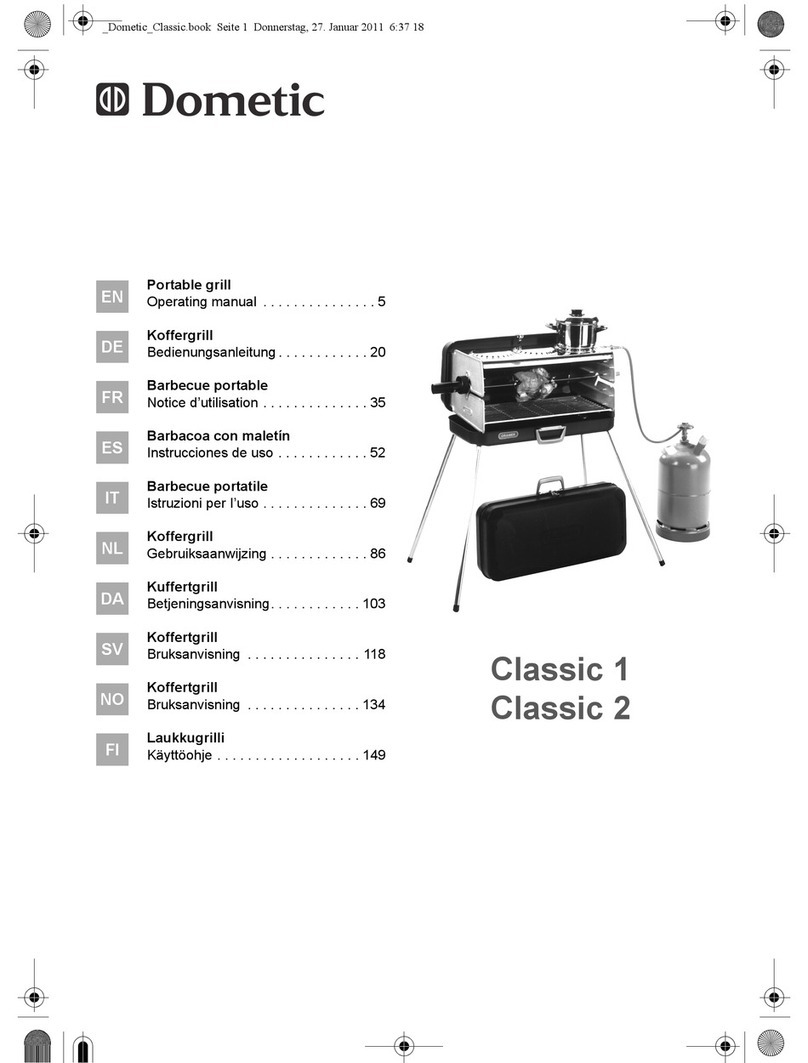
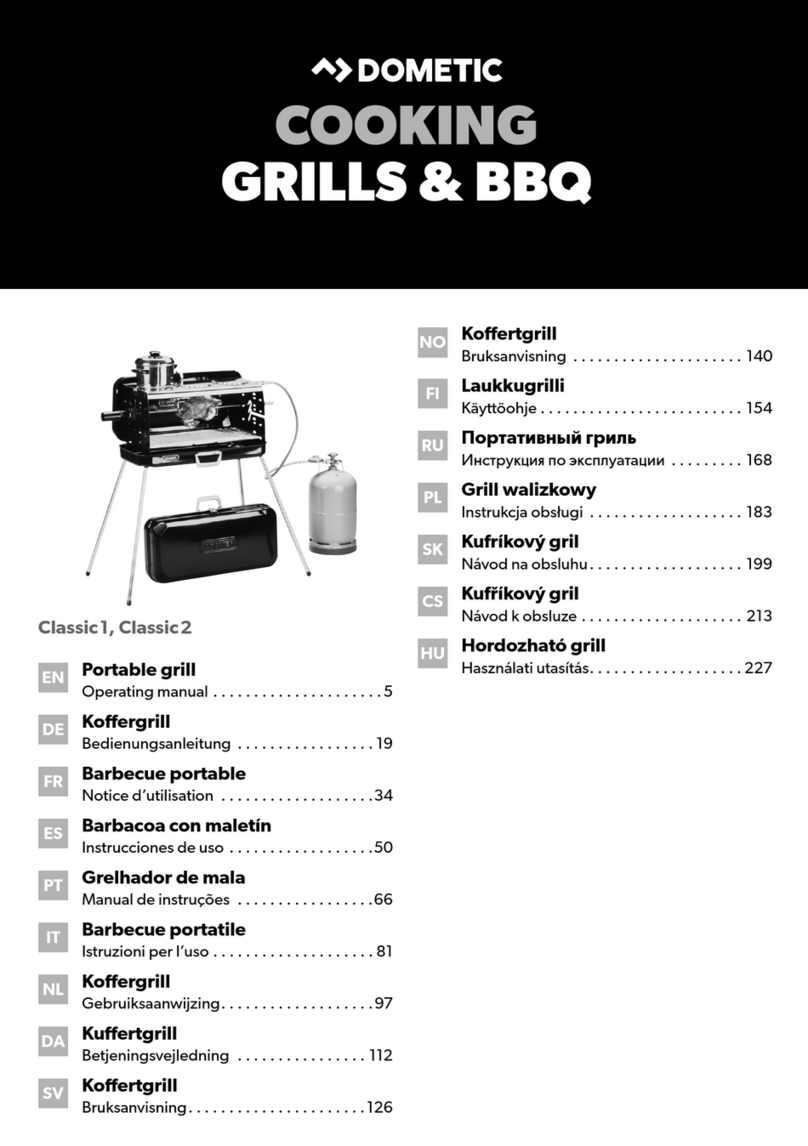
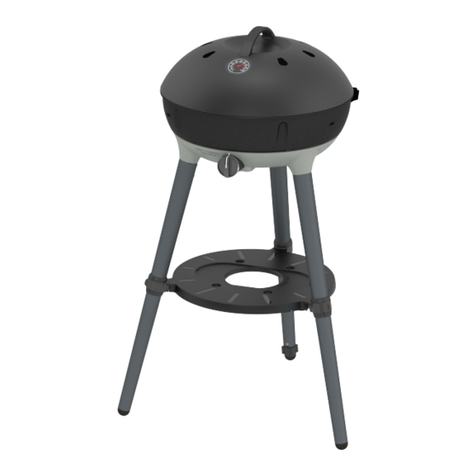
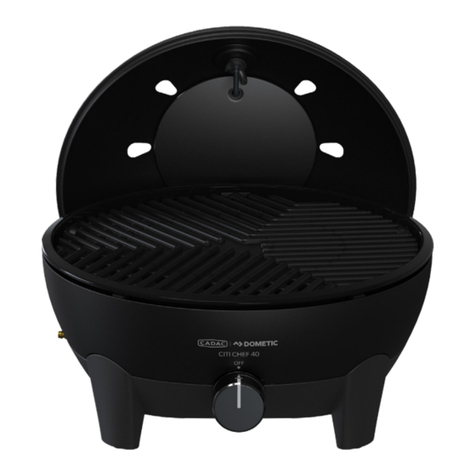
Dometic CADAC CITI CHEF 40 User manual

503-0888 LEV1
USER INSTRUCTIONS
NOTE! PRODUCT MAY VARY FROM ILLUSTRATIONS
EN DE DK ES FR IT NL NO PL SE SI FI TR
MODEL No: 8905
28/37/50mbar
CARRI CHEF 40

EN
Recycling packaging material. Place the packaging material in the appropriate recycling waste bins
wherever possible.
Explanation of Symbols

11
CAUTION
Provide ample ventilation. This gas appliance consumes air (oxygen). Do not use this appliance in an unventilated space to
avoid endangering your life. If still more gas appliances and/or occupants using gas are added to the space, additional ventilation must
be provided.
IMPORTANT
Read these instructions carefully so as to familiarise yourself with the appliance before fitting the appliance to a gas cylinder.
Retain these instructions for future reference.
EN
1. Safety information
These instructions are for your safety and to help you avoid risk of injury and/or damage.
All warranties will become void if you do not follow these instructions.
• This appliance complies to BS EN 498, BS EN 484.
• Gas appliances require ventilation for efficient performance and to ensure the safety of
users and other persons in close proximity, do not use the appliance in an unventilated
area. It is intended for outdoor use only.
• Ensure that the appliance is used in a well-ventilated area.
• WARNING: ACCESSIBLE PARTS MAY BE VERY HOT. KEEP YOUNG CHILDREN AWAY.
• Read these instructions carefully before using the appliance.
• FOR OUTDOOR USE ONLY!
Assembly and use
• Do not use the appliance if it has damaged or worn seals.
• Do not use an appliance that is leaking, damaged or which does not operate properly.
• Handle the appliance with care, do not drop it.
• Always operate the appliance on a firm level surface.
• Ensure that the assembled product is stable and does not rock.
• This appliance is not suitable for installation or connection to a reticulated gas supply.
• This appliance must be kept away from flammable materials during use. Minimum safe distances are: Above the appliance 120cm. At the rear
and sides 60cm. (fig 1)
• When using a pot, the minimum recommended pot size is 150mm and maximum recommended size is 300mm.
• Do not use any cooking surface or pot that is larger than the recommended size. Our cooking surfaces have been specifically designed to
allow gas combustion to escape and the closure of this space could affect the performance of this appliance.
• Do not modify this appliance, any modification may be dangerous. Do not use it for anything for which it has not been designed.
• Do not move the appliance during use.
• Never leave the appliance unattended when lit.
• During use, parts of the appliance will become hot (particularly the burner). Avoid touching hot parts with bare hands. The use of gloves is
recommended.
• Ensure that the pot stand / cooking surfaces are properly located when using the appliance.
Hose
• The hose must be checked for wear or damage before every use and before connecting to the gas container.
• Do not use the appliance if it has a damaged or worn hose. Replace the hose.
• Do not twist or pinch the hose.
• The hose length should be no less than 0.6m and shall not exceed 1.5m. Replace when the hose is damaged or shows signs of brittleness or
cracks.
Gas Container
• Gas is supplied to the unit via a hose and regulator. The hose and regulator can be connected to a gas cylinder or a Power Pak which is a
unit that takes two or more gas cartridges.
• IT COULD BE HAZARDOUS TO ATTEMPT TO FIT OTHER TYPES OF GAS CYLINDERS OR GAS CARTRIDGES (USED IN CONJUNCTION WITH
THE POWER PAK).
• This appliance must only be used with an approved hose and regulator.
• Only to be used with a gas cylinder that does not exceed 500mm in height (not including the regulator) and 400mm in width.
• Ensure that the gas container is fitted or changed in a well-ventilated location, preferably outdoors, away from any sources of ignition such
as naked flames, pilots, electric fires and away from other people.
• Keep gas containers away from heat and flame. Do not place on a stove or any other hot surface.
• Refillable containers are to be used only in the upright position so as to ensure proper fuel withdrawal. Failure to adhere to this may cause
liquid discharge from the gas container resulting in a dangerous operating conditions.
• Do not try to remove the gas container whilst the appliance is in operation.
• The gas container must be disconnected from the appliance aer use or when in storage.
Light back
• In the event of light back (where the flame burns back and ignites inside the burner or venturi housing), immediately turn off the gas supply
by firstly closing the control valve on the gas cylinder and then the appliance valve. Aer the flame is extinguished, remove the regulator
and check the condition of the seal; replace the seal if in doubt. Re-light the appliance.
• Should the flame persistently light back, return the product to your authorized repair agent.
Leaks
• If there is a gas leak on your appliance (smell of gas), immediately turn off the gas supply by turning the control knob clockwise to the “OFF”
position and take it into a flame free location where the gas leak may be detected and stopped. If you wish to check for gas leaks on your
appliance, do it outside. Do not try to detect gas leaks using a flame; use soapy water.
Fig. 1

22
How to check the appliance is connected to the gas supply in a sound fashion
• It is important that all gas connections have been correctly connected to prevent any gas leaks.
• The correct way is to smear the joint, i.e. where the gas container connects to the appliance, with soapy water. Turn the appliance control knob
slightly anti-clockwise to turn the gas on. If bubbles form, then there is a gas leak. Immediately turn the gas off and disconnect the gas supply
from the appliance. Check that all the connections are properly fitted. Check that the seal is in place and in good condition before connecting
the gas supply. Re-check with soapy water aer refitting the gas supply.
• If a gas leak persists, return the product to your local dealer for inspection/repair.
EN
Country of use DK, FI, NO, NL, SE, AT,
DE, SI
BE, ES, FR, IE, IT, PT,
GB, CH
PL AT, DE, CH
Appliance Catagories I3B/P (30) I3+ (28-30/37) I3B/P (37) I3B/P (50)
Allowable gases and
operating pressure
Butane @ 28-30mbar
Propane @ 28-30mbar
Butane/Propane mixtures
@ 28-30mbar
Butane @ 28-30mbar
Propane @ 37mbar
Butane @ 37mbar
Propane @ 37mbar
Butane/Propane mixtures
@ 37mbar
Butane @ 50mbar
Propane @ 50mbar
Butane/Propane mixtures
@ 50mbar
Nominal usuage Butane - 204 grams/hour Butane - 204 grams/hour Butane - 204 grams/hour Butane - 204 grams/hour
Gross nom. heat input 2.8 kW 2.8 kW 2.8 kW 2.8 kW
Jet number 0.84 0.79 0.74
Gas supply sources:
a) A refillable gas container not exceeding 11kg and complying with local regulation in force.
b) CA 445/CA 500 Cadac or equivalent disposable cartridge that complies with EN 417.
Country Name and Abbreviations
AE = United Arab Emirates AL = Albania AT = Austria BE = Belgium CH = Switzerland
CZ = Czech Republic DE = Germany DK = Denmark ES = Spain FI = Finland
FR = France GB = United Kingdom GR = Greece HR = Croatia IT = Italy
JP = Japan KR = Korea NL = Netherlands NO = Norway PL = Poland
PT = Portugal RO = Romania RU = Russia RS = Serbia SI = Slovenia
SK = Slovakia SE = Sweden TR = Turkey ZA = South Africa
I 3B/P (30), I 3+ (28-30/37) and I 3B/P (37), Appliance categories: (DK, FI, NO, NL, SE, AT, DE, BE, ES, FR, IE, IT, PT, GB, CH)
Push an approved hose onto the valve tailpiece until it is properly seated. On the other end, attach a suitable low pressure regulator.
I3B/P(30) : 30mbar Butane configurations regulator or 30mbar Propane configurations regulator or 30mbar butane/propane mixture
configuration regulator.
I3B/P(37) : 37mbar Butane configurations regulator or 37mbar Propane configurations regulator or 37mbar butane/propane mixture
configuration regulator.
I3+(28-30/37) : 30mbar Butane configurations regulator or 37mbar Propane configurations regulator.
Again making sure that the hose is properly seated. The type of hose used shall comply with the relevant EN standard and locate
requirement.
I 3B/P (50) Appliance category: (AT, DE, CH)
I3B/P(50) : 50mbar Butane configurations regulator or 50mbar Propane configurations regulator or 50mbar butane/propane mixture
configurations regulator.
Screw a hose with the correct threaded fittings on each end, onto the le hand 1/4” BSP thread of the valve. Attach a suitable 50mbar low-
pressure regulator on the end of the hose. The hose assembly used must comply with DIN 4815 part 2 or equivalent.

33
2. Fitting and Changing the Gas Supply
Connecting the gas supply
• Before connecting the appliance to a gas supply, ensure that the rubber seal on the regulator is in position
and in good condition.
• Before connecting the hose and regulator to the appliance, check that the appliance control knob is in the
“OFF” position.
• Carry out this check each time you fit the appliance to a gas cylinder.
• Blow out any dust from the gas supply opening to prevent possible blockage of the jet.
• Fit an approved hose and regulator to the appliance.
• Ensure that the gas supply (gas cylinder/gas cartridge) is fitted in a well-ventilated location away from any
source of ignition, such as naked flames and away from other people.
• Do not twist or pinch the hose. Ensure that it is routed away from the stove body so as to prevent
deterioration / damage to the hose caused by heat.
• Make sure that the gas cylinder is kept upright at all times, connect to the cylinder by screwing on hand
tight until fully engaged.
• Ensure that a complete gas seal has been made (check for the smell of gas around the connection
joint). Do not check for leaks with a naked flame. Use warm soapy water only, applied to the joints
and connections of the appliance. Any leakage will show up as bubbles around the leakage area.
• If you cannot rectify the gas leak do not use the appliance. If you are in doubt, contact your
nearest stockist.
Disconnecting and changing the gas supply
• Aer use, turn the appliance control knob to the “OFF” position and close the gas supply.
• When you need to replace your empty cylinder, make sure that the gas is closed at the cylinder
valve.
• Do not smoke while changing the cylinder.
• Remove the regulator from the empty cylinder.
• Attach the regulator to the full cylinder, refer to the instructions above on how to connect the gas
supply.
• Apply the same care and checking procedures as if fitting a new gas cylinder.
How to check if your gas cylinder is empty
• The easiest way to check if you are low on gas is by picking up your gas cylinder.
• If you think your gas cylinder is feeling a little lighter than you’d like, weighing the bottle is a great way to see how much gas is le. Most
cylinders will have the empty weight stamped on either the neck or foot ring, and if the weight indicated on the stamp and the weight of your
cylinder are the same, you’re out of gas. You can then approximate the amount of gas you have le by the difference in weight.
3. Operating the Appliance
Assembly and use
• The appliance is designed to be portable, therefore the legs and the utility tray are easily removable and dis-assemble for the ease of transport
and use.
• User assembly / dis-assembly is limited to the fitment of the legs, utility tray and the installation / removal of cooking surfaces.
• When assembling the legs, always make sure that the legs are properly secured and that the assembled product is stable and does not rock.
Do not use the appliance without fitting the utility tray as it also plays an important role in ensuring the overall sturdiness of the appliance.
• Should the heat shield, fat pan or burner pan become damaged in such a way that permanent contact between the heat shield and the fat pan
occurs during use, do not use the appliance. Return it to your stockist for repair.
• When operating this appliance, please take care to ensure that all parts are in good working order and that you have checked for any gas
leaks before lighting the appliance with every use.
• Cooking surfaces can simply be placed and are ready to use. No assembly required.
• PLEASE NOTE: Please ensure all protective packaging and plastic are removed from the appliance before use.
• The appliance is designed for use with cooking vessels of not less than 150mm diameter and not greater than 300 in diameter.
Precautions to observe before lighting.
• Use this appliance only on a firm level surface.
• Aer prolonged storage, inspect the appliance for any insects and webs, which may affect gas flow.
Lighting the appliance using the piezo
• To light up the appliance using the piezo igniter, push and turn the control knob (fig.2) in an anticlockwise direction until you hear a click.
If the gas does not ignite on the first spark, turn the control knob back to its “OFF” position. Try again, by pushing and turning the control
knob anti-clockwise until you hear a click. If the gas has not ignited in the first two to three seconds you should close the control valve by
turing the control knob back to its “OFF” position.
• Wait approximately thirty seconds to let any accumulated gas within the burner escape. Repeat the above process if necessary until the
flame ignites. The flame should normally light up within the first one to two seconds.
Lighting up using a BBQ lighter
• When starting cold, the appliance may be lit from the top prior to fitting the desired cooking surface onto the fat pan. When lighting up a
hot appliance, it is recommended that this be done by sticking a barbecue lighter through one of the vent holes underneath the burner,
until it is in line with the burner (DO NOT place the BBQ lighter through the large hole directly underneath the burner). Ignite the BBQ
lighter. Whilst the BBQ lighter is lit, push and turn the control knob anti-clockwise to light the burner.
EN
Gas inlet
Control knob
Fig. 2
Fit hose
clamp
here
Seal
Cylinder
Valve
Regulator
Hose
Fig. 3

44
EN
4. Component List
(A) Dome
(B) BBQ Grid
(C) Pot Stand
Burner Base
(E) Chef Pan 40
(used for frying)
(G) BBQ 2 Plancha 40
(for frying/grilling)
(F) Grill 2 Braai 40
(used for Frying/grilling)
(D) Fat Pan
Utility tray
Leg
A B C D E F G
8905-20
8905-40
8905-50
8905-80
*
*
*
****
*
*
*
*
*
*
*
*
*
*
*
Using the control knob
• The control knob is fitted with two positive stop positions, one at low, and one at ignite/high. This limits the adjustment of the flame to
between these two points. The fully closed position is at the furthest clockwise position.
• To rotate the valve from the fully closed position, it is necessary to first press the control knob in just enough to move out of the lock
mechanism. While holding the control knob in, turn it in an anti-clockwise direction. Once the spindle has moved out of the lock position it
is no longer necessary to keep the control knob pressed in and it can be rotated freely to the desired flame setting.
General
• Use the control knob to adjust the flame intensity to the desired level by turning the knob clockwise to increase the flame and anti-clockwise
to decrease the flame.
• When cooking food with a high fat content, flaring may occur if the selected heat setting is too high. Should this happen, turn the heat down
until the flaring ceases.
• Aer use, first close the control valve on the gas cylinder (if applicable). When the flame has gone out, close the control valve on the appliance.
• Do not move the appliance when in use. It is unsafe practice to move the appliance whilst lit and may cause flaring.
• When not in use remove the gas supply.
Leg leveller
Inspection hole
Control knob

55
EN
Paella Pan 40
(used for Paella/frying) Pizza Stone Pro 40
(used for Pizza baking) So Soak 40
(for easier cleaning)
5. GreenGrill Cooking Options
GreenGrill Cooking
Most of the cooking surfaces have our GreenGrill coating. This ceramic coating is completely PFOA-free; it contains no toxic substances, and
guarentees healthier cooking!
PREPARATION & USE
• ‘Seasoning’: before using the cooking surface for the first time, you can season it to give the cooking surface a thin protective layer that
prevents food from sticking. It is not required but we do recommend it. It’s very easy: lightly rub cooking oil on the surface and then place
over medium heat for 2 - 3 minutes. When it cools, wash the cooking surface with soapy water before use and grease it lightly with some oil
(cooking oil of your choice, e.g. sunflower oil).
It’s ready to go!
• Note: GreenGrill coating conducts heat better than products with a regular (PTFE) non-stick coating. We therefore recommend using only 75%
of the power of what you are used to.
• Never leave the cooking surface on the heat source without oil. Apply a thin layer of oil with a kitchen paper towel or a brush before placing the
cooking surface on the heat source. Make sure you have oiled all parts, so with e.g. a BBQ grid include the raised edges as well.
• We recommend frying in sunflower oil or Rapeseed Oil because of the high burning point. Olive oil can have a relatively low burning point,
which can cause the ingredients to stick to the pan or burn. We therefore do not recommend using olive oil.
Tip: bring meat or fish to room temperature before frying. This will prevent sticking to the cooking surface.
• Always use silicone and/or wooden utensils so that the GreenGrill coating is not damaged. Never use metal utensils as this can damage the
coating.
CLEANING
• Let the cooking surface cool down before cleaning. Extreme temperature changes can cause deformation of the cooking surface.
• The GreenGrill coating is ‘Easy Clean’. Warm soapy water with a so sponge is sufficient for cleaning the cooking surfaces with GreenGrill
coating. Avoid scouring pads or steel wool.
• If the cooking surface has food particles remaining from a previous use they can adhere to the coating, which can lead to brown spots. In
these places, ingredients can stick to the cooking surface because the coating is no longer reached. Make sure that these spots are properly
removed before use.
• For stubborn stains or residues, you can try the ‘vinegar method’ for the paella pan or chef pan: pour a layer of vinegar into the pan and heat
the pan slightly. The vinegar does not have to boil and should certainly not evaporate completely. Pour the vinegar out of the pan, clean the pan
with soapy water and the pan is as good as new. Note: heating vinegar can give off an unpleasant smell.
• The CADAC | DOMETIC So Soak (sold seperately) is the ideal companion product to facilitate overnight
soaking. When using the So Soak, we recommend placing the cooking surface face down which allows for
maximum soaking and also uses less water.
• Any stubborn stains that remain aer soaking, can be loosened and brushed away using the
CADAC | DOMETIC So Soak Brush (sold seperately).
• Dry with a so cloth and you’re done!
MAINTENANCE
• We recommend to add a little oil to the cooking surface aer cleaning and spread it with kitchen paper
The oil seals the surface from the outside air and moisture. It also ensures that the food does not burn into
the surface.
• Place the cooking surface in a plastic bag before you put it into its storage bag so you are ensured the
storage bag remains clean and oil free.
• The storage bag prevents damage to the GreenGrill coating and your product.
Cooking Options
• These are the available cooking options. (Use windshields in case of windy conditions)
Grilling: This cooking option is ideal for fat-free grilling of chicken, sausages, chops, kebabs, fish or vegetables. For this type of cooking, use
the grill plate.
Caution: Please note that when cooking fatty meats some fat will splatter onto the unit which may cause flare-ups. Please use caution when
handling such meats. The cooking temperatures are easily adjusted to suit your own requirements by turning the control knob to regulate the
degree of heat.
Frying: This option is ideal for stir-fries, fish, breakfast, pancakes, prawns, paella and vegetables. For this type of cooking, use the flat grill.
Please note that being a shallow pan, it is not suitable for deep-frying. The easy clean surface encourages the minimum use of fat for healthy
cooking.
The following surfaces are not included and are sold seperately:
So Soak Brush
Coffee pot stand

66
6. Cleaning
• Allow the appliance to cool down before you clean it.
• Use a damp cloth wrung out in a solution of soapy water to clean exterior surfaces.
• The grill plate is coated with a tough durable ceramic non-stick coating that has been used with great success on some of the best cookware
in the world. Never the less, taking care of it can help you to enjoy extra years of healthy, easy, non-stick cooking.
• Whilst the ceramic non-stick coating is very durable, it can easily be damaged by the use of metal cooking utensils. It is therefore
recommended that only plastic or wooden utensils be used when cooking.
• Always allow the grill/flat plate to cool before immersing it in water.
• Make sure that no water gets onto the burners or pilot/light area. Wipe the appliance completely dry before use.
• Do not use abrasive cleaners as they may damage the surfaces.
• Clean the appliance aer each use. Aer cleaning recondition the cooking surface with a light wipe of oil.
• Do not use any high-pressure steam equipment or a water jet to clean the appliance.
• Note: For stubborn stains, oven cleaner may be used.
7. Storage
• Always allow the unit to cool down and be cleaned before storing.
• Turn off the gas supply to the appliance, disconnect and remove the gas supply from the appliance.
• Never store an appliance with the gas supply connected, this is an unsafe practice.
• Store the appliance and gas supply in a well-ventilated area away from combustible material. Storage of cylinders should preferably be
outdoors and must NOT be in a basement.
EN
8. Maintenance & troubleshooting
Maintenance
• If you clean and maintain your appliance on a regular basis, the life of your appliance will extend and the possibility of problems will
decrease.
• We recommend the service of your appliance to be every twelve (12) months by a service agent to ensure continued efficient operation.
• This appliance must only be serviced by an authorized person.
• Check your gas hose and connections regularly for any signs of leaks and every time the gas cylinder is re-filled or fitted to the appliance
with every use.
Troubleshooting
In the case of a spattering flame or jet blockage:
• Clean your burner ports in case of an over spill.
• We recommend to clean or replace the jets every six (6) months to ensure continued efficient operation of your appliance.
• Should the appliance operate abnormally aer storage and all checks have not isolated the problem, the jet may be blocked. A blocked
jet would be indicated by a weaker yellowish flame or no flame at all in extreme cases. Under these circumstances it will be necessary to
remove and check and thoroughly clean out any foreign matter which may have gathered in the appliance.
• This may be done by removing the jet using standard tools and blow any dirt from the jet, alternatively, you may purchase new jets from your
local store. Do not attempt to clean the jet mechanically.
Replacing a blocked jet
• Your appliance is fitted with a specific size jet to regulate the correct amount of gas.
• Should the hole in the jet become blocked, this may result in a small flame or no flame at all. Do not attempt to clean the jet with a pin or
other such device as this may cause damage which could make the appliance unsafe.
• To replace the jet: Remove all loose surfaces as well as the utility tray and legs from the appliance. Turn the burner base over and remove
the 3 screws from the bottom cover plate (fig.4) to seperate the burner base from the burner assembly (fig. 5). Disconnect the Piezo wire,
taking care not to damage it and remove the burner assembly from the body of the burner base to expose the jet (fig. 6). The jet can now be
removed using a suitable spanner. Do not use pliers as this can damage the jet, making it unusable or impossible to remove. Screw the new
jet into the valve. Do not overtighten as this may damage the unit.
• Reverse the above procedure to re-assemble the unit, ensuring the venturi and jet line up correctly (fig 7), and that the Piezo wire is
reconnected.
Replacing the Hose:
• The fitting of a hose is described in Section 2.
Boiling: For this type of cooking, place the pot stand in its locator grooves ensuring that it is properly seated. Place a suitable pot (not less than
150mm diameter and not more than 300mm diameter). One liter of water will boil in approximately 6 minutes depending on the conditions,
size of pot used, etc. Use windshields in case of windy conditions
Note: When using small sized pots do not attempt to use pots with plastic handles as these can get extremely hot.
Paella: This cooking option is ideal for preparing paellas, risottos, pasta dishes, traditional breakfasts etc. The Paella Pan is made from a high
quality pressed aluminium which allows for excellent heat distribution and retention.
Pizza baking: This cooking option is ideal for preparing pizzas, flat breads etc. The pizza stone is 12mm thick that can withstand temperatures
of up to 300°C and includes a pan. The dome needs to be used in order to create the baking effect.
Coffee: This option is ideal for brewing a hot cup of coffee. Ideal for anytime, anywhere.

77
EN
9. Spares & Accessories
Always use genuine spares as they have been designed to give optimum performance.
Item Spares No
5610-SP001 V2
8905-SP005
8905-SP014
8905-SP003
8905-SP008
8905-SP021
Item Spares No
8905-SP001
8905-SP016
(adjustable leg)
HM6-074
(Jet 0.74 50mbar)
HM6-079
(Jet 0.79 37mbar)
HM6-084
(Jet 0.84
28/30mbar)
8905-SP023
8905-SP009
Item Spares No
8905-SP004
8905-SP015
8905-SP029
(28/30mbar)
8905-SP030
(30mbar)
8905-SP031
(50mbar)
8905-SP019
(Adjuster nut)
8905-SP020
(Rubber foot -
adjustable leg)
Fig. 4
Fig. 6
Fig. 5
Jet
Fig. 7

88
EN
10. Warranty
CADAC Europe BV hereby warrants to the ORIGINAL PURCHASER of this appliance for 2 years, that it will be free of defects in material and
workmanship from the date of purchase as follows:
Valves: 2 Years
Plastic parts: No Warranty
Enamel parts: 2 Years
Burners: 1 Year
The warranty will only apply if the unit is assembled and operated in accordance with the printed instructions.
CADAC Europe BV may require reasonable proof of your date of purchase. THEREFORE, YOU SHOULD RETAIN YOUR SALES SLIP OR
INVOICE.
This Limited Warranty shall be limited to the repair or replacement of parts that prove defective under normal use and service and which
on examination shall indicate, to CADAC Europe BV’s satisfaction, they are defective. Before returning any parts, contact the customer
service representative in your region using the contact information provided with your manual. If CADAC Europe BV confirms the defect
and approves the claim, CADAC Europe BV will elect to replace such parts without charge. CADAC Europe BV will return parts to the
purchaser, freight or postage prepaid.
This Limited Warranty does not cover any failures or operating difficulties due to accident, abuse, misuse, alteration, misapplication,
vandalism, improper installation or improper maintenance or service, or failure to perform normal and routine maintenance, including but
not limited to damage caused by insects within the burner tubes, as set out in this owner’s manual.
Deterioration or damage due to severe weather conditions such as hail, hurricanes, earthquakes or tornadoes, discoloration due to
exposure to chemicals either directly or in the atmosphere, is not cover by this Limited Warranty.
There are no other express warrants except as set forth herein and any applicable implied warranties of merchantability and fitness are
limited in duration to the period of coverage of this express written Limited Warranty. Some regions do not allow limitation on how long an
implied warranty lasts, so this limitation may not apply to you.
CADAC Europe BV is not liable for any special, indirect or consequential damages. Some regions do not allow the exclusion or limitation of
incidental or consequential damages, to this limitation or exclusion may not apply to you.
CADAC Europe BV does not authorize any person or company to assume for it any obligation or liability in connection with the sale,
installation, use, removal, return, or replacement of its equipment; and no such representations are binding on CADAC Europe BV.
This Warranty applies only to products sold at retail.
To enjoy and ensure longevity of your product, please refer to the cleaning and maintenance section of the user manual.
Item Item No
8600-200
346-10
370-EU
370-UK
370-DE
370-EF
370-DK
Accessories
Item Item No
98433
8600-102
5610-900
98326
Item Item No
5610-300
5610-200
5610-400
203-100

5757
Verpakkingsmateriaal recyclen. Deponeer het verpakkingsmateriaal waar mogelijk in de daarvoor
bestemde afvalbakken.
Verklaring van symbolen
NL

5858
VOORZICHTIG
Zorg voor voldoende ventilatie. Dit gastoestel verbruikt lucht (zuurstof). Gebruik dit toestel niet in een ongeventileerde ruimte om
gevaar voor eigen leven te voorkomen. Alleen voor gebruik buitenshuis.
BELANGRIJK
Lees deze instructies goed door om vertrouwd te raken met het toestel voordat het toestel aangesloten wordt op de gasfles.
Bewaar deze instructies voor toekomstig gebruik.
1. Veiligheidsinformatie
Deze instructies zijn voor uw veiligheid en om risico op letsel en/of schade te voorkomen.
Alle garanties vervallen indien u deze instructies niet opvolgt.
• Het toestel voldoet aan de normen BS EN 498, BS EN 484
• Gastoestellen hebben ventilatie nodig voor een efficiënte werking en om de veiligheid
van gebruikers en andere personen in de directe nabijheid te waarborgen. Gebruik
het apparaat niet op een ongeventileerde plaats. Het is alleen bedoeld voor gebruik
buitenshuis.
• Zorg ervoor dat het toestel gebruikt wordt op een goed geventileerde plek.
• LET OP: TOEGANKELIJKE ONDERDELEN KUNNEN ERG HEET ZIJN. HOUD KLEINE
KINDEREN UIT DE BUURT.
• Lees de instructies door voordat het toestel wordt gebruikt.
• Alleen buitenshuis gebruiken!
Montage en gebruik
• Gebruik het apparaat niet als het beschadigde of versleten afdichtingen hee.
• Gebruik geen toestel dat lekt, beschadigd is of niet goed functioneert.
• Behandel het toestel voorzichtig; niet laten vallen.
• Gebruik het apparaat altijd op een stevige, vlakke ondergrond
• Zorg ervoor dat het product stabiel is en niet kan wankelen.
• Dit toestel is niet geschikt voor installatie of aansluiting op de hoofdgastoevoer.
• Zorg ervoor dat het toestel gebruikt wordt op afstand van brandbare materialen. Minimale veilige afstanden boven het toestel - 1,2m, aan
de achterkant en zijkanten - 0.6m. (fig.1)
• Bij gebruik van een pan, is de minimum aanbevolen panmaat 150mm en de maximale panmaat 300mm.
• Gebruik geen kookoppervlak of pan die groter is dan de aanbevolen maat. Onze kookoppervlakken zijn speciaal ontworpen om
gasverbranding te laten ontsnappen en te weinig ruimte kan de prestaties van dit apparaat beïnvloeden.
• Wijzig dit apparaat niet, elke wijziging kan gevaarlijk zijn. Gebruik het niet voor iets waarvoor het niet is ontworpen.
• Het toestel niet tijdens gebruik verplaatsen.
• Laat het toestel nooit zonder toezicht achter wanneer het aangestoken is.
• Tijdens gebruik, zullen delen van het toestel heet worden (vooral de brander). Voorkom het aanraken van hete delen met blote handen. Het
gebruik van een ovenwant wordt aangeraden.
• Gebruik het apparaat niet als het geschikte kookoppervlak niet correct is geplaatst.
Slang
• De gasslang en afdichting op de regelaar moeten, voor elk gebruik en voor het aansluiten op de gasfles, gecontroleerd worden op slijtage
of beschadiging.
• Gebruik het apparaat niet als de slang beschadigd of versleten is. Vervang de slang als deze beschadigd is of tekenen hee van broosheid
of barsten.
• De gasslang niet afknijpen of verdraaien.
• De lengte van de gasslang mag niet korter zijn dan 0.8m en niet langer zijn dan 1,5m.
Gasfles
• Gas wordt via een slang en regelaarnaar het toestel gevoerd. De slang en regelaar kunnen worden aangesloten op een gasfles of
een Power Pak, een apparaat dat de gastoevoer van 2 of 3 patronen combineert. Let op: slang, regelaar en Power Pak worden niet
meegeleverd met het apparaat.
• HET KAN GEVAARLIJK ZIJN TE PROBEREN ANDERE TYPES GASFLESSEN OF GASPATRONEN TE PLAATSEN.
• Dit apparaat mag alleen worden gebruikt met een goedgekeurde slang en regelaar.
• Alleen te gebruiken met een gasfles die niet hoger is dan 500 mm (exclusief de regelaar) en 400 mm breed.
• Zorg ervoor dat de gasfles op een goed geventileerde plaats wordt geplaatst of vervangen, bij voorkeur buitenshuis, uit de buurt van
ontstekingsbronnen zoals open vuur, waakvlammen, elektrische vuren en uit de buurt van andere mensen.
• Houd gasflessen uit de buurt van hitte en vlammen. Niet op een fornuis of een ander heet oppervlak plaatsen.
• Navulbare gasflessen mogen alleen rechtopstaand worden gebruikt om ervoor te zorgen dat de brandstof goed kan worden afgevoerd.
Als u zich hier niet aan houdt, kan er vloeistof uit de gasfles lopen, wat kan leiden tot gevaarlijke situaties.
• Probeer de gasfles niet te verwijderen terwijl het apparaat in werking is.
• De gasfles moet na gebruik of bij opslag worden losgekoppeld van het toestel.
Vlamterugslag
• In geval van vlamterugslag (wanneer de vlam terugslaat en bij de gaspit ontsteekt) onmiddellijk de gastoevoer afsluiten door eerst de
afsluiter op de gasfles dicht te draaien en dan de afsluiter van het toestel. Nadat de vlam gedoofd is, de regelaar verwijderen en de staat
van de afdichting controleren. Vervang bij twijfel de afdichting. Steek het toestel weer aan.
• Als het probleem aanhoudt, breng het product dan terug naar uw dealer.
NL
Fig. 1

5959
Lekken
• Als er een lek in uw toestel zit (gaslucht), draai dan de gastoevoer dicht, eerst bij de gasfles en dan op uw toestel door de regelknop
helemaal rechtsom te draaien. Dan onmiddellijk meenemen naar buiten naar een goed geventileerde, vlamvrije locatie waar het
lek gevonden en gestopt kan worden. Als u uw apparaat op gaslekken wilt controleren, doe dit dan buiten. Probeer gaslekken niet op te
sporen met een vlam; gebruik hiervoor een zeepwater.
Zo controleert u of het toestel op een degelijke manier is aangesloten op de gastoevoer
• Het is belangrijk om alle gasaansluitingen op de juiste wijze aan te sluiten; dit voorkomt gaslekkages.
• De juiste manier is door de verbindingen in te smeren met zeepwater. Als er bellen ontstaan, is er een gaslek. Dan onmiddellijk de gastoevoer
dichtdraaien, eerst door het sluiten van de afsluiter op de gasfles, en dan de afsluiter van het toestel; controleer of alle verbindingen goed
gemonteerd zijn. Nog een keer controleren met zeepwater.
• Wanneer het gaslek blij optreden het product terugsturen naar uw dealer voor inspectie / reparatie.
I 3B/P (30), I 3+ (28-30/37) en I 3B/P (37), Toestelcategorieën: (DK, FI, NO, NL, SE, AT, DE, BE, ES, FR , IE, IT, PT, GB, CH)
Duw een goedgekeurde slang op de slangpilaar totdat deze goed op zijn plaats zit. Bevestig aan het andere uiteinde een geschikte
lagedrukregelaar.
I3B/P(30): 30 mbar butaan configuraties regelaar of 30 mbar propaan configuraties regelaar of 30 mbar butaan/propaan mengsel
configuratie regelaar.
I3B/P(37): 37 mbar butaan configuraties regelaar of 37 mbar propaan configuraties regelaar of 37 mbar butaan/propaan mengsel
configuratie regelaar.
I3+(28-30/37): 30 mbar butaan configuraties regelaar of 37 mbar propaan configuraties regelaar.
Zorg er opnieuw voor dat de slang goed op zijn plaats zit. Het gebruikte type slang moet voldoen aan de relevante EN-norm en lokale
wet- en regelgeving.
I 3B/P (50) Toestelcategorie: (AT, DE, CH)
I3B/P(50): 50 mbar butaan configuraties regelaar of 50 mbar propaan configuraties regelaar of 50 mbar butaan/propaan mengsel
configuraties regelaar.
Schroef een slang met de juiste schroefdraadfittingen aan elk uiteinde op de linker 1/4” BSP-schroefdraad van het ventiel. Bevestig een
geschikte lagedrukregelaar van 50 mbar aan het uiteinde van de slang. De gebruikte slang en drukregelaar moeten voldoen aan DIN
4815 deel 2 of gelijkwaardig.
NL
Landnamen en afkortingen
AE = Verenigde Arabische
Emiraten AL = Albanië AT = Oostenrijk BE = België CH = Zwitserland
CZ = Tsjechische Republiek DE = Duitsland DK = Denemarken ES = Spanje FI = Finland
FR = Frankrijk
GB = Verenigd
Koninkrijk GR = Griekenland HR = Kroatië IT = Italië
JP = Japan KR = Korea NL = Nederland NO = Noorwegen PL = Polen
PT = Portugal RO = Roemenië RU = Rusland RS = Servië SI = Slovenië
SK = Slowakije SE = Zweden TR = Turkije ZA = Zuid-Afrika
Land van gebruik DK, FI, NO, NL, SE, AT,
DE, SI
BE, ES, FR, IE, IT, PT,
GB, CH
PL AT, DE, CH
Categorieën van
toestel
I3B/P (30) I3+ (28-30/37) I3B/P (37) I3B/P (50)
Toegestane gas-
soorten en
bedrijfsdruk
Butaan bij 28-30mbar
Propaan bij 28-30mbar
Butaan/propaan meng-
sels bij 28-30mbar
Butaan bij 28-30mbar
Propaan bij 37mbar
Butaan bij 37mbar
Propaan bij 37mbar
Butaan/propaan meng-
sels bij 37mbar
Butaan bij 50mbar
Propaan bij 50mbar
Butaan/propaan meng-
sels bij 50mbar
Nominaal verbruik Butaan - 204 gram/uur Butaan - 204 gram/uur Butaan - 204 gram/uur Butaan - 204 gram/uur
Bruto nom. warmte-
inbreng
2.8 kW 2.8 kW 2.8 kW 2.8 kW
Gaspit nummer 0.84 0.79 0.74
Gastoevoerbronnen:
a) Een hervulbare gasfles niet zwaarder dan 11 kg en die voldoet aan de plaatselijke regelgeving die van kracht is.
b) CA 445/CA 500 Cadac of gelijkwaardige EN417-compatibel wegwerp cartridge.

6060
2. De gastoevoer aansluiten en vervangen
De gastoevoer aansluiten
• Zorg vóórdat het toestel aangesloten wordt op een gasfles dat de rubberen afdichting op de regelaar op
zijn plaats zit en in goede staat is.
• Voordat u de slang en de regelaar op het apparaat aansluit, moet u ervoor zorgen dat de bedieningsknop
van het apparaat in de “OFF”-stand staat.
• Voer deze controle elke keer uit wanneer het toestel op de gasfles aangesloten wordt.
• Blaas alle stof uit de opening van de gasfles om mogelijke blokkering van de gaspit te voorkomen.
• Bevestig een goedgekeurde slang en regelaar aan het apparaat.
• Zorg ervoor dat de gastoevoer (gasfles / gaspatroon) op een goed geventileerde plaats wordt
geïnstalleerd, uit de buurt van ontstekingsbronnen zoals open vuur en uit de buurt van andere mensen.
• De gasslang niet afknijpen of verdraaien. Zorg ervoor dat de gasslang niet te dicht bij het kooktoestel
komt om beschadiging van de gasslang door hitte te voorkomen.
• Zorg ervoor dat de gasfles altijd rechtop staat. Sluit de gasfles aan door deze met de hand goed vast te
schroeven.
• Zorg ervoor dat er een volledige gasafdichting is gemaakt (controleer op gaslucht rond de
aansluiting). Controleer niet op lekken met een open vlam. Gebruik alleen warm zeepwater,
aangebracht op de verbindingen en aansluitingen van het apparaat. Een lekkage is te herkennen
aan luchtbellen.
• Als u het lek niet kunt herstellen, dan het toestel niet gebruiken en contact opnemen met uw
plaatselijke dealer.
Ontkoppelen en vervangen van de gastoevoer
• Draai na gebruik de bedieningsknop van het toestel naar de stand “OFF” en sluit de gastoevoer.
• Wanneer u uw lege fles moet vervangen, zorg er dan voor dat het gas is afgesloten bij de kraan
van de gasfles.
• Rook niet tijdens het vervangen van de gasfles.
• Haal de regelaar van de lege fles.
• Monteer de regelaar op de volle fles, zie bovenstaande instructies voor het aansluiten van de
gastoevoer.
• Pas dezelfde zorg- en controleprocedures toe als bij het installeren van een nieuwe gasfles.
Hoe controleer je of je gasfles leeg is?
• De eenvoudigste manier om te controleren of het gasniveau laag is, is door de gasfles op te tillen.
• Als u merkt dat uw gasfles iets lichter is dan normaal, kunt u de fles wegen om te bepalen hoeveel gas er nog over is. Bij de meeste flessen staat
het tarragewicht op de hals- of onderring gestempeld en als het opgegeven gewicht overeenkomt met het gewicht van uw fles, hee u geen
gas meer. Op basis van het gewichtsverschil kun je inschatten hoeveel gas er nog over is.
3. Het apparaat gebruiken
Montage en gebruik
• Het apparaat is draagbaar en zowel de poten als het plateau kunnen eenvoudig worden verwijderd en gemonteerd.
• Montage/demontage door de gebruiker is beperkt tot het plaatsen/verwijderen van de poten, het plateau en kookplaten.
• Let er bij het monteren van de poten altijd op dat de zekeringsringen goed zijn aangedraaid. Het apparaat moet stabiel staan en niet
wankelen. Gebruik het apparaat niet zonder dat het plateau is bevestigd. Dit is belangrijk voor de stevigheid van het apparaat.
• Als het hitteschild, de vetopvangbak of branderbak dermate beschadigd raken dat het hitteschild en de vetopvangbak elkaar raken tijdens
het gebruik, kunt u het apparaat niet gebruiken. Breng het apparaat ter reparatie naar uw leverancier.
• Blokkeer of verander de luchttoevoeropeningen van de ventielklep niet. Dit kan de prestaties van het product beïnvloeden en een
onstabiele vlam geven.
• Zorg er bij het gebruik van dit apparaat voor dat alle onderdelen in goede staat verkeren en dat u bij elk gebruik op gaslekken hebt
gecontroleerd voordat u het apparaat aansteekt.
• De kookvlakken kunnen eenvoudig worden gepositioneerd en zijn klaar voor gebruik. Geen montage vereist.
• LET OP: Zorg ervoor dat alle beschermende verpakking en plastic van het toestel verwijderd wordt voordat het in gebruik genomen wordt.
• Het toestel is ontworpen voor het gebruik van kookpannen groter dan 150 mm in diameter en niet groter dan 300 mm in diameter.
Voorzorgsmaatregelen die u moet nemen voor het aansteken.
• Gebruik dit apparaat alleen op een stabiele en vlakke ondergrond.
• Inspecteer het apparaat na langdurige opslag op insecten en spinnenwebben die de gasstroom
kunnen belemmeren.
Het apparaat aansteken met de piezo
• Om het apparaat aan te steken met behulp van de piëzo-ontsteker, drukt en draait u de bedieningsknop tegen de klok in totdat u een klik
hoort. Als het gas niet ontsteekt bij de eerste vonk, draai dan de bedieningsknop terug naar de “OFF”-stand. Probeer het opnieuw door de
bedieningsknop in te drukken en te draaien tegen de klok in totdat u een klik hoort. Als het gas in de eerste twee tot drie seconden niet is
ontstoken, moet u de gastoevoer sluiten door de regelknop terug naar de “OFF”-stand te draaien.
• Wacht ongeveer dertig seconden om eventueel opgehoopt gas in de brander te laten ontsnappen. Herhaal het bovenstaande proces
indien nodig totdat de vlam ontsteekt. De vlam moet normaal gesproken binnen de eerste één tot twee seconden oplichten.
Aansteken met een BBQ-aansteker
• Bij een koude start kan het apparaat van bovenaf worden aangestoken voordat het gewenste kookoppervlak wordt geplaatst. Bij het
aansteken van een heet apparaat is het aan te raden om dit te doen door een BBQ-aansteker door een van de ventilatiegaten onder de
brander te steken, totdat deze in lijn is met de brander (Steek de BBQ-aansteker NIET door het grote gat direct eronder de brander). Steek
de barbecue aansteker aan. Terwijl de BBQ-aansteker brandt, drukt en draait u de bedieningsknop tegen de klok in om de brander aan te
steken.
NL
Gasinlaat
Bedieningsknop
Fig. 2
Plaats hier de
slangklem
Afdichting
Gasfles
kraan
RegelaarGasslang
Fig. 3

6161
4. Componentenlijst
NL
Algemeen
• Nadat het apparaat is aangestoken, kan de vlamintensiteit worden aangepast. Draai de regelknop naar rechts voor een lagere vlam of naar
links voor een hogere vlam.
• De volledig gesloten positie bevindt zich uiterst rechts. Als u het ventiel uit de volledig gesloten positie wilt draaien, moet u de knop eerst
ver genoeg indrukken om de vergrendeling op te heffen. Houd de knop ingedrukt en draai die naar links. Wanneer de vergrendeling
eenmaal is opgeheven, hoe u de regelknop niet meer ingedrukt te houden en kunt u die naar de gewenste vlaminstelling draaien.
• Als het apparaat eenmaal is aangestoken, kan de intensiteit van de vlam worden aangepast door de bedieningsknop met de klok mee te
draaien om de vlam te verkleinen of tegen de klok in om deze te vergroten.
• Bij het bereiden van voedsel met een hoog vetgehalte kunnen opflakkeringen optreden als het warmteniveau te hoog is. Als dit gebeurt,
verlaag dan het vuur totdat de opflakkeringen stoppen.
• Sluit na gebruik eerst de regelkraan op de gasfles (indien van toepassing). Als de vlam gedoofd is, sluit u de gastoevoer op het apparaat
• Verplaats het apparaat niet wanneer het in gebruik is. Het verplaatsen van het apparaat terwijl het is ingeschakeld, is gevaarlijk en kan
opflakkeringen veroorzaken.
• Sluit na gebruik eerst de gasflesregelkraan (indien aanwezig). Als de vlam gedoofd is, sluit u de regelklep van het apparaat.
• Verwijder de gasfles of Power Pak als het apparaat niet wordt gebruikt.
(A) Deksel
Brander unit
(C) Pandrager
(gebruikt voor koken)
(D) Vetopvangbak
(B) Barbecue rooster
Plateau
Poot
A B C D E F G
8905-20
8905-40
8905-50
8905-80
*
*
*
****
*
*
*
*
*
*
*
*
*
*
*
(E) Chef Pan 40
(G) BBQ 2 Plancha 40
(F) Grill 2 Braai 40
Poot Leveler
Inspectie gat
Regelknop

6262
5. GreenGrill kookopties
GreenGrill Koken
De meeste kookoppervlakken zijn voorzien van GreenGrill coating. Deze keramische coating is volledig PFOA-vrij; het bevat geen giige
stoffen en staat garant voor gezonder koken!
VOORBEREIDING & GEBRUIK
• Uw grillplaat ‘inbranden’: Voordat u de kookplaat voor de eerste keer gebruikt, kunt u deze inbranden om de kookplaat een dunne
beschermlaag te geven die voorkomt dat voedsel blij plakken. Het is niet verplicht, maar we raden het wel aan. Het is heel eenvoudig: Wrijf
het kookoppervlak in met wat olie en plaats op matig vuur gedurende 2 tot 3 minuten. Laat het kookoppervlak vervolgens afkoelen en was af
met een sopje. Vet het vervolgens licht in met wat (zonnebloem)olie. Uw kookoppervlak is klaar voor gebruik!
• Let op: GreenGrill geleidt warmte beter dan producten met een reguliere (PTFE) antiaanbaklaag. We raden daarom aan om slechts 75% van
het vermogen te gebruiken van wat je gewend bent.
• Laat het kookoppervlak nooit zonder olie op de warmtebron staan. Breng een dun laagje olie aan met keukenpapier of een borstel voordat
je het kookoppervlak op de warmtebron plaatst. Zorg ervoor dat je het complete kookoppervlak hebt geolied, dus bijvoorbeeld ook de
opstaande randjes van het BBQ rooster.
• Vanwege het hoge verbrandingspunt raden wij aan om in zonnebloemolie of koolzaadolie te bakken. Olijfolie kan een relatief laag
verbrandingspunt hebben, waardoor de ingrediënten aan de pan kunnen plakken of verbranden. We raden daarom af om olijfolie te
gebruiken. Tip: breng vlees of vis voor het koken op kamertemperatuur. Dit voorkomt dat het aan het kookoppervlak blij kleven.
• Gebruik altijd siliconen en/of houten keukengerei, zodat de GreenGrill-coating niet wordt beschadigd. Gebruik nooit metalen keukengerei
omdat dit de coating kan beschadigen.
REINIGING
• Laat het kookoppervlak afkoelen voordat u het schoonmaakt. Extreme temperatuurschommelingen kunnen vervorming van het
kookoppervlak veroorzaken.
• De GreenGrill coating is ‘Easy Clean’. Warm water met zeepsop met een zachte spons zijn doorgaans voldoende om de kookoppervlakken
met GreenGrill-coating te reinigen. Vermijd schuursponsjes of staalwol.
• Als er voedselresten op het kookoppervlak zijn achtergebleven van een eerder gebruik, kunnen deze aan de coating hechten, wat kan leiden
tot bruine vlekken. Op deze plekken kunnen eiwitten uit voedsel zijn achtergebleven. Hierdoor kunnen
ingrediënten blijven plakken aan het kookoppervlak omdat de coating niet meer bereikt wordt.
• Voor hardnekkige vlekken of resten op de paella pan of chef pan kunt u proberen deze een nacht in heet
water met zeepsop te laten weken of de ‘azijnmethode’ gebruiken: giet een laagje azijn in de pan en
verwarm de pan lichtjes. De azijn hoe niet te koken en mag zeker niet helemaal verdampen. Giet de azijn
uit de pan, maak de pan schoon met een sopje en de pan is weer als nieuw. Let op: warme azijn kan een
onaangename geur afgeven.
• De CADAC | DOMETIC So Soak (apart verkrijgbaar) is ideaal om ‘s nachts weken te vergemakkelijken. Bij
gebruik van de So Soak raden we aan om het kookoppervlak met de bovenkant naar beneden te plaatsen,
zodat je maximaal kunt weken en er ook minder water wordt verbruikt.
• Eventuele hardnekkige vlekken die na het inweken achterblijven, kunnen worden losgemaakt en
weggeborsteld met de CADAC | DOMETIC So Soak Brush (apart verkrijgbaar)
• Afdrogen met een zachte doek en klaar!
ONDERHOUD
• We raden aan om na het schoonmaken een beetje olie aan het kookoppervlak toe te voegen en deze met
keukenpapier in te smeren. De olie sluit het oppervlak af van de buitenlucht en vocht. Het zorgt er ook
voor dat het voedsel niet inbrandt aan de oppervlakte.
• Plaats het kookoppervlak in een plastic zak voordat u het in de opbergtas doet, zodat u zeker weet dat de opbergtas schoon en olievrij blij.
• De opbergtas voorkomt schade aan de GreenGrill en uw product.
NL
Paella Pan 40
(voor o.a. paella en (roer)bakken) Pizzasteen Pro 40
(voor bijv. pizza en broodjes) So Soak 40
(Voor eenvoudiger schoonmaken)
De volgende onderdelen/accessoires zijn niet inbegrepen en worden separaat verkocht:
Kookopties
• Dit zijn de beschikbare kookopties.
Grillen: Deze kookoptie is ideaal voor het vetvrij grillen van kip, worstjes, karbonades, kebabs, vis of groenten. Gebruik voor deze manier van
koken het BBQ rooster.
Let op: Houd er rekening mee dat bij het koken van vet vlees wat vet op het apparaat zal spatten, wat opflakkeringen kan veroorzaken. Wees
voorzichtig bij het grillen van dergelijk vlees. De kooktemperaturen zijn eenvoudig aan uw eigen wensen aan te passen door aan de
bedieningsknop te draaien om de warmtetoevoer te regelen.
So Soak Brush
Percolatorhouder

6363
Bakken: Deze optie is ideaal voor roerbakgerechten, vis, ontbijt, pannenkoeken, garnalen, paella en groenten. Gebruik voor dit soort
bereidingen de bakplaat, Chef Pan of paella pan. Het gemakkelijk te reinigen oppervlak stimuleert een minimaal gebruik van vet voor gezond
koken.
Koken: Hiervoor plaatst u de pandrager in de groeven zodat deze op zijn plaats zit. Plaats een geschikte pan (niet minder dan 150mm
diameter en niet meer dan 300mm diameter). Een liter water kookt in ongeveer 6 minuten, afhankelijk van de omstandigheden, de grootte
van de gebruikte pan, enz.
Opmerking: als u een kleine pan gebruikt, gebruik dan geen pan met plastic handvatten, omdat deze extreem heet kunnen worden.
Paella: deze kookoptie is ideaal voor het bereiden van paella, risotto, pastagerechten, Engels ontbijt, enz. De paella pan is gemaakt van
hoogwaardig geperst aluminium dat zorgt voor een uitstekende warmteverdeling en -behoud.
Pizza bakken: Deze kookoptie is ideaal voor het bereiden van pizza’s, platte broden enz. De pizzasteen is 12 mm dik, bestand tegen
temperaturen tot 300°C. De deksel moet worden gebruikt om een oveneffect te creëren.
Koffie: Deze optie is ideaal voor het zetten van een warme kop koffie met een koffiepercolator. Gebruik hiervoor de percolatorhouder.
6. Schoonmaken
• Het wordt aanbevolen het toestel na elk gebruik schoon te maken. Dit verlengt de levensduur van het toestel.
• Laat het apparaat afkoelen voordat u het schoonmaakt.
• Gebruik een vochtige doek uitgewrongen met wat zeepwater om de buitenkant van het toestel schoon te maken.
• Om de behuizing van het kooktoestel schoon te maken, eenvoudigweg schoonvegen met een vochtige doek en als het nodig is met wat
afwasmiddel.
• NIET ONDERDOMPELEN IN WATER omdat er dan water in de brander pijp komt, waardoor het toestel defect raakt.
• Het BBQ rooster is voorzien van een duurzame keramische coating, dat tevens gebruikt wordt op het beste kookgerei ter wereld. Een
goede verzorging van de coating zal helpen om jarenlang te genieten van het kookoppervlak.
• Hoewel de keramische antiaanbaklaag zeer duurzaam is, kan deze gemakkelijk worden beschadigd door het gebruik van metalen
keukengerei. Het wordt daarom aanbevolen om bij het koken alleen plastic of houten keukengerei te gebruiken.
• Laat kookoppervlakken altijd afkoelen voordat u deze in water onderdompelt.
• Zorg ervoor dat er geen water op de branders of op het waakvlamgebied komt. Veeg het apparaat voor gebruik volledig droog.
• Gebruik geen schurende reinigingsmiddelen, aangezien deze de oppervlakken kunnen beschadigen.
• Reinig het apparaat na elk gebruik. Na reiniging het kookoppervlak licht met olie insmeren.
• Gebruik geen hogedrukstoomapparatuur of een waterstraal om het apparaat schoon te maken.
• Let op: Voor hardnekkige vlekken kan CADAC barbecue reiniger worden gebruikt.
7. Opslag
• Laat het apparaat altijd afkoelen en maak het schoon voordat u het opbergt.
• Sluit de gastoevoer naar het toestel af, ontkoppel en verwijder de gastoevoer van het toestel.
• Berg een apparaat nooit op terwijl de gastoevoer is aangesloten, dit is niet veilig.
• Bewaar het apparaat en de gastoevoer in een goed geventileerde ruimte uit de buurt van brandbare materialen. Gasflessen dienen bij
voorkeur buiten te worden opgeslagen en NIET in een kelder.
8. Onderhoud en probleemoplossing
Onderhoud
• Als u uw apparaat regelmatig schoonmaakt en onderhoudt, verlengt u de levensduur van uw apparaat en neemt de kans op problemen af.
• Dit apparaat hee geen gepland onderhoud nodig.
• Dit apparaat mag alleen worden onderhouden door een bevoegd persoon.
• Controleer uw gasslang en aansluitingen regelmatig op lekkage en elke keer dat de gasfles of Power Pak vervangen of opnieuw
aangesloten wordt.
Probleemoplossing
Bij vlamspatten of verstopping van de straalpijp:
• Reinig uw branderpoorten in geval van overlopen.
• We raden aan om de inspuiters elke zes (6) maanden te reinigen of te vervangen om een blijvende efficiënte werking van uw apparaat te
garanderen.
• Als het apparaat zich na opslag abnormaal gedraagt en bij alle controles het probleem niet aan het licht is gekomen, kan de venturi verstopt
zijn. Een verstopte venturi kan in extreme gevallen herkend worden aan een zwakkere gelige vlam of helemaal geen vlam. Controleer in dit
geval of er geen stof, insecten, spinnewebben etc. in het apparaat zitten.
• Dit kan door de inspuiter met standaard gereedschap te verwijderen en eventueel vuil uit de jet te blazen. U kunt ook nieuwe inspuiters
kopen bij uw plaatselijke dealer. Probeer de inspuiter niet mechanisch te reinigen.
Een geblokkeerde inspuiter vervangen
• Uw toestel is uitgerust met een inspuiter van een bepaalde maat om de juiste hoeveelheid gas te regelen.
• Als het gat in de inspuiter verstopt raakt, kan dit resulteren in een kleine vlam of helemaal geen vlam. Probeer de inspuiter niet te reinigen
met een speld of iets dergelijks, aangezien dit schade kan veroorzaken waardoor het apparaat onveilig kan worden.
• De inspuiter te vervangen: Verwijder alle losse oppervlakken, evenals het plateau en de poten van het apparaat. Draai de branderbasis
om en verwijder de 3 schroeven van de onderste afdekplaat (fig.4) om de branderbasis te scheiden (fig. 5). Koppel de piëzodraad los, zorg
ervoor dat u deze niet beschadigt en verwijder de brandereenheid van het lichaam van de branderbasis te verwijderen om de inspuiter
bloot te leggen (fig. 6). De inspuiter kan nu met een geschikte sleutel worden verwijderd. Gebruik geen tang omdat dit de inspuiter kan
beschadigen, waardoor deze onbruikbaar of onmogelijk te verwijderen is. Schroef de nieuwe inspuiter in het ventiel. Draai niet te vast,
omdat dit het apparaat kan beschadigen.
Voer de bovenstaande procedure in omgekeerde volgorde uit om het apparaat weer in elkaar te zetten.
NL

6464
9. Reserveonderdelen en accessoires
• Gebruik altijd originele reserveonderdelen, aangezien deze zijn ontworpen om optimale prestaties te leveren.
NL
Item Artikelnr
5610-SP001 V2
8905-SP005
8905-SP014
8905-SP003
8905-SP008
8905-SP021
Item Artikelnr
8905-SP001
8905-SP016
verstelbare poot
HM6-074
(Jet 0.74 50mbar)
HM6-079
(Jet 0.79 37mbar)
HM6-084
(Jet 0.84
28/30mbar)
8905-SP023
8905-SP009
Item Artikelnr
8905-SP004
8905-SP015
8905-SP029
(28/30mbar)
8905-SP030
(30mbar)
8905-SP031
(50mbar)
8905-SP019
(afstelmoer)
8905-SP020
(Rubberen voet -
verstelbare poot)
Reserveonderdelen
Fig. 4
Fig. 6
Fig. 5
Inspuiter
Fig. 7

6565
10. Garantie
CADAC Europe BV garandeert bij deze aan de OORSPRONKELIJKE KOPER van dit CADAC Europe BV gas toestel, dat het zonder gebreken
in materiaal en vakmanschap zal zijn vanaf de datum van aankoop zoals volgt:
Afsluiters: 2 jaar
Plastic onderdelen: Geen garantie
Emaille delen: 2 jaar
Branders: 1 jaar
Deze garantie is alleen van toepassing als het apparaat samengesteld is en bediend wordt overeenkomstig de afgedrukte instructies.
CADAC Europe BV mag redelijk bewijs eisen van uw aankoopdatum. DAAROM MOET U DE KASSABON OF FACTUUR BEWAREN.
Deze beperkte garantie is beperkt tot de reparatie of vervanging van onderdelen die defect blijken te zijn bij normaal gebruik en
onderhoud en die er na onderzoek op zullen duiden, naar tevredenheid van CADAC Europe BV, dat ze defect zijn. Voordat er onderdelen
geretourneerd worden, graag contact opnemen met de vertegenwoordiger van de klantenservice in uw regio gebruikmakend van de
contactinformatie die gegeven is samen met uw handleiding. Als CADAC Europe BV het defect bevestigt en de claim goedkeurt, zal
CADAC Europe BV er voor kiezen zulke onderdelen kosteloos te vervangen. CADAC Europe BV zal de onderdelen opsturen naar de koper,
vracht of post vooruitbetaald.
Deze beperkte garantie dekt geen gebreken of problemen met de werking ten gevolge van een ongeluk, misbruik, verkeerd gebruik,
wijziging, verkeerd gebruik, vandalisme, onjuiste installatie of onjuist onderhoud of service, of verzuim in het uitvoeren van normaal en
routinematig onderhoud, inclusief maar niet gelimiteerd tot schade veroorzaakt door insecten in de brander buizen, zoals uiteengezet in
deze gebruikershandleiding.
Aantasting of schade ten gevolge van barre weersomstandigheden zoals hagel, orkanen, aardbevingen of tornado’s, verkleuring ten
gevolge van blootstelling aan chemische stoffen hetzij rechtstreeks of in de atmosfeer, wordt niet gedekt door deze beperkte garantie.
Er zijn geen andere uitdrukkelijke garanties behalve zoals hierin uiteengezet en alle geldende impliciete garanties van verhandelbaarheid
en geschiktheid zijn in duur gelimiteerd tot de periode van dekking van deze uitdrukkelijk schrielijke beperkte garantie. Sommige
regio’s staan geen beperking toe met betrekking tot hoe lang een expliciete garantie duurt, dus deze beperking is mogelijk niet op u van
toepassing.
CADAC Europe BV is voor geen enkele speciale, indirecte of gevolgschade aansprakelijk. Sommige regio’s staan geen uitsluiting of
beperking toe van incidentele of gevolgschades, dus deze beperking is mogelijk niet op u van toepassing.
CADAC Europe BV autoriseert geen enkel persoon of bedrijf tot het aannemen van enige verplichting of aansprakelijkheid in
verband met de verkoop, installatie, gebruik, verwijdering, retournering, of vervanging van zijn apparatuur; en geen van dergelijke
vertegenwoordigingen zijn bindend voor CADAC Europe BV.
Deze garantie is alleen van toepassing op producten die verkocht worden in de detailhandel.
Om te genieten van een lange levensduur van uw product, graag de paragraaf schoonmaken en onderhoud van de gebruikershandleiding
raadplegen.
NL
Accessoires
Item Artikelnr.
8600-200
346-10
370-EU
370-UK
370-DE
370-EF
370-DK
Item Artikelnr.
98433
8600-102
5610-900
98326
Item Artikelnr.
5610-300
5610-200
5610-400
203-100
Other manuals for CADAC CITI CHEF 40
2
This manual suits for next models
1
Table of contents
Languages:
Other Dometic Grill manuals

Dometic
Dometic CE 88-ZF + User manual

Dometic
Dometic CADAC SAFARI CHEF 30 User manual

Dometic
Dometic CADAC CITI CHEF 40 User manual

Dometic
Dometic PI7093 Technical specifications

Dometic
Dometic CSO103 User manual

Dometic
Dometic Consul User manual

Dometic
Dometic CADAC SAFARI CHEF 30 User manual

Dometic
Dometic CPB101 User manual

Dometic
Dometic CADAC CITI CHEF 40 User manual

Dometic
Dometic F0200FT Specification sheet