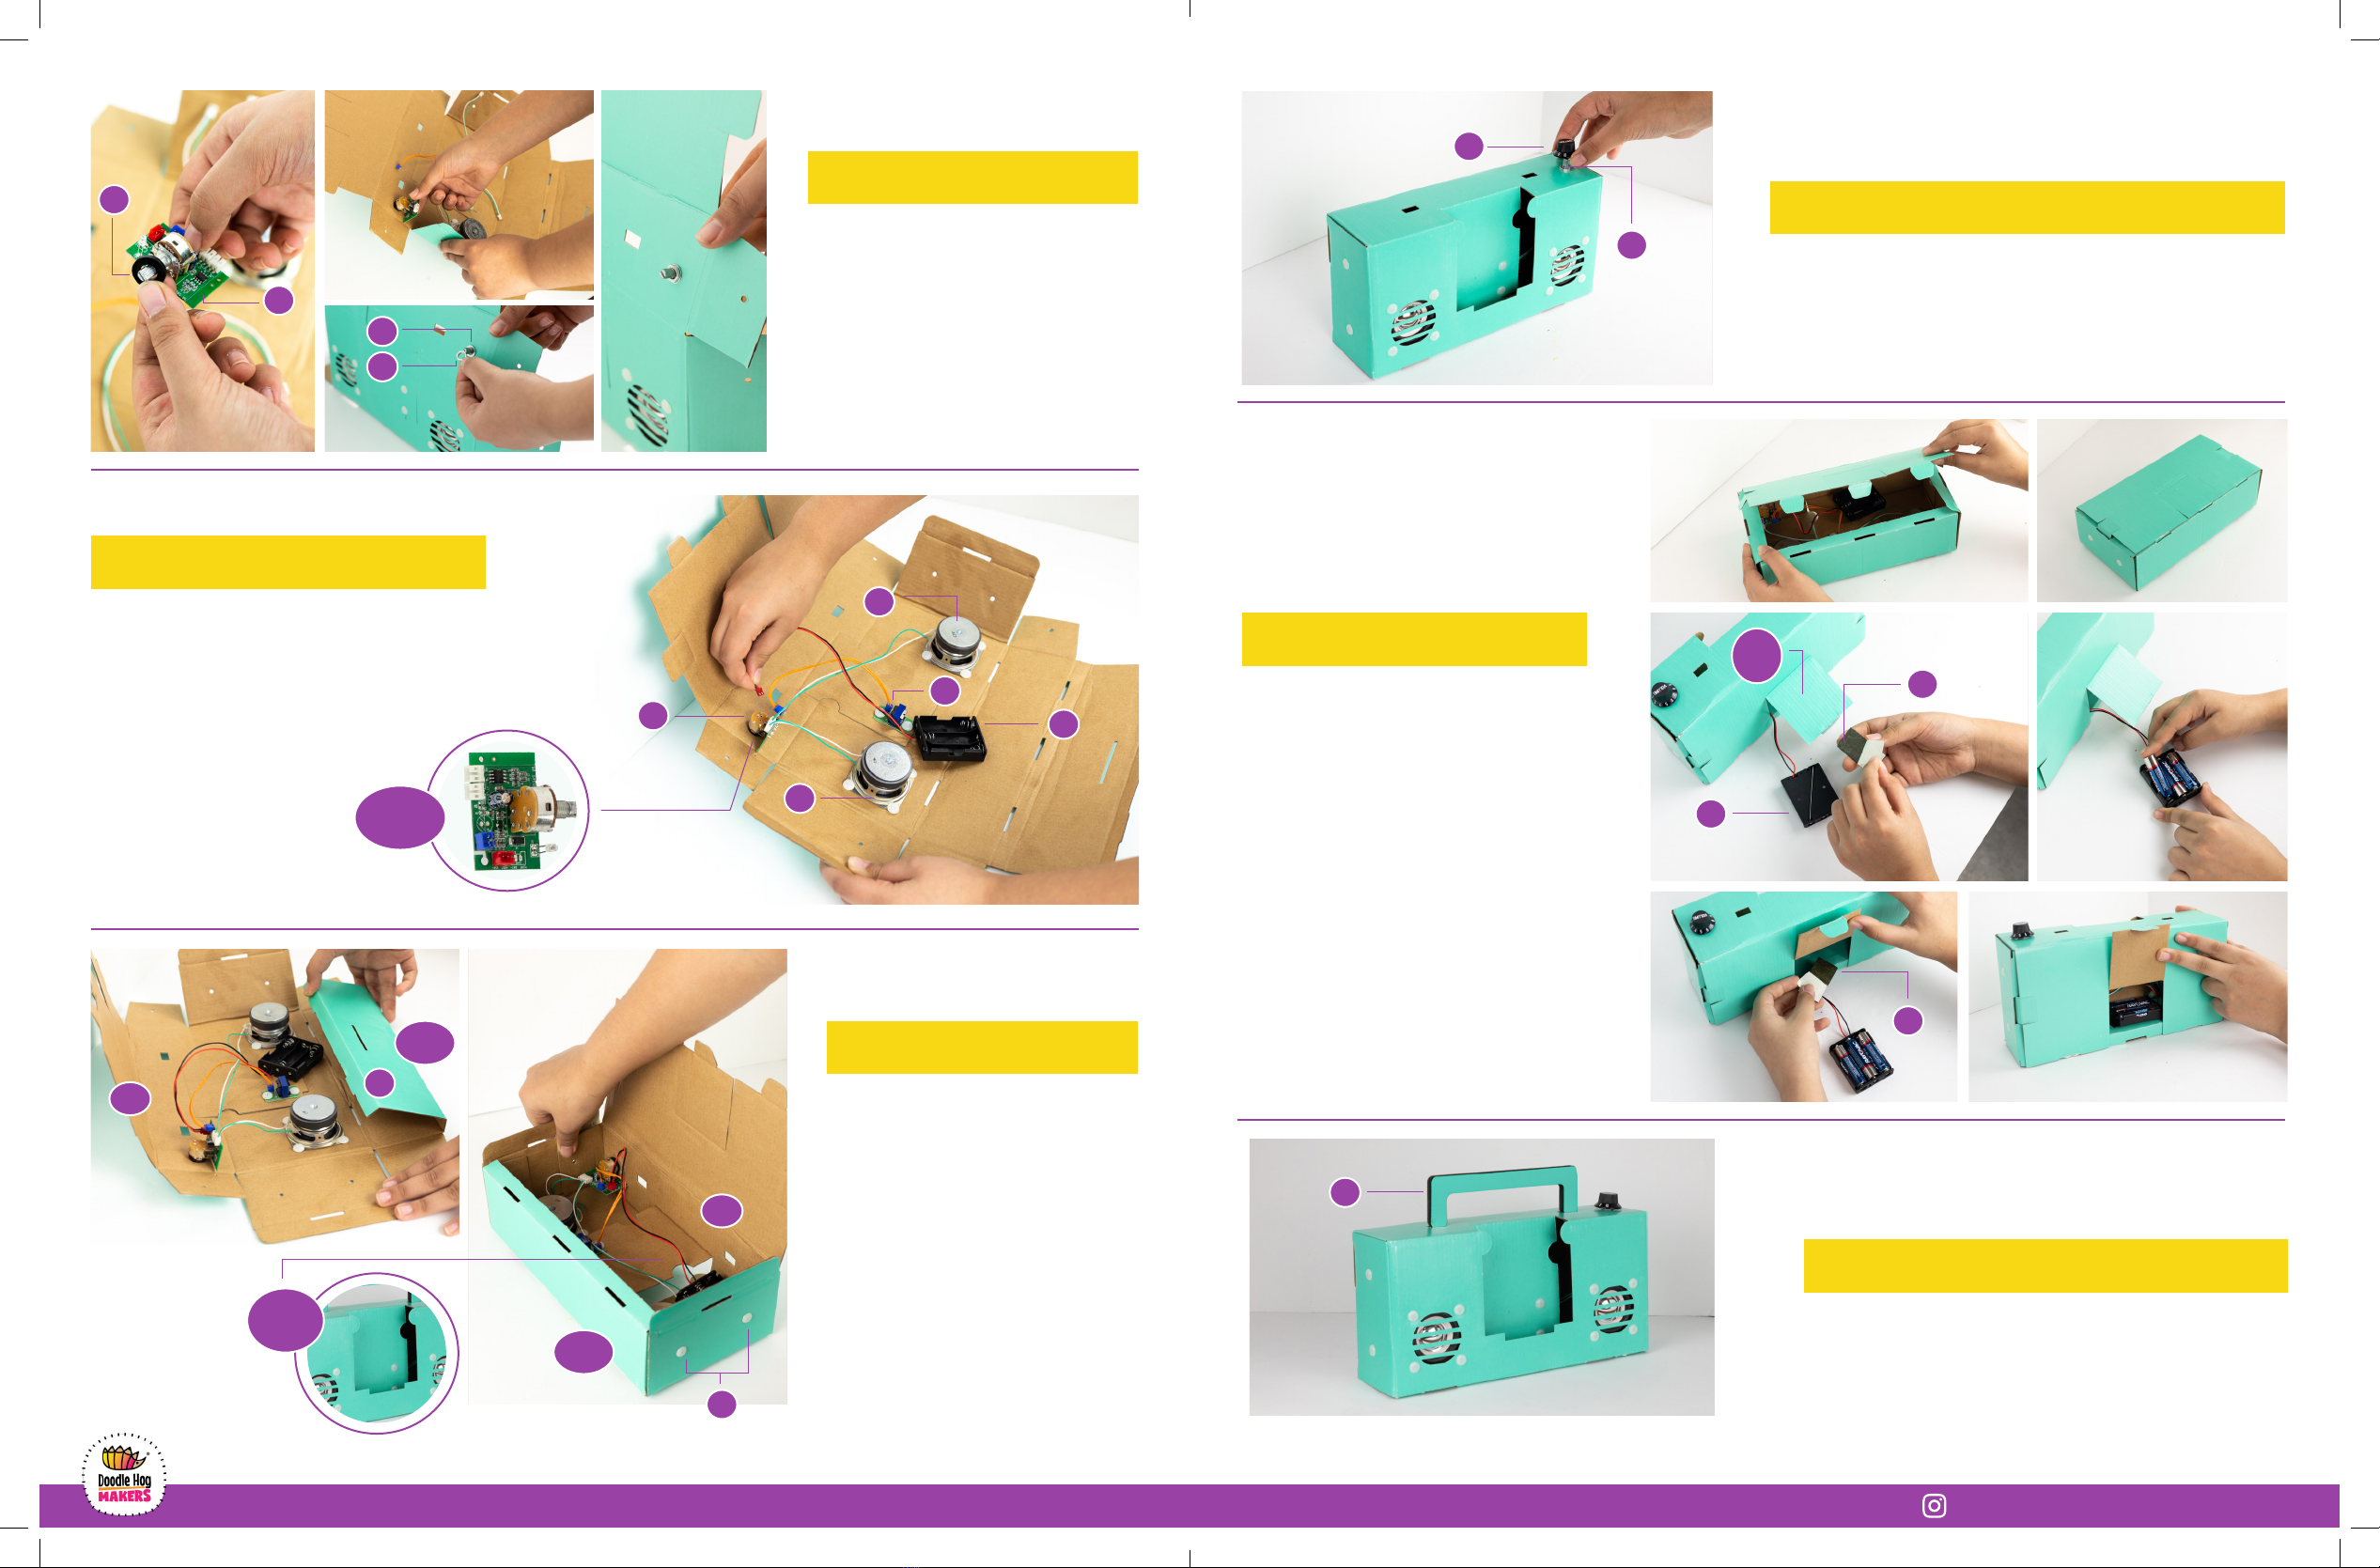
STEP 4 CONNECT WIRES
Insert the white plugs of the wire from Cand the
wire from Dinto the white sockets on the left side of
E. Take the blue end of the wire from Fand plug it
into the blue socket of E. Insert the red plug of the
wire from battery box Ginto the red socket on E.
STEP 6 ASSEMBLE VOLUME SWITCH H
Ensure the volume knob is turned off, all the way to the left. Gently
press the volume switch H rmly onto the silver handle Euntil secure.
STEP 7 BATTERY BOX G
1. Hold down the two side aps of the box
and fold down the back panel of the box
securing it by inserting the cardboard tabs in
the matching holes. Keep the back ap open
to access the battery box G. Remove the
white paper from magnet Land secure to the
back of the battery pack.
2. Place 3 AA batteries in battery box G.
Remove the sticker sheet from the second
magnet L(two magnets may be stuck
together), and press to the cardboard on the
bottom of the inside of the box to secure.
STEP 5 ASSEMBLE BOX
1. The bottom of A: Fold the bottom of
the box Aalong the crease and insert it
into the two long holes at the bottom
of A. Fold the sides along the crease
and secure with plastic Jpieces to the
bottom hole on each side of the box.
2. The top of A: Fold the top of the box
along the crease. Push the middle ap in
as you fold the top. The middle ap will
insert in the long hole in the middle of
the bottom of the box. Secure the sides
using plastic Jpieces in the top hole on
each side.
STEP 3 INSTALL PCB BIG BOARD E
Place the rubber gasket Kon the silver
handle of the PCB big board E. Thread
the silver handle through the hole in the
cardboard with the green board facing
down. Place the metal gasket M over the
silver handle. Screw metal nut I on top.
Tighten the nut I as much as possible so E
can’t move. Optional: use pliers to tighten
the nut.
@DOODLEHOGCRAFTS DOODLEHOG.COM
K
E
M
I
E
D
C
F
G
A
BOTTOM
J
H
E
G
L
L
B
MIDDLE
FLAP
STEP 8 INSTALL HANDLE B
Insert the two ends into the holes on top of the box.
COLORED
SOCKETS
TOP
BOTTOM
TOP
Back
Flap


