INSTRUCTION
Please read the entire instruction manual before use and save it for future reference. We
reserve the right for any errors in text or images and for making any necessary technical
changes to this document. If you should have any questions concerning technical
problems please contact our customer Services.
SAFETY AND CAUTIONS
1.
Please hang the shoes on the shoes rack properly.
2.
Do not put dripping wet shoes on the rack.
3.
Make sure you use a properly grounded outlet.
4.
Immediately stop using the product if the cover or heating tube gets damaged.
5.
Start power only after fully and properly installed.
6.
Do not operate this appliance with a damaged cord, plug, or after the appliance
malfunctions or has been dropped or damaged in any manner.
7.
If you encounter any issues please contact us directly. Do not attempt to disassemble or fix by
yourself.
8.
Keep away from unsupervised children and pets.
Whats in the box:
1. Main body
2. Base
3. Connector
Note: Actual items may differ from picture, please refer to the actual product.
INSTALLATION
Technical specifications
120 Volt / 60Hz / 30 Watt
Product dimensions 13 x 13 x 12.6 inches
Temperature Reaches 120°-130° Fahrenheit
UL Certified
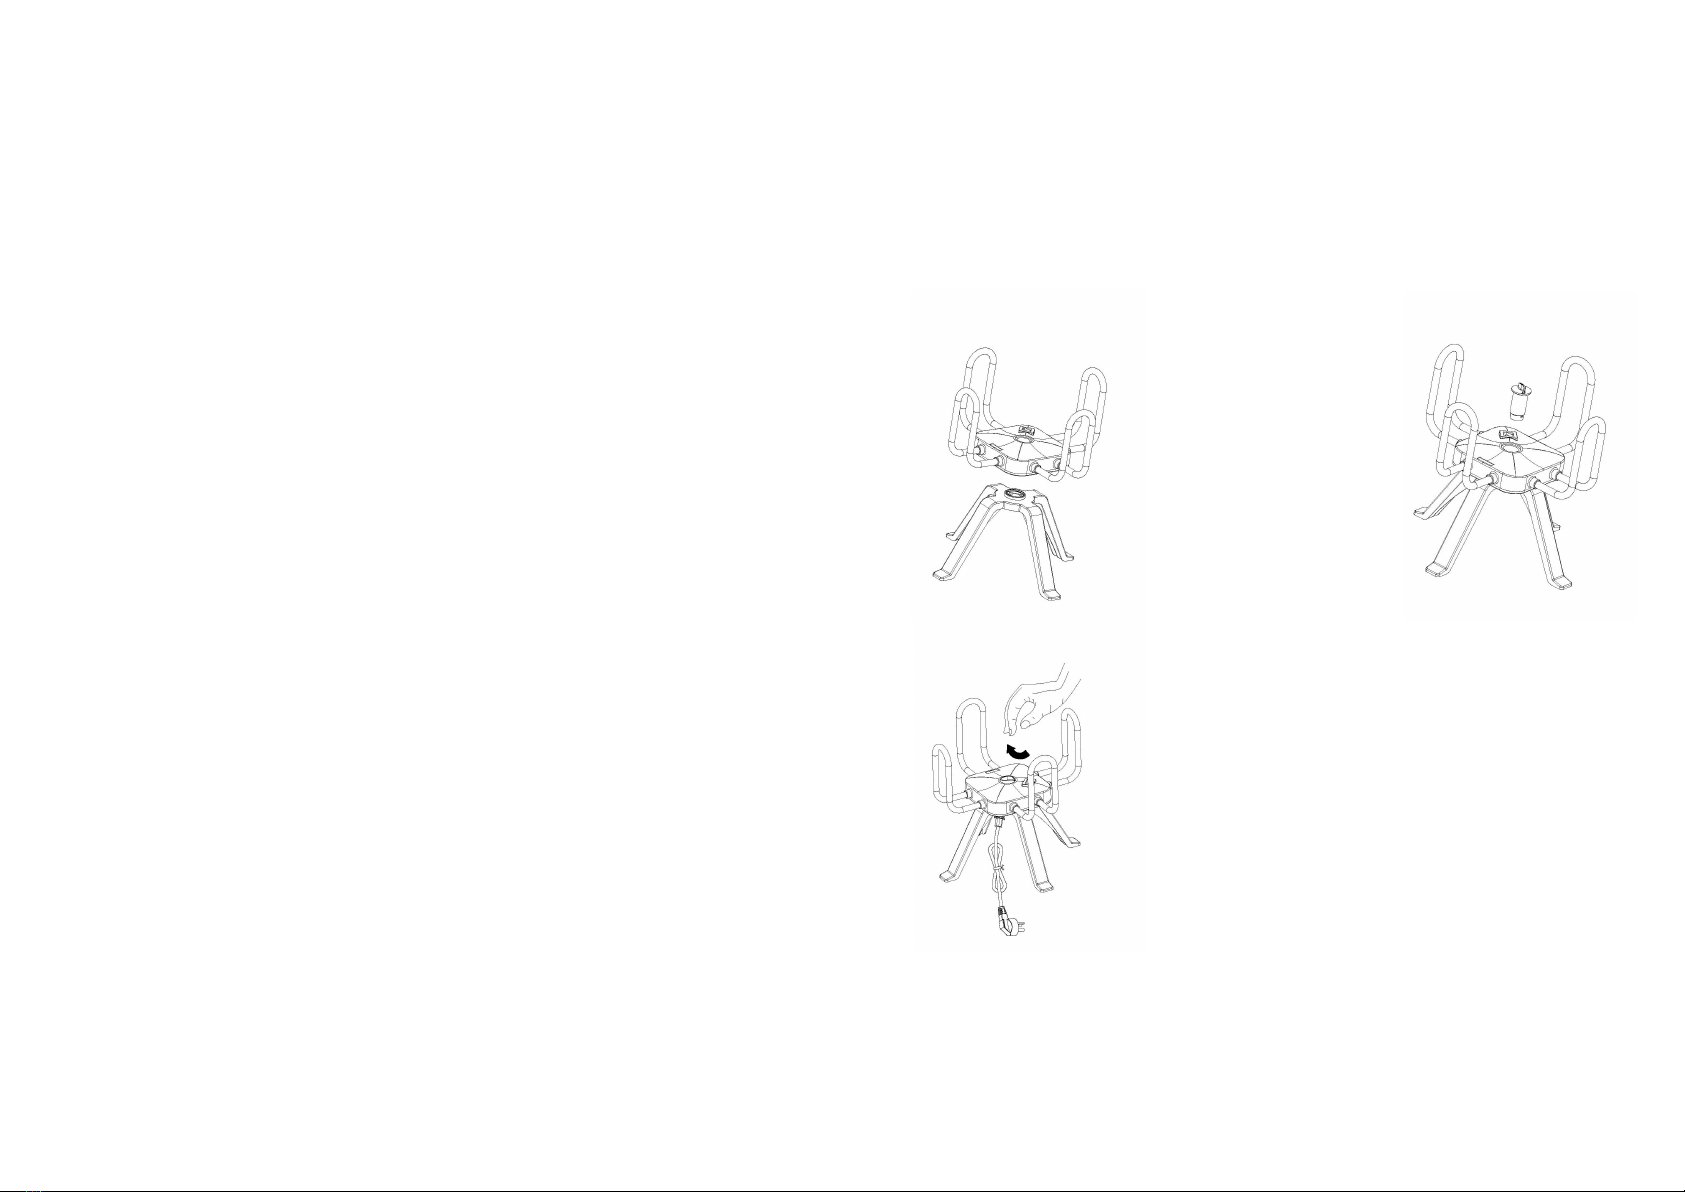
1. Place the main body ontop of the base, and align the two holes. 2. Insert the connector
3. Turn clockwise to lock the base in plac e. When taking apart, turn counter-clockwise to unlock
and remove.
4. Place upright and plug into a properly grounded outlet.
5. Your Shoe Rack is ready to use. Just flip the switch to start warming. Remember to shut it when
not in use.


