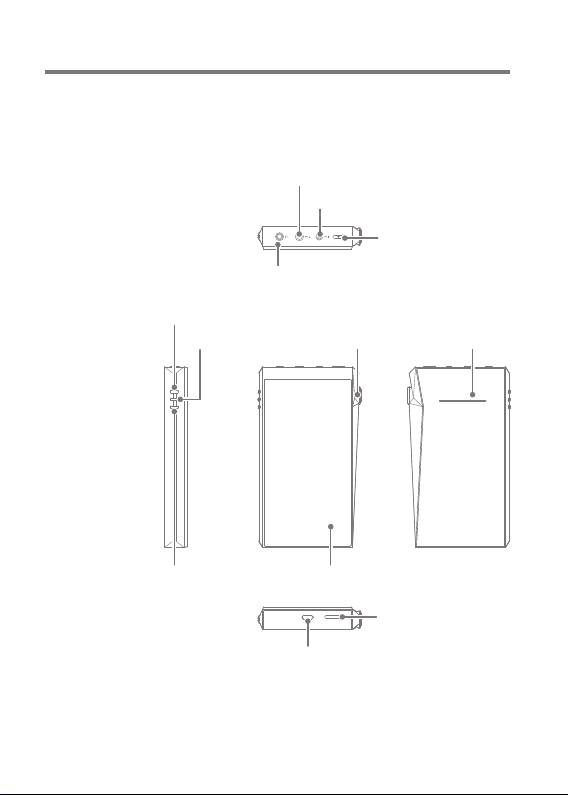
Power: - Power symbol.
Short press - Turns the screen on or off.
Press and hold - Turns the device on or off.
Volume: Turn the wheel to adjust the playback output
volume level.
LED Indicator: Displays information through light based on
the track currently playing and the current volume level.
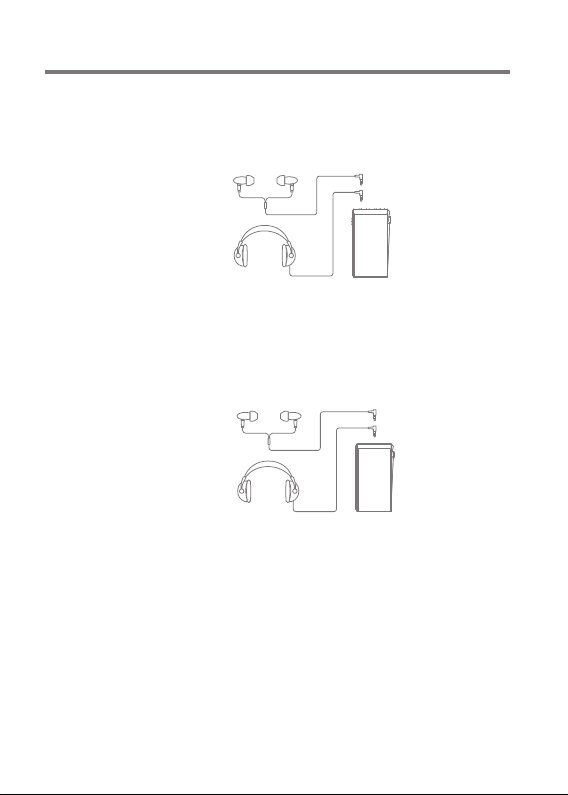
3.5mm Unbalanced Port:
- 3.5mm Unbalanced Port symbol.
For audio output, connect earphones or headphones that
utilize a 3.5mm jack.
4.4mm Balanced Port: - 4.4mm Balanced Port symbol.
For audio output, connect earphones or headphones that
utilize a 4.4mm jack.
2.5mm Balanced Port: - 2.5mm Balanced Port symbol.
For audio output, connect earphones or headphones that
utilize a 2.5mm jack.
Previous/Rewind:
Short press - Play the previous song or restart the current
song.
Press and hold - Rewind the current song.
Play/Pause: Play or pause the current song.
Next/Fast-Forward:
Short press - Play the next song.
Press and hold - Fast-forward the current song.
LCD Touchscreen: Display screen with touch control features.
microSD Card Slot: - microSD Card Slot symbol.
Insert a microSD card to access its files.
USB Type-C Port: - DC Power symbol.
For charging and data transfer.
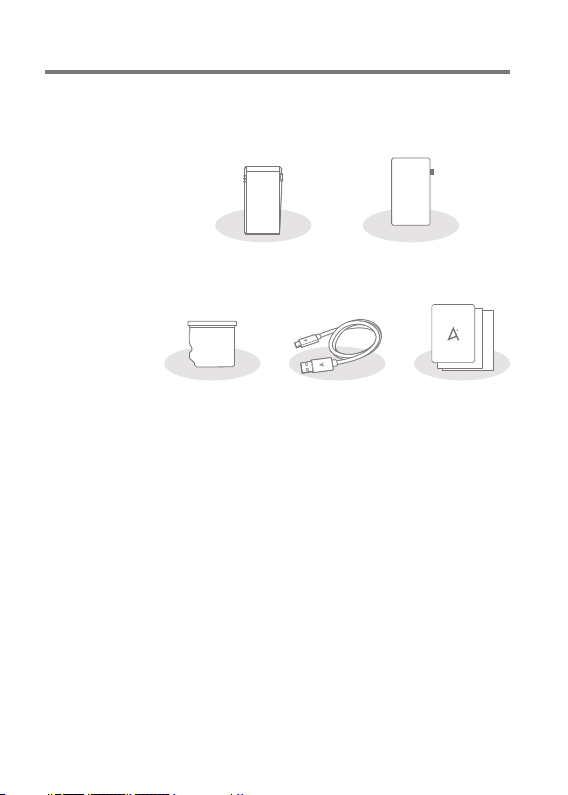
User Guide
Getting Started
04