manuals.online logo
Brands
  1. Home
  2. •
  3. Brands
  4. •
  5. DriSteem
  6. •
  7. Dehumidifier
  8. •
  9. DriSteem RL Series User manual

DriSteem RL Series User manual

This manual suits for next models

2

Other DriSteem Dehumidifier manuals

DriSteem RL-14 User manual

DriSteem

DriSteem RL-14 User manual

DriSteem RL-3 User manual

DriSteem

DriSteem RL-3 User manual

DriSteem RL-31 User manual

DriSteem

DriSteem RL-31 User manual

Popular Dehumidifier manuals by other brands

GET DHMD102 User instructions

GET

GET DHMD102 User instructions

Daewoo COL1471 user manual

Daewoo

Daewoo COL1471 user manual

WILMS KT 1130 manual

WILMS

WILMS KT 1130 manual

Aprilaire E080 quick start guide

Aprilaire

Aprilaire E080 quick start guide

fisair DFLEX Series user manual

fisair

fisair DFLEX Series user manual

Daitsu CD031IU-DFA owner's manual

Daitsu

Daitsu CD031IU-DFA owner's manual

Fehom PDGT701BE user manual

Fehom

Fehom PDGT701BE user manual

Trotec TTR 400 D User instructions

Trotec

Trotec TTR 400 D User instructions

Westpoint MDF1-30AE instruction manual

Westpoint

Westpoint MDF1-30AE instruction manual

SOLIS easy dry compact user manual

SOLIS

SOLIS easy dry compact user manual

Sinclair R-9112 instruction manual

Sinclair

Sinclair R-9112 instruction manual

Kenmore 580.54701 owner's manual

Kenmore

Kenmore 580.54701 owner's manual

Demargo DM828NF Installation and operating instructions

Demargo

Demargo DM828NF Installation and operating instructions

Altrad Lescha LDH 600 Original instructions

Altrad Lescha

Altrad Lescha LDH 600 Original instructions

BOMANN LE 1150 CB instruction manual

BOMANN

BOMANN LE 1150 CB instruction manual

SPT SD-46 instruction manual

SPT

SPT SD-46 instruction manual

Haier HD458 user manual

Haier

Haier HD458 user manual

Logik L20DHW12 instruction manual

Logik

Logik L20DHW12 instruction manual

manuals.online logo
manuals.online logoBrands
  • About & Mission
  • Contact us
  • Privacy Policy
  • Terms and Conditions

Copyright 2025 Manuals.Online. All Rights Reserved.

1
CDS Humidifier RL Series
CDS DEHUMIDIFIER
RL Series
Round duct kit for Model RL-31 Dehumidifier
Part #: 601177
HOUSING OUTLET
MODEL RL-31 DEHUMIDIFIER
HOUSING INLET
SCREWS x40
SEALING PLUGS x3
FILTER ACCESS DOOR
THUMB SCREWS x2
24" (610 mm) INLET RING x2
CAUTION
Sharp edges may cause serious injury from cuts. Use care
when cutting plenum openings and handling duct work.
NOTICE
• Failure to follow ducting guidelines may negatively impact
unit performance.
• Minimize equivalent duct length to maximize unit capacity
and efficiency.
90-2578
AIRFLOW DELIVERY SPECIFICATIONS
• Nominal airflow through dehumidifier is 1760 cfm
(2991 m3/h).
• Airflow decreases as duct length and bends increase,
therefore if the equivalent duct length is too long the
dehumidifier will cease to function properly.
2
CDS Humidifier RL Series
90-2579
• If using registers and diffusers, the total open area must
be at least 453 in2(0.3m3), which is the equivalent
area to a 24 inch (610 mm) round.
• When locating registers and diffusers be aware of the
following;
• Relative to other dehumidifier inlets/outlets – must
be a minimum 10 feet (3 m) apart and do not direct
toward one another.
• Relative to HVAC diffusers – ensure minimum 10
foot (3 m) distance from other HVAC diffusers.
• For agriculture applications – do not directly vent
onto plants.
• Ensure that the ductwork is supported within 2 feet
(0.6 m) of inlet and outlet of the dehumidifier. Consult
building codes and standards for duct support
requirements beyond 2 feet (0.6 m) of the dehumidifier.
DUCT SIZING AND ROUTING
• Inlet and outlet collars fit 24" (610 mm) round duct.
• Unit performance decreases as airflow decreases,
the shortest possible duct lengths with minimal bends
should be used.
• Do not exceed 1,000 feet (305 m) of metal duct or
750 feet (229 m) of flex duct.
• Max static pressure is 0.6" w.c. (149 Pa).
• Install the dehumidifier in location where filter door,
service access panel, compressor side panel, and
user interface are accessible, see the Dehumidifier
Installation and Operating Instructions for more details.
• Do not install a bend in the ductwork within 2 feet
(0.6 m) of the dehumidifier inlet or outlet.
• When selecting duct material, it is preferred to use
metal ducting to maintain airflow. If flex duct is to be
used, ensure it is extended out as much as possible
to limit disruptions to the airflow. Note:Use only
insulated ducting when the inlet side of the duct work
is located outside of the conditioned space. In some
instances when the dehumidifier is placed outside of
the conditioned space, the cabinet of the dehumidifier
may also need to be insulated to prevent condensation
formation on the exterior of the unit.
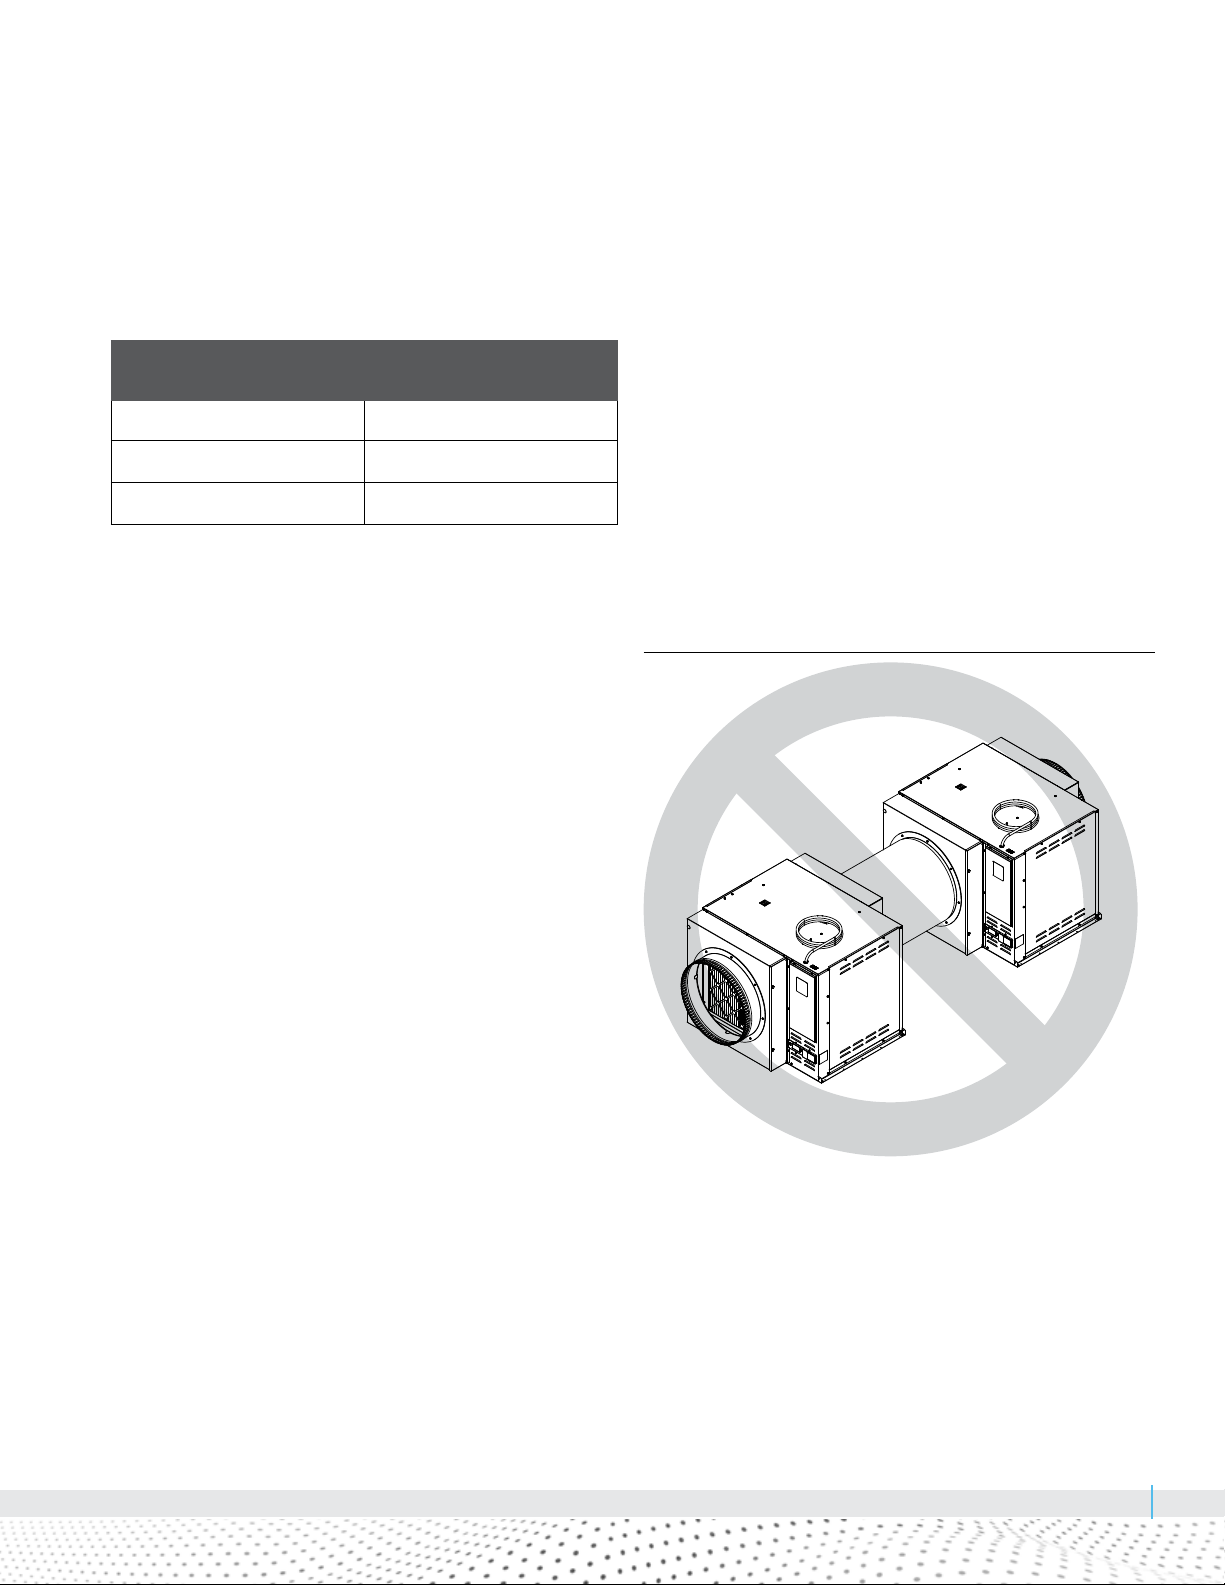
• Do not duct more than one dehumidifier together. See
Figure 2-1.
Table 2-1:
Equivalent length of bends
45° bend 5 feet (1.5 m)
90° bend 10 feet (3.0 m)
180° bend 30 feet (9.1 m)
FIGURE 2-1: DO NOT DUCT MORE THAN ONE DEHUMIDIFIER
TOGETHER
3
CDS Humidifier RL Series
ALIGNMENT TABS x4
REMOVE 6 CLIPS
SEALING PLUGS
90-2582
90-2583
90-2584
DUCT KIT INSTALLATION
1. On each housing, bend the four alignment tabs so
they are protruding out of the front as shown below.
These are to be used as alignment features for the 24"
(610 mm) collar. See Figure 3-1.
2. Attach the assembled duct housing to the dehumidifier
using screws provided. Additional holes will need to
be made in the cabinet where holes did not previously
exist. To properly seal the unit, use a 5/32" (4 mm)
bit to pre-drill holes and use the screws provided.
If you choose to use self drilling screws, make sure
they are no longer than 1" (25 mm). To secure the
3screws on the left side of the duct kit (opposite the
filter access door), a bit extension of at least 6" (152
mm) is required. After securing all screws, insert the
sealing plugs provided into the access holes on the left
hand side. See Figure 3-2.
3. Install the filter access door and secure with the two
thumb screws. See Figure 3-3.
FIGURE 3-1: ALIGN TABS
FIGURE 3-2: ATTACH ASSEMBLED DUCT HOUSING
FIGURE 3-3: INSTALL
4
CDS Humidifier RL Series
© 2023 Research Products Corporation
Form No. CDS-DUCT-INSTRUCTIONS-0123
Part No. 890000-277 REV A
10016710
REPLACING THE FILTER
1. Loosen the two thumb screws and remove the filter access door.
2. Pull the filter away from the unit, then out through the access opening.
3. Install the new filter in the same direction.
4. Reinstall the filter access door and tighten the thumb screws.
90-2580
FIGURE 4-1: OVERALL DIMENSIONS WITH DUCT KIT (INCHES)
54.70 (1389 mm)
SIDE
TOP
43.20 (1097 mm)
34.36 (873 mm)
17.22
(437 mm)
16.69
(424 mm)
ø23.75
(603 mm)
44.86
(1139 mm)