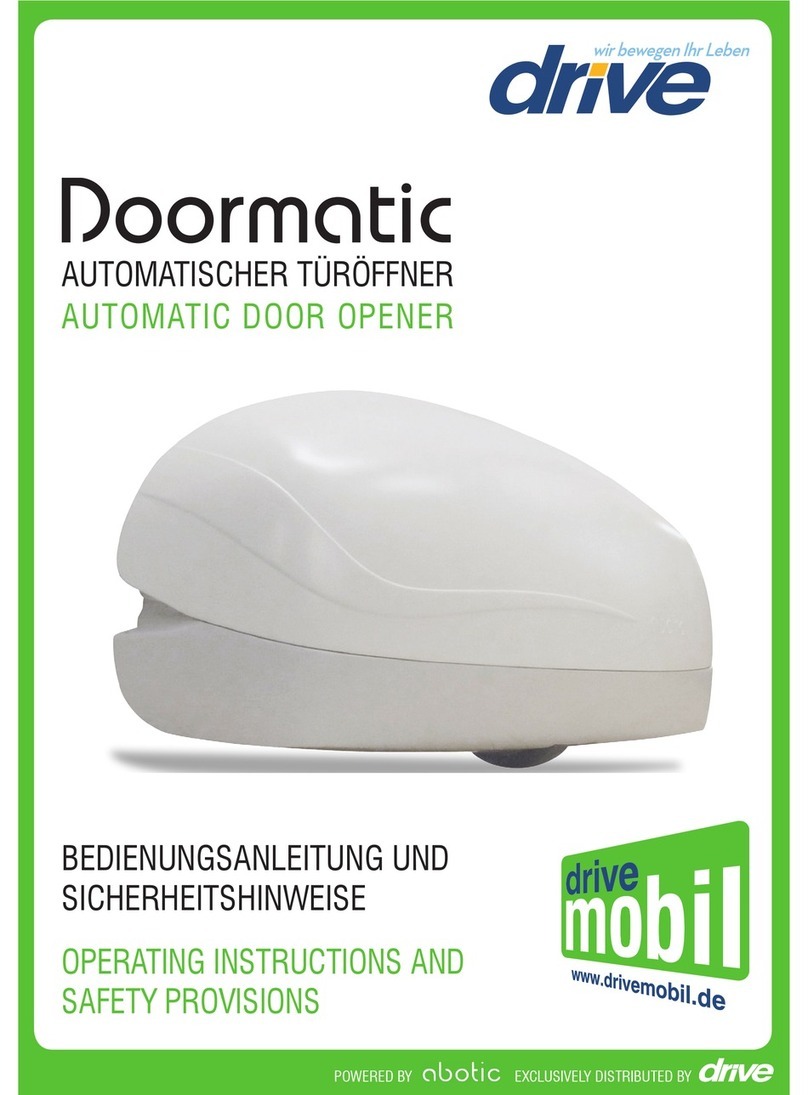
drive mobil Doormatic Product information sheet

1
Manual de Seguridad
Instrucciones de uso y Seguridad
OPERATING INSTRUCTIONS AND
SAFETY PROVISIONS
POWERD B Y
MEDICAL DESIGN & MANUFACTURING
EXCLUSIVELY DISTRIBUTED B Y
Automatización Puertas

2
2. Ausgabe (April 2012)
2. Release (April 2012)

3
Contenidos / Contents
Contenido
Table of contents
Descripción Producto ____________________________________________________ 4
Device overview
Funcionamiento de Menú _________________________________________________ 6
Menu operation
Uso Previsto __________________________________________________________ 7
Intended use
Preparación _________________________________________________________ 8
Preparation
Instalación ___________________________________________________________ 9
Installation
Instalación y Puerta Visagra _____________________________________ 11
Installation of door stay and door hinge
Adaptación _________________________________________________________ 12
Customisation
Operación ___________________________________________________________ 13
Operation
Uso Flexible ____________________________________________________ 16
Flexible use
Ajustes Individuales, esquema menús _____________________________ 17
Individual settings, Menu overview
Menú - Ajustes rápidos __________________________________________ 18
Menu—Quick settings
Menú - Configuración __________________________________________ 19
Menu—My settings
Menú - Servicio _____________________________________________________ 23
Menu—Service
Limpieza y Mantenimiento ______________________________________________ 24
Maintenance and Cleaning
Posibles Fuentes de Error _______________________________ 25
Possible error sources, Frequently asked questions
Seguridad _________________________________________________ 26
Safety provisions
Responsabilidad y Cumplimiento ________________________________________ 31
Liability and conformity

4
Vista General / Device overview
Vista Posterior
Back view
Vista Frontal
Front view
Diseño
Design cover

5
Vista General / Device overview
Lado izquierdo de la
unidad
Left hand side of the device
Batería
Battery
Retenedor de puerta
Door stay
Batería
Battery compartment
Scocket de
programación
Programming socket
Toma de carga
Charging socket
Bisagra de puerta
Adhesive tape
Lado derecho de la unidad
Right hand side of the device
Carril de guía
Guide rails
Bisabra de la puerta
Door hinge

6
Menú Funcionamiento / Menu-Operation
Cómo utilizar la puerta automática
You can operate Doormatic as follows
En la parte delantera de la unidad, debajo de la cubierta se puede ver la pantalla con el ON y OFF, así
como las teclas de navegación.
At the front part of the device, you will see the display with On and Off buttons as well as
the navigation buttons just under the design cover.
La luz de fondo se activa automáticamente cuando se pulsa la techa. Si no se pulsa ninguna tecla,
la iluminación se apaga después de un tiempo. Después de un minuto, la pantalla se desactiva. Para
activarla, pulse cualquier tecla.
The display backlight is activated automatically at the press of a button. If no button is
pressed, the backlight will disappear after some time. After a few minutes, the display will
switch off. Press any Button to activate.
Dispositivo de encendido y apagado.
Switch the device on or o
Desplazar hacia arriba o aumentar el valor.
Navigate upwards / increase the value
Desplazar hacia abajo o reducir el valor.
Navigate downwards / reduce the value
Volver sin guardar los ajustes.
Return without saving the settings
Confirme la selección o guardar la configuración
Confirm selection and save the settings

7
Uso Previsto / Intended Use
El Doormatic es para la automatización de puertas batientes interiores estandar con un peso máximo
de 50Kg.
Doormatic is designed for automatisation of standard Interior swing doors with rabbet and a
door leaf weight of 50 kg max.
El Doormatic sirve para ayudar a la apertura y cierre de las mismas. Otro uso adicional, no está
contemplado y Drive Mobil no se hace responsable de ningún fallo o daño causado más allá de lo
especificado. El operador asume este riesgo.
Doormatic supports with opening and closing these doors. Drive Mobil will not be liable for
any damage caused due to any other use beyond what is specified. The operator bears the
risk for this.
La unidad se adhiere a los suelos planos y secos. Deben estar libres de suciedad, polvo, aceite, grasa y otros
contaminantes. The traction wheels will work on even and dry floor surfaces. These must be
free from any dirt, dust, oil, grease and other impurities. On wet or dirty floors, performance
will be reduced.
Doormatic es válido para piertas batientes estandar interiores
•Peso máximo de la hoja 50 kg.
Doormatic is suitable for standard interior swing doors with rabbet
•Door leaf weight up to 50 kg
No use Doormatic para puertas con requesitos especiales:
•Puertas de compartimiento de fuego
•Puertas de compartimiento del humo
•Puertas de emergencia
Do not use doormatic for doors with specific requirements, e.g.:
•Fire doors
•Smoke compartment doors
•Escape doors

8
Preparación / Preparation
Aquí, Doormatic se puede instalar
Here, Doormatic can be installed
Tenga en cuenta los siguientes puntos antes de comenzar la instalación:
Please pay attention to the following points before beginning with the installation process:
Se puede utilizar Doormatic en muchos puertas y
suelos. En las puertas que no se pegue, desenroscar
los carriles de la puerta.
You can use Doormatic on different
floors and door surfaces.
For non-stick coated doors, screw
the guide rails on the door.
Doormatic sólo se puede instalar en puertas con
superficies plana Doormatic can only be installed
on even door surfaces.
Selecione el lado de la hoja de la puerta.
Select the door leaf side
Incluso en los umbrales de las puertas, el lado de la hoja de la
puerta se puede elegir libremente. Recomendamos el lado que no
da a un pasillo cuando la puerta es abierta.
On even door sills, the door leaf side can be freely chosen.
We recommend that side that does not point to the corridor
area when the door is opened.
En un primer niverl(diferencia de altura entre dos habitaciones), el
dispositivo se instalará en la parte inferior.
At one level (height difference between both rooms), the
device will be installed at the lower bottom side of the floor.
Posición en la hoja de la puerta
Position on the door leaf
Recomendamos la instación en el centro de la hoja de la puerta
We recommend installation in the centre of the door leaf.
Alternativa:
Si el espacio entre la pared y la puerta o el mueble es pequeño para la
profundidad que necesita el dispositivo, el dispositivo deberá ser
instalado en la parte exterior de la hoja de la puerta.
Alternative:
If the space between door and the wall or cupboard for example
is smaller than the depth of the device, the device shall then be
installed at the outer edge of the door.

9
Instalación / Installation
Instalación en 7 pasos
Installation in 7 steps
(1) Cierra la puerta y asegúrate que permanece cerrada durante
la instalación. Con llave si es posible.
(1) Close the door and make sure that its remains closed
during installation.
You may lock the door (If possible).
(2) Limpie la parte inferior de la puerta con el
paño de limpieza incluido
(2) Clean the lower door area with the
enclosed cleaning cloth.
(3) Espere al menos 3 minutos, hasta que
el detergente se evapore.
(3) Wait for at least 3 minutes,
until the detergent vaporises.
)4) Pegue las tiras de adhesivo a las guías como se ilustra y
retire la lámina protectora.
(4) Stick the adhesive tape to the guide rails as illustrated
and remove the protective foil
(5) Pegue lass guías en alrededor de 1cm por encima del borde inferior
de la puerta. El lado redondeado de la guía hacia arriba. Asegurate que el
montaje está perfectamente vertical para el correcto funcionamiento del
Doormatic. Presiona la guía firmemente en la puerta al menos 1 minuto.
(5) Attach the guide rails around 1 cm above the lower edge of
the door, with the rounded end of the guide rail pointing
upwards. Make sure that it is mounted straight and vertically so
that your Doormatic works optimally. Press the guide rails firmly
on the door for at least one minute.
Opcionalmente, la guía puede atornillarse. Utilice para ello los orificios provisto.
Optionally, the guide rails can be screwed on.
Use the specified drill holes for this purpose.
>3 min

10
Instalación / Installation
(6) Inserte Doormatic desde arriba en las guías. El dispositivo se mantiene
por el carril de guía de la puerta.
(6) Insert Doormatic from the top into the guide rails.
The device will be held to the door on the guide rails.
(7) Retire el diseño de la cubiertab del Doormatic. Para ello, mantenga firmemente
ambos con las manos a los lados, la mano izquierda y la mano derecha, y tire de él
hacia usted.
(7) Remove the design cover from Doormatic. For this, hold it firmly with
both the hands on the left and right hand sides and pull it towards yourself.
Conexión de la fuente de alimentación
Connecting the power supply
Funcionamiento Baterías
Battery operation
Inserte la batería cargada en el compartimento de la batería
Inserte la batería en el extremo del compartimento de la batería con los contactos apuntando hacia
arriba.
Insert the fully charged battery into one of the battery compartments.
Insert the end of battery into the compartment with the battery´s contacs pointing upwards.
Puede conectar el cargador de forma permanente o sólo cuando sea necesario. La toma de carga se
encuentra en el lado derecho.
You may connect the charging unit with Doormatic permanently or simply just when
required. You will find the charging socket at the right hand side of the device.
Funcionamiento de Red
Mains supply operation
Las versiones de equipos sin al batería, conecte el adaptador de CA. El
enchufe del conector de alimentación está en el lado derecho del dispositivo.
Please connect the mains supply for devices without battery.
The socket for the mains connection is present at the right hand side of
the device.
Asegurese que el cable no se encuentra en la zona de giro de la puerta
Ensure the cable cannot pose an entrapment or other hazard when the
Doormatic is idle or operating.
Conduzca el cable por la canaleta para diriguir el cable hacia el lado derecho
o izquierdo.
Use the prescribed cable duct at the front part of the device in order to
lead the cable towards left or right hand side as required.

11
Soporte de puerta y Bisagra / Door stay and door hinge
Instalación del soporte de puerta y bisagra
Installation of the door stay and door hinge
Soporte puerta
Door stay
(1) Ponga dos mitades. Sostenga el soporte de la puerta en sus manos y simuleel proceso de ajuste
automático de las dos mitades. De esta manera, usted puede determinar fácilmente qué medio se
fija a la puerta y cual a la pared. (1) Assemble both the halves together. Hold the door stay
in your hands and simulate the snapping process of both the halves. In this way, you
can easily determine which half has to be fixed to the door and which to the wall.
(2) Peque las tiras como se muestra, y retire
la lámina protectora
(2) Apply the adhesive tape as illustrated
and remove the protective foil.
(3) Fije el soporte de la puerta en la zona
superior de la puerta en el borde de cierre. Una
media se fija en la puerta y otra para el marco de
la puerta o la pared.
3) Fix the door stay to the closing edge at the
upper door area. One half will be fixed to the
door and the other to the doorframe or wall.
(4) Si la puerta estaba cerrada, la puerdes
desbloquear.
(4) If the door was locked, you may unlock
it now.
Bisagra de la puerta
Door hinge
(1) Abra la puerta
(1) Open the door.
(2) Retire la película protectora de la bisagra de la puerta
(2) Remove the protective foil from the door hinge.
(3) Pegar la bisabra de la puerta en el rebaje superior de la manija de la
puerta en el lado de la caja de la puerta, de manera que esté totalmente
abierta.
(3) Attach the door hinge over the upper recess of the door handle
on the side of the doorframe so that it is completely covered.
(4) Cierre la puerta otra vez
(4) Close the door once again.
Esquina de montaje en
marco de puerta. Corner
mounting
the door frame
Montaje empotrado.
Flush mounting

12
Ajuste / Adjustment
Ajuste pulsando un botón
Configured at the click of a button
(1) Apague la unidad pulsando On/Off
(1) Switch off Doormatic by pressing
the On/Off button.
(2) Para iniciar el viaje de aprendizaje que abre la puerta a unos 5
cm. El Doormatic se activará automáticamente.
(2) For test walkthrough, open the door up to ca. 5 cm (2").
Doormatic will be activated automatically.
(3) La puerta se abrirá completamente y se cerrará. Cuando la
active la próxima vez, la puerta se abrirá 2cm menos que la
caída en el viaje de aprendizaje.
(3) Your door will be completely open and then close.
When activated next time, the door will open 2 cm less
than during the test walkthrough.
Tipp / Tip
Si queire automatizar varias puertas cercanas, pulse el botón de radio
frecuencia durante el test para emparejar accesorios. Consulte página 18
If you want to automate several closely located doors, press the radio
transmitter button during the test walkthrough in order to couple the
accessory. See page 18.
((4) Después de una exitosa carrera de aprendizaje, aparecerá el logo de Drive Mobil en la
pantalla. Coloque la tapa del Doormatic
(4) After a successful test walkthrough, the Drive Mobil logo will be shown on the display
screen. Put the design cover back on the Doormatic.
Felicidades, Doormatic esta totalmente instalado y listo para usar.
Congratulations, the Doormatic has been completely configured and is now ready to
operate.
Otrasopciones de configuración están enpágina 17.
Other Settings have been described on page 17.

13
Operación / Operation
Para poder activar el Doormatic
You can activate Doormatic in this way
Push & Go / Through Push & Go
Activar Doormatic directamente a su puerta empujando suavemente o tirando de él abierto. Unos
pocos centímetros será suficiente para activar el dispositivo. El periodo de espera antes de que se
abra o cierre la puerta puede ser ajustado en "tiempo de espera". Más información en la página 18.
Activate Doormatic directly on your door by pushing or pulling it open. A few centimetres
will suffice to activate the device. A waiting period before the door is opened or closed can
be set through the menu items ‘‘waiting period OPEN and ‘’waiting period CLOSE“.
Further information regarding the waiting periods has been provided on page 18.
Usted puede para o mover la puerta en dirección contraria, la puerta siempre es móvil.
You can stop or move your door in the opposite direction even during when walking
through, your door is always movable.
A través de radio / Through radio
Controle Doormatic usando el control remoto o detector de movimiento.
Control Doormatic using a remote control device or motion detector.
Tenga en cuenta que la activación por radio, el "Tiempo de espera" está desactivado. La puerta se
abrirá inmediatamente después de que la señal de radio sea recibida.
Please note that in case of radio activation, the ‘‘waiting period OPEN’’ function is disabled.
The door will be opened immediately after the radio signal is received.
Control Remoto Radio / Radio remote control
Al presionar el botón, la puerta se abrirá y se cerrará después de un periodo de tiempo. Para
detener la unidad, presione el mando a distancia otra vez.
At the press of a button, the door will open and then close after the waiting period has
lapsed. In order to stop the device, press the button on the remote control again during
when walking through.
Detector de Movimiento / Radio motion detector
Para activación por movimiento, usa el control por movimiento del detector. Al acercarse a la puerta
se abre automáticamente. El ciclo de cierre, 10 segundo después de salir de la zona de detección de
movimiento. Para un periodo superior deberá ser seleccionado en la configuración.
For contactless activation, use the radio motion detector.
On nearing, the door will automatically be opened. The closing cycle takes place 10
seconds after leaving the detection area of the motion detector. A longer waiting period
can be set in the settings.
Esta función, debe ser accivada como se describe en la página 18 y en la página 20.
For this function, the radio connection must be activated as described on page 18, and
on page 21 under the heading ‘‘properties’’.

Cuando la batería está baja, suena un pitido durante el ciclo de apertuta o cierre. El Doormatic
puede ser activado aproximadamente 20 veces. Su puerta puede abrirse manualmente , como de
costumbre, incluso con una batería vacía.
When the battery level is low, a signal tone will be heard during the opening or closing
cycle. Doormatic can still be used about 20 times. Your door can be manually closed
or opened at any time as usual even with an empty battery.
Cargue la batería
Charging the battery
Puede cargar la batería en el dispositivo o eternamente. Conecte el cargador a una toma de CA. El
enchufe de carga en el extremo del cable a Doormatic. La toma de carga se encuentra en el lado
derecho.
You can charge the battery inside the device as well as externally. Connect the charging
unit with a power socket and the charging plug to the Doormatic. The charging socket is
located at the right hand side of the device.
Si conecta el cargador, este icono aperece en pantalla:
If the charging unit has been connected, this symbol will be shown on the display screen:
Para una carga externa, retire la batería de Doormatic y
conecte el enchife del cargador a la batería.
To charge externally, remove the battery from the
Doormatic and connect the charging plug with the
battery.
La carga aproximada tarda 12 hora para cada batería
The charging process takes around 12 hours for each battery from flat.
14
Operación / Operation
Batería y Alimentación
Battery and Power supply
Nivel de batería y el indicador de batería
Battery status and battery indicator
La pantalla muestra el nivel de batería actuañ, y se muestra mediante icono
On the display screen, the current battery status is indicated through symbols.
Batería Completa/ Battery is full
Cargue la batería pronto / Charge the battery soon
Cargue la batería inmediatamente / Charge the battery immediately

15
Operación / Operation
Detección de Obstáculos y Limitador de Fuerza
Hindrance recognition and force limitation
Doormatic está equipado con una dettección automática de obstáculos. Tras el contacto con el
obstáculo, el dispositivo se detiene inmediatamente el movimiento de la puerta.
The Doormatic is equipped with an automatic hindrance recognition system. On contact
with an obstacle, the device immediately stops door movement.
Obstáculo en seri inicial (cuando la puerta se está abriendo)
Hindrance in the opening cycle (when the door is opening)
Si Doormatic detecta un obstáculo mientras se abre la puerta, el ciclo de apertura
se detendrá inmediatamente y la puerta se cerrará de nuevo.
If Doormatic recognises a hindrance while the door is being opened, the
opening cycle will immediately stopp and the door will close again.
Obstáculo en la fase de cierre
Hindrance in the closing cycle (when the door is closing)
Si el obstáculo se detecta mientras la puerta se está cerrando, el ciclo de cierre se detiene y la puerta
se abrirá completamente. La unidad se cerrará deacuerdo con el periordo programado. Si encuentra
un obstáculo otra vez, la puerta se abrirá y permanecerá abierta. El dispositivo se desactivará por
medidas de seguridad. Antes de activarla otra vez, compruebe que no hay ningún obstáculo. Luego
activelo Push & Go o radio.
If a hindrance is recognised while the door is being closed, the closing cycle will
immediately stopp and the door will reopen. The door will close according to the waiting
period set. If the hindrance arises again, the door will open and will remain open. The
device will be disabled for safety reasons. Before activating it again, check for any
hindrance at the doorway. Then activate it through Push & Go or radio. The door will
close again as usual. All settings remain unchanged.
Autocorreción
Auto-correction
Doormatic está equipada con una función de autocorrección. En este caso, la puerta se abre hasta
el ángulo máximo de apertura y cierra de nuevo. La corrección automática se lleva a cabo
durante un viaje de abrir de forma independiente cunado se requiera.
Doormatic is equipped with an auto-correction feature.
The door is opened up to the maximum possible opening angle and then closed again.
Auto-correction is carried out by the Doormatic during an opening cycle when required.

16
Uso Flexible / Flexible use
Puede quitar Doormatic de la manera siguiente
You can remove the Doormatic from the door as follows
(1) Cierre la puerta y asegurese de que permanece cerrada, durante el
proceso de desmontaje.
(1) Close the door and make sure that it remains closed during
the removal process. You may lock the door.
(2) Retire la carcasa y acceda al dispositivo
(2) Remove the design cover and
switch off the device.
(3) Mueva el dispositivo hacia arriba a lo largo de la
superfifie de la puerta con ambas manos y la saca de las
guía.
(3) Move the device upwards along the door surface
using both hands and lift it out of the guide rails.
(4) Retire la tira de espuma adhesiva cuidadosamente desde la parte inferior
hasta la parte superior, utilizando un alambre delgado
(4) Remove the adhesive strip foam carefully with light saw movements
from the bottom to the top, using a thin wire or a hard string.
(5) Los restos de adhesivo, simplemnete se puede quitar sin ningún tipo de
detergente o agente de fregado
(5) The adhesive remains can simply be removed without any detergent
or scouring agent.
(6) Si la puerta esta cerrada, ya la puede desbloquear.
(6) If the door was locked earlier, you may unlock it now.

17
Ajustes Individuales / Personal settings
Ajuste Doormatic según sus necesidades
Customise the Doormatic according to your personal needs
Todos los ajustes esenciales se hacen automáticamente. Opcionalmente, puede personalizar los
ajustes deacuerdo a sus deseos. En las páginas siguientes, se han descrito todos los elementos de
menú y sus funciones. Para navegar y seleccionar los elementos del menú, utilice los botones de la
parte frontal.
All the essential settings are automatically made. Optionally, you can customise the
settings according to your individual desires. On the following pages, all menu items and
their functions have been described. For navigating and choosing the menu items, use the
buttons on the front side.
Visión general de los elementos del menú
An overview of the menu items has been provided in form of a table below:
Configuración / My settings Servicio / Service
ÄTiempo de espera/ Waiting period
» Plazo en apertura/ Waiting period OPEN
» Plazo en cierre / Waiting period CLOSE
ÄRadio / Radio
» Activación radio / Radio activation
» Accesorios de radio / Coupling the radio
ÄAjuste de Fábrica / Factory settings Ä
Cambio lenguaje / Change language Ä
Estado de Ajustes / Settings status Ä
Información / Information
ÄVersión Software / Software version
ÄSoftware actualización / Software update
accessory »
Desconectar radio / Disconnect the radio
ÄProceso Cerrado / Closing process »
Fuerza de cierre / Closing force
» Sensibilidad/ Sensitivity
ÄCambio tutorial camino / Changing the
walkthrough path
» Repitiendo tutorial camino / Repeating the test
walkthrough
» Manual / Manual
» Ajuste Fino / Fine adjustment
ÄVelocidad/ Speed
» Tiempo Abierto / Tempo OPEN
» Tiempo Cerrado / Tempo CLOSE
ÄSeñal Acustica / Signal tone
ÄPropiedad / Properties
» Reconocimiento Obstáculo / Hindrance recognition »
Activación / Activation
» Modo Operación / Operating mode

18
Menu - Ajustes / Menu - My settings
Ä Periodo de espera/ Waiting period
Determine el tiempo que debe transcurrir antes de apertura o cierre.
Determine the time that shall elapse before opening or closing the door.
Periodo tiempo Apertura / Waiting period OPEN
Establezca el periodo de tiempo antes de abrir la puerta.
Set the time period that shall elapse before the door is opened
Tenga en cuenta que el "tiempo de espera" está a la espera sólo para
Push&Go. En la activación de radio, la puerta se abre inmediatamente.
Note that ‘‘Waiting period OPEN“ only applies to Push & Go
activation. In case of radio activation, the door is opened immediately.
Ä Enlace Radio/ Radio link
Active su Doormatic fácilmente por radio
Activate your Doormatic comfortably through a radio link
Activación de Radio / Radio activation
Off / Off Radio está inactiva. . Si no se usan accesorios de radio, por lo
que la duración de la batería pueder ser más largo.
Radio is inactivate. If no radio accessories are being
used, the battery will last longer between charges.
On / On El dispositivo responde junto a transmisores de radio. Para el
acoplamiento , elija el elemento del menú "Accesorios Radio"
The device responds to coupled radio transmitters. For
coupling, choose the menu item: ‘‘Couple radio accessories’’
Acoplamiento accesorios radio/ Coupling of radio accessories
Elija si desea acoplar el dispositivo de control remoto o detector de movimiento. Presione el
dispositivo de control remoto o mueva el detector de movimiento, de forma que el LED rojo se
enciende. Si se detecta una señal de radio, suena un pitido.
Choose whether you want to couple the remote control device or motion detector. Press
the remote control device or move the motion detector such that the red LED lightens up. If
a radio signal is recognised, a single tone will be heard.
Desconectar radio / Disconnect the radio
El accesorio acoplado se desconecta. Si el dispositivo o detector de movimiento del mando a
distancia no se acopla correctamente puede quitarlo.
The coupled accessory is disconnected. If the remote control device or motion detector is
not coupled properly, you may remove it again

19
Menu - Configuración/ Menu - My settings
Ä Proceso de cierre / Closing process
El proceso de cierre puede ser modificado de manera óptima
The closing process can be customised according to your door.
Fuerza de cierre / Closing force
Este valor afecta a los 10 cm antes de que la puerta se haya cerrado. Si la puerta no está
completamente cerrada, aumentar la fuerza de cierre. Si la puerta cierra con demasiada fuerza,
reducir la fuerza.
This value relates to the 10 cm of space available before the door is closed. If your door
cannot be completely closed, increase the closing force. If a loud noise is produced when
the door is closed, reduce the force.
bajo > medio> fuerte
weak > medium > strong
Ä Sensibilidad/ Sensitivity
El ajuste de sensibilidad del sistema de detección de obstáculos se refiere a 10cm de espacio
disponible antes de que la puerta esté cerrada. Reducir la sensibilidad sólo si la puerta no se puede
cerrar completamente.
The adjustable sensitivity of the hindrance detection system relates to the 10 cm of space
available before the door is closed. Reduce the sensitivity only if the door cannot be closed
completely.
Ä Cambiar la ruta paso a paso/ Changing the walkthrough path
Puedo ajustar la ruta paso a paso, la distancia a la que se abre o cierra la puerta automáticamente.
You can adjust the walkthrough path, the distance over which your door is
automatically opened or closed.
Repitiendo el tutorial de la prueba / Repeating the test walkthrough
Repita paso a paso la prueba en el momento de la puesta en marcha inicial. Cualquier acoplamiento
de radio se desconectan y reconectan durante el viaje de tutorial de prueba. El resto de parámetros se
mantendrán sin cambios. Por favor, preste atención a las instrucciones que se muestran en la pantalla.
Repeat the test walkthrough at the time of initial commissioning. Any radio couplings will
be disconnected and reconnected during the test walkthrough. All other settings will remain
unchanged. Please pay attention to the instructions displayed on the screen.
Manual/ Manual
Todos los ajustes, así como las conexiones inalámbricas se mantienen sin cambios. Siga las
instrucciones de la pantalla
All settings as well as radio connections remain unaffected. Please pay attention to the
instructions displayed on the screen.
Ajuste fino / Fine adjustment
Aquí puede usted ajustar la ruta paso a paso en cm con mucha precisión. Use +/- para aumentar o
disminuir los valores en cm.
Here, you can adjust the walkthrough path in cm steps very precisely. Use the + / -
buttons in order to increase or reduce the cm values.

20
Menú - Mi configuración / Menu - My settings
Ä Velocidad / Speed
Ajuste la velocidad del Doormatic . Hay cinco niveles de velocidad para elegir.
Adjust the speed of Doormatic to your personal tempo. There are five speed options to
choose from:
Muy lento > normal
very slow > normal
Tiempo Apertura / Tempo OPEN
Ajuste la velocidad de apertura.
Adjust the opening speed here.
Tiempo Cierre/ Tempo CLOSE
Ajuste la velocidad de cierre.
Adjust the closing speed here.
Peligro de Lesiones!
Los valores más altos de velocidad puede conducir a lesiones y accidentes.
Elija por razones de seguridad, la velocidad más baja posible
Risk of injury!
High tempo settings may lead to injuries and accidents. Select the
lowest possible tempo for safety reasons.
Señal acústica / Signal tone
En cuanto a la característica de seguridad adicional, un tono de señal se puede activar. Para el
ajuste "Todod ON", una señal acústica se puede escuchar cuando se abre la puerta, así como
cuando se cierra.
As an additional safety feature, a signal tone can be activated. For the setting
‘‘Everything On’’, a signal tone can be heard when the door is opened as well as when it
is closed.
Cerrar > Abrir
CLOSE > OPEN
Ä Propiedades /Properties
Elija entre las diferentes opciones de activación y modos de funcionamiento y ajuste el
reconocimiento de obstáculos en forma óptima.
Choose from different activation options and operating modes and adjust the hindrance
recognition optimally.
Detección de Obstáculos / Hindrance recognition
Ajuste la sensibilidad de función de la detección de los obstáculos a diferentes plantas.
Para suelos irregulares (por ejemplo, suelos de baldosas) reduzca su sensibilidad . Para
suelo liso, como el laminado, se puede aumentar la sensibilidad.
Adjust sensitivity of the hindrance recognition feature to different floors.
For uneven floors (e.g. flow floors), reduce the sensitivity.
For a floor with smooth surface such as laminate, you can increase the
sensitivity.
Other manuals for Doormatic
1
This manual suits for next models
1
Table of contents
Other drive mobil Door Opening System manuals
Popular Door Opening System manuals by other brands

Dormakaba
Dormakaba 8600 EMF installation instructions

hawa
hawa Concepta 40 Planning and installation instructions

CAME
CAME MR8204 manual

RoHS Compliant
RoHS Compliant START-S12-M Instruction and warnings for the installer

Hard Head
Hard Head 013213 operating instructions

Assa Abloy
Assa Abloy Norton 1600 Series quick start guide