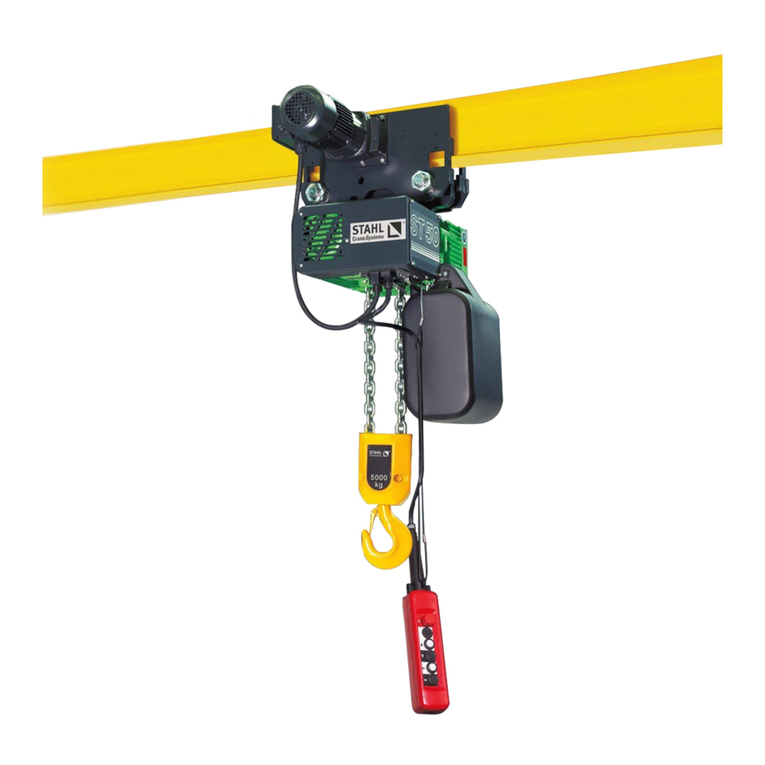
Duke DU904 User manual

Page 1

Page 2
DUKE Electric Mini Chain Hoist Introduction
The DUKE Electric Mini Chain Hoist is designed for various workplace applications,
such as general factories, warehouse, construction, plumbing, agriculture industries,
unique rigging applications encountered at small venues, lightweight, quiet, and
portable.
CONTENTS
1. Preface....................................
3
2. Safety Instruction.................................
4
2-1 Safety regulations...........................
4
2-1-1 General safety rules..........................
4
2-1-2 Electrical safety rules..........................
5
2-1-3 Safety rules of hoist...........................
6
2-2. All safety related elements..........................
7
2-3.Checklist of electrical and safety function.................
8
3. Mini Chain Hoist Description........................
9
3-1 General characteristics.............................
9
3-1-1 Usages...................................
9
3-1-2 Features...................................
9
3-2 Specifications................................
10
3-3 Overall dimensions.............................
11
3-4 Working space required and operating position.................
12
3-5 Main units and name...........................
13
4. Pre-use Preparation................................
14
4-1 Notice and inspection before operating....................
14
4-1-1 Mechanical Check.............................
14
4-1-2 Electrical Check.............................
14
4-2 Expected use and limits of use.......................
15
5. Transport, Install and Dismantle..........................
16
5-1 Transport................................
16
5-2 Install.....................................
17
5-2-1 Power & Control System.......................
17
5-2-2 Preliminary Checks.............................
17
5-2-3 Continuous rating.............................
21
6. Operation..................................
22
6-1 Control device: Control panel........................
22
6-2 Operating procedure............................
22
6-3 Handling precautions..........................
23
7. Maintenance and Adjustment..........................
24
7-1 Inspections & Maintenance............................
24
7-2 Troubleshooting................................
31
8. Drawings and Part list.............................
34
8-1 Assembly drawings and part list.....................
34
8-2 Electrical system drawings and part list..................
38

Page 3
1. Preface
Please read this Instruction Manual carefully before you start using the electric
winch. You will find many useful hints which will help you to keep the winch always
in its first-class condition.
You are kindly requested to read this manual thoroughly, to follow scrupulously
the instructions given and for safety reasons, avoid controlling, adjusting or
performing procedures other than those specified.
This winch has been designed and built in full compliance with EN ISO 12100, ISO
14121 and EN 60204 standards on machine and further modification, with
high-quality materials and particularly studying the possibilities to reduce as much
as possible the risks of accident.
Foreword to the operating instructions
The operating instructions are designed to familiarize the user with the winch and
its designated use.
The instruction manual contains important information on how to operate the winch
safety, properly and most efficiently. Observing these instructions helps to avoid
danger, to reduce repair costs and downtimes and to increase the reliability and
life of the winch.
The instruction manual is to be supplemented by the respective national rules and
regulations for accident prevention and environmental protection.
The operating instructions must always be available wherever the winch is in use.
These operating instructions must be applied by any person in change of carrying
out work with and on the winch, such as
operation including setting up, troubleshooting in the course of work, care of
consumables
maintenance (serving, inspection, repair) and/or
transport
This electric winch is designed and built in full compliance with the safety standard,
please read carefully before installing the machine.You will find many hints to keep
the machine in its best condition, also to avoid the risk of accident.
In addition to the operating instructions and to the mandatory rules and regulations
for accident
Prevention and environment protection in the country and place of use of the winch,
the generally recognized technical rules for safe and proper working must also be
observed.

Page 4
2. Safety Instruction
2-1 Safety regulations
2-1-1 General safety rules
1. This electric hoist is designed for lifting products only. Do not apply the electric
hoist for lifting person.
2. The electric hoist should be mounted on a flat solid place.
3. Installing the electric hoist at a proper levelling condition to ensure the chain
arranged neatly. This may avoid chain friction against the hoist body.
4. Make sure your power source comply with the voltage indicated on the electric hoist
before connecting the power wires to the power source.
5. Connect the power wires. Tighten the terminals securely.
6. Make sure the electric hoist has been properly grounded. The power circuit should
be equipped with an electric shock breaker.
7. Before operating the electric hoist, read and follow the instructions for allowable
lifting weight, speed and voltage etc. Indicated on the attached plate.
8. Do not exceed the rated lifting capacity of the electric hoist. Allowable lifting weight
is indicated on the attached plate.
9. The electric hoist should be operated by a skilled operator. Before operating the
electric hoist check again if all lock screws are tightened securely without
loosening.
10. Before operating the electric hoist check to see if the chain runs to the correct
direction and the brake works normally.
11. Do not allow any person approaches under the electric hoist, bracket or weight.
12. Select a proper location for mounting the electric hoist, to prevent the lifting weight
bumping against any construction, steel frame or construction beam etc while
lifting.
13. Always keep the chain in a good condition.
14. Lift weight vertically. Do not lift weight in a slant or horizontal direction. Do not have
weight hooked on the chain for a long time.
15. Do not use the electric hoist to pull out any object fixed in the floor or any
construction.
16. When the electric hoist is running, keep your hands or any object away from it to
avoid danger.
17. Prevent control wire or power wire from hooking or contacting by the chain. This
may avoid electric shock or any danger.
18. In case any malfunction or abnormal noise occurs during operation, stop the electric
hoist immediately. Check and repair it immediately for safety.
19. Do not alter the electric circuit or use any other replacement parts not supplied from
the original manufacturer.. This avoids affection on the hoist performance or any
accident.
20. The operator is requested to fully obey the safety rules listed for safety protection.

Page 5
2-1-2 Electrical safety rules
1. Before installing, please pay attention to the input rated voltage and current and
make sure the hoist is grounded, in order to prevent accident.
2. There must be a main power switch at main input side of electric control system.
3. Remember to disconnect the main power before repair, maintenance and clean.
4. Unauthorized or untrained personnel cannot repair or maintain any electric
equipment.
5. Comply with the maintenance instruction to repair and maintain the electric
equipment.
6. Before operating the hoist, check all of the electric equipments and parts are broken
or damaged or not. If there is something broken or damaged, replace a new one
immediately and please note its original rated specification.
7. After connecting power, check the direction of motor rotation and the direction of
hoist is correct or not.
8. Please check whether the function of emergency stop button is normal or not. The
emergency stop button is used under emergency situation to cut off power of hoist.
(Operator usually misunderstand that the hoist is broken down when they forgot to
release the emergency stop button.)
9. Please check whether the function of each safety parts is normal or not, such as
emergency stop button, emergency stop wire, interlocking switch, main power
switch, safety valve, limit switch, and etc.
10. Please check whether the screws of each terminal base are tightened or not. If the
screws loose, screw them tightly.
11. The wiring practices of electric control system must be complied with circuit
diagram.

Page 6
2-1-3 Safety rules of hoist
1. Don't misuse the hoist, to avoid danger.
2. Before start the hoist, make sure all the protecting covers are not breakdown and
damage.
3. If the mechanism or any part breakdown, operator should stop the hoist immediately
and then examine and repair it.
4. If it results abnormal sound during operation, operator should stop the hoist
immediately and then examine and repair it.
5. If abnormal temperature phenomenon happens during operation, operator should
stop the hoist immediately and then examine and repair it.
6. Don’t modify the original design of mechanical structure, in order to keep the best
efficiency and security.
7. Please store the spare parts and tools well, and avoid moist and damage.
8. Untrained or unauthorized operator is prohibited operating, installing or
maintaining hoist.
9. Please maintain and repair the hoist according to service instruction.
10. Please replace broken part according to the specification in part list.

Page 7
2-2. All safety related elements
ITEM
DESCRIPTION
1
EMERGENCY STOP
2
FUSE
3
Chain Guide Spring
1
2
3

Page 8
2-3.Checklist of electrical and safety function
Item
Content inspection and safety requirement
Result
Comment
1
Is every terminal protected by isolation plate (IP2X)?
YES
2
Does technician follow the procedure number to wire?
YES
3
Are the diameter of grounding wire and each circuit accord
with safety requirement of designed electrical circuit?
YES
4
Is fuse accord with safety requirement of designed
electrical circuit?
YES
5
Are these screws on electric box fixed tightly?
YES
6
Is the electric box equipped with a ventilator (e.g. fan)?
YES
7
Does the design of electric box conform to IP requirement?
YES
8
Is all the function of every control switch and component
described specifically on this operation manual?
YES
9
Are input voltage, frequency, and phase marked correctly?
YES
10
Is the machine earthed?
YES
11
Is there an independent earth copper plate equipped inside
electric box?
YES
12
Is every function of control device regular?
YES
13
Is the emergency stop device functional?
YES
14
Is the rotary direction of motor or transmission correct?
YES
15
Is the cover functional (fixed or movable)?
YES
16
Is the machine set stable?
YES
17
Have all the acute angle and fur been ground?
YES
18
Has the machine been pasted a CE mark?
YES
19
Has the machine been pasted a nameplate?
YES
20
Has the machine been pasted related warning marks?
YES
21
Have the listed related safety parts in TCF 1.6 been installed
indeed?
YES
22
Have all the safety information and attentions been
provided completely for user?
YES
23
Does the written language of manual and machine conform
to local country?
YES
24
Has the operation manual been provided?
YES
25
Has the EC Declaration of Conformity been signed?
YES

Page 9
3. Mini Chain Hoist Description
3-1 General characteristics
3-1-1 Usages
Fit for various workplace applications, such as general factories, warehouse,
construction, plumbing, and agriculture industries. Designed for unique rigging
applications encountered at small venues, lightweight, quiet, and portable. Operates on
220V- 2 4 0 V, w h i c h m e a n s yo u c a n p l u g i t i n j u s t a b o u t a ny w h e re .
3-1-2 Features
Braking: Dual braking system combines mechanical plus regenerative braking,
provides instant and safe braking.
Gearing: Precision machined gears heat treated for strength and durability, the ball or
needle bearings at all rotating points run in oil bath lubrication for a quieter, smoother
and cooler operation.
Loading sheave: Provide smooth lifting, reduce vibration and wear.
Housing: Lightweight, cast aluminum alloy
Friction clutch: A high performance and durability friction clutch that is integrated
with the load brake. This design is to slip in order to prevent overloading and over
travel that could damage the hoist.
Chain: Designed and manufactured by FEC, Japan, grade 80 alloy steel with resistance
and long life service.
Chain bag: The vinyl chain bag container is provided standard with hoist.
Switch: Simply layout of the control with 3M power cable as standard and emergency
stop as option.

Page 10
3-2 Specifications
Model
DU-903
DU-904
Dimensions
Length (mm)
456
456
Width (mm)
212
214
Height (mm)
535
675
Capacity (kg)
1000
2000
Standard Lift(m)
Control Cable(m)
3
3
Lifting Speed(m/min)
50HZ-4
60HZ-5
50HZ-2
60HZ-2.5
Chain(mm)
7.1x20
7.1x20
Safety Factor
WLL x 1.25
Insulation Class
F
ED%
30%
No. Of Starts per hr
180
Power Cable (m)
5
5
Net Weight (kg)
23
28

Page 11
3-3 Overall dimensions
MODEL
Length
Width
Height
DU-903
456mm
212mm
535mm
DU-904
456mm
214mm
675mm

Page 12
3-4 Working space required and operating position
FRONT OPERATOR
Top View
1500mm
1500mm
1500mm
1500mm
FRONT OPERATOR

Page 13
3-5 Main units and name
Item
Part’s name
1
Electric Department
2
Motor
3
Chain - 7.1mm x 20mm
4
Lower Hook
5
Chain bag
6
Gear Box
7
Upper Hook
1
2
3
4
7
6
5

Page 14
4. Pre-use Preparation
4-1 Notice and inspection before operation
4-1-1 Mechanical Check
1. Are all transport protection facilities removed?
2. Is there any mechanical damage?
3.Are all the safety device, safety covers refitted from the set-up installation?
4. Are all winch unit correctly aligned and locked in position?
5. Are all mobile and rotating parts exempt of foreign bodies? Is there mobility
unimpaired (tools wire, yarns, waste, etc.)
4-1-2 Electrical Check
1. Are all ground conductors connected?
2. Are all cables connected?
3. Is there any mechanical damage of electrical control operating and indicator units
4. Are all plug-in connection to the hoist fitted correctly?
5. Are all the cable near mobile parts fixed correctly?
6. Are the cable fitting tightened?
7.Were chain rests and metal objects removed and cleaned away from switch box,
junction box, control cabinets, and operating panel?
8. Are frequency inverters motor set for the correct V/Hz ratio if applied?
9. Are the drive rotating direction correct?

Page 15
4-2 Expected use and limits of use
Specification of essential parts:
Please refer to the list of specification in operation manual.
This winch is expected to be used under industrial environment:
The well lighting, well ventilation, clean environment, dry, and maintains a normal
temperature.
The winch needs the following supplies:
Electric power: single phase / 220-240V / 50Hz and 60Hz (or base on previous
designation).
Working Duty (ED%):
30%.
No more than 20 minutes use within 60 minutes frame.
The required technique and experience during safety operation and use.
They should be a proficient operator or trained staff.

Page 16
5.Transport, Install and Dismantle
5-1 Transport
Always carry the winch with two hands to prevent a strike.
Below table shows net weight and gross weight for each model of winch.
MODEL
NET WEIGHT
GROSS WEIGHT
DU-903
23 KGS
26 KGS
DU-904
28 KGS
31 KGS

Page 17
5-2 Install
5-2-1 POWER & CONTROL SYSTEM
REQUIREMENTS
The DUKE hoist comes in a direct control. They must be connected to a power
and control system that is properly designed to operate the chain hoist and to
handle the power consumption of the motor. DUKE hoists are standard wired for
220V-240V-1ph-50/60Hz.
5-2-2 PRELIMINARY CHECKS
Before installing / starting to use the chain hoist, check the following:
General:
1.After unpacking the unit, carefully inspect for any damage that may have
occurred during transit. Check for loose, missing or damaged parts. Shipping
damage claims must be filed with the carrier. Be sure that the voltage labeled
on the unit matches your power supply.
2.Make sure all supporting structures and attaching devices have the strength to
safety absorb the weight of the intended loads. If in doubt, consult a qualified
structural Power cables to chain hoists must include a ground conductor. If in
doubt, consult a qualified structural engineer.
3.Chain hoists should not experience voltage drops of more than 10% of the
supply voltage. It is critical to use adequate sized power cable.
4.The user’s control board must be grounded in accordance with the electrical
codes that are applicable in the local area. Power cable to chain hoists must
include a ground conductor. The power cable includes a yellow/green ground
conductor.
5.The installation area must provide safe operating conditions for the operator,
including sufficient room for the operator and other personnel to stand clear of
the load at all times.

Page 18
RIGGING THE HOIST:
1. Before each use, visually inspect the hoist and all load bearing parts of the hoist, like
hook and chain.
2. Make sure the intended structural support component is able to safely absorb the
chain hoist lifting capacity.
3. Attach the chain bag to the chain bag ring.
4. Put the chain into the chain bag and make sure there are no twists or knots in the
chain in the chain bag.
5. Attach the chain hook to the main structural support member, either direct to an
existing eyebolt or lug-plate, or using a bracket or beam clamp. It is also possible to
use a sling or bridle. Avoid slinging on sharp edges.

Page 19
6. Connect the power (and control) cable and make sure these will have proper
stress relieves and sufficient slack in every direction of planned tilting of the
load. Use Velcro or cable-strings to tie the cable to the hoist body or lifting
hook.
7. Lower the chain hook by letting the chain run out to the required height.
8. Put the load under the chain hook.
9. Attach the load to the chain hook, either to a lug plate, eyebolt or using one or more
slings.
10. Run the chain up until the load chain just taut.
11. Check all lifting and slinging connections, and lift the load until it is freely
floating of the ground.
12. Visually check the whole lifting structure from chain hoist and cable through
the load chain down to the load.
13. Remove all people from the area before you start lifting the load. Do not allow any
people to stand under the moving load.
14. Make sure you have a full visual view on the complete travel path of the load.
15. Lift the load to the required height.
16. Add a secondary in between support structure and the load when persons have to

Page 20
get under the load.
17. Make sure this secondary is as tight as possible, preferably using clutch-chains.
DE-RIGGING THE HOIST:
1. Remove the secondary (when present).
2. Check the direction of travel. If the pre-selection switch on the controller is in
the down-direction the chain hoist should run in down-direction.
3. Check if both the lifting directions work properly (lifting and lowering).
Remove all people from the area before you start lowering the load. Do not allow
any people to stand under the moving load.
5. Make sure you have a full visual view on the complete travel path of the load.
6. Bring the load down until within reach for further dismantling.
7. Remove all parts of the load and slings attached the chain hook.
8. Disconnect the power and control cables.
9. Remove the chain hoist from the suspension structure and bring it down.
10. Put the chain hoist and the chain bag in their compartments of the flight case
(when applicable).
11. Remove any bracket, beam clamp or sling from the main structure elements.
This manual suits for next models
1
Table of contents
Popular Chain Hoist manuals by other brands

Molnar
Molnar 11 Series Installation, operation & maintenance manual

Sievert Crane & Hoist
Sievert Crane & Hoist BUDGIT 2ton installation instructions

KITO
KITO L5 Supplementary manual

Columbus McKinnon
Columbus McKinnon Coffing Hoists LSB-C Series Operating, Maintenance & Parts Manual

POWERTEX
POWERTEX PALH-S1 Series user manual

goldwinch
goldwinch GTD 300 Assembly & Operating Instruction