Entering Text with Remote Control
Generally, entering text is carried out the same way as with most cell
phones.
0, 1, 2, 3, 4, 5, 6, 7, 8, 9: Enter a character to the position pointed
by the cursor.
First press: enter the first character from a set of characters related
to this button. Each subsequent press: you may change the entered
character to the next one from this set.
● 0: enter the space.
● 1: enter a special character (punctuation marks, etc).
● Up, Down, Left, Right after pressing 1 (special character entering
mode): select the required character.
ENTER — confirm selection; finish text entering.
SUBTITLE — enter the period (for numeric mode); functions like but-
ton 1 (character mode).
CLEAR (<-) — delete a character to the left of cursor.
SELECT (cap|num) — switch input mode:
abc: character mode, small latin letters.
ABC: character mode, capital latin letters.
123: numeric mode, digits.
RETURN — cancel the text changes and finish text entering.
Left/Right — move the cursor one character left/right.
Up/Down — move the cursor to the start/end of a text line.
● If the cursor is already in start/end position: select another user interface element which is
under/over the current text entry area (only for dialogs with several elements of user inter-
face; text changes are confirmed automatically).
POP UP MENU — show context menu with a list of available commands. They allow you
to cut, copy and paste text using the clipboard, much like it is done on a PC.
abc
Standby Mode
Pressing the POWER remote control button switches the player to the Standby mode.
In this mode the built-in HDD is turned off, as well as the video output, but the device
does not switch off completely.
To activate the player from the Standby mode, press the POWER remote control button once
again. The player will be switched on immediately (within several seconds).
Note: you can also configure the player to power off completely when pressing the POWER
remote control button (see Setup / Miscellaneous / Advanced / "POWER" remote button).
Connections
Chapter 3
This chapter describes different possibilities of connecting the media player to AV
equipment.
Depending on the model and the design of a TV/monitor/projector, after connecting it using one
of the provided schemes and plugging in the power, the player initialization may take up to 10
sec. If after this time there is no picture (a "DUNE" logo) on the screen, then it is a problem with
the cable connection or the TV/monitor/projector. Please check the "Troubleshooting" section
in such case.
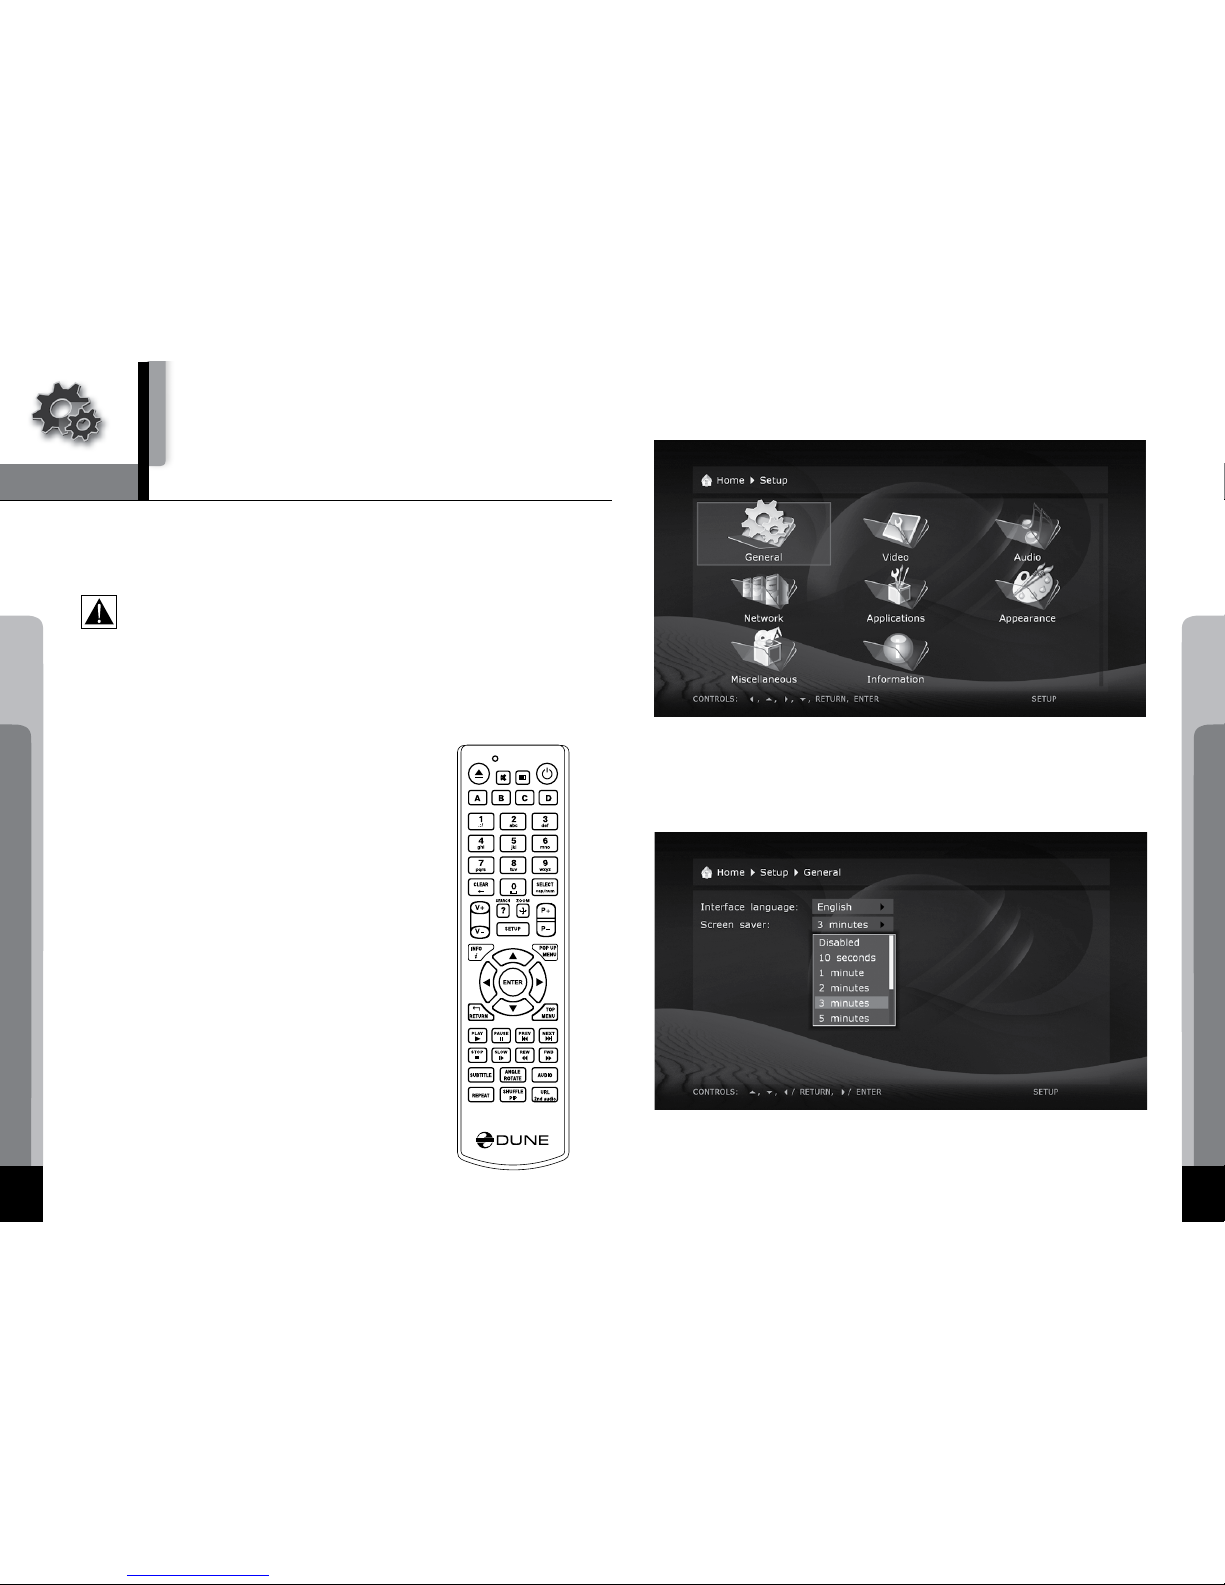
If, after the initial screen (a "DUNE" logo) disappears, there is no other picture on the screen in 10
sec and more, then it is most likely a problem of incorrect video mode set in the player. Please ad-
dress the "Quick Setting of Video Output Mode" section below in such case.
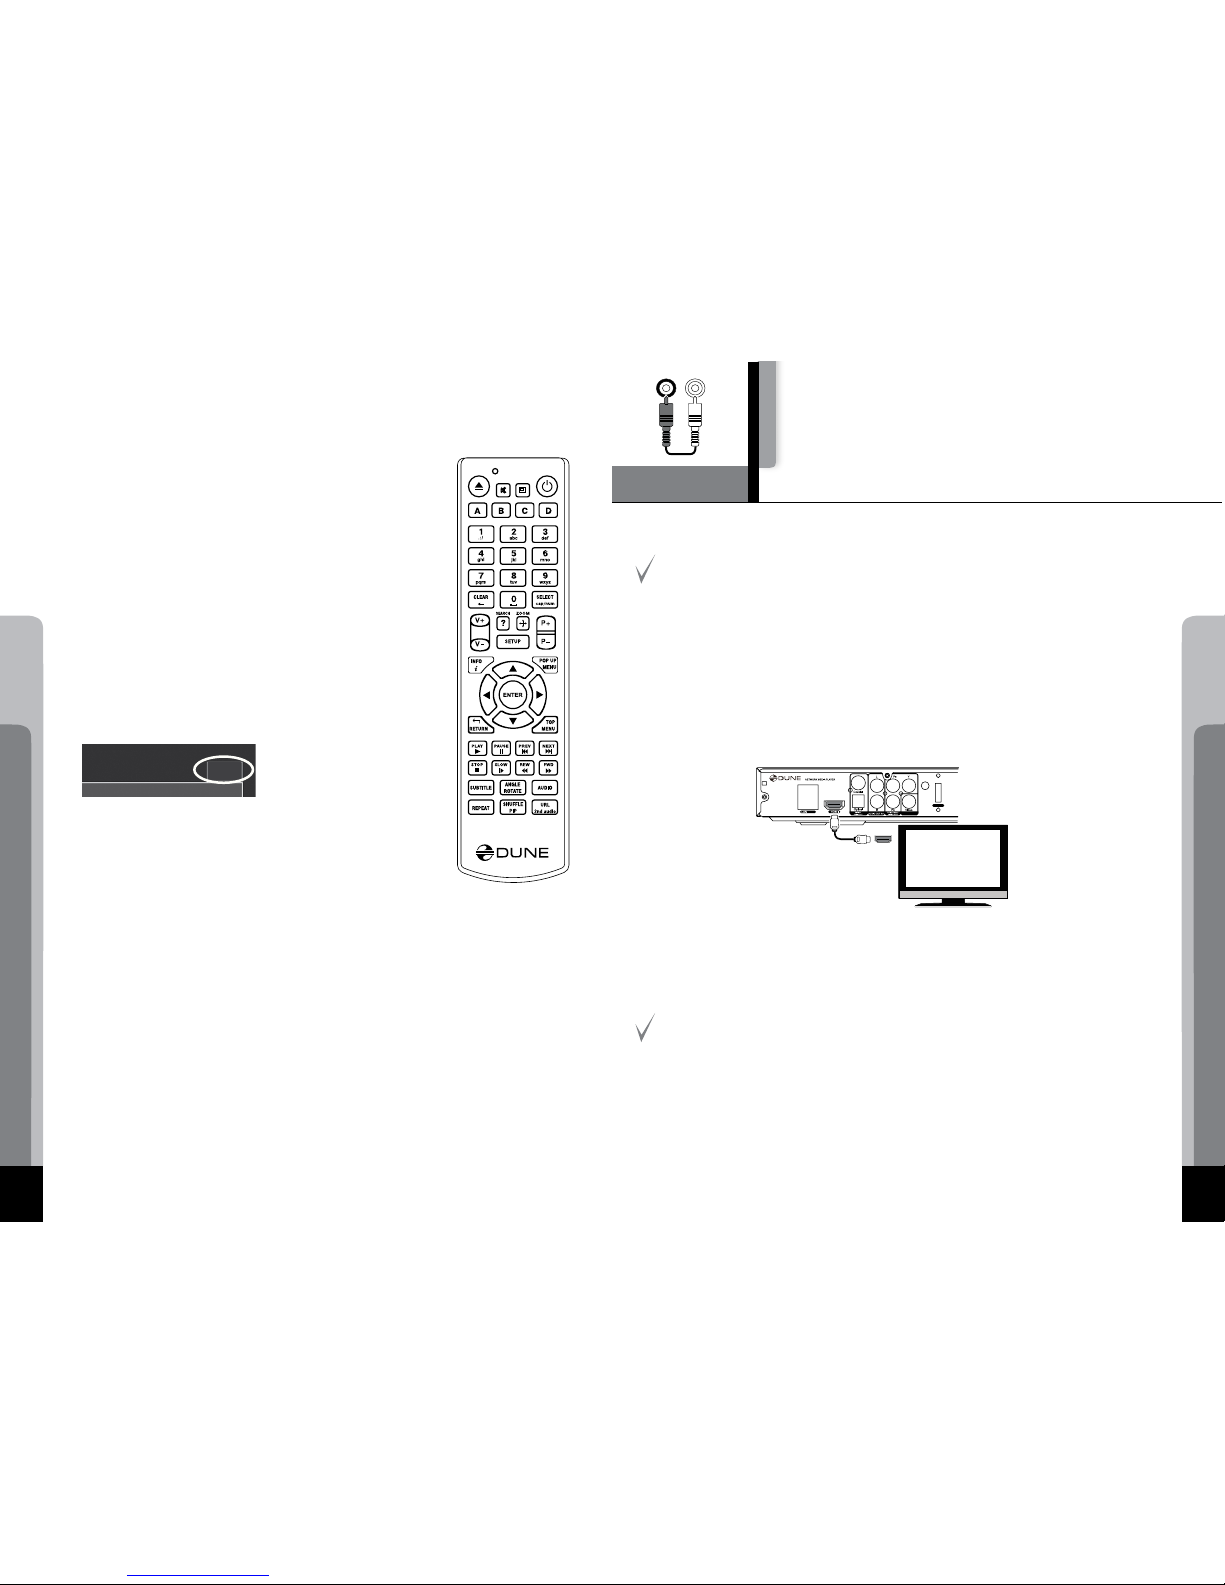
Connecting a TV/Monitor/Projector with
HDMI/DVI Input
Since the player is designed first of all for playback of high definition (HD) video (up to 1080p),
the best way of signal transmission from the player to a TV/monitor/projector is the HDMI inter-
face. In this case, video and audio streams are transmitted in digital form, without loss, deliver-
ing excellent picture and sound.
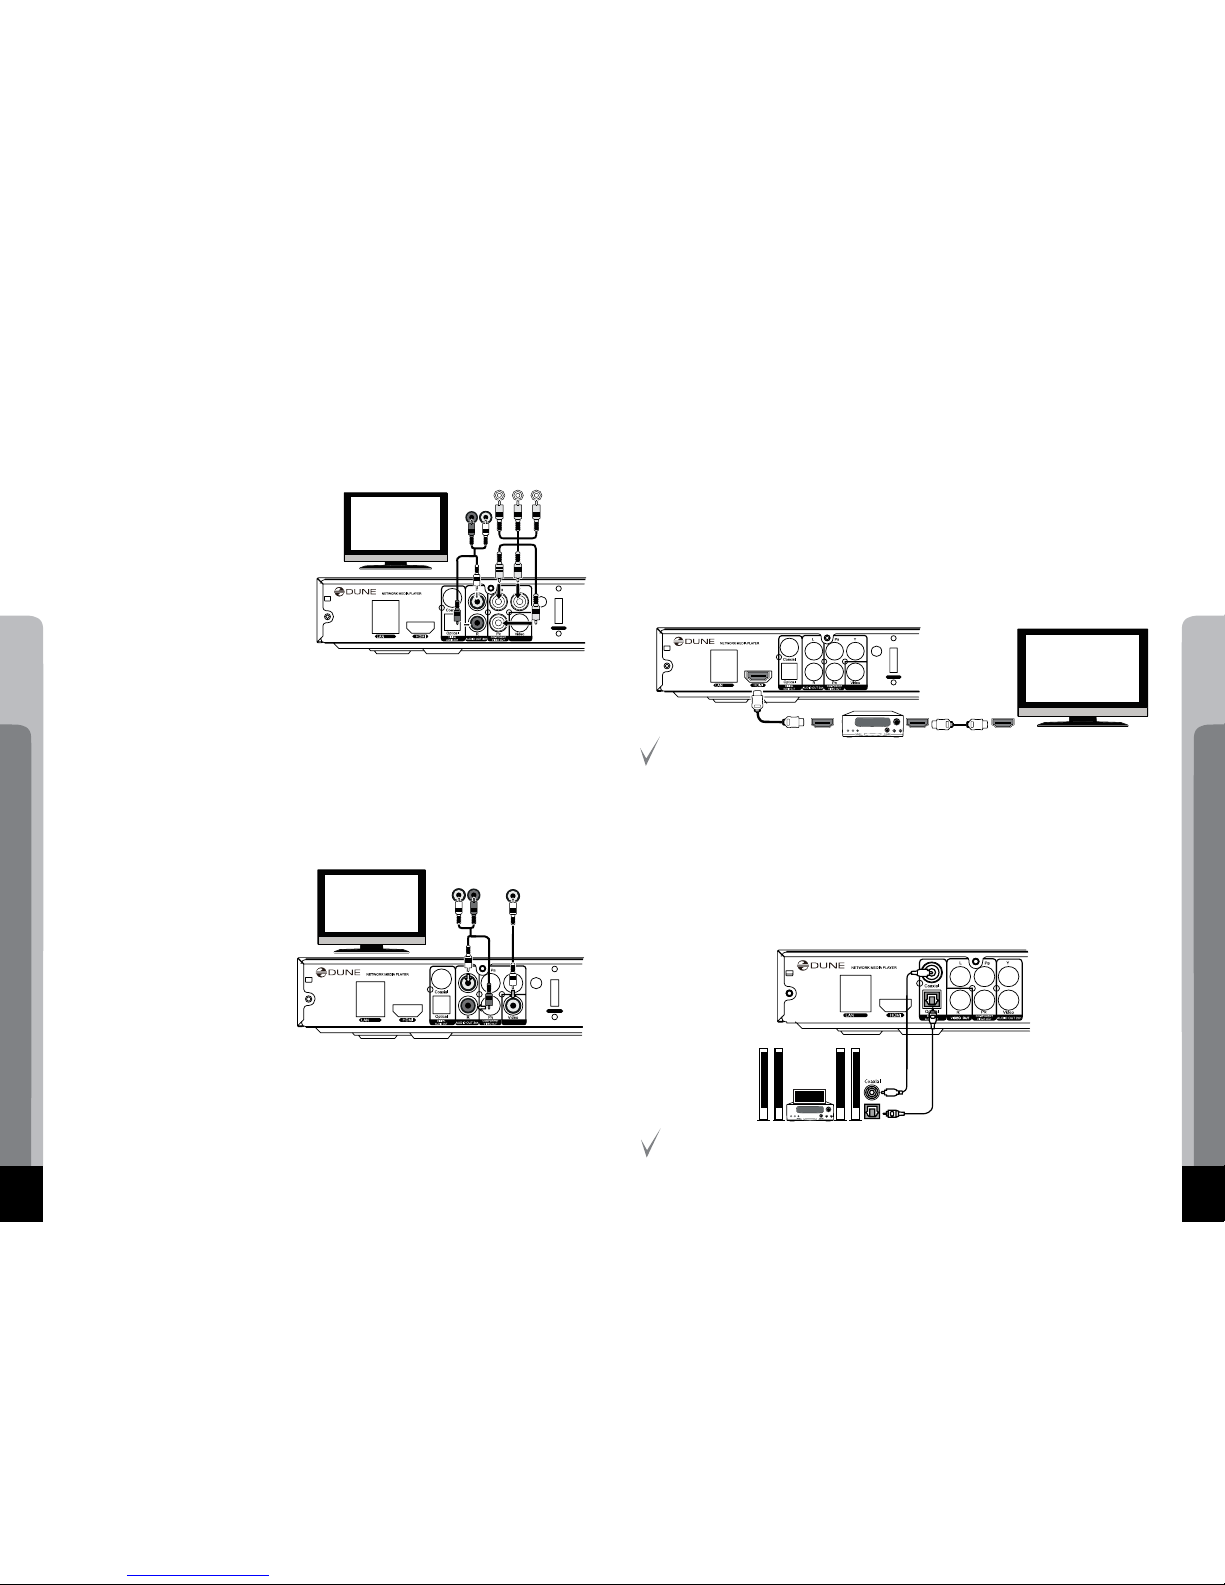
If your TV/monitor/projector has no HDMI port but is equipped with the DVI one, you can
use an HDMI-DVI adapter (to be connected to HDMI-HDMI cable) or HDMI-DVI cable (no
adapter needed). In this case, transmission of audio stream via HDMI is not supported, so
one of the analog or digital audio outputs has to be used.
1. Make sure that the player and the TV/monitor/projector is switched off. Do not switch them
on until the connection procedure is finished.
2. Connect the HDMI/DVI cable and (if needed) the HDMI-DVI adapter.
3. Using RC/buttons of the TV/monitor/projector, select the required input port and (for display
mode. For further instructions please refer to the manual of your displaying equipment.
4. Power on the devices. Wait until the initial screen (a "Dune" logo) is shown.
eSATA
/USB
HD BASE 2.0
In collaboration of HDI,
China Hualu Group
Made in China
COMPOSITE
VIDEOOUT
HDMI IN