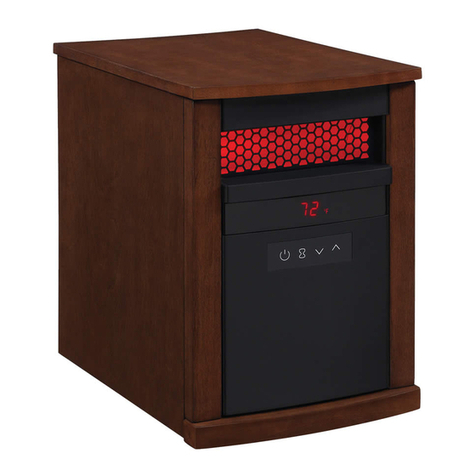
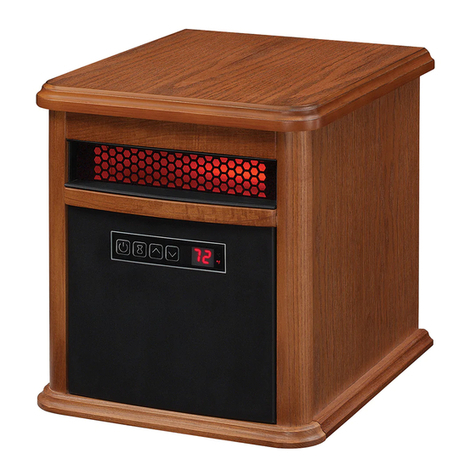
Duraflame 10QI072ARA User manual

A
A

CONSUMER SAFETY INFORMATION
PLEASE READ THIS MANUAL BEFORE OPERATING THIS APPLIANCE.
WARNING!!
IF THE INFORMATION IN THIS MANUAL IS NOT FOLLOWED
EXACTLY, AN ELECTRIC SHOCK OR FIRE MAY RESULT CAUSING
PROPERTY DAMAGE, PERSONAL INJURY OR LOSS OF LIFE.
DO NOT STORE OR USE GASOLINE OR OTHER FLAMMABLE VAPORS
AND LIQUIDS IN THE VICINITY OF THIS OR ANY OTHER APPLIANCE.
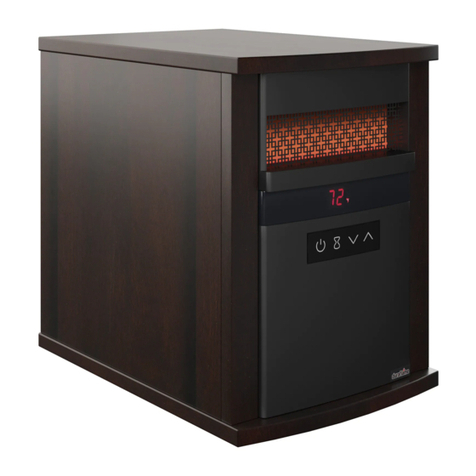
Infrared Heater
OWNERS OPERATING MANUAL
MODEL: 10QI072ARA
Thank you and congratulations on your purchase ofaTwin-Star International, Inc.
heater. Please read the Operating Instructions before using this appliance.
IMPORTANT: Read all instructions and warnings carefully before operating.
Failure to follow these instructions may result inapossible electric shock, fire hazard
and/or injury and will void the warranty.
E-1
Twin-Star International, Inc.
Delray Beach, FL 33445
Made in China
Printed in China
U.S.A.
For Customer Service:
www.twinstarhome.com
English Call: 866-661-1218
Español /Français Call: 866-661-1219

For product warranty registration please visit:
www.twinstarhome.com/registration
Before setting up this product please record the model number and
serial number of this product in the spaces below for in registration
and warranty reference.
Heater Model Number
Mantel Model Number
Serial Number
For product warranty registration please visit:
www.twinstarhome.com/registration
Before setting up this product please record the model number and
serial number of this product in the spaces below for in registration
and warranty reference.
Heater Model Number
Mantel Model Number
Serial Number
For product warranty registration please visit:
www.twinstarhome.com/registration
Before setting up this product please record the model number and
serial number of this product in the spaces below for in registration
and warranty reference.
Heater Model Number
Mantel Model Number
Serial Number
E-2

IMPORTANT INSTRUCTION
SAVE THESE
INSTRUCTIONS
E-3
1. Read all instructions before using this heater.
2. This heater is hot when in use. To avoid burns,
do not let bare skin touch hot surfaces. If provided,
use handles when moving this appliance. Keep
combustible materials, such as furniture, pillows,
bedding, papers, clothes and curtains at least 3 feet
(0.9 m) from the front of the heater and keep them
away from the sides and rear.
WARNING: In order to avoid overheating, do not
cover the heater. It cannot be used in a wardrobe.
3. CAUTION: Whenever the heater is left operating
and unattended, extreme caution is necessary if
children or invalids are nearby.
4. The appliance is not to be used by children or
persons with reduced physical, sensory or mental
capabilities, or lack of experience and knowledge,
unless they have been given supervision or
instruction.
5. Children being supervised not to play with the
appliance.
6. Always unplug heater when not in use.
7. Do not operate any heater with a damaged cord or
plug or after the heater malfunctions, has been
dropped or damaged in any manner. Discard heater,
or return to authorized service facility for examination
and/or repair.
8. If the supply cord is damaged, it must be replaced
by the manufacture, its service agent or similarly
qualified persons in order to avoid a hazard.
9. Any repairs to this heater should be carried out
by a qualified service person.
10. Under no circumstances should this heater
be modified. Parts having to be removed for
servicing must be replaced prior to operating this
heater again.
11. Do not use outdoors.
12. This heater is not intended for use in bathrooms,
laundry areas and similar indoor locations. Never
locate heater where it may fall into a bathtub or other
water container.
13. Do not run cord under carpeting. Do not cover
cord with throw rugs, runners or similar coverings. Do
not route cord under furniture or appliances. Arrange
cord away from traffic areas and where it will not be
tripped over.
14. To disconnect heater, turn controls to the off, then
remove plug from outlet.
15. Connect to properly grounded outlets only.
16. This appliance, when installed, must be electrically
grounded in accordance with local codes or, in the
absence of local codes, with the current CSA C22.1
Canadian Electrical Code or for U.S.A. installations,
follow local codes and the National Electrical
Code, ANSI/NFPA NO.70.
When using electrical appliances, basic precautions should always be followed to reduce the risk of fire,
electrical shock, and injury to persons including the following:
17. There is a thermostat limiter inside the heater.
When the inner temperature over heating or occurs
abnormal heating, the thermostat protective device
would cut off power supply to avoid the heater
damaged or risk of fire.
18. The heaters must not be located immediately
below a socket-outlet.
19. Do not insert or allow foreign objects to enter any
ventilation or exhaust opening as this may cause an
electric shock or fire, or damage the heater.
20. To prevent a possible fire, do not block air intakes
or exhaust in any manner. Do not use on soft
surfaces, like a bed, where opening may become
blocked.
21. A heater has hot and arcing or sparking parts
inside. Do not use it in areas where gasoline, paint
or flammable liquids are used or stored.
22. Use this heater only as described in the
manual. Any other use not recommended by the
manufacturer may cause fire, electric shock or
injury to persons.
23. Always plug heaters directly into a wall outlet/
receptacle. Never use with an extension cord or
relocatable power tap (outlet/ power strip).
24. See directions in Figure 1.
This heater is for use on 120 volts. The cord has a
plug as shown in figure 1. See Figure 1 for grounding
instruction. An adapter as shown at C is available for
connecting three-blade grounding type plugs to two-slot
receptacles. The green grounding plug extending from
the adapter must be connected to a permanet ground
such as a properly gounnded outlet box. The adapter
should not be used if a three-slot grounded receptacle
is available.
Figure 1
GROUNDING PIN
METAL SCREW
COVER OF GROUNDED
OUTLET BOX
B
A
C
GROUNDING PIN
D
ADAPTER
GROUNDING
MEANS
Blower Assembly
Control Panel Circuit Board
Main PCBA
Remote Control - 4 Buttons
PRODUCT ORIENTATION
E-4
10QI072ARA
Part Name
PARTS LIST
Control Panel - 4 Buttons
Infrared Heater Assembly
Figure 2
Face Cover
Filter
Filter Cover
Caster
Touch-up Pen
Touch-up Pen
Caster
Caster
Air outlet
Display
Control Panel

HEATER LOCATION
When choosing a location for your new heater,
ensure that the general instructions are followed.
Also, for best effect, install the heater out of direct
sunlight.
ELECTRICAL CONNECTION
A 15 AMP, 120 Volt, 60 Hz circuit with a properly
grounded outlet is required. Preferably, the
heater will be on a dedicated circuit as other
appliances on the same circuit may cause the circuit
breaker to trip or the fuse to blow when the heater is
in operation. The unit comes standard with 6 feet
(1.8 m) three wire cord, exiting from the rear of the
heater.
CAUTION: Do not exceed the current rating of the
current tap. Always plug heaters directly into a wall
outlet/ receptacle. Never use with an extension cord or
relocatable power tap (outlet/ power strip).
CLEARANCE TO COMBUSTIBLES
Keep electrical cords, drapery, furniture and other
combustibles at least 3 feet (0.9 m) from the front of the
heater and away from the sides.
CLEANING TRIM
Clean the trim using a soft cloth, slightly
dampened with citrus oil based product and buff with
a clean soft cloth. DO NOT use brass polish or
household cleaners as these products will damage
the metal trim. Citrus oil based products can be
obtained at supermarkets or hardware stores.
Periodic cleaning/vacuuming of the filter is recommended.
Make sure the unit is turned OFF and unplugged
whenever you are cleaning the heater.
WARNING: Make sure the power is turned off before proceeding. Any electrical repairs or
rewiring of this unit should be carried out by a licensed electrician in accordance with
national and local codes.
If repairing or replacing any electrical component or wiring, the original wire routing, color
coding and securing locations must be followed.
WARNING: Electrical outlet wiring must comply with local building codes and other applicable
regulations to reduce the risk of fire, electrical shock and injury to persons.
WARNING: Do not use this heater if any part of it has been under water. Immediately call a
qualified service technician to inspect the heater and replace any part of the electrical system.
Warning: Disconnect power before attempting any maintenance or cleaning to reduce the risk
of fire, electrical shock or personal injury.
MAINTENANCE
WARNING: Make sure the power is turned off before proceeding. Any electrical repairs or
rewiring of this unit should be carried out by a licensed electrician in accordance with
national and local codes.
If repairing or replacing any electrical component or wiring, the original wire routing, color
coding and securing locations must be followed.
WARNING: Electrical outlet wiring must comply with local building codes and other applicable
regulations to reduce the risk of fire, electrical shock and injury to persons.
WARNING: Do not use this heater if any part of it has been under water. Immediately call a
qualified service technician to inspect the heater and replace any part of the electrical system.
Warning: Disconnect power before attempting any maintenance or cleaning to reduce the risk
of fire, electrical shock or personal injury.
Warning: During any service of this appliance, the power to the unit must be turned off.
First turn the main power switch to the “OFF” position. Then remove the electrical plug from
the wall outlet.
Cold climate installation recommendation:
when installing this unit against a
non-insulated exterior wall or chase, it is
mandatory that the outer walls be insulated
to conform to applicable insulation codes.
Figure 3
Filter
Cover
Filter
ELECTRICAL SPECIFICATIONS
Amps
Watts
Voltage
Temperature
12.5 Amps
1,500 Watts
120 V~, 60 Hz
50 °F-97 °F (10 °C-36 °C)
E-5

HEATER LOCATION
When choosing a location for your new heater,
ensure that the general instructions are followed.
Also, for best effect, install the heater out of direct
sunlight.
ELECTRICAL CONNECTION
A 15 AMP, 120 Volt, 60 Hz circuit with a properly
grounded outlet is required. Preferably, the
heater will be on a dedicated circuit as other
appliances on the same circuit may cause the circuit
breaker to trip or the fuse to blow when the heater is
in operation. The unit comes standard with 6 feet
(1.8 m) three wire cord, exiting from the rear of the
heater.
CAUTION: Do not exceed the current rating of the
current tap. Always plug heaters directly into a wall
outlet/ receptacle. Never use with an extension cord or
relocatable power tap (outlet/ power strip).
CLEARANCE TO COMBUSTIBLES
Keep electrical cords, drapery, furniture and other
combustibles at least 3 feet (0.9 m) from the front of the
heater and away from the sides.
CLEANING TRIM
Clean the trim using a soft cloth, slightly
dampened with citrus oil based product and buff with
a clean soft cloth. DO NOT use brass polish or
household cleaners as these products will damage
the metal trim. Citrus oil based products can be
obtained at supermarkets or hardware stores.
Periodic cleaning/vacuuming of the filter is recommended.
Make sure the unit is turned OFF and unplugged
whenever you are cleaning the heater.
WARNING: Make sure the power is turned off before proceeding. Any electrical repairs or
rewiring of this unit should be carried out by a licensed electrician in accordance with
national and local codes.
If repairing or replacing any electrical component or wiring, the original wire routing, color
coding and securing locations must be followed.
WARNING: Electrical outlet wiring must comply with local building codes and other applicable
regulations to reduce the risk of fire, electrical shock and injury to persons.
WARNING: Do not use this heater if any part of it has been under water. Immediately call a
qualified service technician to inspect the heater and replace any part of the electrical system.
Warning: Disconnect power before attempting any maintenance or cleaning to reduce the risk
of fire, electrical shock or personal injury.
MAINTENANCE
WARNING: Make sure the power is turned off before proceeding. Any electrical repairs or
rewiring of this unit should be carried out by a licensed electrician in accordance with
national and local codes.
If repairing or replacing any electrical component or wiring, the original wire routing, color
coding and securing locations must be followed.
WARNING: Electrical outlet wiring must comply with local building codes and other applicable
regulations to reduce the risk of fire, electrical shock and injury to persons.
WARNING: Do not use this heater if any part of it has been under water. Immediately call a
qualified service technician to inspect the heater and replace any part of the electrical system.
Warning: Disconnect power before attempting any maintenance or cleaning to reduce the risk
of fire, electrical shock or personal injury.
Warning: During any service of this appliance, the power to the unit must be turned off.
First turn the main power switch to the “OFF” position. Then remove the electrical plug from
the wall outlet.
Cold climate installation recommendation:
when installing this unit against a
non-insulated exterior wall or chase, it is
mandatory that the outer walls be insulated
to conform to applicable insulation codes.
Figure 3
Filter
Cover
Filter
ELECTRICAL SPECIFICATIONS
Amps
Watts
Voltage
Temperature
12.5 Amps
1,500 Watts
120 V~, 60 Hz
50 °F-97 °F (10 °C-36 °C)
E-5
OPERATING INSTRUCTIONS CONTROL FUNCTIONS
Figure 4
10QI072ARA
Model#
E-6
TO ACCESS CONTROL PANEL-
Control panel can be accessed on the front panel of the heater.
- POWER
1. The POWER button supplies power to all the functions of the
heater. Pressing the POWER button again the heater will be
put in standby mode.
2. Pressing and holding the POWER button on the control panel for
3 seconds will switch between °F and °C.
- TIMER
1. a. There are 9 timer settings and OFF that can be selected.
OFF(00), 30min, 1Hour, 2H, 3H, 4H, 5H, 6H, 7H, 8H.
b. Double-digit minute settings, such as:
30 minutes are:
c. A digital plus a "H" show hours setting, such as:
2 Hours are:
2. If the timer function was previously set the first press
of the timer button won’t change the previous setting.
Pressing the timer button will activate the timer display.
3. When the timer is active, the display will count down from
60 seconds before shutting off the heater.
▲ ▼- SETTING TEMPERATURE
1. When pressing the ▲ ▼ buttons the display will enter temperature
setting mode.
2. When in temperature setting mode pressing the ▲ ▼ buttons will
change the thermostat by 1 °F (1 °C.)
The temperature setting range is between 50 °F - 97 °F
(10 °C and 36 °C).
3. The default temperature is 72 °F (22 °C.)
4. After 10 seconds without control input the display will exit temperature
setting mode and show the current ambient temperature.
NOTE: After the heater function or power is shutoff the blower will continue to run for several minutes to cool
the internal components.
THERMOSTAT CALIBRATION
Thermostat readings can vary based on the running environment. If desired the thermostat on the heater can be
manually calibrated. To calibrate the thermostat:
1. Press the TIMER button for 3 seconds to begin calibration.
2. Use the ▲ ▼ buttons to adjust the thermostat. The calibration range is -9°F to 9°F (-5°C to 5°C).
3. After 10 seconds without control input the heater will exit thermostat calibration.
Figure 5
NOTE: PLEASE OPERATE REMOTE
TRANSMITTER AT A SLOW MEASURED
PACE. PRESS THE REMOTE CONTROL
BUTTONS WITH AN EVEN MOTION
AND GENTLE PRESSURE. REPEATEDLY
PRESSING BUTTONS IN RAPID
SUCCESSION MAY CAUSE THE
TRANSMITTER TO MALFUNCTION.

E-7
TROUBLE SHOOTING GUIDE
SOLUTION
PROBLEM
1. Heater does not blow warm air.
1a. The ambient temperature is higher than the thermostat setting.
1b. Unplug the unit from the wall outlet for 2 hours. After 2 hours plug the
unit back into wall outlet, and operate as normal.
3c. Check if the air inlet is blocked or the air filter is dirty and needs to be cleaned.
MODEL:10QI072ARA
DISPOSAL OF USED BATTERIES
Battery may contain hazardous substances which could endanger the environment and human health.
This symbol marked on the battery and/ or packaging indicates that used battery shall not be treated as
municipal waste. Batteries should be disposed of at an appropriate collection point for recycling.
By ensuring the used batteries are disposed of correctly, you will help preventing potential negative
consequences for the environment and human health. The recycling of materials will help to conserve
natural resources.
For more information about collection and recycling of used batteries, please contact your local
municipality or your waste disposal service.
REPLACING THE REMOTE CONTROL BATTERY
When the remote control stops operating or its range seems reduced, it is time to replace the battery with new ones.
1. The battery compartment is located on the back end of the remote.
2. Press and slide the battery door open and remove the old battery.
3. Insert 2pcs AAA batteries, checking that the + and - sides of the battery match inside the battery compartment.
4. Replace the battery compartment door.
2. Low air outlet speed and higher
temperature. 2a. Check if the air inlet is blocked or the air filter is dirty and needs to be cleaned.
NOTE: This equipment has been tested and found to comply with the limits for Class B digital device, pursuant to
part 15 of the FCC Rules. These limits are designed to provide reasonable protection against harmful interference in
a residential installation. This equipment generates, uses, and can radiate radio frequency energy and, if not installed
and used in accordance with the instructions, may cause harmful interference to radio or television reception, which
can be determined by turning the equipment off and on, the user is encouraged to try to correct the interference by one
or more of the following measures:
• Reorient or relocate the receiving antenna.
• Increase the separation between the equipment and the receiver.
• Connect the equipment into an outlet on a circuit different from that to which the receiver is connected.
• Consult the dealer or an experienced radio/TV technician for help.
This device complies with Part 15 of the FCC Rules. Operation is subject to the following two conditions:
(1) This device may not cause harmful interference, and
(2) this device must accept any interference received, including interference that may cause undesired operation.
Modifications not approved by the party responsible for compliance could void user’s authority to operate the equipment.
This Class B digital apparatus complies with Canadian ICES-003.
NOTE: Do not mix old and new batteries.
Do not mix alkaline, standard (carbonzinc), or rechargeable (nicad, nimh, etc) batteries.
Caution for ingestion.
CAUTION:
• Always purchase the correct size and grade of battery most suitable for the intended use.
• Replace all batteries of a set at the same time.
• Clean the battery contacts and also those of the device prior to battery installation.
• Ensure the batteries are installed correctly with regard to polarity (+ and -).
• Remove batteries from equipment which is not to be used for an extended period of time.
• Remove used batteries promptly.

BASIC WARRANTY
IF WARRANTY SERVICE IS NEEDED
1 YEAR LIMITED WARRANTY
Twin-Star ™ Heater Models
Twin-Star International, Inc.
Delray Beach, FL 33445
Made in China
Printed in China
© 2012, Twin-Star International, Inc.
E-8
Twin-Star International, Inc. (hereinafter referred to
collectively as the (“Company”) warrants that your
new Twin-Star Heater is free from manufacturing and
material defects for a period of one year from date
of purchase, subject to the following conditions and
limitations.
1. This heater must be installed and operated at all
times in accordance with the installation and
operating instructions furnished with the product.
Any unauthorized repair, alteration, willful abuse,
accident, or misuse of the product shall nullify
this warranty.
2. This warranty is non-transferable, and is made to
the original owner, provided that the purchase was
made through an authorized supplier of the company.
3. The warranty is limited to the repair or replacement
of part(s) found to be defective in material or
workmanship, provided that such part(s) have been
subjected to normal conditions of use and service,
after said defect is confirmed by the Company’s
inspection.
4. The Company may, at its discretion, fully discharge
all obligations with respect to this warranty by
refunding the wholesale price of the defective part(s).
5. Any installation, labor, construction, transportation,
or other related costs/expenses arising from defective
part(s), repair, replacement, or otherwise of same,
will not be covered by this warranty, nor shall the
Company assume responsibility for same.
6. The owner/user assumes all other risks, if any,
including the risk of any direct, indirect or
consequential loss or damage arising out of the
use, or inability to use the product, except as
provided by law.
7. All other warranties – expressed of implied –
with respect to the product, its components and
accessories, or any obligations/liabilities on the
part of the Company are hereby expressly excluded.
8. The Company neither assumes, nor authorizes any
third party to assume, on its behalf, any other
liabilities with respect to the sale of the Twin-Star
product.
9. The warranties as outlined within this document
do not apply to non Twin-Star accessories used in
conjunction with the installation of this product.
10. This warranty gives you specific legal rights, and
you may also have other rights which vary from
state to state.
This warranty is void if:
a. The heater is subjected to prolonged periods of
dampness or condensation.
b. Any unauthorized alteration, willful abuse,
accident, or misuse of the product.
c. You do not have the original receipt of purchase.
For update and revisions to this manual
please see our website
www.twinstarhome.com/instructions
U.S.A.
For Customer Service: www.twinstarhome.com
or call 866-661-1218 in English, 866-661-1219 in
French, 866-661-1219 in Spanish. Make sure you have
your warranty, your sales receipt, location of purchase
and the model/ serial number of your Twin-Star products.
For Customer Service:
www.twinstarhome.com
English Call: 866-661-1218
Español /Français Call: 866-661-1219

INFORMACIÓN SOBRE SEGURIDAD PARA EL CONSUMIDOR
LEA ESTE MANUAL ANTES DE OPERAR ESTE APARATO
¡¡ADVERTENCIA!!
EN CASO DE NO SEGUIR LA INFORMACIÓN EN ESTE MANUAL
CON EXACTITUD, PODRÍAN PROVOCARSE DESCARGA ELÉCTRICA
O INCENDIO Y DAÑOS A LA PROPIEDAD, LESIONES PERSONALES O
LA PÉRDIDA DE LA VIDA.
NO GUARDE NI USE GASOLINA NI OTROS VAPORES Y LÍQUIDOS
INFLAMABLES CERCA DE ESTE APARATO, NI DE CUALQUIER OTRO.
Calentador Infrarrojo
MANUAL DE OPERACIÓN DEL PROPIETARIO
MODELO: 10QI072ARA
Gracias y felicitaciones por su adquisición de una calentador de Twin-Star International, Inc.
Lea las Instrucciones de Operación antes de utilizar este aparato.
IMPORTANTE: Lea todas las instrucciones y advertencias con detenimiento antes de
comenzar la operación. Si no se siguen las instrucciones, podría provocarse riesgo de
descarga eléctrica, incendio o lesiones y, además, la garantía perdería validez.
S-1
Twin-Star International, Inc.
Delray Beach, FL33445
EE. UU.
Impreso en China
Fabricado en China
www.twinstarhome.com
Inglés llamadas: 866-661-1218
Español /Français llamadas: 866-661-1219
Servicio de atención al cliente:

Inserte número de mantel
Inserte número de Calentador
Para registrar la garantía del producto, por favor visite:
www.twinstarhome.com/registration
Antes de intalar el producto, por favor registre el número de modelo y
serie de este producto en los espacios debajo para el registro y la referencia
de garantía.
Número de serie
Para registrar la garantía del producto, por favor visite:
www.twinstarhome.com/registration
Antes de intalar el producto, por favor registre el número de modelo y
serie de este producto en los espacios debajo para el registro y la referencia
de garantía.
Número de serie
Para registrar la garantía del producto, por favor visite:
www.twinstarhome.com/registration
Antes de intalar el producto, por favor registre el número de modelo y
serie de este producto en los espacios debajo para el registro y la referencia
de garantía.
Número de serie
S-2
Inserte número de mantel
Inserte número de Calentador
Inserte número de mantel
Inserte número de Calentador

INSTRUCCIONES IMPORTANTES
GUARDE ESTAS
INSTRUCCIONES
S-3
1. Lea todas las instrucciones antes de usar este calentador.
2. Este calentador se calienta cuando está en uso. Para evitar
quemaduras, no permita que la piel sin protección entre
en contacto con superficies calientes. Si están incluidas,
utilice las manijas para mover este aparato. Mantenga
los materiales inflamables, como muebles, almohadas,
ropa de cama, papeles, prendas de vestir y cortinas,
a un mínimo de 3 pies (0.9 m) de distancia de la parte
frontal del calentador y manténgalos alejados
de los laterales y la parte posterior.
ADVERTENCIA: Para evitar un sobrecalentamiento, no
cubra el calentador. No puede utilizarse en guardarropas.
3. PRECAUCIÓN: Siempre que se deje el calentador en
funcionamiento y sin atención, deberá tenerse extremo
cuidado si hay niños o personas inválidas cerca.
4. El aparato no debe ser utilizado por niños o personas con
capacidades mentales, sensoriales o físicas disminuidas o con
falta de experiencia o conocimiento, a menos que sean
supervisados o que hayan recibido instrucciones.
5. Los niños deberán ser supervisados para que no jueguen
con el aparato.
6. Siempre desenchufe el calentador cuando no esté en uso.
7. No opere ningún calentador con un cable o enchufe
dañado o luego de que éste funcione incorrectamente, o
en caso de que se haya caído o dañado de cualquier
manera. Deseche el calentador, o devuélvalo al centro
de servicio técnico autorizado para que lo examinen y/o
reparen.
8. Si el cable se daña, debe ser reemplazado por el fabricante,
su agente de mantenimiento u otras personas con
calificaciones similares a fin de prevenir riesgos.
9. Todas las reparaciones a esta calentador deberán ser realizadas
por una persona calificada de mantenimiento.
10. En ninguna circunstancia podrá modificarse esta calentador.
Las piezas que se hayan retirado para realizarles el
mantenimiento deberán volver a colocarse antes de operar
esta calentador nuevamente.
12. Este calentador no está diseñado para su uso en baños,
áreas de lavado ni lugares interiores similares. Nunca
coloque el calentador donde podría caerse en una bañera o
en otro recipiente de agua.
13. No pase el cable debajo de una alfombra. No cubra el
cable con alfombras pequeñas, tapetes o elementos similares.
No pase el cable debajo de muebles ni artefactos. Coloque
el cable lejos de las áreas de paso y donde no ocasione
tropezones.
14. Para desconectar el calentador, coloque los controles
en la posición de apagado y luego retire el
enchufe del tomacorriente.
15. Sólo conecte el aparato a tomacorrientes con una conexión
a tierra adecuada.
16. Al instalar este aparato, éste deberá contar con una conexión
eléctrica a tierra de acuerdo con códigos locales o, en
ausencia de códigos locales, con el Código Canadiense de
Electricidad vigente, norma CSA C22.1 o, para las
instalaciones en EE. UU., de acuerdo con códigos locales y
el Código Nacional de Electricidad, ANSI/NFPA Nº 70.
17. El calentador incluye un limitador de termostato. Si la
temperatura interior aumenta demasiado o se produce un
Al utilizar aparatos eléctricos, siempre deberán tomarse precauciones básicas para reducir el riesgo
de incendio, descarga eléctrica y lesiones a personas. Éstas incluyen:
Figura 1
B
A
C D
ADAPTADOR
MEDIO DE CONEXIÓN A TIERRA
calentamiento anormal, el dispositivo protector del
termostato interrumpirá el suministro de energía para evitar
daños en la calentador o un riesgo de incendio.
18. Los calentadores no deben colocarse inmediatamente debajo
de un tomacorriente.
19. No introduzca ni permita que objetos extraños ingresen
a ninguna abertura de ventilación o escape, ya que esto
podría causar una descarga eléctrica o incendio o bien
dañar el calentador.
20. A fin de evitar un posible incendio, no bloquee las
entradas ni las salidas de aire de manera alguna. No utilice el
aparato sobre superficies blandas, como una cama, donde la
abertura podría bloquearse.
21. Los calentadores tienen piezas calientes y piezas que producen
arcos eléctricos o chispas en el interior. No los utilice en áreas
donde se usen o guarden líquidos inflamables, gasolina
o pintura.
22. Utilice este aparato únicamente como se describe en el
manual. Cualquier otro uso no recomendado por el fabricante
podría causar incendio, descarga eléctrica o lesiones a personas.
23. Siempre enchufe los calentadores directamente en un
receptáculo o tomacorriente de pared. Nunca los utilice con
un cable prolongador o un contacto múltiple con tomas
reubicables (tomacorriente/enchufe múltiple).
24. Vea la figura 1 para consultar las indicaciones a seguir. Este
calentador debe utilizarse con 120 voltios. El cable incluye
un enchufe tal como se muestra en la figura 1. Vea la figura 1
para obtener instrucciones sobre la conexión a tierra. Un
adaptador (como se muestra en C) se encuentra disponible
para conectar enchufes de conexión a tierra de tres clavijas
a receptáculos de dos ranuras. El enchufe verde de conexión a
tierra que se extiende desde el adaptador debe conectarse a
una toma de tierra permanente, tal como una caja de
distribución con una conexión a tierra adecuada. El adaptador
no deberá utilizarse si se dispone de un receptáculo de tres
ranuras conectado a tierra.
CLAVIJA DE CONEXIÓN A TIERRA
TAPA DE LA CAJA DE DISTRIBUCIÓN CON
CONEXIÓN A TIERRA
TORNILLO METÁLICO

S-4
Nombre de la pieza
INFORMACIÓN DE ORIENTACIÓN DEL PRODUCTO
10QI072ARA
Pantalla
Salida de Aire
Figura 2
Panel de Controles
Rueda Giratoria
Conjunto del Ventilador
Conjunto del Calentador Infrarrojo
Panel de Controles: 4 Botones
PCBA (Conjunto de Placa de Circuito Impreso) Principal
Placa de Circuitos del Panel de Controles
Control Remoto: 4 Botones
Cubierta Delantera
Filtro
Cubierta del Filtro
Rueda Giratoria
LISTA DE PIEZAS
Bolígrafo Para
Retocar
Bolígrafo Para Retocar

UBICACIÓN DE LA CALENTADOR
Al elegir una ubicación para su nueva calentador,
asegúrese de seguir las instrucciones generales.
Además, a fin de obtener los mejores resultados,
instale la calentador de manera que no esté en contacto
con la luz del sol.
CONEXIÓN ELÉCTRICA
Se requiere un circuito de 60 Hz, 15 AMP y 120 voltios
con un tomacorriente correctamente conectado a tierra.
Preferentemente, la calentador deberá estar en un circuito
especial, ya que otros aparatos en el mismo circuito
podrían causar que se desconecte el interruptor de
circuito o que se queme el fusible cuando el calentador
esté funcionando. La unidad viene de serie con un
cable trifilar de 1,8 metros (6 pies) que sale de la parte
trasera de la calentador.
PRECAUCIÓN: No debe excederse la corriente nominal
de la toma actual. Siempre enchufe los calentadores
directamente en un receptáculo o tomacorriente de pared.
Nunca los utilice con un cable prolongador o un contacto
múltiple con tomas reubicables (tomacorriente/enchufe
múltiple).
DISTANCIA DE MATERIALES INFLAMABLES
Mantenga cables eléctricos, cortinados, muebles y otros
materiales inflamables a un mínimo de 0,9 metros (3 pies)
de distancia de la parte frontal del calentador y alejados
de los laterales.
LIMPIEZA DE LA MOLDURA
Limpie la moldura metálica con un paño suave
humedecido con un producto a base de aceite cítrico y
púlalo con un paño suave y limpio. NO utilice productos
de limpieza domésticos ni limpiametales, ya que estos
productos dañarán la moldura metálica. Los productos
a base de aceite cítrico pueden conseguirse en
supermercados o ferreterías.
Se recomienda limpiar/aspirar el filtro periódicamente.
Asegúrese de que la unidad esté apagada y desenchufada
siempre que limpie el calentador.
MAINTENANCE
MANTENIMIENTO
Recomendación para la instalación en
climas fríos: Al instalar esta unidad contra
un compartimiento o una pared exterior
sin aislamiento, es obligatorio aislar las
paredes externas conforme con los códigos
correspondientes de aislamiento.
ADVERTENCIA: Asegúrese de que la energía esté cortada antes de continuar. Toda
reparación o renovación del sistema eléctrico de la unidad deberá ser realizada por un
electricista autorizado de acuerdo con códigos nacionales y locales.
En caso de reparar o cambiar cualquier componente eléctrico o cableado, deberá seguirse la ruta
de cables, el código de colores y los lugares de sujeción originales.
ADVERTENCIA: El cableado del tomacorriente eléctrico debe cumplir con los códigos de
edificación locales y otras normas aplicables, a fin de reducir el riesgo de incendio, descarga
eléctrica y lesiones a personas.
ADVERTENCIA: No utilice esta calentador si alguna de sus piezas ha estado sumergida en
agua. Llame inmediatamente a un técnico de mantenimiento calificado para que inspeccione
la calentador y cambie cualquier pieza del sistema eléctrico.
ADVERTENCIA: Desconecte la alimentación antes de intentar realizar mantenimiento o limpieza a
fin de reducir el riesgo de incendio, descarga eléctrica o lesiones personales.
ADVERTENCIA: Durante el mantenimiento de este aparato, deberá cortarse la alimentación
a la unidad. Primero, coloque el interruptor de alimentación principal en la posición “OFF”
(apagado). Luego, retire el enchufe eléctrico del tomacorriente de pared.
S-5
Cubierta
del Filtro
Filtro
Amperaje
Vatios
Voltaje
Temperatura
12.5 A
1,500 W
120 V~, 60 Hz
De 50 °F a 97 °F (de 10 °C a 36 °C)
ESPECIFICACIONES ELÉCTRICAS
Figura 3

INSTRUCCIONES DE OPERACIÓN FUNCIONES DE LOS CONTROLES
S-6
Figura 4
10QI072ARA
Model#
Figura 5
ACCESO AL PANEL DE CONTROLES:
Se puede obtener acceso al panel de controles en el panel delantero del calentador.
NOTA: OPERAR EL TRANSMISOR REMOTO
LENTAMENTE. PRESIONAR LOS BOTONES
DEL CONTROL REMOTO CON UN
MOVIMIENTO PAREJO Y UNA PRESIÓN
SUAVE. PRESIONAR LOS BOTONES
REPETIDAMENTE EN UNA SECUENCIA
RÁPIDA PUEDE CAUSAR UN MAL
FUNCIONAMIENTO DEL TRANSMISOR.
- ENCENDIDO (POWER)
1. El botón de ENCENDIDO (POWER) suministra energía a
todas las funciones del calentador.
Al presionar de nuevo el botón de ENCENDIDO (POWER)
el calentador entrará en modo de espera.
2. Mantener presionado el botón de ENCENDIDO (POWER) en
el panel de control durante 3 segundos cambiará entre °F y °C.
- TEMPORIZADOR (TIMER)
1. a. Hay 9 configuraciones del temporizador y APAGADO (OFF)
que se pueden seleccionar.
APAGADO (OFF) (00), 30 minutos, 1 hora, 2H, 3H, 4H, 5H,
6H, 7H, 8H.
b. Configuración de minutos de dos dígitos, tales como:
30 minutos son:
c. Un número digital más una "H" muestran la configuración
de horas, tales como: 2 Horas son:
2. Si la función de temporizador se ha establecido previamente,
presionar el botón de temporizador por primera vez no
cambiará la configuración anterior.
Al presionar el botón de temporizador se activará la pantalla
del temporizador.
3. Cuando el temporizador está activado, la pantalla contará en
forma regresiva desde 60 segundos antes de apagar el calentador.
▲ ▼ - CONFIGURACIÓN DE LA TEMPERATURA
1. Al presionar los botones ▲ ▼ la pantalla entrará en el
modo de configuración de temperatura.
2. En el modo de configuración de temperatura, el termostato
tendrá un cambio de 1 °C (1 °F) al presionar los botones ▼ ▲ El rango de configuración de la temperatura
es entre 10 °C y 36 °C (50 °F - 97 °F).
3. La temperatura predeterminada es de 22 °C (72 °F ).
4. Después de 10 segundos sin entrada de control, la pantalla cerrará el modo de configuración de temperatura
y mostrará la temperatura ambiente actual.
NOTA: Después de la función del calentador o después del apagado, el ventilador continuará funcionando
durante varios minutos para enfriar los componentes internos.
CALIBRACIÓN DEL TERMOSTATO
Las lecturas del termostato pueden variar según el entorno de ejecución. Si se desea, el termostato del
calentador puede ser calibrado manualmente. Para calibrar el termostato:
1. Presione el botón del TEMPORIZADOR (TIMER) durante 3 segundos para iniciar la calibración.
2. Utilice los botones ▲ ▼ para ajustar el termostato. El rango de calibración es de -5 °C a 5 °C (-9 °C a 9 °F ).
3. Después de 10 segundos sin entrada de control, el calentador saldrá de la calibración del termostato.

S-7
NOTA: Este equipo ha sido probado y se ha establecido que cumple con los límites de un dispositivo digital
clase B, en conformidad con la sección 15 del reglamento de la Comisión Federal de Comunicaciones (FCC).
Estos límites tienen como objetivo brindar una protección razonable contra interferencias nocivas en una
instalación residencial. Este equipo puede generar, utilizar y emitir energía de radiofrecuencia. Si no se instala y
utiliza según las instrucciones, esta energía puede ocasionar una interferencia nociva en la recepción radial o
televisiva, lo cual se puede determinar al apagar o encender el equipo. Se recomienda al usuario que intente
corregir la interferencia a través de algunas de las siguientes medidas:
• Reoriente o reubique la antena receptora.
• Aumente la distancia entre el equipo y el receptor.
• Conecte el equipo a un tomacorriente en un circuito diferente al que se encuentra conectado el receptor.
• Consulte al representante o a un técnico con experiencia en radio o televisión para obtener ayuda.
Este dispositivo cumple con la Sección 15 del reglamento de la FCC. Su funcionamiento está sujeto a las siguientes
condiciones:
(1) Es probable que este dispositivo no ocasione interferencia nociva.
(2) Este dispositivo debe aceptar cualquier interferencia recibida, incluso aquella que pueda ocasionar un
funcionamiento no deseado. Las modificaciones que no tengan la aprobación de la parte responsable del
cumplimiento de las normas podría anular la autoridad del usuario para usar el equipo.
Este aparato digital de clase B cumple con la norma canadiense ICES-003.
Cuando el control remoto deja de funcionar o parece tener un menor alcance, es hora de reemplazar la batería
por una nueva.
1. El compartimiento de la batería está en el extremo trasero del control remoto.
2. Presione la pequeña lengüeta hacia adentro mientras desliza y abre la cubierta de la batería, y retire la batería vieja.
3. Inserte 2 baterías AAA; verifique que los terminales “+” y “-” de la batería coincidan con el interior del
compartimiento de la batería.
4. Vuelva a colocar la cubierta del compartimiento de la batería.
5. Debe sacar la batería si se ha agotado o si el producto va a permanecer sin uso por un periodo de tiempo largo.
La batería puede contener sustancias peligrosas que pueden poner en peligro el medio ambiente y la
salud de las personas.
Este símbolo marcado en la batería o el paquete indica que las baterías usadas no deben tratarse como
desechos municipales. Las baterías deben eliminarse en un lugar de recolección apropiado para su reciclado.
Al asegurarse de que las baterías usadas se desechen correctamente, ayudará a evitar posibles consecuencias
negativas para el medio ambiente y la salud de las personas. El reciclado de materiales ayudará a
conservar los recursos naturales.
Si desea más información sobre el reciclado de las baterías usadas, póngase en contacto con el servicio de
eliminación de desechos de su municipio.
PROBLEMAS SOLUCIÓN
MODEL: 10QI072ARA
1. El calentador no emite aire
caliente.
2. La velocidad de la salida de aire
es baja y la temperatura es más
elevada.
1a. La temperatura ambiente es mayor que la configuración del termostato.
1b. Desconecte la unidad de la toma de corriente por 2 horas. Después de 2 horas
conecte la unidad a una toma de pared, y opere de forma normal.
1c. Compruebe si la entrada de aire está bloqueada o si el filtro de aire está sucio
y necesita ser limpiado.
2a. Compruebe si la entrada de aire está bloqueada o si el filtro de aire está sucio
y necesita ser limpiado.
GUÍA PARA SOLUCIÓN DE PROBLEMAS
NOTA: No mezclar baterías viejas con nuevas.
No mezclar baterías alcalinas, baterías recargables (de Ni-Cd, Ni-MH, etc.) y baterías estándar (de zinc-carbono).
Precaución por ingestión.
REEMPLAZO DE LA BATERÍA DEL CONTROL REMOTO
PRECAUCIÓN:
• Siempre compre las pilas de tamaño y grado correctos para este uso.
• Reemplace todas las pilas de un set al mismo tiempo.
• Limpie los contactos de las pilas y los del aparato antes de colocar las pilas.
• Asegúrese que las pilas estén bien colocadas respecto a la polaridad (+ y -).
• Retire las pilas del equipo si no se va a utilizar por un tiempo prolongado.
• Retire las pilas usadas de inmediato.
ELIMINACIÓN DE LAS BATERÍAS USADAS

GARANTÍA BÁSICA
SI NECESITA EL SERVICIO DE LA GARANTÍA
GARANTÍA LIMITADA DE 1 AÑO
Modelos de calentador Twin-Star™
S-8
Twin-Star International, Inc. (de aquí en adelante,
denominado la “Compañía” de manera colectiva)
garantiza que su nueva calentador Twin-Star
está libre de defectos de fabricación y de materiales,
durante un período de 1 año a partir de la fecha de
compra, sujeto a las siguientes condiciones y
limitaciones.
1. Esta calentador deberá instalarse y operarse
en todo momento de acuerdo con las instrucciones
de instalación y operación suministradas con el
producto. Toda reparación, alteración, abuso
intencionado, accidente o mala utilización del
producto que no esté autorizada anulará esta
garantía.
2. Esta garantía no es transferible y se otorga al
propietario original, siempre y cuando la compra
se haya realizado a través de un proveedor
autorizado de la compañía.
3. La garantía está limitada a la reparación o la
reposición de piezas que se hayan encontrado
defectuosas en relación con la mano de obra o
el material, siempre y cuando estas piezas hayan
sido sometidas a condiciones normales de uso y
mantenimiento, luego de que dicho defecto haya
sido confirmado por la inspección de la Compañía.
4. Según su criterio, la Compañía podrá cumplir con
todas las obligaciones con respecto a esta garantía
al reembolsar el precio mayorista de las piezas
defectuosas.
5. Todos los costos de instalación, mano de obra,
construcción, transporte u otros gastos que surjan
de las piezas defectuosas, la reparación, la
reposición o similares, no estarán cubiertos por esta
garantía, ni la Compañía asumirá la responsabilidad
por ellos.
6. El propietario/usuario asume todos los otros riesgos,
si los hay, que incluyen el riesgo de cualquier pérdida
Para obtener las actualizaciones y revisiones de
este manual, visite nuestro sitio Web
www.twinstarhome.com/instructions
o daño directo, indirecto o resultante que surja del
uso o la incapacidad para usar el producto, a
excepción de lo dispuesto por ley.
7. Por la presente se excluyen expresamente todas las
otras garantías, ya sean explícitas o implícitas, con
respecto al producto, sus componentes y accesorios,
o cualquier obligación/responsabilidad por parte
de la Compañía.
8. La compañía no asume, ni autoriza a ningún tercero
a asumir en su nombre, ninguna otra responsabilidad
con respecto a la venta del producto Twin-Star.
9. Las garantías tal como se describen en este
documento no se aplican a accesorios que no sean de
Twin-Star y que se utilicen en conjunto con la
instalación de este producto.
10. Esta garantía le otorga derechos legales específicos
y es posible que usted tenga otros derechos, que
varían según el estado.
Esta garantía no tendrá validez en caso de:
a. Que la calentador sea sometida a períodos prolongados
de humedad o condensación.
b. Cualquier alteración no autorizada, abuso
intencionado, accidente o uso indebido del
producto.
c. Que usted no tenga el recibo original de la compra.
Twin-Star International, Inc.
Delray Beach, FL33445
EE. UU.
Impreso en China
Fabricado en China
©2012, Twin-Star International,Inc.
Servicio de atención al cliente: www.twinstarhome.com
o llame al 866-661-1218 para hablar en inglés,
al 866-661-1219 para hablar en francés o al 866-661-1219
para hablar en español. Asegúrese de tener la garantía, el
recibo de venta, el lugar de la compra y el número de
modelo/serie de sus productos Twin-Star.
www.twinstarhome.com
Inglés llamadas: 866-661-1218
Español /Français llamadas: 866-661-1219
Servicio de atención al cliente:

CONSIGNES DE SÉCURITÉ À L’USAGE DU CONSOMMATEUR
VEUILLEZ LIRE LE PRÉSENT MANUEL AVANT D’UTILISER CET APPAREIL
AVERTISSEMENT!
SI LES CONSIGNES DU PRÉSENT MANUEL NE SONT PAS
RIGOUREUSEMENT RESPECTÉES, LES RISQUES DE CHOC
ÉLECTRIQUE OU D’INCENDIE AUGMENTENT, CE QUI PEUT CAUSER
DOMMAGES MATÉRIELS, BLESSURES CORPORELLES OU DÉCÈS.
NE PAS ENTREPOSER OU UTILISER DE L’ESSENCE, DES SUBSTANCES
VAPORISÉES OU D’AUTRES LIQUIDES INFLAMMABLES À
PROXIMITÉ DE CET APPAREIL OU DE TOUT AUTRE APPAREIL.
Chaufferette Infrarouge
MANUEL D’UTILISATION À L’USAGE DES PROPRIÉTAIRES
MODÈLE: 10QI072ARA
Merci et félicitations d’avoir acheté ce Chaufferette Twin-star. Veuillez lire les instructions
d’utilisation avant de mettre en marche cet appareil.
IMPORTANT : Veuillez lire attentivement toutes les instructions et tous les avertissements
avant de commencer d’utilisation. Le non-respect de ces instructions risquerait de causer
des chocs électriques, des incendies ou des blessures corporelles et annulerait la garantie.
F-1
Twin-Star International, Inc.
Delray Beach, FL33445
États-Unis
Imprimé en Chine
Fabriqué en Chine
www.twinstarhome.com
Anglais Appelez: 866-661-1218
Español /Français Appelez: 866-661-1219
Service à la clientèle :

Pour l’enregistrement de la garantie du produit veuillez
consulter :
www.twinstarhome.com/registration
Avant la mise en place de ce produit veuillez noter le numéro de modèle
et le numéro de série de celui-ci dans l’espace prévu ci-dessous pour
l’enregistrement et les références de garantie demandées ultérieurement.
Le Numéro de Série
F-2
Le Numéro de modèle du Foyer
Le Numéro de modèle du Chauffage
Le Numéro de modèle du Foyer
Le Numéro de modèle du Chauffage
Le Numéro de modèle du Foyer
Le Numéro de modèle du Chauffage

INSTRUCTIONS IMPORTANTES
CONSERVER CES
INSTRUCTIONS
F-3
1. Lisez toutes les instructions avant d’utiliser cet appareil
de chauffage.
2. Cet appareil de chauffage est chaud pendant son utilisation.
Pour éviter toute brûlure, la peau nue ne doit jamais toucher
directement les surfaces chaudes. Si elles sont fournies,
utiliser les poignées pour déplacer cet appareil. Garder les
matières inflammables comme les meubles, coussins et
oreillers, articles de literie, papiers, vêtements et rideaux
à au moins 0,9 m (3 pi) de l’avant de l’appareil et les tenir
à l’écart des côtés et de l’arrière.
AVERTISSEMENT : Pour éviter une surchauffe, ne pas
recouvrir l’appareil de chauffage. Ne pas utiliser dans
une garde-robe.
3. ATTENTION : Lorsque l’appareil de chauffage
fonctionne sans surveillance, une prudence extrême est
requise si des enfants ou des personnes handicapées
sont à proximité.
4. Cet appareil ne doit pas être utilisé par des enfants, des
personnes à capacités physiques, sensorielles ou mentales
restreintes, ou des personnes qui connaissent peu le
produit ou qui ne sont pas familières avec son utilisation,
à moins qu’ils soient supervisés ou qu’on leur donne
des instructions précises.
5. Les enfants ne doivent pas jouer avec l’appareil, même
sous supervision.
6. Débranchez toujours l'appareil de chauffage lorsqu'il
n'est pas utilisé.
7. Ne faites jamais fonctionner un appareil de chauffage si
le cordon ou la fiche est endommagée ou s’il présente des
dysfonctionnements, a subi une chute ou a été endommagé
de quelque autre façon. Mettez l’appareil de chauffage de
côté, ou retournez-le à une installation de service autorisé
aux fins d’examens et/ou réparation.
8. Si le cordon d’alimentation fourni est endommagé, il
doit être remplacé par le fabricant, un de ses agents ou
autre personne qualifiée afin d’éviter tout danger.
9. Confier la réparation du foyer à un technicien qualifié.
10. Cet appareil ne doit être modifié en aucun cas. Les
pièces retirées pour entretien ou réparation doivent
être remplacées avant de remettre le chaufferette en marche.
11. Ne pas utiliser le produit à l’extérieur.
12. Cet appareil de chauffage n’est pas destiné à être utilisé
dans les salles de bain, salles de lavage et pièces intérieures
similaires. Ne placez jamais l’appareil de chauffage dans un
endroit où il pourrait tomber et atterrir dans une baignoire
ou autre conteneur d’eau.
13. Ne faites pas passer le cordon sous les moquettes Ne couvrez
pas le cordon avec des carpettes, tapis de corridor ou revêtements
similaires. Ne faites pas passer le cordon sous des meubles ou
appareils électriques. Disposez le cordon loin des endroits
achalandés où les passants ne trébucheront pas dessus.
14. Pour débrancher l’appareil de chauffage, mettez les commandes
hors fonction, puis retirez la fiche de la prise.
15. Brancher uniquement dans une prise de courant
convenablement mise à la terre.
16. Une fois installé, ce foyer doit être mis à la terre
conformément aux codes locaux ou, en l’absence de tels
codes, conformément à la dernière édition de la norme
CSA C22.1 du Code canadien de l’électricité ou, si le
produit est installé aux États Unis, aux codes locaux et
à la norme ANSI/NFPA 70 du National Electrical Code.
17. On retrouve un limiteur de thermostat à l’intérieur de
Lors de l’utilisation d’appareils électriques, pour éviter les risques d’incendie, d’électrocution et de
blessures, toujours suivre les consignes de sécurité de base suivantes :
Figure 1
B
A
C D
ADAPTATEUR
SYSTÈME DE MISE
À LA TERRE
l’appareil de chauffage. Lorsque la température interne
devient trop élevée ou varie de façon anormale, le
limiteur de thermostat coupe l’alimentation afin
d’éviter des dommages au foyer ou des risques d’incendie.
18. Les appareils de chauffage ne doivent pas être installés
directement sous une prise de courant.
19. N’insérez pas ou ne permettez pas à des corps étrangers
d’entrer dans les ouvertures de ventilation ou d’échappement
puisque cela pourrait causer un choc électrique ou un feu, ou
endommager l’appareil de chauffage.
20. Pour prévenir un incendie possible, ne bloquez pas les
entrées d’air ou les évacuations d’air de quelque autre façon.
N’utilisez pas sur des surfaces molles telles qu'un lit, où
l’ouverture pourrait être bloquée.
21. Un appareil de chauffage possède des pièces chaudes ou des
pièces produisant des étincelles à l’intérieur. Ne l’utilisez
pas dans des endroits ou de l’essence, de la peinture ou des
liquides inflammables sont utilisés ou entreposés.
22. Utiliser uniquement cet appareil de la façon prescrite dans
ce manuel. Tout autre usage non recommandé par le
fabricant pourrait causer un incendie, un choc électrique
ou des blessures corporelles.
23. Brancher toujours les appareils de chauffage dans une
prise/fiche murale. Ne jamais utiliser une rallonge ou une
prise électrique relogeable (sortie / barre d’alimentation).
24. Consulter la figure 1 afin de prendre connaissance des
directives suivantes. Cet appareil de chauffage a été
conçu pour être utilisé sous une tension de 120 V. La
fiche du cordon est montrée à la figure 1. Consulter la
figure 1 afin de prendre connaissance des instructions
de mise à la terre. L’adaptateur montré en C est
disponible pour brancher des fiches à trois branches
avec mise à la terre dans des prises à deux fentes. La
fiche verte de mise à la terre qui sort de l’adaptateur
doit être reliée à une boîte de sortie convenablement
mise à la terre. L’adaptateur ne doit pas être utilisé
lorsqu’une prise mise à la terre à trois fentes est
disponible.
BROCHE DE MISE
À LA TERRE
BRANCHE DE MISE
À LA TERRE
COUVERCLE DE LA BOÎTE DE SORTIE MISE
À LA TERRE
VIS EN MÉTAL
Table of contents
Languages:
Other Duraflame Heater manuals

Duraflame
Duraflame DFH-TH-19-O User manual

Duraflame
Duraflame 9QI010ARA User manual

Duraflame
Duraflame 9HM1000-C240 User manual

Duraflame
Duraflame DFS-550-21 User manual

Duraflame
Duraflame 9HM900-E451 User manual

Duraflame
Duraflame 20QI071ARA User manual

Duraflame
Duraflame DFH-IH-12-O User manual

Duraflame
Duraflame 9HM9126 User manual

Duraflame
Duraflame 10HM8000 User manual

Duraflame
Duraflame 7QH1000 Operation manual