Duratech Z-5010 User manual

Fever Detection System
Z-5010 Thermal Camera
FEVA-500 NVR
Installation Guide

1
Table of Contents
1. Introduction................................................................................................2
2. Hardware Installation.................................................................................3
3. System Setup ............................................................................................8
4. Best Practices for Thermal Rapid Fever Screening.................................15
DuraTech USA Inc.
714-898-2171 O.C. County
562-424-5502 L.A. County
714 719-9496 Cell
FAX: 866-704-9132
Email: [email protected]
www.DuraTechUSA.com

2
1.Introduction
Package contents:
1. Z-5010 thermal camera with cables
a. 12V DC adapter
b. Ethernet Cable
2. FEVA-500 thermal analysis NVR
a. 19V DC adapter
b. Ethernet cable with waterproof connecter
Equipment needed:
1. Tripod, stand or a shelf to place the camera
2. Forehead thermometer
3. Computer monitor
4. Keyboard
5. Mouse

3
2.Hardware Installation
1. FEVA-500 NVR installation
Step1: Connect a keyboard and a mouse to the NVR via USB ports.
Step2: Connect a monitor to the NVR via HDMI or VGA cable.
Step3: Connect the power adaptor to the NVR and plug it in.

4
2. Camera installation
There are 4 ports on the camera: Ethernet cable, power adaptor. Initialize
button and control connector.

5
Step1: Connect the cable into the camera Ethernet protect case.

6
Step2: Connect the power adaptor cable into the camera power adaptor port.
Step3: Put the camera on the stand and install it on a tripod or place the
camera in a secured location.

7

8
3.System Setup
1. System power on:
Step1: Power on the NVR.
Step2: Once the Windows is powered on, it will automatically start the “IVS-
II” program. You should see 2 windows, one shows the camera image, the
other shows the thermo image.

9
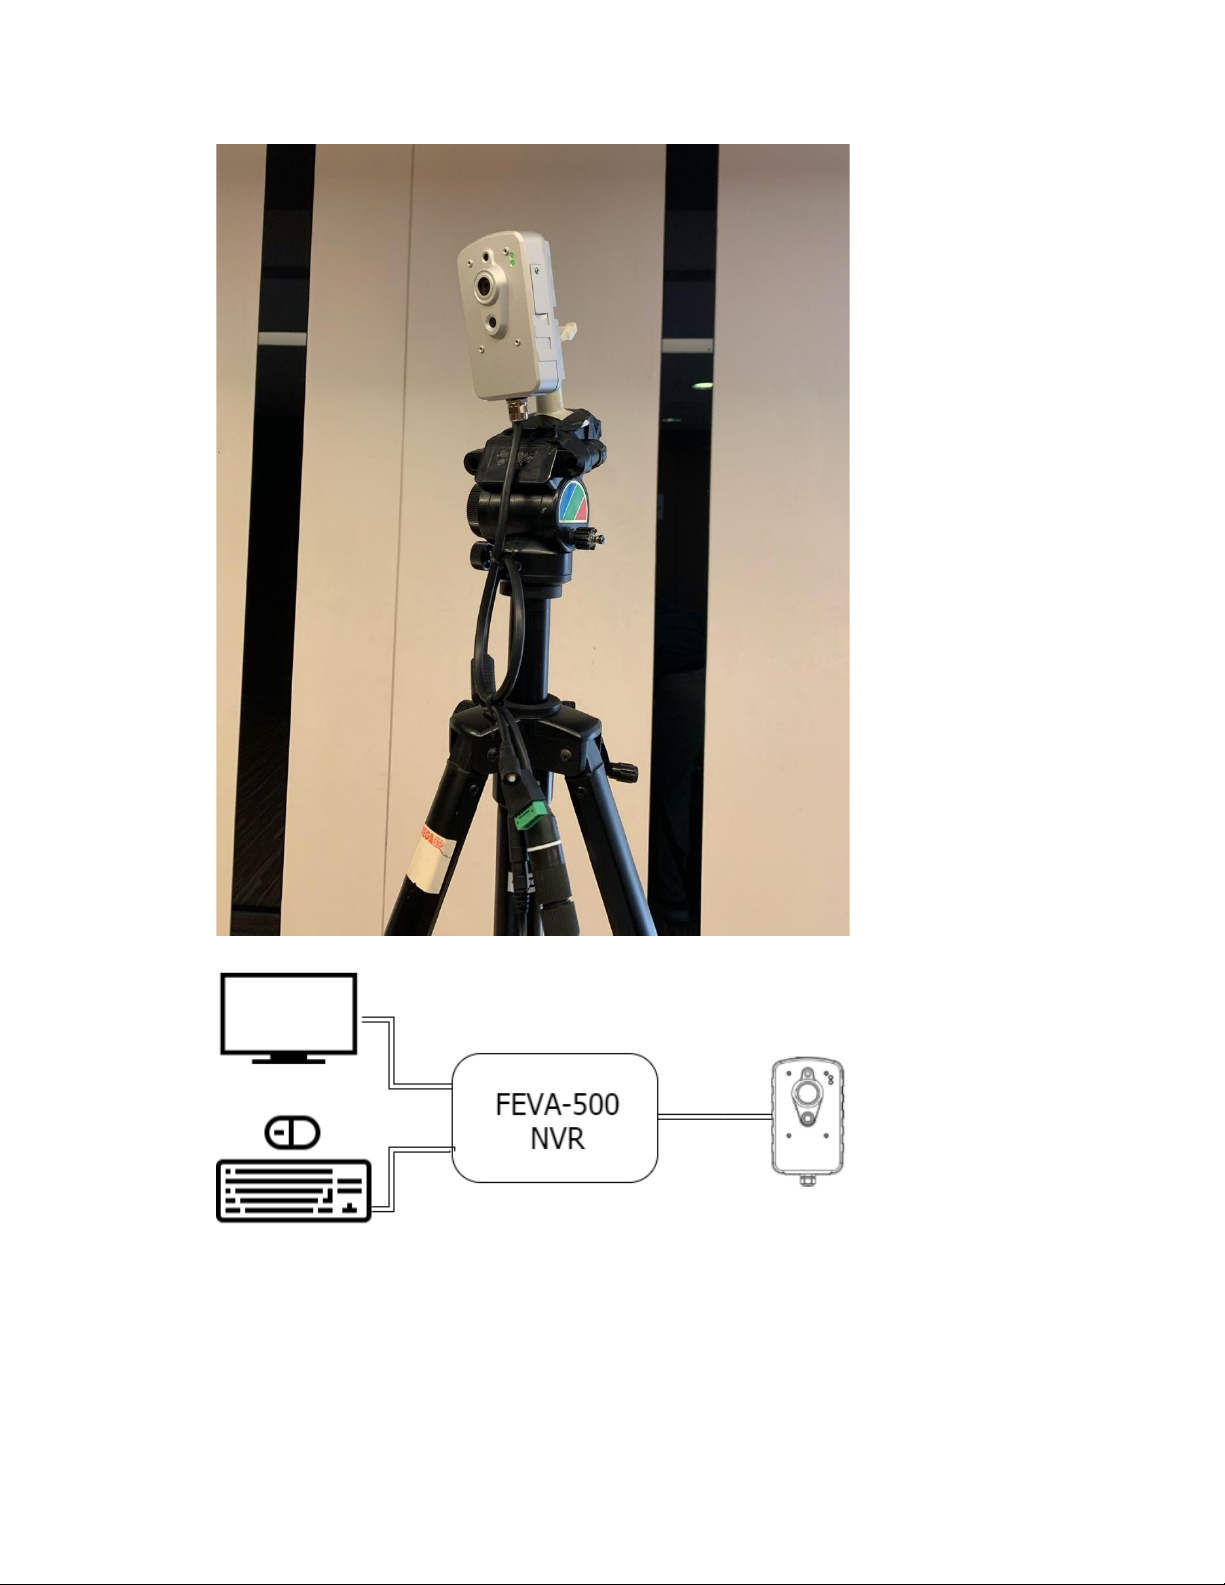
2. Thermo camera placement(important!)
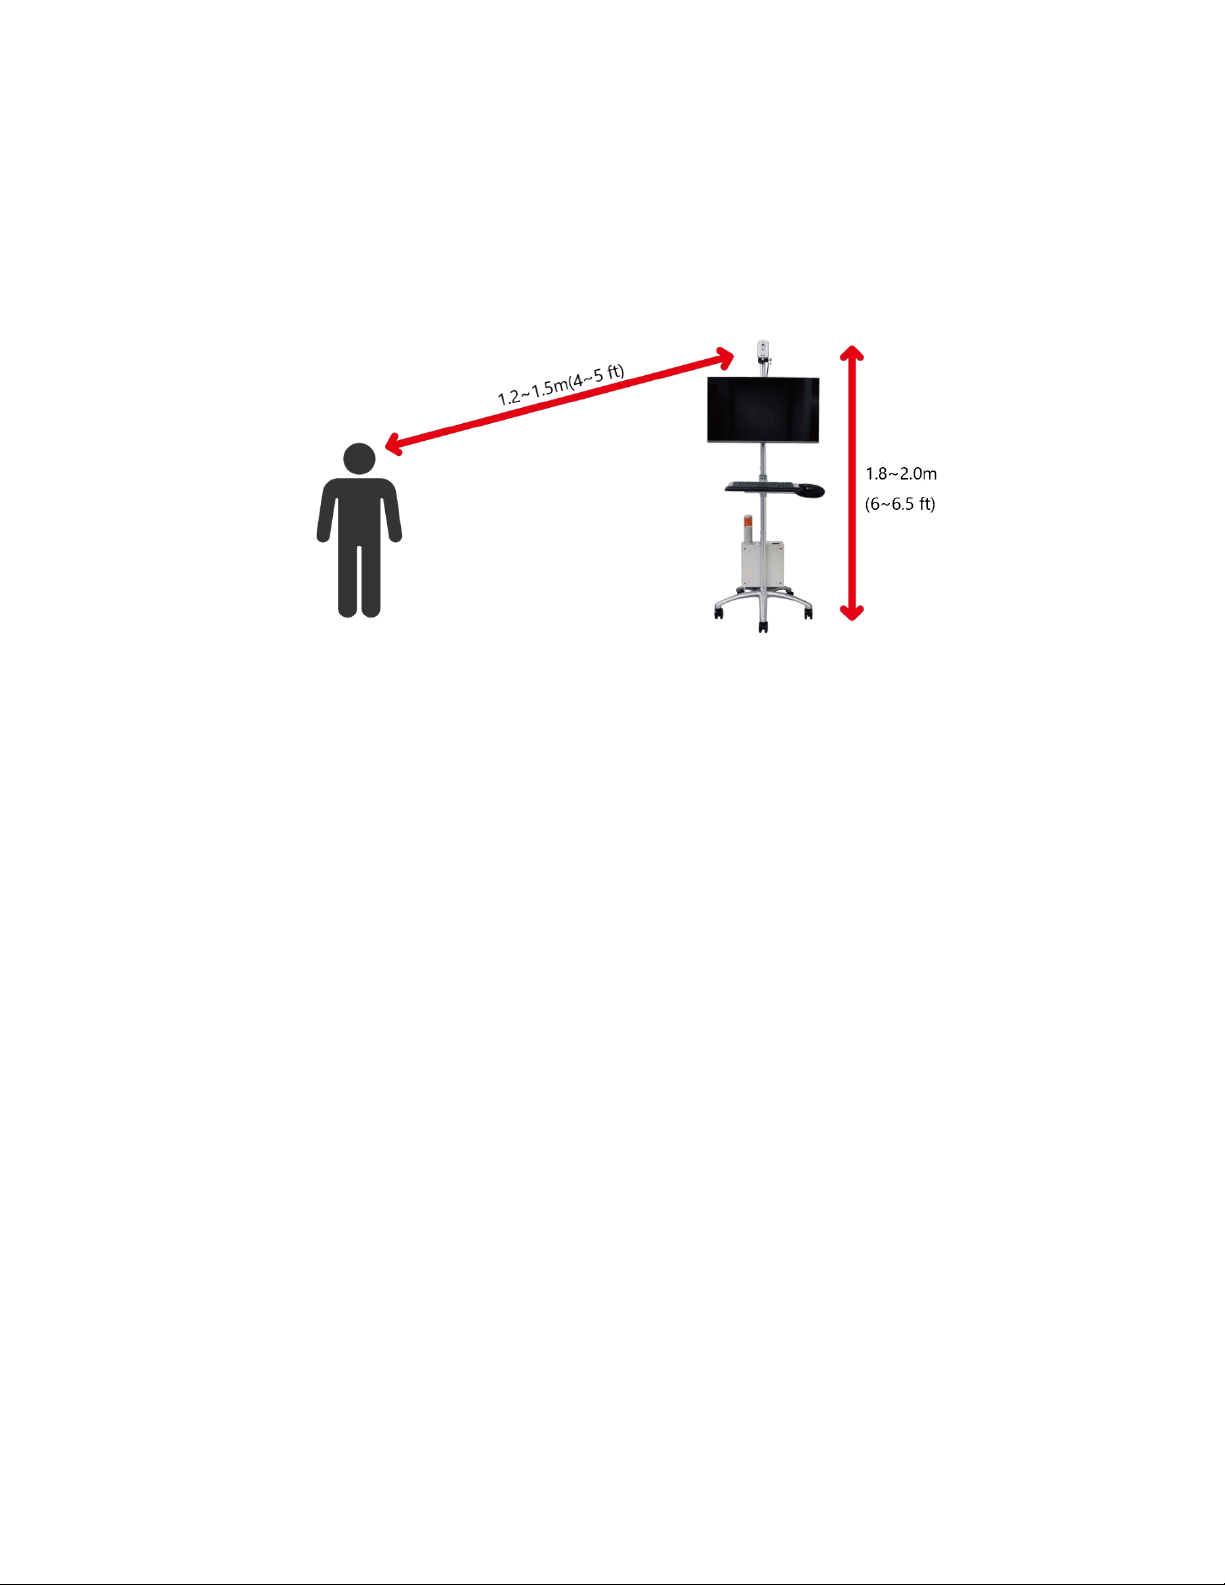
Note1: The thermo camera must be placed at ~6.2 ft (1.8±0.2m) above the
ground.
Note2: The thermo camera must be placed ~ 4-5 ft (1.2-1.5m) away from
the people passing by. (See image below)
3. Thermo camera initialization (important!)
For the most accurate thermo reading, the camera must be initialized every
time the system is turned on or when the ambient temperature changes. It is
recommended to press the button ~every 8 hours.
Step1: The camera will do a self-initialization every time it is powered on.
Step2: Wait for 10 minutes after the camera is first powered on.
Step3: Point the camera to the area where you wish to monitor.
Step4: Avoid any glass or mirror from the camera view.
Step5: Adjust the thermo view to where the top area (red bar area) is not
pointed to any unfixed object, heat source or light source. It is best to point to
a plain wall.
Step6: Press the initialization button on the camera ports. The Thermo view
will show ”INITIAL” on the bottom. Wait till the ”INITIAL” message is gone.

10
4. Thermo camera calibration (important!)
Now we will calibrate the camera with the use of a forehead thermometer.
Step1: Measure the temperature of the installation personnel with a
forehead thermometer.
Step2: The same person stands ~ 4.5 ft in front of the camera (where all
the people will be passing by).
Step3: Note the temperature reading on the monitor.
Step4: Use the actual temperature from “step 2” minus the temperature
from the “step 3” thermo image. For example, 36.5°C (97.7°F) - 34.4°C
(93.92°F) = 2.1°C

11
Step5: Right click the left thermo image then choose “Thermo Setting”.
Step6: Change the “Temperature adjust” to the value from Step4. (2.1
degrees). Then press “OK”.

12
Step7: Check the temperature on the thermo image to see if it matches the
temperature from the forehead thermometer. If it is the same, then the
calibration is completed. If it is different, then repeat step4-6.
5. Higher Temperature warning setting:
Step1: Right click the left thermo image then choose “Thermo Setting”.
Step2: Adjust the “Heat Object Alarm” to the temperature you want the
alarm to go off. This temperature should be set slightly lower than the warning
temperature.

13
Step3: Whenever a person with high temperature passes by:
1) The thermo screen will show a red “Heat Alarm” warning.
2) The LED on camera will turn on.
3) The alarm sound will go off (a speaker must be connected to the
NVR).
6. Recording
Step1. Right click the left thermo image then choose “Start record”.

14
7. View Recording
Step1: Press the camera icon on the top left corner.
Step2: Choose the date on the left calendar.
Step3. Drag the yellow line on the recording bar to the time you wish to
watch.
Step4. Hit the “play” icon on the lower left corner.

15
4.Best Practices for Thermal
Rapid Fever Screening
(1) Recommended measuring distance
⚫The best distance is 120-150 cm (~4 ft-5 ft). The farther the
distance, the lower the temperature will be.
⚫The height of camera should be 1.8~2.0 m (~6-6.5 ft), and vertical
angle slightly down.
(2) Install indoors and at a stable, windless environment
⚫Install device in a stable temperature environment to avoid huge
changes in thermal imaging.
(3) Set up a traffic flow for testing.
⚫Post visible signs to remind people to enter the thermo
measurement area.
⚫The testing site should be marked by a line for flow control and
people should be instructed to walk the line slowly.
⚫Keep social distance at 1.5m (5ft)or it may affect accuracy of the
system.
⚫Avoid overlapping images of two people as it may affect temperature
reading.
(4) Main area of the temperature detection
⚫Avoid heat interference such as heat sources, air conditioning
outlets and infrared monitoring systems.
⚫Keep 1.5-2 cm (0.6-0.8inch) blank area above the screen, to avoid
the error of ambient temperature learning processing.
(5) Thermo screen freeze momentary

16
⚫Thermal screen will freeze for a few seconds sometimes to do self-
initialization, it’s a normal behavior.
(6) Ambient temperature learning button
⚫When switching to a new environment, place the camera after 10-15
minutes, then press the ambient temperature learning button till the
Initial” message is off.
⚫Daily ambient temperature changes can affect the accuracy of
detection, such as early morning, noon and night. It is recommended
to push the buttons 3 times a day to keep the accuracy of detection.
(7) No electromagnetic interference in the environment
⚫Do not use in places with electromagnetic interference.
(8) Thermal imaging cannot penetrate water
⚫Thermal imaging system can only detect objects over the water.
(9) Avoid mirror reflection
⚫Thermal imagining cannot penetrate glass and metal, avoid mirror
reflection in the camera view.
(10) Cannot be used as medical equipment
⚫The thermal imaging rapid screening system is not a medical grade
device and cannot be used as a measure of the actual temperature
of the human body. The detection is for reference only and cannot
be construed as a medical equipment.
This manual suits for next models
1
Table of contents