manuals.online logo
Brands
  1. Home
  2. •
  3. Brands
  4. •
  5. Dwarf Connection
  6. •
  7. Antenna
  8. •
  9. Dwarf Connection DC-LINK-ULR1 User manual

Dwarf Connection DC-LINK-ULR1 User manual

Quick sTarT guide
dC-liNk-ulr1 / lr2 X.LINK.L1
RSSI Display
Antenna Positioning
Establishing a Connection
Operating
Country-specic Regulations
Position the antennas on transmitter and
receiver as shown in the illustration. This
ensures the best possible RF performance.
Install the transmitter and the receiver as
high as possible (at least 2 metres above
ground level) to maintain a good line-of-sight.
During operation, try to keep the transmitter
and the receiver at similar heights.
Avoid obstacles such as walls, trees, water
and steel structures between transmitter and
receiver.
The connection is at its strongest when the
at surfaces of the transmitter and receiver
face each other.
The RSSI (Wireless Received Signal Strength
Indicator) display shows the strength of the
signal, allowing the operator to ensure the
system is working reliably.
Status Description
0-1 LEDs Radio signal strength is weak and
artefacts are visible in the video signal
2-3 LEDs Radio signal strength is normal and
video quality is good
4-5 LEDs Radio signal strength is very strong and
video quality is very good
1. Connect the two omni-directional
antennas to the SMA connectors on the
Transmitter.
2. Connect the ve omni directional antennas
to the SMA connectors on the Receiver.
3. Use the enclosed 4-pin male-to-D-TAP
cable to connect to a power supply with a
suitable voltage.
4. Connect an SDI or HDMI signal to the
transmitter’s SDI or HDMI input. If there is
a signal on both inputs, the transmitter will
prioritise the SDI signal.
5. Ensure you have selected the frequency
that corresponds to that of the transmitter.
Once all previous steps have been performed,
turn on the transmitter and the receiver using
the power switch.
Once the transmitter recognizes a video input,
the video format will be displayed on the LCD
screen.
It takes between 10-30 seconds for the
transmitter to connect to the receiver. During
this brief period, the receiver’s video output
displays “Waiting for connection”.
Channel Frequency Europe USA Canada Russia Japan China Turkey
0 5550 MHz x x x ✓x x x
1 5590 MHz x x x ✓x x x
2 5630 MHz x x x ✓x x x
3 5670 MHz x x x ✓x x x
4 5150 MHz x x x ✓x x x
5 5190 MHz Indoor Indoor Indoor ✓Indoor ✓Indoor
6 5230 MHz Indoor Indoor Indoor ✓Indoor ✓Indoor
7 5270 MHz x x x ✓x x Indoor
8 5310 MHz x x x ✓x x Indoor
9 5510 MHz x x x ✓x x x
FuNcTioNs
Choosing a Channel
DC-SCAN
OSD
Reducing Transmission Power
Fan Control
To choose a channel on the transmitter/
receiver press the “MENU” button and select
the channel with the “+” or “-” button, then
press the “MENU” button to conrm.
To enter the DC-SCAN, press the “-” button
on the receiver for 3 seconds. The frequency
scanner is only available on your HDMI output.
To switch the DC-SCAN off press the “-” button
again for three seconds.
To switch it off, please press the “MENU” button
on the receiver three times to navigate to the
OSD menu and select the desired state by using
the “+” or “-” button. Conrm your selection by
pressing the “MENU” button again. An indicator
on the OLED display of the receiver reveals the
OSD state.
Navigate with the “MENU” button to the
transmission power lever. It is the number in
small letters next to the channel.
To alter the transmission power press the “+”
or “-” button, and conrm your selection with
the “MENU” button. One step reduces 5% of
the transmission power. The lowest transmission
power selectable is 10%.
To switch the fan on the transmitter /
receiver off or on, press the “MENU” button
to navigate to the fan menu and select the
desired state by using the “+” or “-” button.
The possible states are “AUTO”, “√” or “X”.
“AUTO” selects the cinema-mode, which
triggers the fans using the record and stop
signals of the camera.
“√” switches the fans on permanently. “X”
switches the fans off.
Cinema Mode
The cinema mode is an automatic mode
(indicated with “AUTO” in the fan menu) which
only works via SDI signal. The fan is switched
off at the start of recording via the record
trigger of the camera. When the recording is
nished the fan starts automatically.
Warning!
Switching off the fans may be required
in some situations, but doing this
permanently is not recommended. This
will effect the life-time of your wireless
equipment. To prevent your device from
damage, fans switch on automatically
after a reboot. If the temperature
exceeds 75 degrees Celcius, please
switch on the fans instantly. Any damage
caused by over-heating voids warranty.

Other manuals for DC-LINK-ULR1

1

This manual suits for next models

2

Other Dwarf Connection Antenna manuals

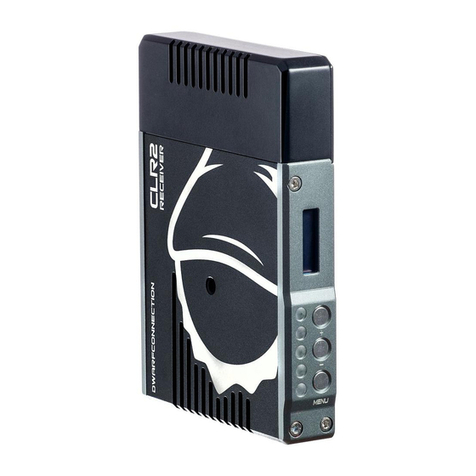
Dwarf Connection DC-LINK-RE1 User manual

Dwarf Connection

Dwarf Connection DC-LINK-RE1 User manual

Dwarf Connection DC-LINK-CLR2 User manual

Dwarf Connection

Dwarf Connection DC-LINK-CLR2 User manual

Popular Antenna manuals by other brands

stellar labs 30-2447 user manual

stellar labs

stellar labs 30-2447 user manual

RF Elements StationBox XL installation instructions

RF Elements

RF Elements StationBox XL installation instructions

iNetVu 1500 installation manual

iNetVu

iNetVu 1500 installation manual

NARDA PMM AS02 user manual

NARDA

NARDA PMM AS02 user manual

Nera WorldCommunicator Getting started guide

Nera

Nera WorldCommunicator Getting started guide

SAC "H" Helipad manual

SAC

SAC "H" Helipad manual

Matsing MS-MBA-3.2-H4-L4 instruction manual

Matsing

Matsing MS-MBA-3.2-H4-L4 instruction manual

TRENDnet TEW-AI07OB Quick installation guide

TRENDnet

TRENDnet TEW-AI07OB Quick installation guide

Beyerdynamic AT91 operating instructions

Beyerdynamic

Beyerdynamic AT91 operating instructions

Spektrum DX7 Assembly manual

Spektrum

Spektrum DX7 Assembly manual

Ubiquiti AM-5G16-120 Quick start quide

Ubiquiti

Ubiquiti AM-5G16-120 Quick start quide

Ubiquiti airMAX Omni AMO-5G13 quick start guide

Ubiquiti

Ubiquiti airMAX Omni AMO-5G13 quick start guide

Ebyte TXWF-XPL-150 user manual

Ebyte

Ebyte TXWF-XPL-150 user manual

Omron V750-BA50D04-SG-MY user manual

Omron

Omron V750-BA50D04-SG-MY user manual

Naxa NAA-303 Operation manual

Naxa

Naxa NAA-303 Operation manual

Winegard YA-6260 Specifications

Winegard

Winegard YA-6260 Specifications

l-com HG2415Y installation instructions

l-com

l-com HG2415Y installation instructions

BFT Passy Installation and user manual

BFT

BFT Passy Installation and user manual

manuals.online logo
manuals.online logoBrands
  • About & Mission
  • Contact us
  • Privacy Policy
  • Terms and Conditions

Copyright 2025 Manuals.Online. All Rights Reserved.